auto Hyundai Azera 2017 Service Manual
[x] Cancel search | Manufacturer: HYUNDAI, Model Year: 2017, Model line: Azera, Model: Hyundai Azera 2017Pages: 520, PDF Size: 16.33 MB
Page 179 of 520
Features of your vehicle
100
4
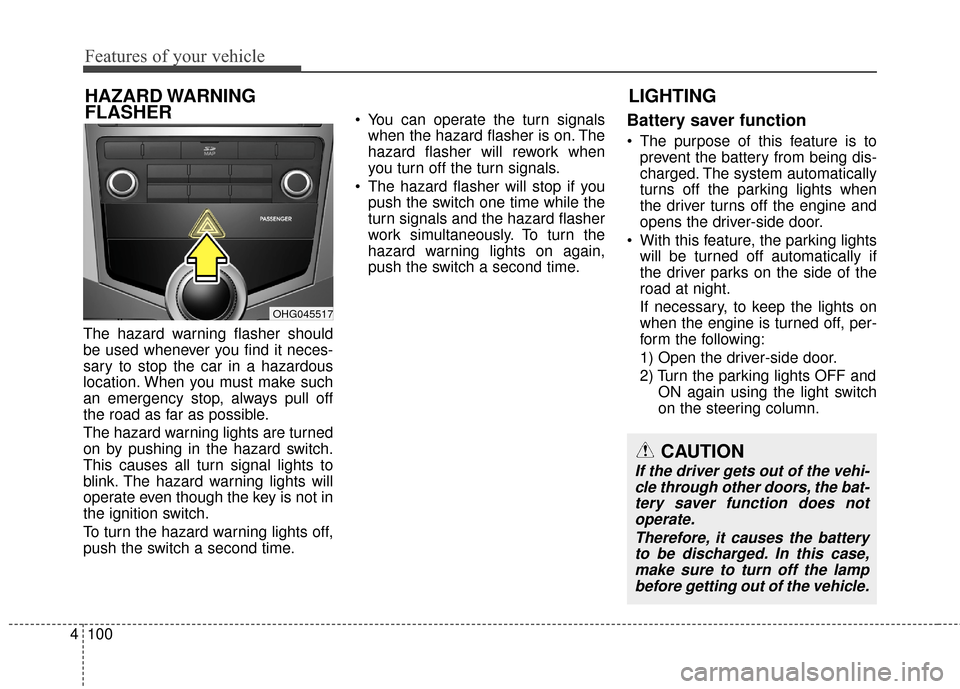
The hazard warning flasher should
be used whenever you find it neces-
sary to stop the car in a hazardous
location. When you must make such
an emergency stop, always pull off
the road as far as possible.
The hazard warning lights are turned
on by pushing in the hazard switch.
This causes all turn signal lights to
blink. The hazard warning lights will
operate even though the key is not in
the ignition switch.
To turn the hazard warning lights off,
push the switch a second time. You can operate the turn signals
when the hazard flasher is on. The
hazard flasher will rework when
you turn off the turn signals.
The hazard flasher will stop if you push the switch one time while the
turn signals and the hazard flasher
work simultaneously. To turn the
hazard warning lights on again,
push the switch a second time.
Battery saver function
The purpose of this feature is toprevent the battery from being dis-
charged. The system automatically
turns off the parking lights when
the driver turns off the engine and
opens the driver-side door.
With this feature, the parking lights will be turned off automatically if
the driver parks on the side of the
road at night.
If necessary, to keep the lights on
when the engine is turned off, per-
form the following:
1) Open the driver-side door.
2) Turn the parking lights OFF and ON again using the light switch
on the steering column.
LIGHTING
HAZARD WARNING
FLASHER
CAUTION
If the driver gets out of the vehi-
cle through other doors, the bat-tery saver function does notoperate.
Therefore, it causes the batteryto be discharged. In this case,make sure to turn off the lampbefore getting out of the vehicle.
OHG045517
Page 180 of 520
4101
Features of your vehicle
Headlight (Headlamp) escort
function
If you turn the ignition switch to the
ACC or OFF position with the head-
lights ON, the headlights (and/or
parking light) remain on for about 5
minutes. However, if the driver’s door
is opened and closed, the headlights
(and/or parking light) turn off after 15
seconds.
The headlights (and/or parking light)
can be turned off by pressing the
lock button on the smart key twice or
turning the light switch to the OFF or
Parking light position.
You can activate or deactivate this
feature. Refer to “User Settings
Mode” in this section.
Headlight (Headlamp) welcome
function
When the headlight is in the ON or
AUTO position and all doors (and
trunk) are closed and locked, if you
press the door unlock button on the
smart key, the headlights (and/or
parking light) will come on for about
15 seconds. At this time, if you press
the door lock or unlock button, the
headlights (and/or parking light) will
turn off immediately.
You can activate or deactivate this
feature. Refer to “User Settings
Mode” in this section.
Daytime running light
Daytime Running Lights (DRL) can
make it easier for others to see the
front of your vehicle during the day.
DRL can be helpful in many different
driving conditions, and it is especially
helpful after dawn and before sunset.
The DRL system turns ON when:1. The light switch is in the AUTO light position.
2. The light switch is in the Parking light position.
The DRL system turns OFF when: 1. The multifunction switch is in the DRL OFF position.
2. The headlights are ON.
3. The turn signal is ON. (the blink- ing side of the DRL will turn off)
4. The hazard warning light is ON.
5. The parking brake is applied.
6. Engine stops.
Page 181 of 520
Features of your vehicle
102
4
Lighting control
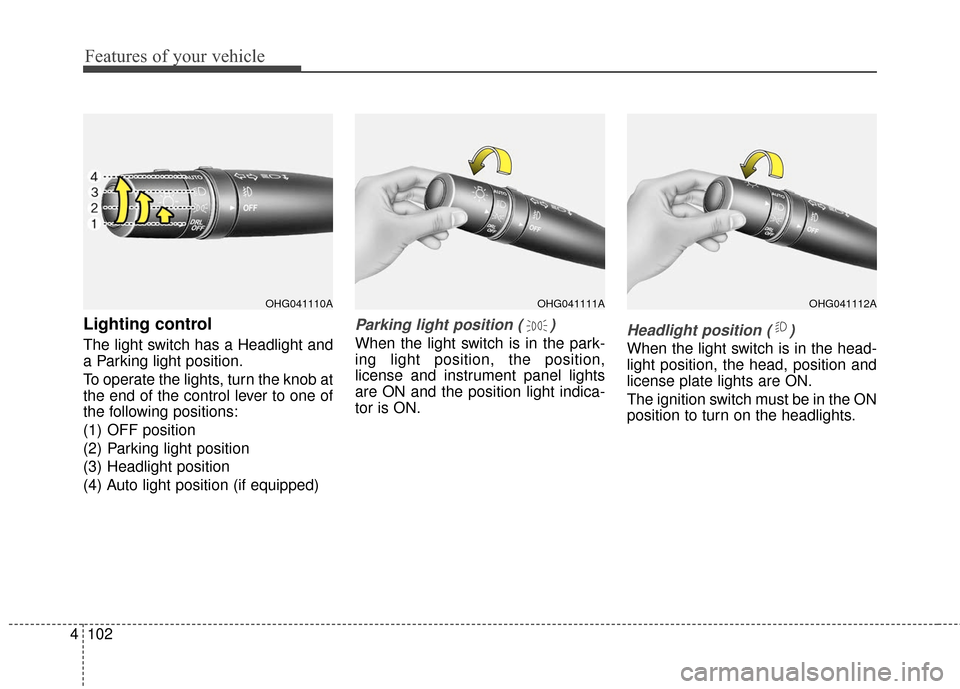
The light switch has a Headlight and
a Parking light position.
To operate the lights, turn the knob at
the end of the control lever to one of
the following positions:
(1) OFF position
(2) Parking light position
(3) Headlight position
(4) Auto light position (if equipped)
Parking light position ( )
When the light switch is in the park-
ing light position, the position,
license and instrument panel lights
are ON and the position light indica-
tor is ON.Headlight position ( )
When the light switch is in the head-
light position, the head, position and
license plate lights are ON.
The ignition switch must be in the ON
position to turn on the headlights.
OHG041111AOHG041112AOHG041110A
Page 182 of 520
4103
Features of your vehicle
Auto light position
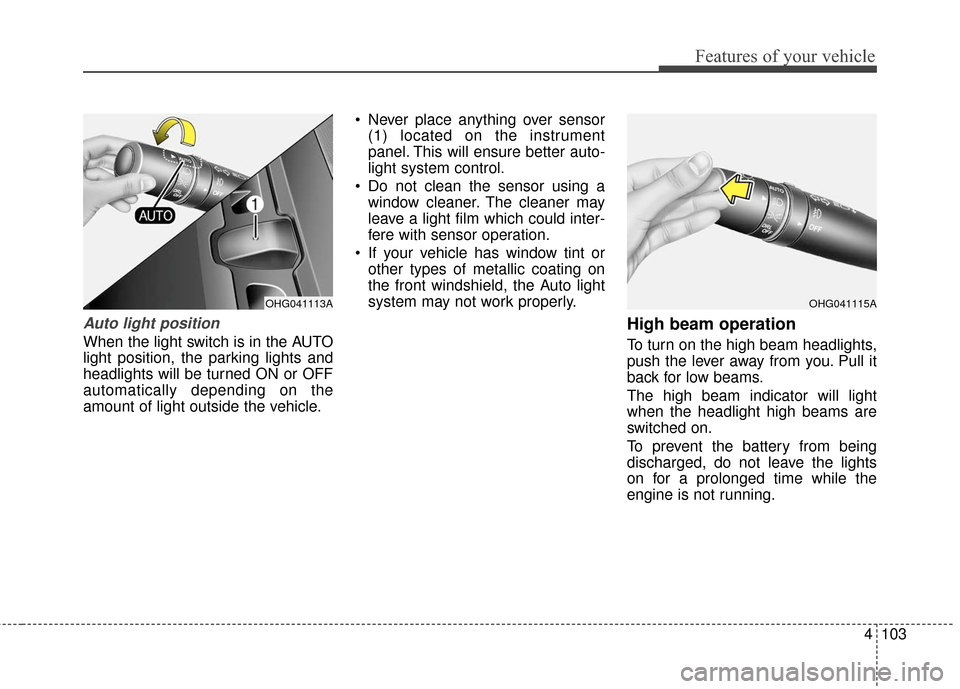
When the light switch is in the AUTO
light position, the parking lights and
headlights will be turned ON or OFF
automatically depending on the
amount of light outside the vehicle. Never place anything over sensor
(1) located on the instrument
panel. This will ensure better auto-
light system control.
Do not clean the sensor using a window cleaner. The cleaner may
leave a light film which could inter-
fere with sensor operation.
If your vehicle has window tint or other types of metallic coating on
the front windshield, the Auto light
system may not work properly.
High beam operation
To turn on the high beam headlights,
push the lever away from you. Pull it
back for low beams.
The high beam indicator will light
when the headlight high beams are
switched on.
To prevent the battery from being
discharged, do not leave the lights
on for a prolonged time while the
engine is not running.
OHG041115AOHG041113A
Page 183 of 520
Features of your vehicle
104
4
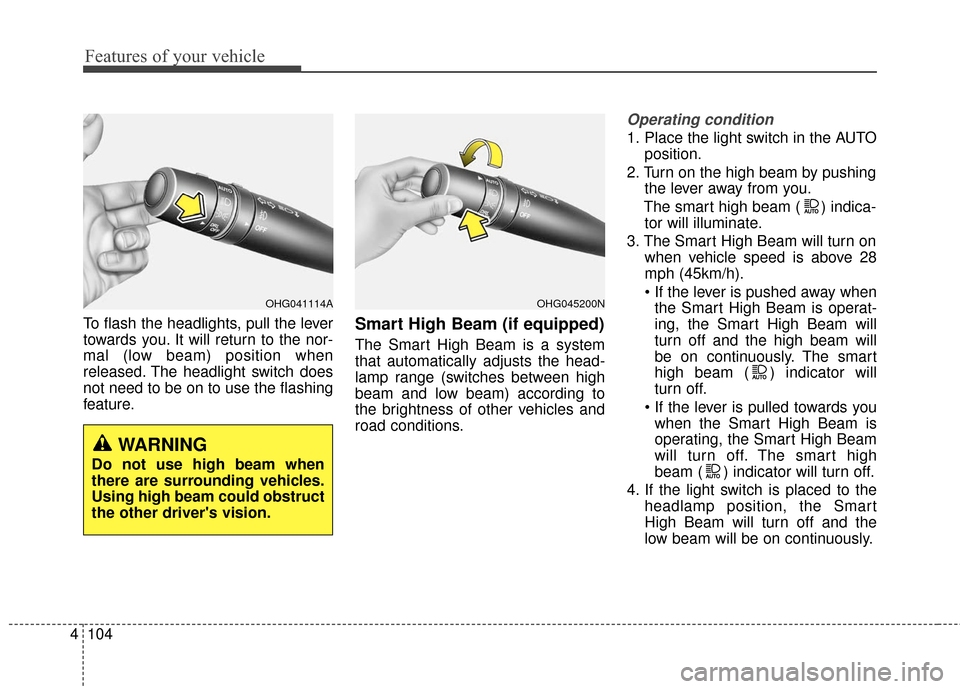
To flash the headlights, pull the lever
towards you. It will return to the nor-
mal (low beam) position when
released. The headlight switch does
not need to be on to use the flashing
feature.Smart High Beam (if equipped)
The Smart High Beam is a system
that automatically adjusts the head-
lamp range (switches between high
beam and low beam) according to
the brightness of other vehicles and
road conditions.
Operating condition
1. Place the light switch in the AUTO
position.
2. Turn on the high beam by pushing the lever away from you.
The smart high beam ( ) indica- tor will illuminate.
3. The Smart High Beam will turn on when vehicle speed is above 28
mph (45km/h).
the Smart High Beam is operat-
ing, the Smart High Beam will
turn off and the high beam will
be on continuously. The smart
high beam ( ) indicator will
turn off.
when the Smart High Beam is
operating, the Smart High Beam
will turn off. The smart high
beam ( ) indicator will turn off.
4. If the light switch is placed to the headlamp position, the Smart
High Beam will turn off and the
low beam will be on continuously.
WARNING
Do not use high beam when
there are surrounding vehicles.
Using high beam could obstruct
the other driver's vision.
OHG041114AOHG045200N
Page 184 of 520
4105
Features of your vehicle
The high beam switches to low beam
in the below conditions.
- When the Smart High Beam is off.
- When the light switch is not in theAUTO position.
- When the headlamp is detected from the on-coming vehicle.
- When the tail lamp is detected from the front vehicle.
- When the surrounding is bright enough high beams are not need-
ed.
- When streetlights or other lights are detected.
- When vehicle speed is below 22 mph (35 km/h).
Turn signals and lane change
signals
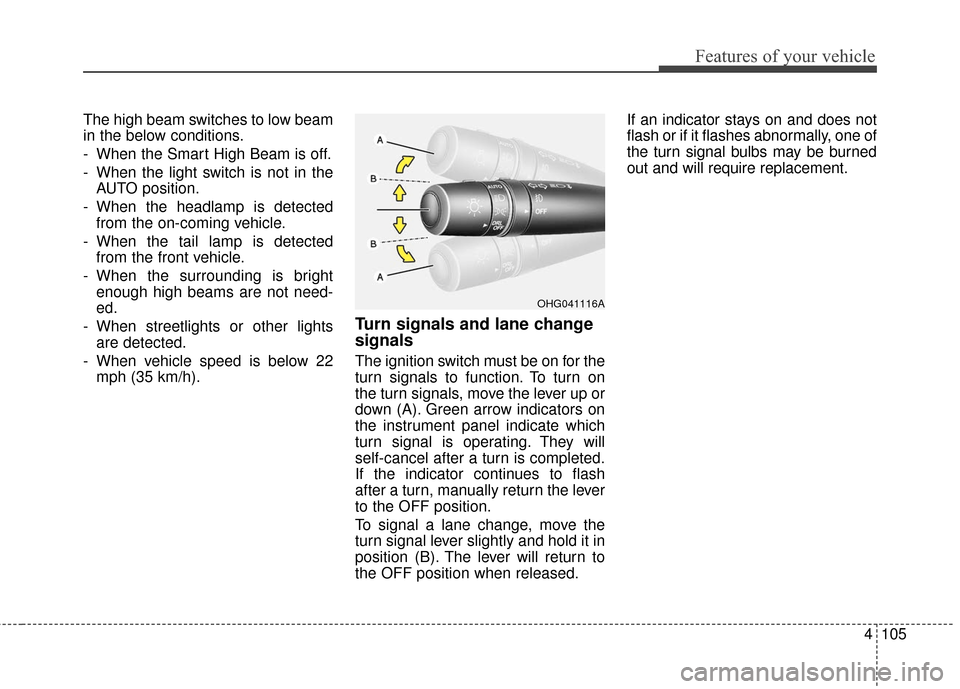
The ignition switch must be on for the
turn signals to function. To turn on
the turn signals, move the lever up or
down (A). Green arrow indicators on
the instrument panel indicate which
turn signal is operating. They will
self-cancel after a turn is completed.
If the indicator continues to flash
after a turn, manually return the lever
to the OFF position.
To signal a lane change, move the
turn signal lever slightly and hold it in
position (B). The lever will return to
the OFF position when released. If an indicator stays on and does not
flash or if it flashes abnormally, one of
the turn signal bulbs may be burned
out and will require replacement.
OHG041116A
Page 188 of 520
4109
Features of your vehicle
INTERIOR LIGHT
Automatic turn off function
(if equipped)
The interior lights automatically turn
off approximately 20 minutes after
the ignition switch is turned off.
With the theft alarm system, the inte-
rior lights automatically turns off
approximately 5 seconds after the
system is in the armed stage.
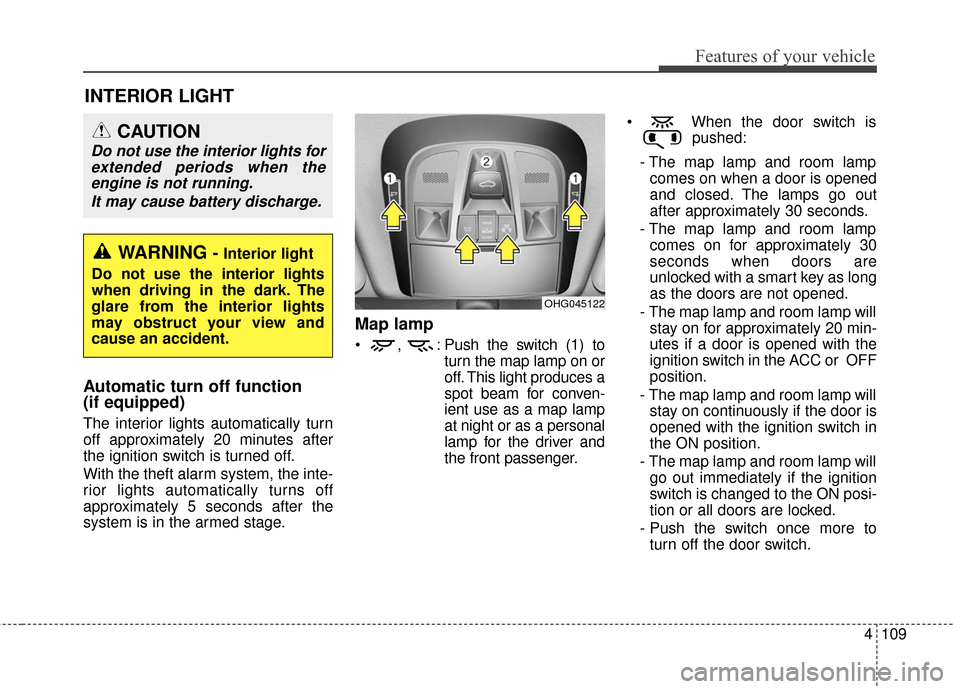
Map lamp
, : Push the switch (1) toturn the map lamp on or
off. This light produces a
spot beam for conven-
ient use as a map lamp
at night or as a personal
lamp for the driver and
the front passenger. When the door switch is
pushed:
- The map lamp and room lamp comes on when a door is opened
and closed. The lamps go out
after approximately 30 seconds.
- The map lamp and room lamp comes on for approximately 30
seconds when doors are
unlocked with a smart key as long
as the doors are not opened.
- The map lamp and room lamp will stay on for approximately 20 min-
utes if a door is opened with the
ignition switch in the ACC or OFF
position.
- The map lamp and room lamp will stay on continuously if the door is
opened with the ignition switch in
the ON position.
- The map lamp and room lamp will go out immediately if the ignition
switch is changed to the ON posi-
tion or all doors are locked.
- Push the switch once more to turn off the door switch.
OHG045122
WARNING - Interior light
Do not use the interior lights
when driving in the dark. The
glare from the interior lights
may obstruct your view and
cause an accident.
CAUTION
Do not use the interior lights for extended periods when theengine is not running.
It may cause battery discharge.
Page 190 of 520
4111
Features of your vehicle
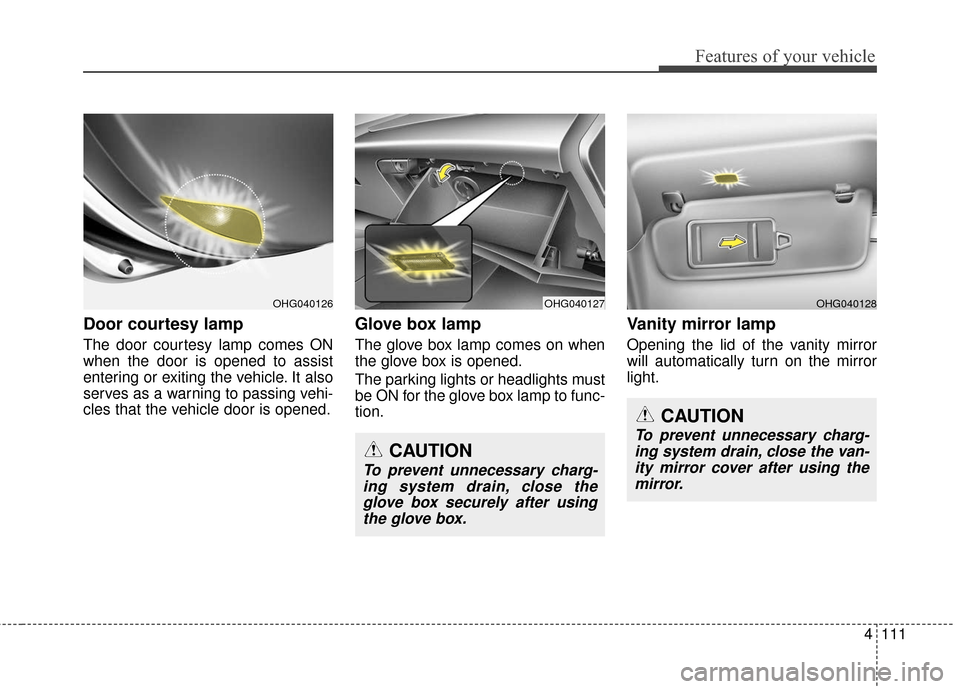
Door courtesy lamp
The door courtesy lamp comes ON
when the door is opened to assist
entering or exiting the vehicle. It also
serves as a warning to passing vehi-
cles that the vehicle door is opened.
Glove box lamp
The glove box lamp comes on when
the glove box is opened.
The parking lights or headlights must
be ON for the glove box lamp to func-
tion.
Vanity mirror lamp
Opening the lid of the vanity mirror
will automatically turn on the mirror
light.
OHG040127OHG040128OHG040126
CAUTION
To prevent unnecessary charg-ing system drain, close theglove box securely after usingthe glove box.
CAUTION
To prevent unnecessary charg-ing system drain, close the van-ity mirror cover after using themirror.
Page 191 of 520
Features of your vehicle
112
4
DEFROSTER
✽
✽ NOTICE
If you want to defrost and defog
the front windshield, refer to
“Windshield defrosting and defog-
ging” in this section.
Rear window defroster
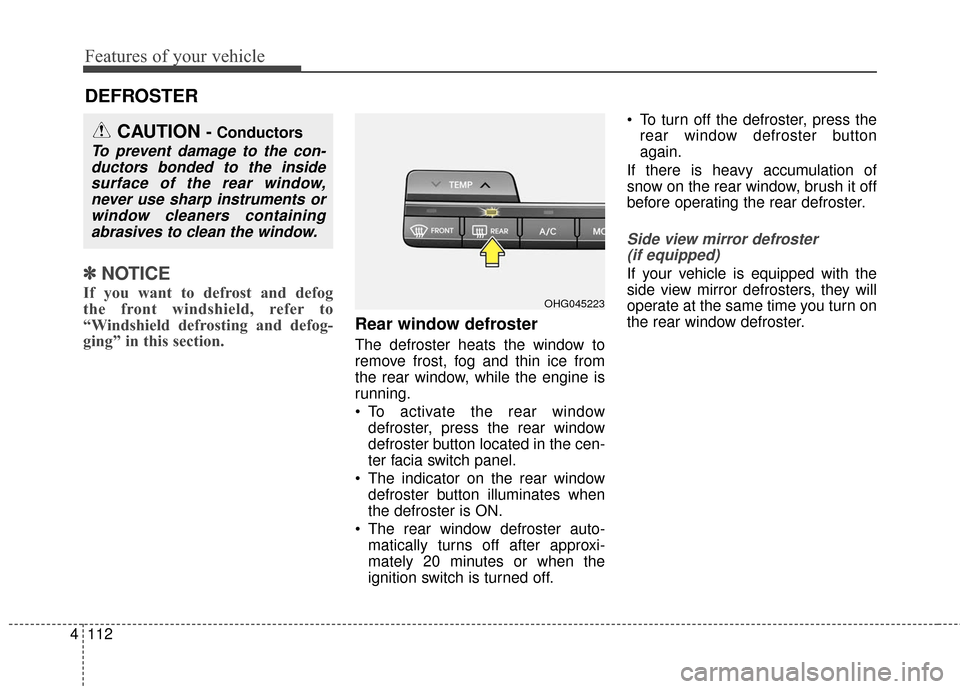
The defroster heats the window to
remove frost, fog and thin ice from
the rear window, while the engine is
running.
To activate the rear window
defroster, press the rear window
defroster button located in the cen-
ter facia switch panel.
The indicator on the rear window defroster button illuminates when
the defroster is ON.
The rear window defroster auto- matically turns off after approxi-
mately 20 minutes or when the
ignition switch is turned off. To turn off the defroster, press the
rear window defroster button
again.
If there is heavy accumulation of
snow on the rear window, brush it off
before operating the rear defroster.
Side view mirror defroster (if equipped)
If your vehicle is equipped with the
side view mirror defrosters, they will
operate at the same time you turn on
the rear window defroster.
CAUTION - Conductors
To prevent damage to the con-ductors bonded to the insidesurface of the rear window,never use sharp instruments orwindow cleaners containingabrasives to clean the window.
OHG045223
Page 192 of 520
4113
Features of your vehicle
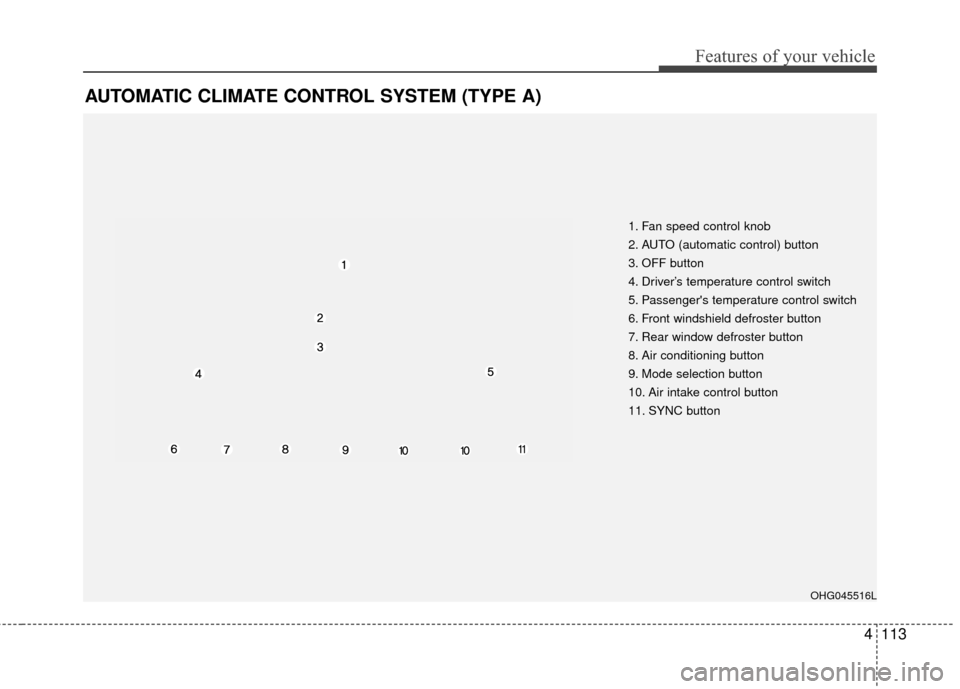
AUTOMATIC CLIMATE CONTROL SYSTEM (TYPE A)
1. Fan speed control knob
2. AUTO (automatic control) button
3. OFF button
4. Driver’s temperature control switch
5. Passenger's temperature control switch
6. Front windshield defroster button
7. Rear window defroster button
8. Air conditioning button
9. Mode selection button
10. Air intake control button
11. SYNC button
OHG045516L