parking brake Hyundai Coupe 2002 Owner's Manual
[x] Cancel search | Manufacturer: HYUNDAI, Model Year: 2002, Model line: Coupe, Model: Hyundai Coupe 2002Pages: 140, PDF Size: 1.45 MB
Page 32 of 140
CONTROLS AND EQUIPMENT
1- 24 8
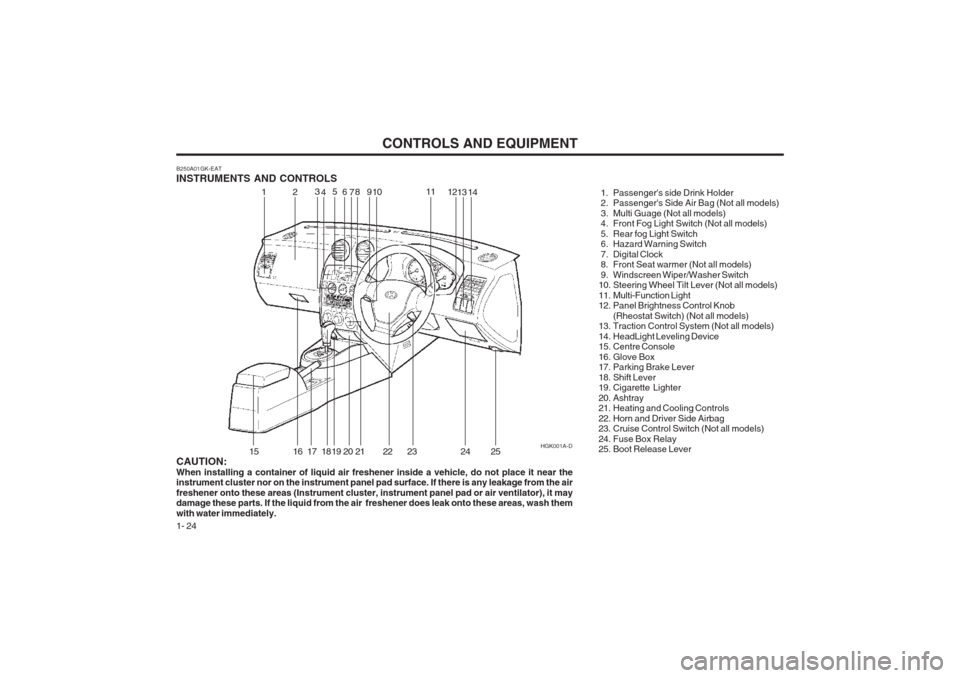
B250A01GK-EAT INSTRUMENTS AND CONTROLS
1. Passenger's side Drink Holder
2. Passenger's Side Air Bag (Not all models)
3. Multi Guage (Not all models)
4. Front Fog Light Switch (Not all models)
5. Rear fog Light Switch
6. Hazard Warning Switch
7. Digital Clock
8. Front Seat warmer (Not all models)
9. Windscreen Wiper/Washer Switch
10. Steering Wheel Tilt Lever (Not all models)
11. Multi-Function Light
12. Panel Brightness Control Knob(Rheostat Switch) (Not all models)
13. Traction Control System (Not all models)
14. HeadLight Leveling Device
15. Centre Console
16. Glove Box
17. Parking Brake Lever
18. Shift Lever
19. Cigarette Lighter
20. Ashtray
21. Heating and Cooling Controls
22. Horn and Driver Side Airbag
23. Cruise Control Switch (Not all models)
24. Fuse Box Relay
25. Boot Release Lever
CAUTION: When installing a container of liquid air freshener inside a vehicle, do not place it near the instrument cluster nor on the instrument panel pad surface. If there is any leakage from the air freshener onto these areas (Instrument cluster, instrument panel pad or air ventilator), it may damage these parts. If the liquid from the air freshener does leak onto these areas, wash them with water immediately. HGK001A-D
12
3
4 5
69 10 11
1213
15
16 17 18 19 20 21 22 23 24
714
25
Page 33 of 140
CONTROLS AND EQUIPMENT1- 25
HGK026B
1
234 5 67 8
910 1112 13 14
151617 18 1920 21
2
2223
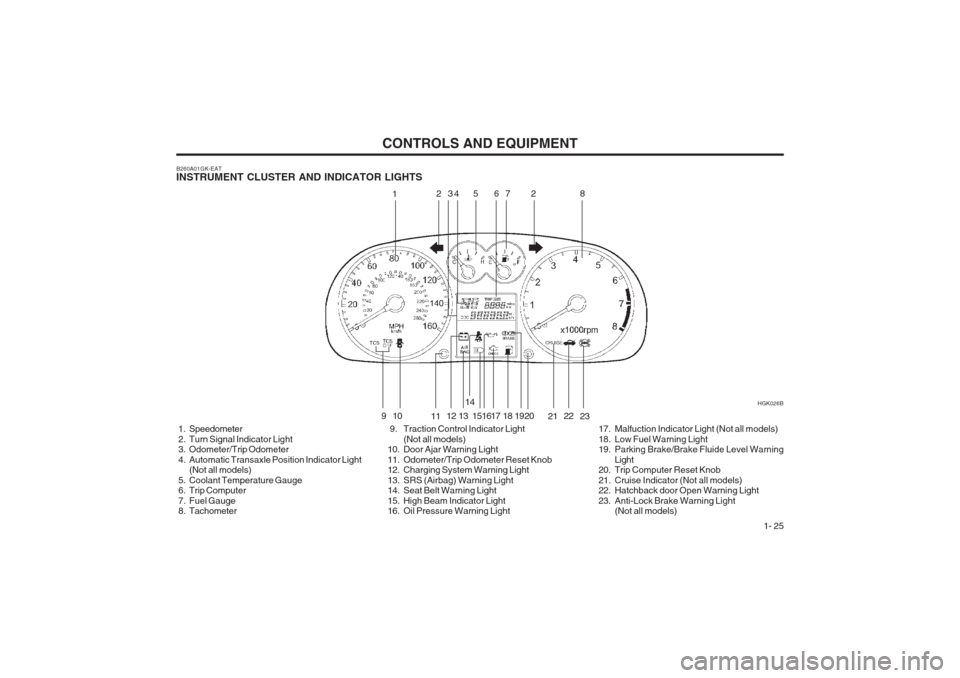
B260A01GK-EAT INSTRUMENT CLUSTER AND INDICATOR LIGHTS
1. Speedometer
2. Turn Signal Indicator Light
3. Odometer/Trip Odometer
4. Automatic Transaxle Position Indicator Light (Not all models)
5. Coolant Temperature Gauge
6. Trip Computer
7. Fuel Gauge
8. Tachometer 9. Traction Control Indicator Light
(Not all models)
10. Door Ajar Warning Light
11. Odometer/Trip Odometer Reset Knob
12. Charging System Warning Light
13. SRS (Airbag) Warning Light
14. Seat Belt Warning Light
15. High Beam Indicator Light
16. Oil Pressure Warning Light 17. Malfuction Indicator Light (Not all models)
18. Low Fuel Warning Light
19. Parking Brake/Brake Fluide Level Warning
Light
20. Trip Computer Reset Knob
21. Cruise Indicator (Not all models)
22. Hatchback door Open Warning Light
23. Anti-Lock Brake Warning Light (Not all models)
Page 34 of 140
CONTROLS AND EQUIPMENT
1- 26 SB210K1-E
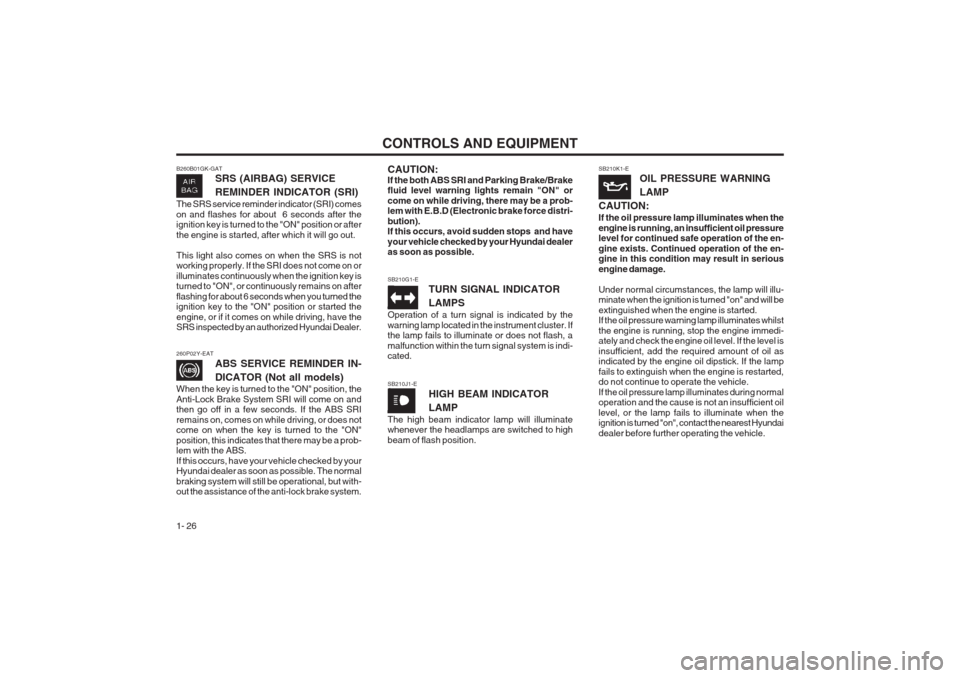
OIL PRESSURE WARNING LAMP
CAUTION: If the oil pressure lamp illuminates when the engine is running, an insufficient oil pressure level for continued safe operation of the en- gine exists. Continued operation of the en- gine in this condition may result in serious engine damage. Under normal circumstances, the lamp will illu- minate when the ignition is turned "on" and will be extinguished when the engine is started. If the oil pressure warning lamp illuminates whilst the engine is running, stop the engine immedi- ately and check the engine oil level. If the level is insufficient, add the required amount of oil as indicated by the engine oil dipstick. If the lamp fails to extinguish when the engine is restarted, do not continue to operate the vehicle. If the oil pressure lamp illuminates during normal operation and the cause is not an insufficient oil level, or the lamp fails to illuminate when the ignition is turned "on", contact the nearest Hyundai dealer before further operating the vehicle.
SB210G1-E TURN SIGNAL INDICATOR LAMPS
Operation of a turn signal is indicated by the warning lamp located in the instrument cluster. If the lamp fails to illuminate or does not flash, a malfunction within the turn signal system is indi- cated.
SB210J1-E HIGH BEAM INDICATOR LAMP
The high beam indicator lamp will illuminate whenever the headlamps are switched to high beam of flash position.
260P02Y-EAT
ABS SERVICE REMINDER IN-
DICATOR (Not all models)
When the key is turned to the "ON" position, the Anti-Lock Brake System SRI will come on and then go off in a few seconds. If the ABS SRI remains on, comes on while driving, or does not come on when the key is turned to the "ON" position, this indicates that there may be a prob- lem with the ABS. If this occurs, have your vehicle checked by your Hyundai dealer as soon as possible. The normal braking system will still be operational, but with- out the assistance of the anti-lock brake system. CAUTION: If the both ABS SRI and Parking Brake/Brake fluid level warning lights remain "ON" or come on while driving, there may be a prob- lem with E.B.D (Electronic brake force distri- bution). If this occurs, avoid sudden stops and have your vehicle checked by your Hyundai dealer as soon as possible.
B260B01GK-GAT
SRS (AIRBAG) SERVICE REMINDER INDICATOR (SRI)
The SRS service reminder indicator (SRI) comes on and flashes for about 6 seconds after the ignition key is turned to the "ON" position or after the engine is started, after which it will go out. This light also comes on when the SRS is not working properly. If the SRI does not come on or illuminates continuously when the ignition key is turned to "ON", or continuously remains on after flashing for about 6 seconds when you turned the ignition key to the "ON" position or started the engine, or if it comes on while driving, have the SRS inspected by an authorized Hyundai Dealer.
Page 35 of 140
CONTROLS AND EQUIPMENT1- 27
SB2100I-E
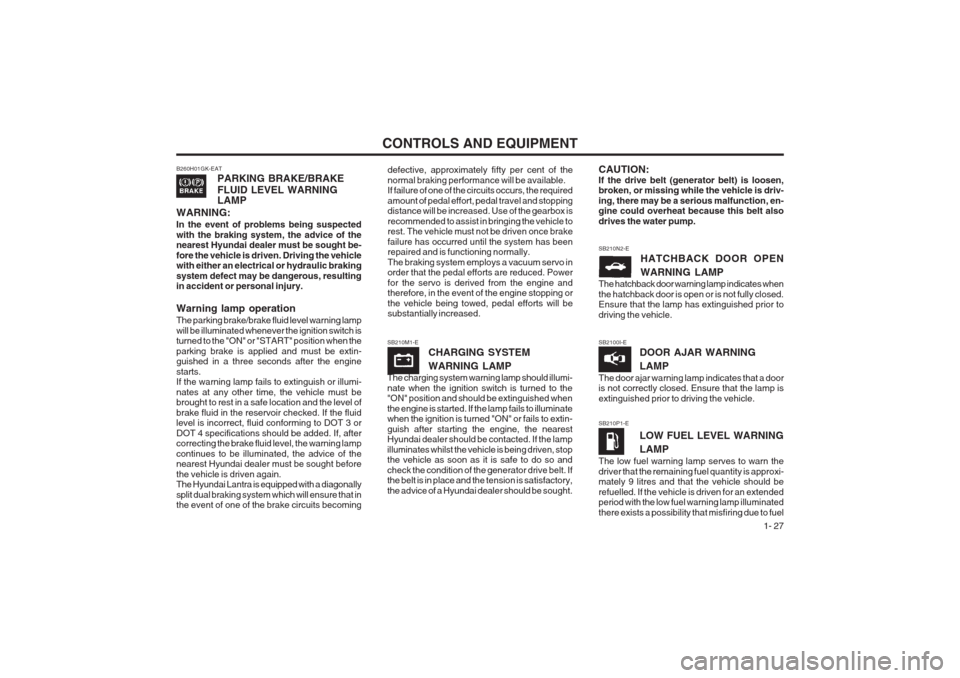
DOOR AJAR WARNING LAMP
The door ajar warning lamp indicates that a door is not correctly closed. Ensure that the lamp is extinguished prior to driving the vehicle.
SB210P1-E
LOW FUEL LEVEL WARNING LAMP
The low fuel warning lamp serves to warn the driver that the remaining fuel quantity is approxi- mately 9 litres and that the vehicle should be refuelled. If the vehicle is driven for an extended period with the low fuel warning lamp illuminated there exists a possibility that misfiring due to fuel
defective, approximately fifty per cent of thenormal braking performance will be available. If failure of one of the circuits occurs, the required amount of pedal effort, pedal travel and stopping distance will be increased. Use of the gearbox is recommended to assist in bringing the vehicle to rest. The vehicle must not be driven once brake failure has occurred until the system has been repaired and is functioning normally. The braking system employs a vacuum servo in order that the pedal efforts are reduced. Power for the servo is derived from the engine and therefore, in the event of the engine stopping or the vehicle being towed, pedal efforts will be substantially increased.
SB210M1-E CHARGING SYSTEM WARNING LAMP
The charging system warning lamp should illumi- nate when the ignition switch is turned to the "ON" position and should be extinguished when the engine is started. If the lamp fails to illuminate when the ignition is turned "ON" or fails to extin- guish after starting the engine, the nearest Hyundai dealer should be contacted. If the lamp illuminates whilst the vehicle is being driven, stop the vehicle as soon as it is safe to do so and check the condition of the generator drive belt. If the belt is in place and the tension is satisfactory, the advice of a Hyundai dealer should be sought.
B260H01GK-EAT PARKING BRAKE/BRAKE FLUID LEVEL WARNING LAMP
WARNING: In the event of problems being suspected with the braking system, the advice of the nearest Hyundai dealer must be sought be- fore the vehicle is driven. Driving the vehicle with either an electrical or hydraulic braking system defect may be dangerous, resulting in accident or personal injury. Warning lamp operation The parking brake/brake fluid level warning lamp will be illuminated whenever the ignition switch is turned to the "ON" or "START" position when the parking brake is applied and must be extin- guished in a three seconds after the engine starts. If the warning lamp fails to extinguish or illumi- nates at any other time, the vehicle must be brought to rest in a safe location and the level of brake fluid in the reservoir checked. If the fluid level is incorrect, fluid conforming to DOT 3 or DOT 4 specifications should be added. If, after correcting the brake fluid level, the warning lamp continues to be illuminated, the advice of the nearest Hyundai dealer must be sought before the vehicle is driven again. The Hyundai Lantra is equipped with a diagonally split dual braking system which will ensure that in the event of one of the brake circuits becoming SB210N2-E
HATCHBACK DOOR OPEN WARNING LAMP
The hatchback door warning lamp indicates when the hatchback door is open or is not fully closed. Ensure that the lamp has extinguished prior to driving the vehicle.CAUTION: If the drive belt (generator belt) is loosen, broken, or missing while the vehicle is driv- ing, there may be a serious malfunction, en- gine could overheat because this belt also drives the water pump.
Page 50 of 140
CONTROLS AND EQUIPMENT
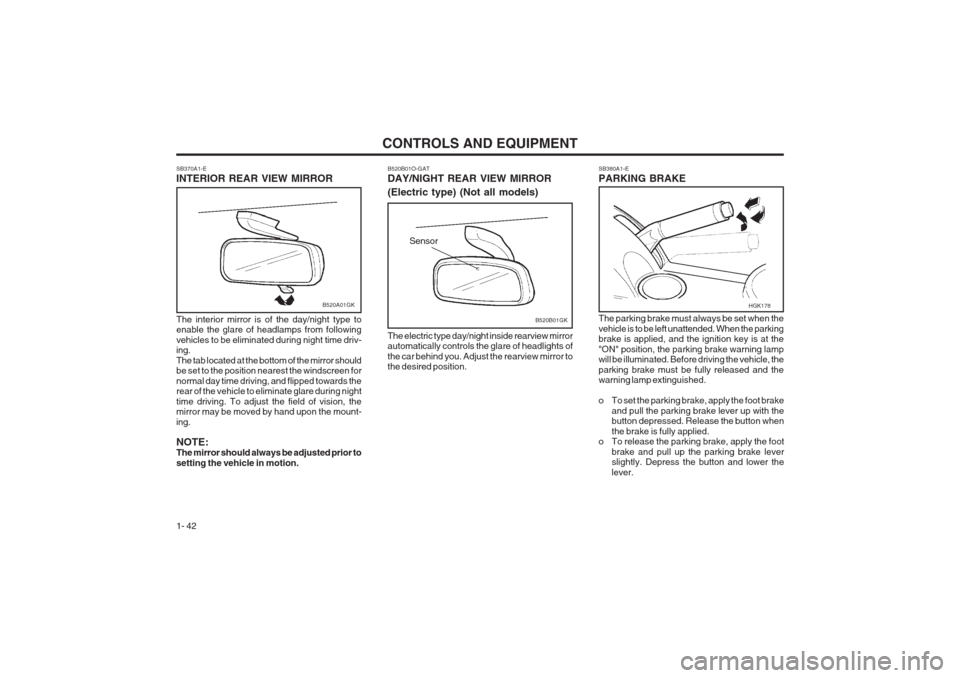
1- 42 SB380A1-E PARKING BRAKE The parking brake must always be set when the vehicle is to be left unattended. When the parking brake is applied, and the ignition key is at the "ON" position, the parking brake warning lamp will be illuminated. Before driving the vehicle, the parking brake must be fully released and the warning lamp extinguished.
o To set the parking brake, apply the foot brake
and pull the parking brake lever up with the button depressed. Release the button when the brake is fully applied.
o To release the parking brake, apply the foot
brake and pull up the parking brake lever slightly. Depress the button and lower the lever.
SB370A1-E INTERIOR REAR VIEW MIRROR The interior mirror is of the day/night type to enable the glare of headlamps from following vehicles to be eliminated during night time driv- ing. The tab located at the bottom of the mirror should be set to the position nearest the windscreen for normal day time driving, and flipped towards the rear of the vehicle to eliminate glare during night time driving. To adjust the field of vision, the mirror may be moved by hand upon the mount- ing. NOTE: The mirror should always be adjusted prior to setting the vehicle in motion.
B520A01GK
B520B01O-GAT DAY/NIGHT REAR VIEW MIRROR (Electric type) (Not all models) The electric type day/night inside rearview mirror automatically controls the glare of headlights of the car behind you. Adjust the rearview mirror to the desired position.
B520B01GK
Sensor
HGK178
Page 76 of 140
DRIVING YOUR HYUNDAI
2- 2
SC030A1-E BEFORE STARTING THE ENGINEBefore you start the engine, you should always:
1. Look around the vehicle to be sure there are
no flat tires, puddles of oil or water or otherindications of possible trouble.
2. After entering the car, check to be sure the parking brake is engaged.
3. Check that all windows, and lights are clean.
4. Check that the interior and exterior mirrors are clean and in position.
5. Check your seat, seatback and head re- straint to be sure they are in their proper positions.
6. Lock all the doors.
7. Fasten your seat belt and be sure that all other occupants have fastened theirs.
8. Turn off all lights and accessories that are
not needed.
9. When you turn the ignition switch to "ON' check that all appropriate warning lights areoperating and that you have sufficient fuel.
10.Check the operation of warning lights and all bulbs when key is in the "ON" position. o To start the engine, insert the ignition key
and turn it to the "START" position. Release it as soon as the engine starts. Do not hold the key in the "START" position for more that 15 seconds.
NOTE: For safety, the engine will not start if the shift lever is not in "P" or "N" Position (Auto T/A).
SC040A1-F COMBINATION IGNITION SWITCH AND STEERING LOCK To Start the Engine
o If your Hyundai is equipped with a manual transaxle, place the shift lever in neutral and depress the clutch pedal fully.
o If your Hyundai has an automatic transaxle, place the shift lever in "P" (park). SC050A2-E
KEY POSITIONS WARNING:
The engine must never be turned off and the
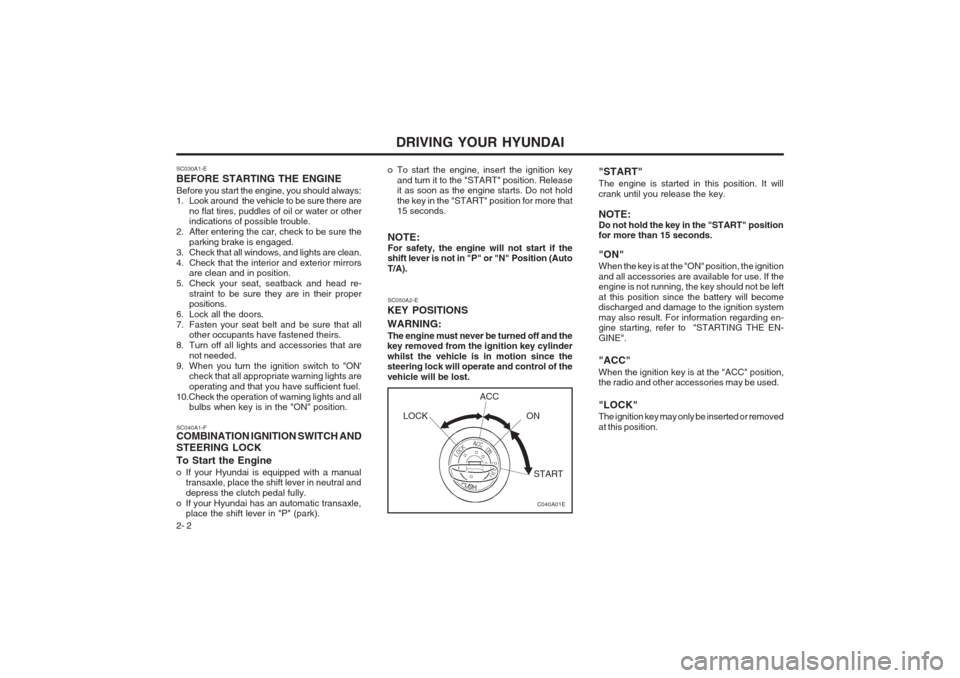
key removed from the ignition key cylinder whilst the vehicle is in motion since the steering lock will operate and control of the vehicle will be lost. "START" The engine is started in this position. It will crank until you release the key. NOTE: Do not hold the key in the "START" position for more than 15 seconds. "ON" When the key is at the "ON" position, the ignition and all accessories are available for use. If the engine is not running, the key should not be left at this position since the battery will become discharged and damage to the ignition system may also result. For information regarding en- gine starting, refer to "STARTING THE EN- GINE". "ACC" When the ignition key is at the "ACC" position, the radio and other accessories may be used. "LOCK" The ignition key may only be inserted or removed at this position.
C040A01E
LOCK
ACC
ON
START
Page 79 of 140
DRIVING YOUR HYUNDAI 2- 5
SC090B1-F Using the Clutch The clutch should be pressed all the way to the floor before shifting, then released slowly. Do not rest your foot on the clutch pedal while driving.This can cause unnecessary wear.Do not partially engage the clutch to hold the car on an incline. This causes unnecessary wear.Use the parking brake to hold the car on an incline. Do not operate the clutch pedal rapidly and repeatedly.
NOTE:
o During cold weather, shifting may be dif-
ficult until the transaxle lubricant has warmed up. This is normal and not harm- ful to the transaxle.
o If you 've come to a complete stop and
it's hard to shift into 1 st
or R(Reverse),
put the shift lever in N(Neutral) positionand let up on the clutch. Press the clutch pedal back down, and then shift into 1 st
or R(Reverse) gear position.
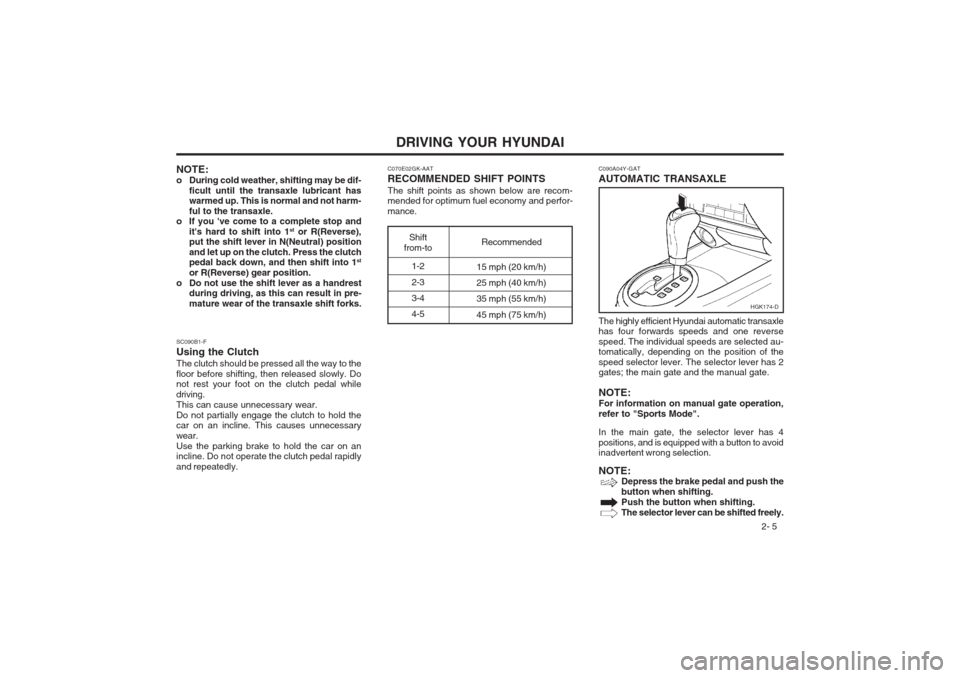
o Do not use the shift lever as a handrest during driving, as this can result in pre- mature wear of the transaxle shift forks. C070E02GK-AAT RECOMMENDED SHIFT POINTSThe shift points as shown below are recom- mended for optimum fuel economy and perfor- mance.
1-2 2-3 3-44-5
Shift
from-to Recommended
15 mph (20 km/h)25 mph (40 km/h)35 mph (55 km/h) 45 mph (75 km/h) HGK174-D
C090A04Y-GAT AUTOMATIC TRANSAXLE The highly efficient Hyundai automatic transaxle has four forwards speeds and one reverse speed. The individual speeds are selected au- tomatically, depending on the position of the speed selector lever. The selector lever has 2 gates; the main gate and the manual gate. NOTE: For information on manual gate operation,refer to "Sports Mode". In the main gate, the selector lever has 4 positions, and is equipped with a button to avoid inadvertent wrong selection. NOTE:
Depress the brake pedal and push the button when shifting.Push the button when shifting.The selector lever can be shifted freely.
Page 80 of 140
DRIVING YOUR HYUNDAI
2- 6 The first few shifts on a new vehicle, or if the
battery has been disconnected, may be somewhat abrupt. This is a normal condi- tion, and the shifting sequence will adjust after shifts are cycled a few times by the T.C.M (Transmission Control Module).
CAUTION:Never shift into "R" or "P" position while
the vehicle is moving.
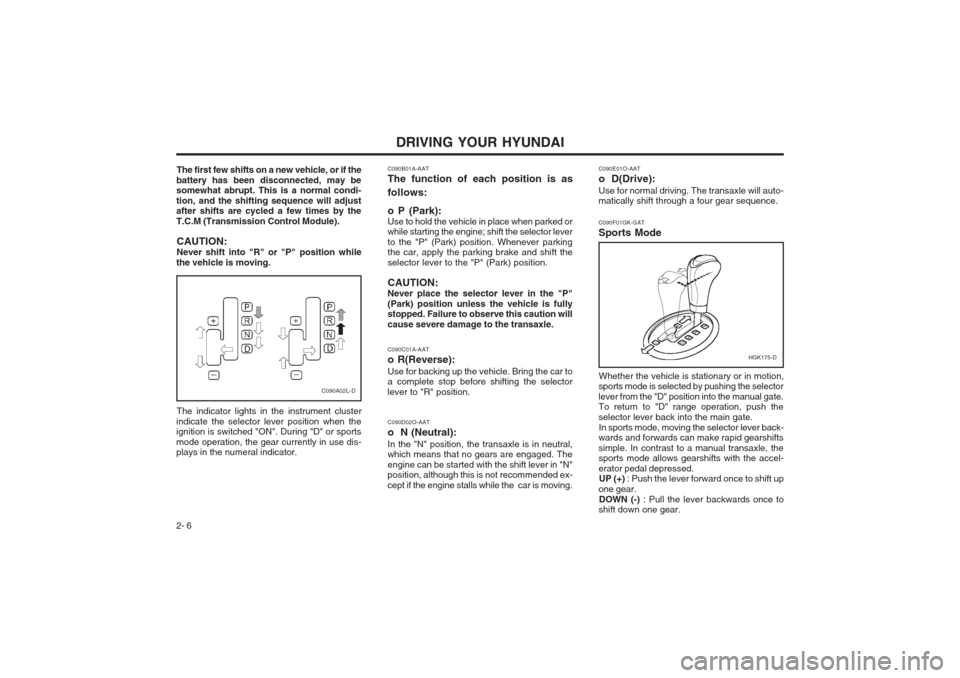
The indicator lights in the instrument cluster
indicate the selector lever position when the ignition is switched "ON". During "D" or sports mode operation, the gear currently in use dis- plays in the numeral indicator.
C090A02L-D C090F01GK-GAT Sports Mode
HGK175-D
Whether the vehicle is stationary or in motion,
sports mode is selected by pushing the selector lever from the "D" position into the manual gate. To return to "D" range operation, push the selector lever back into the main gate.
In sports mode, moving the selector lever back-
wards and forwards can make rapid gearshiftssimple. In contrast to a manual transaxle, the sports mode allows gearshifts with the accel- erator pedal depressed. UP (+) : Push the lever forward once to shift up
one gear. DOWN (-) : Pull the lever backwards once to
shift down one gear.
C090E01O-AAT
o D(Drive):Use for normal driving. The transaxle will auto- matically shift through a four gear sequence.
C090B01A-AAT The function of each position is as follows: o P (Park): Use to hold the vehicle in place when parked or while starting the engine; shift the selector lever to the "P" (Park) position. Whenever parking the car, apply the parking brake and shift the selector lever to the "P" (Park) position. CAUTION: Never place the selector lever in the "P"(Park) position unless the vehicle is fully stopped. Failure to observe this caution will cause severe damage to the transaxle. C090C01A-AAT o R(Reverse):Use for backing up the vehicle. Bring the car to a complete stop before shifting the selector lever to "R" position. C090D02O-AAT o N (Neutral):In the "N" position, the transaxle is in neutral, which means that no gears are engaged. The engine can be started with the shift lever in "N" position, although this is not recommended ex- cept if the engine stalls while the car is moving.
Page 81 of 140

DRIVING YOUR HYUNDAI 2- 7
C090H01L-GAT NOTE:
o For smooth and safe operation, depress
the brake pedal when shifting from "Neu- tral" position or "Park" position to a for- ward or reverse gear.
o The ignition key must be in the "ON" position and the brake pedal fully de-pressed in order to move the shift lever from the "P" (Park) position to any of the other positions.
o It is always possible to shift from "R", "N", "D" position to "P" position. Thevehicle must be fully stopped to avoid transaxle damage.
SKIP
: By rapidly moving the selector forwards
or backwards twice, it is possible to skip onegear, i.e. 1st to 3rd or 3rd to 1st . CAUTION:
o In sports mode, the driver must execute upward shifts in accordance with pre-vailing road conditions, taking care to keep the engine speed below the red zone.
o For engine protection, upward shifts are made automatically when the engine rpmreaches the red zone.
o By rapidly moving the selector lever back- wards (-) twice it is possible to skip onegear by using the sports mode. Since sudden engine braking and/or rapid ac- celeration can cause a loss of traction, however, downshifts must be made care- fully in accordance with the vehicle's speed.
NOTE:
o In sports mode, only the four forward gears can be selected. To reverse or parkthe vehicle, move the selector lever to the "R" or "P" position as required.
o In sports mode, downward shifts are made automatically when the vehicleslows down. When the vehicle stops, 1st gear is automatically selected.
o To maintain the required levels of vehicle performance and safety, the system maynot execute certain gearshifts when the selector lever is operated. o Before driving away from a stop on a
slippery road, push the selector leverforward into the +(UP) position. This causes the transaxle to shift into 2nd gear which is better for smooth driving away on a slippery road. Push the selec- tor lever to the -(DOWN) side to shift back to 1st gear. C090I01L-GAT CAUTION:
o Shift into "R" and "P" position only when
the vehicle has completely stopped.
o Do not accelerate the engine in reverse or any of the forward positions with the brakes applied.
o Always apply the footbrake when shift- ing from "P" or "N", to "R", "D"position.
o Do not use the "P" (Park) position in place of the parking brake. Always set the parking brake, shift the transaxle into "P" (Park) position and turn off the igni- tion when you leave the vehicle, even momentarily. Never leave the vehicle unattended while the engine is running.
o Check the automatic transaxle fluid level regularly, and add fluid as necessary.
C090N01O-AAT Good Driving Practices
o Never move the gear selector lever from "P" or "N" to any other position with the acceler- ator pedal depressed.
o Never move the gear selector lever into "P" when the vehicle is in motion.
o Be sure the car is completely stopped be- fore you attempt to shift into "R".
o Never take the car out of gear and coast down a hill. This may be extremely hazard-ous. Always leave the car in gear when moving.
o Do not "ride" the brakes. This can cause them to overheat and malfunction. Instead,
Page 82 of 140

DRIVING YOUR HYUNDAI
2- 8 o Since the power assistance provided by the
brake servo is derived from the engine, coasting with the engine turned off or towing of the vehicle with the engine turned off will result in greatly increased pedal pressures being required to stop the vehicle.
o Do not hold the vehicle on the upgrade with the accelerator pedal. This can cause thetransmission to overheat. Always use the brake pedal or parking brake.
SC140B1-E ANTI-LOCK BRAKE SYSTEM (Not all models) The Anti-Lock Brake System (ABS) is designed to prevent wheel lock-up during sudden braking or on hazardous road surfaces. The ABS con- trol module monitors the wheel speed and con- trols the pressure applied to each brake. Thus, in emergency situations or on slick roads, ABS will increase vehicle control during braking. NOTE: During ABS operation, a slight pulsation may be felt in the brake pedal when the brakes are applied. Also, a noise may be heard in the engine compartment while brak- ing. These conditions are normal and indi- cate that the anti-lock brake system is func- tioning properly.
when you are driving down a long hill, slowdown and shift to a lower gear. When you do this, engine braking will help slow the car.
o Slow down before shifting to a lower gear.
Otherwise, the lower gear may not be en-gaged.
o Always use the parking brake. Do not de- pend on placing the transaxle in "P" to keep the car from moving.
o Exercise extreme caution when driving on a slippery surface. Be especially careful whenbraking, accelerating or shifting gears. On a slippery surface, an abrupt change in vehi- cle speed can cause the drive wheels to lose traction and the vehicle to go out of control.
WARNING:
o Avoid high cornering speeds.
o Do not make quick steering wheel move- ments, such as sharp lane changes orfast, sharp turns.
o Always wear your seat belts.
o The risk of rollover is greatly increased if
you lose control of your vehicle at high- way speeds.
o Loss of control often occurs if two or more wheels drop off the roadway andthe driver oversteers to reenter the road- way.
o In the event your vehicle leaves the road- way, do not steer sharply. Instead, slowdown before pulling back into the travel lanes. o In a collision crash, un unbelted person
is significantly more likely to die than aperson wearing a seatbelt.
SC140A1-E EFFECTIVE BRAKINGBraking system performance and friction mate- rial life are greatly affected by the driving style adopted. The following suggestions are made to assist in achieving the best results from the braking system.
o Anticipate the road and conditions ahead in order that heavy braking may be avoided.
o When descending long gradients, use the engine to assist in retarding the vehicle to minimize the possibility of brake fade occur- ring.
o When trailer towing, ensure that the trailer brakes function correctly and use enginebraking to assist the vehicle braking system.
o Use only genuine Hyundai replacement brake pads and shoes to ensure consistentfriction characteristics and wear rates.
o After driving through deep water (e.g.
fording), the brakes may become wet and performance reduced. Always check brake efficiency after emerging from the water and dry the brakes by lightly depressing the brake pedal several times whilst driving slow- ly.
o Apply the parking brake only when the vehi- cle is at rest.