fuel pressure Hyundai Coupe 2008 Owner's Manual
[x] Cancel search | Manufacturer: HYUNDAI, Model Year: 2008, Model line: Coupe, Model: Hyundai Coupe 2008Pages: 407, PDF Size: 11.03 MB
Page 12 of 407

YOUR VEHICLE AT A GLANCE
F12B255A02GK-GAT INDICATOR SYMBOLS ON THE INSTRUMENT PANEL * More detailed explanations of these items will be found beginning on page 1-44.
Malfunction Indicator Light (If installed)
SRS (Airbag) Service Reminder Indicator (SRI)(If installed)
Tail Gate Open Warning Light
Low Fuel Level Warning Light
Door Ajar Warning Light (If installed)
ABS Service Reminder Indicator (If installed)
Turn Signal Indicator Lights
High Beam Indicator Light Low Oil Pressure Warning Light Parking Brake/Brake Fluid Level Warning Light
Charging System Warning Light CRUISE Indicator Light (If installed)
Seat Belt Warning Light CRUISE SET Indicator Light (If installed)
Electronic Stability Program (ESP) Indicator Light (If installed)
Immobilizer Warning Light (If installed)
120
km/hOverspeed warning Light (Mideast only)
Page 55 of 407
1
FEATURES OF YOUR HYUNDAI
43
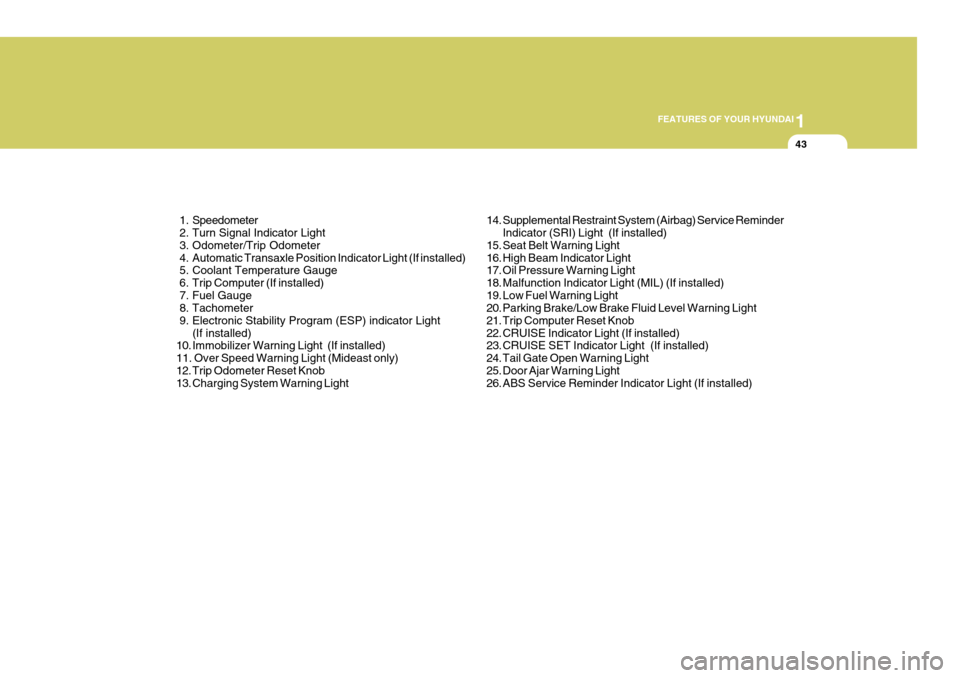
1. Speedometer
2. Turn Signal Indicator Light
3. Odometer/Trip Odometer
4. Automatic Transaxle Position Indicator Light (If installed)
5. Coolant Temperature Gauge
6. Trip Computer (If installed)
7. Fuel Gauge
8. Tachometer
9. Electronic Stability Program (ESP) indicator Light (If installed)
10. Immobilizer Warning Light (If installed)11. Over Speed Warning Light (Mideast only)
12. Trip Odometer Reset Knob
13. Charging System Warning Light 14. Supplemental Restraint System (Airbag) Service Reminder
Indicator (SRI) Light (If installed)
15. Seat Belt Warning Light
16. High Beam Indicator Light
17. Oil Pressure Warning Light
18. Malfunction Indicator Light (MIL) (If installed)
19. Low Fuel Warning Light
20. Parking Brake/Low Brake Fluid Level Warning Light
21. Trip Computer Reset Knob
22. CRUISE Indicator Light (If installed)
23. CRUISE SET Indicator Light (If installed)
24. Tail Gate Open Warning Light
25. Door Ajar Warning Light
26. ABS Service Reminder Indicator Light (If installed)
Page 88 of 407
1FEATURES OF YOUR HYUNDAI
76
o Automotive fuels are flammable/
explosive materials. When refuel- ing, please note the following guidelines carefully. Failure tofollow these guidelines may re- sult in severe personal injury, se- vere burns or death by fire orexplosion.
- Before refueling always note thelocation of the Emergency Gaso- line Shut-Off, if available, at the gas station facility.
- Before touching the fuel nozzle
or fuel filler cap, you shouldeliminate potentially dangerous static electricity discharge bytouching another metal part of the front of the vehicle, a safe distance away from the fuel fillerneck, nozzle, or other gas source.
- Do not get back into a vehicle
once you have begun refueling.Do not touch, rub or slide against any item or fabric (polyester,satin, nylon, etc.) capable of pro- ducing static electricity. Static electricity discharge can ignitefuel vapors resulting in explo- sion.
!
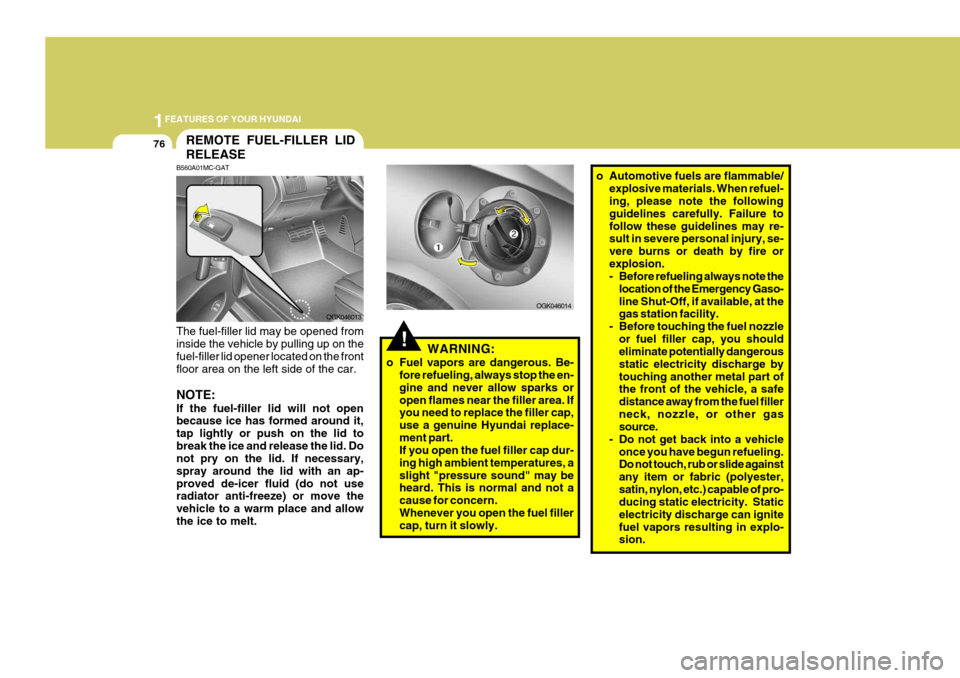
B560A01MC-GAT The fuel-filler lid may be opened from inside the vehicle by pulling up on thefuel-filler lid opener located on the front floor area on the left side of the car. NOTE: If the fuel-filler lid will not open because ice has formed around it, tap lightly or push on the lid tobreak the ice and release the lid. Do not pry on the lid. If necessary, spray around the lid with an ap-proved de-icer fluid (do not use radiator anti-freeze) or move the vehicle to a warm place and allowthe ice to melt.REMOTE FUEL-FILLER LID RELEASE
WARNING:
o Fuel vapors are dangerous. Be- fore refueling, always stop the en- gine and never allow sparks oropen flames near the filler area. If you need to replace the filler cap, use a genuine Hyundai replace-ment part. If you open the fuel filler cap dur- ing high ambient temperatures, aslight "pressure sound" may be heard. This is normal and not a cause for concern.Whenever you open the fuel filler cap, turn it slowly.
OGK046013
OGK046014
Page 163 of 407
2 DRIVING YOUR HYUNDAI
20HIGHER SPEED MOTORING
C160J01A-AAT Don't Let Ice and Snow Accumu- late Underneath Under some conditions, snow and ice can build up under the fenders andinterfere with the steering. When driv- ing in severe winter conditions where this may happen, you should periodi-cally check underneath the car to be sure the movement of the front wheels and the steering components is notobstructed. C160K01A-AAT Carry Emergency Equipment Depending on the severity of the weather where you drive your car, you should carry appropriate emergency equipment. Some of the items youmay want to carry include tire chains, tow straps or chains, flashlight, emer- gency flares, sand, a shovel, jumpercables, a window scraper, gloves, ground cloth, coveralls, a blanket, etc. C170A01A-AAT Pre-Trip Inspections 1. Tires: Adjust the tire inflation pressures to specification. Low tire inflation pres-sures will result in overheating and possible failure of the tires. Avoid using worn or damaged tireswhich may result in reduced traction or tire failure. NOTE: Never exceed the maximum tire in- flation pressure shown on the tires. 2. Fuel, engine coolant and en-
gine oil:
High speed travel consumes more fuel than urban motoring. Do not forget tocheck both engine coolant and engine oil. 3. Drive belt: A loose or damaged drive belt may result in overheating of the engine. C180A01A-AAT Check your lights regularly for correct operation and always keep them clean. When driving during the day in condi- tions of poor visibility, it is helpful todrive with headlights on low beam. This enables you to be seen as well as to see.
USE OF LIGHTS
Page 167 of 407
2 DRIVING YOUR HYUNDAI
24
C190F01A-GAT Trailer or Vehicle Towing Tips
1. Before towing, check hitch andsafety chain connections as well as proper operation of the trailer run- ning lights, brake lights, and turn signals.
2. Always drive your vehicle at a mod- erate speed (Less than 100 km/H).
3. Trailer towing requires more fuel than normal conditions.
4. To maintain engine braking effi-
ciency and electrical chaarging per-formance, do not use fifth gear (manual transaxle) or overdrive (au- tomatic transaxle).
5. Always secure items in the trailer to prevent load shift while driving.
6. Check the condition and air pres- sure of all tires on the trailer and your car. Low tire pressure can seriously affect the handling. Alsocheck the spare tire. 7. The vehicle/trailer combination is
more affected by crosswind andbuffeting. When being passed by a large ve- hicle, keep a constant speed andsteer straight ahead. If there is too much wind buffeting, slow down to get out of the other vehicle's airturbulence.
8. When parking your car and trailer,
especially on a hill, be sure to followall the normal precautions. Turn your front wheel into the curb, set the parking brake firmly, and putthe transmission in 1st or Reverse (manual) or Park (automatic). In addition, place wheel chocks ateach of the trailer's tires.
9. If the trailer has electric brakes,
start your vehicle and trailer mov-ing, and then apply the trailer brake controller by hand to be sure the brakes are working. This lets youcheck your electrical connection at the same time.
10.During your trip, check occasion- ally to be sure that the load issecure, and that the lights and any trailer brakes are still working. 11. Avoid jerky starts, sudden accel-
eration or sudden stops.
12.Avoid sharp turns and rapid lane changes.
13.Avoid holding the brake pedal down too long or too frequently. This could cause the brakes to overheat, re- sulting in reduced braking efficiency.
14.When going down a hill, shift into a lower gear and use the engine brak-ing effect.When ascending a long grade, downshift the transmission to a lower gear and reduce speed toreduce chances of engine over- loading and/or overheating.
15.If you have to stop while going
uphill, do not hold the vehicle inplace by pressing on the accelera- tor. This can cause the automatictransmission to overheat. Use the parking brake or footbrake.
NOTE: When towing check transaxle fluid more frequently.
Page 194 of 407
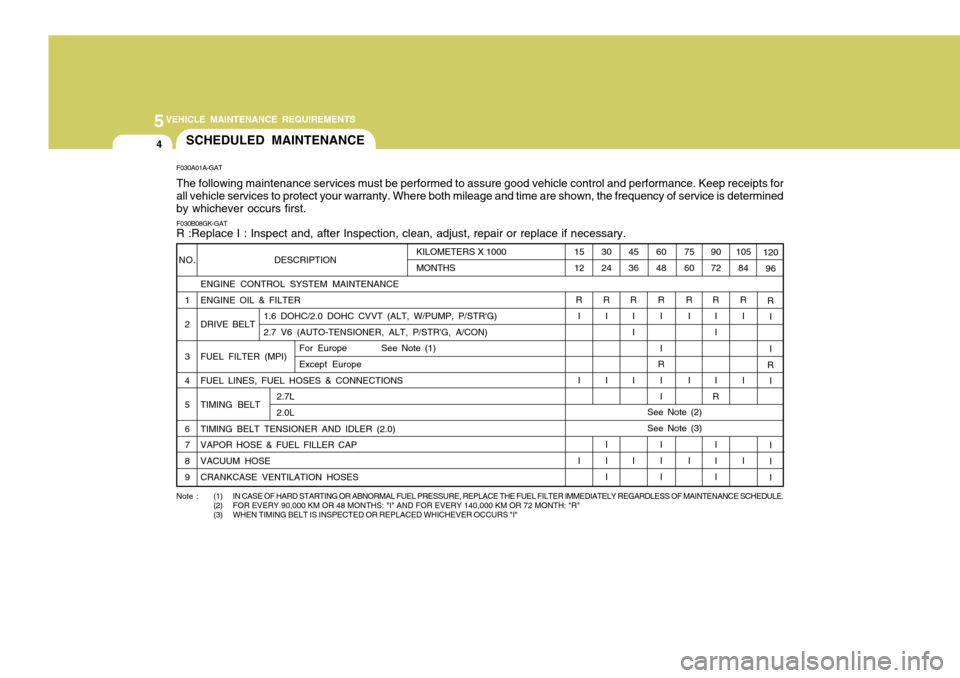
5VEHICLE MAINTENANCE REQUIREMENTS
4
75 60R I I I
NO.
1 2 3 4 56 7 8 9
F030A01A-GAT The following maintenance services must be performed to assure good vehicle control and performance. Keep receipts for all vehicle services to protect your warranty. Where both mileage and time are shown, the frequency of service is determined by whichever occurs first. F030B08GK-GAT R :Replace I : Inspect and, after Inspection, clean, adjust, repair or replace if necessary.105
84
R I I I 120
96
R I I
R I I I I
9072
R II I
R
I I I
60 48
R I I
R
I I I I I
45 36
R II I I
30 24
R I II I I
15 12
R I I I
KILOMETERS X 1000 MONTHS
SCHEDULED MAINTENANCE
DESCRIPTION ENGINE CONTROL SYSTEM MAINTENANCE ENGINE OIL & FILTER DRIVE BELT FUEL FILTER (MPI) FUEL LINES, FUEL HOSES & CONNECTIONS TIMING BELTTIMING BELT TENSIONER AND IDLER (2.0) VAPOR HOSE & FUEL FILLER CAP VACUUM HOSE CRANKCASE VENTILATION HOSES
1.6 DOHC/2.0 DOHC CVVT (ALT, W/PUMP, P/STR'G) 2.7 V6 (AUTO-TENSIONER, ALT, P/STR'G, A/CON)
See Note (2)See Note (3)
2.7L 2.0L
Note : (1) IN
CASE OF HARD STARTING OR ABNORMAL FUEL PRESSURE, REPLACE THE FUEL FILTER IMMEDIATELY REGARDLESS OF MAINTENANCE SCHEDULE.
(2) FOR EVERY 90,000 KM OR 48 MONTHS: "I" AND FOR EVERY 140,000 KM OR 72 MONTH: "R"
(3) WHEN TIMING BELT IS INSPECTED OR REPLACED WHICHEVER OCCURS "I"
For Europe See Note (1) Except Europe
Page 227 of 407
6 DO-IT-YOURSELF MAINTENANCE
26
OGK076068N
G240A01A-AAT Power Steering Hoses It is suggested that you check the power steering hose connections for fluid leakage daily. The power steer- ing hoses should be replaced if thereis severe surface cracking, pulling, scuffing or worn spots. Deterioration of the hose could cause prematurefailure. G290A02GK-GAT
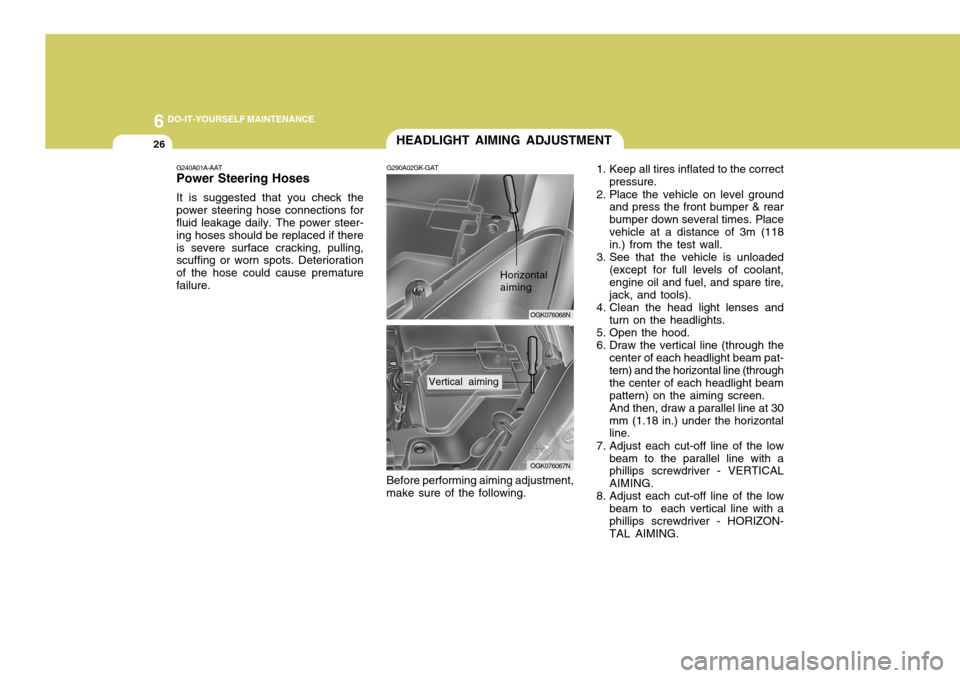
HEADLIGHT AIMING ADJUSTMENT
1. Keep all tires inflated to the correctpressure.
2. Place the vehicle on level ground and press the front bumper & rearbumper down several times. Placevehicle at a distance of 3m (118 in.) from the test wall.
3. See that the vehicle is unloaded (except for full levels of coolant, engine oil and fuel, and spare tire,jack, and tools).
4. Clean the head light lenses and
turn on the headlights.
5. Open the hood.
6. Draw the vertical line (through the center of each headlight beam pat- tern) and the horizontal line (through the center of each headlight beampattern) on the aiming screen.And then, draw a parallel line at 30mm (1.18 in.) under the horizontal line.
7. Adjust each cut-off line of the low beam to the parallel line with aphillips screwdriver - VERTICAL AIMING.
8. Adjust each cut-off line of the low
beam to each vertical line with aphillips screwdriver - HORIZON- TAL AIMING.
Before performing aiming adjustment,
make sure of the following.
OGK076067N
Horizontal aiming
Vertical aiming
Page 269 of 407

YOUR VEHICLE AT A GLANCE
F10B255A02GK-EAT INDICATOR SYMBOLS ON THE INSTRUMENT PANEL
* More detailed explanations of these items will be found beginning on page 1-42.
Turn Signal Indicator Lights Electronic Stability Program (ESP) Indicator Lights (Not all models)Malfunction Indicator Light (Not all models)
SRS (Airbag) Service Reminder Indicator (SRI)
Low Fuel Level Warning Light
High Beam Indicator Light Low Oil Pressure Warning Light
Charging System Warning Light
Seat Belt Warning Light
Immobiliser Warning Light
Hatchback Door Open Warning Light
Door Open (Ajar) Warning Light
ABS Service Reminder Indicator (Not all models)
Parking Brake/Low Brake Fluid Level Warning Light
CRUISE Indicator Light (Not all models)
CRUISE SET Indicator Light (Not all models)
Page 299 of 407
2DRIVING YOUR HYUNDAI
6FUEL ECONOMY
4. Turn the ignition key to the "START" position and release it when the en- gine starts. SC060B1-E The following suggestions are made to assist in achieving the greatest degree of fuel economy.
o Maintaining a constant check on fuel
consumption will enable the most economical use pattern and drivingstyle to be adopted.
o Avoid using the vehicle for very short journeys if possible, particularly whena cold start is involved.
o Ensure that tyre pressures are main- tained at the correct level.
o Use only the recommended grade of
fuel.
o Avoid carrying unnecessary weight, and if a roof rack is in use, remove itas soon as possible after use.
o Anticipate the road and conditions ahead to enable adjustments in speedto be made smoothly. Avoid heavyacceleration and sharp braking.
o Avoid cruising at unnecessary high speeds.
o Always ensure that the periodic main- tenance services are performed by aHyundai authorised repairer at the
time and/or mileage intervals speci-fied.
o Use the air conditioning only when necessary.
!
C050B01A-EAT Normal Conditions The Starting Procedure:
1. Insert key, and fasten the seat belt.
2. Depress the clutch pedal fully and
place the gearshift lever (manual transaxle) in neutral or the selector lever (automatic transaxle) in "P" (park) position.
3. After turning the ignition key to the "ON" position, make certain all warn-ing lights and gauges are function-ing properly before starting the en- gine.
WARNING:
Be sure that the clutch is fully de- pressed when starting a manual transaxle vehicle. This will prevent sudden movement should the ve-hicle be started in gear without the clutch depressed. Otherwise there is the potential tocause damage to the vehicle or in- jury to a person inside or outside of the vehicle as a result of this suddenvehicle movement.
Page 310 of 407
2
DRIVING YOUR HYUNDAI
17
o Apply the parking brake only when the vehicle is at rest.
o Since the power assistance provided by the brake servo is derived from the engine, coasting with the engineturned off or towing of the vehicle with the engine turned off will result in greatly increased pedal pressuresbeing required to stop the vehicle.
o Do not hold the vehicle on an incline
with the accelerator pedal. This cancause the transmission to overheat. Always use the brake pedal or park- ing brake.
o Use caution when parking on a hill. Engage the parking brake and placethe gear selector lever in "P" (auto-matic transaxle) or in first or reverse gear (manual transaxle). If your car is facing downhill, turn the frontwheels into the curb to help keep the car from rolling. If your car is facing uphill, turn the front wheels awayfrom the curb to help keep the car from rolling. If there is no curb or if it is required by other conditions tokeep the car from rolling, block the wheels.DRIVING FOR ECONOMY
C140A02A-EAT You can save fuel and get more miles from your car if you follow these sug- gestions:
o Drive smoothly. Accelerate at a moderate rate. Don't make "jack- rabbit" starts or full-throttle shiftsand maintain a steady cruising speed. Don't race between stoplights. Try to adjust your speed to that of the othertraffic so you don't have to change speeds unnecessarily. Avoid heavy traffic whenever possible. Alwaysmaintain a safe distance from other vehicles so you can avoid unneces- sary braking. This also reduces brakewear.
o Drive at a moderate speed. The faster
you drive, the more fuel your caruses. Driving at a moderate speed, especially on the motorway, is one of the most effective ways to reducefuel consumption.
o Don't "ride" the brake or clutch pedal.
This can increase fuel consumptionand also increase wear on these components. In addition, driving with your foot resting on the brake pedalmay cause the brakes to overheat, which reduces their effectivenessand may lead to more serious conse-quences.
o Take care of your tyres. Keep them
inflated to the recommended pres-sure. Incorrect inflation, either too much or too little, results in unneces- sary tyre wear. Check the tyre pres-sures at least once a month.
o Be sure that the wheels are aligned
correctly. Improper alignment canresult from hitting curbs or driving too fast over irregular surfaces. Poor alignment causes faster tyre wearand may also result in other prob- lems as well as greater fuel con- sumption.
o Keep your car in good condition. For better fuel economy and reducedmaintenance costs, maintain yourcar in accordance with the mainte- nance schedule in Section 5. If you drive your car in severe conditions,more frequent maintenance is re- quired (see Section 5 for details).