Instrument Hyundai Creta 2018 Owner's Guide
[x] Cancel search | Manufacturer: HYUNDAI, Model Year: 2018, Model line: Creta, Model: Hyundai Creta 2018Pages: 472, PDF Size: 11.87 MB
Page 195 of 472
3-110
Convenient features of your vehicle
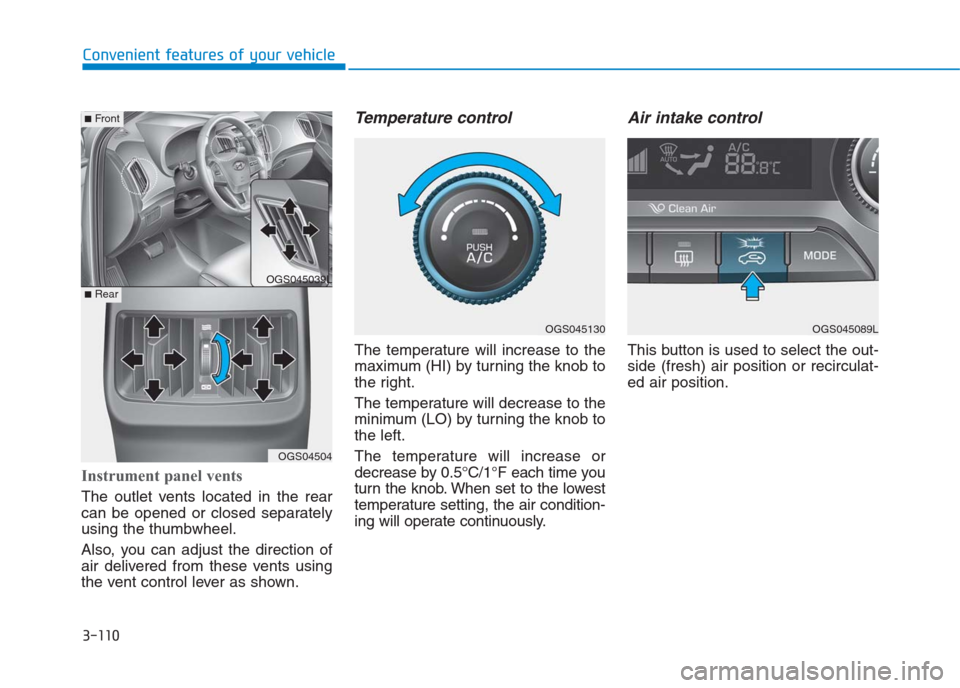
Instrument panel vents
The outlet vents located in the rear
can be opened or closed separately
using the thumbwheel.
Also, you can adjust the direction of
air delivered from these vents using
the vent control lever as shown.
Temperature control
The temperature will increase to the
maximum (HI) by turning the knob to
the right.
The temperature will decrease to the
minimum (LO) by turning the knob to
the left.
The temperature will increase or
decrease by 0.5°C/1°F each time you
turn the knob. When set to the lowest
temperature setting, the air condition-
ing will operate continuously.
Air intake control
This button is used to select the out-
side (fresh) air position or recirculat-
ed air position.
OGS045089LOGS045130
OGS045039L
OGS04504
■Rear
■Front
Page 277 of 472
5-2
Driving your vehicle
Carbon monoxide (CO) gas is toxic. Breathing CO can cause unconsciousness and death.
Engine exhaust contains carbon monoxide which cannot be seen or smelled.
Do not inhale engine exhaust.
If at any time you smell engine exhaust inside the vehicle, open the windows immediately. Exposure to CO can cause
unconsciousness and death by asphyxiation.
Be sure the exhaust system does not leak.
The exhaust system should be checked whenever the vehicle is raised to change the oil or for any other purpose. If
you hear a change in the sound of the exhaust or if you drive over something that strikes the underneath side of the
vehicle, we recommend that the exhaust system be checked as soon as possible by an authorized HYUNDAI dealer.
Do not run the engine in an enclosed area.
Letting the engine idle in your garage, even with the garage door open, is a hazardous practice. Run the engine only
long enough to start the engine and to move the vehicle out of the garage.
Avoid idling the engine for prolonged periods with people inside the vehicle.
If it is necessary to idle the engine for a prolonged period with people inside the vehicle , be sure to do so only in an
open area with the air intake set at "Fresh" and fan control set to high so fresh air is drawn into the interior.
Keep the air intakes clear.
To assure proper operation of the ventilation system, keep the ventilation air intakes located in front of the windshield
clear of snow, ice, leaves, or other obstructions.
If you must drive with the tailgate open:
Close all windows.
Open instrument panel air vents.
Set the air intake control at "Fresh", the air flow control at "Floor" or "Face", and the fan control set to high.
WARNING
Page 278 of 472
Before entering the vehicle
• Be sure all windows, outside mir-
ror(s), and outside lights are clean
and unobstructed.
Remove frost, snow, or ice.
Visually check the tires for uneven
wear and damage.
Check under the vehicle for any
sign of leaks.
Be sure there are no obstacles
behind you if you intend to back up.
Before starting
Make sure the hood, the tailgate,
and the doors are securely closed
and locked.
Adjust the position of the seat and
steering wheel.
Adjust the inside and outside
rearview mirrors.
Verify all the lights work.
Fasten your seatbelt. Check that all
passengers have fastened their
seatbelts. Check the gauges and indicators in
the instrument panel and the mes-
sages on the instrument display
when the ignition switch is in the
ON position.
Check that any items you are car-
rying are stored properly or fas-
tened down securely.
B BE
EF
FO
OR
RE
E
D
DR
RI
IV
VI
IN
NG
G
5-3
Driving your vehicle
5
Page 299 of 472
5-24
Driving your vehicle
Automatic transaxle operation
The automatic transaxle has six for-
ward speeds and one reverse speed.
The individual speeds are selected
automatically in the D (Drive) posi-
tion.The indicator in the instrument clus-
ter displays the shift lever position
when the ignition switch is in the ON
position.
P (Park)
Always come to a complete stop
before shifting into P (Park).
To shift from P (Park), you must
depress firmly on the brake pedal
and make sure your foot is off the
accelerator pedal.
If you have done all of the above and
still cannot shift the lever out of P
(Park), see “Shift-Lock Release” on
page 5-27.
The shift lever must be in P (Park)
before turning the engine off. To reduce the risk of serious
injury or death:
ALWAYS check the surround-
ing areas near your vehicle for
people, especially children,
before shifting a vehicle into
D (Drive) or R (Reverse).
Before leaving the driver’s
seat, always make sure the
shift lever is in the P (Park)
position, then set the parking
brake, and place the ignition
switch in the LOCK/OFF posi-
tion. Unexpected and sudden
vehicle movement can occur
if these precautions are not
followed.
Do not use engine braking
(shifting from a high gear to
lower gear) rapidly on slip-
pery roads. The vehicle may
slip causing an accident.
WARNING
Page 318 of 472
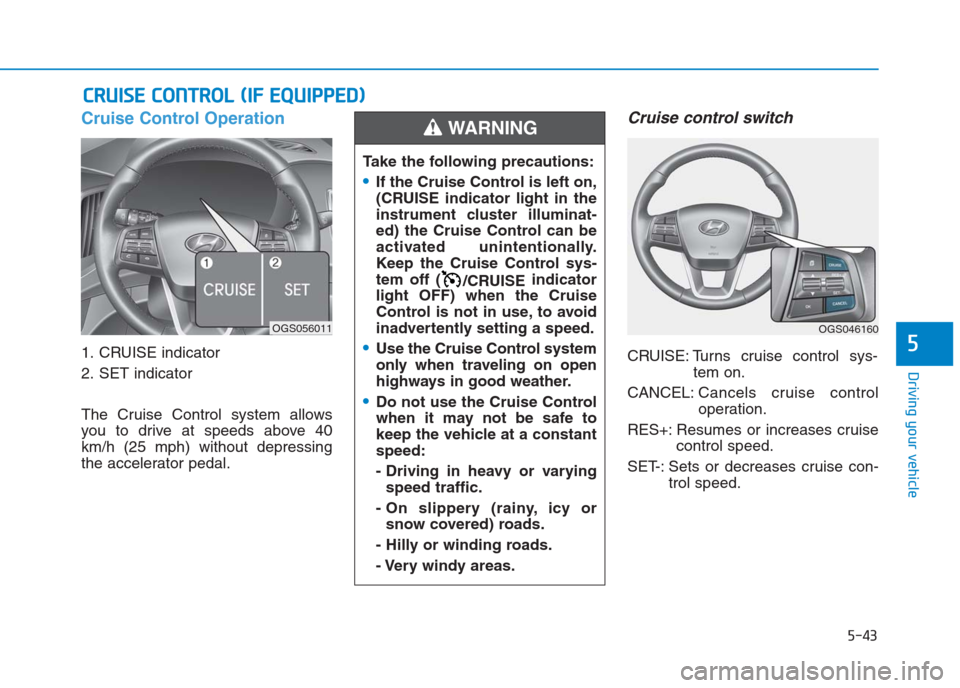
Cruise Control Operation
1. CRUISE indicator
2. SET indicator
The Cruise Control system allows
you to drive at speeds above 40
km/h (25 mph) without depressing
the accelerator pedal.
Cruise control switch
CRUISE: Turns cruise control sys-
tem on.
CANCEL:Cancels cruise control
operation.
RES+: Resumes or increases cruise
control speed.
SET-: Sets or decreases cruise con-
trol speed.
C CR
RU
UI
IS
SE
E
C
CO
ON
NT
TR
RO
OL
L
(
(I
IF
F
E
EQ
QU
UI
IP
PP
PE
ED
D)
)
5-43
Driving your vehicle
5
OGS056011
Take the following precautions:
If the Cruise Control is left on,
(CRUISE indicator light in the
instrument cluster illuminat-
ed) the Cruise Control can be
activated unintentionally.
Keep the Cruise Control sys-
tem off (
/CRUISEindicator
light OFF) when the Cruise
Control is not in use, to avoid
inadvertently setting a speed.
Use the Cruise Control system
only when traveling on open
highways in good weather.
Do not use the Cruise Control
when it may not be safe to
keep the vehicle at a constant
speed:
- Driving in heavy or varying
speed traffic.
- On slippery (rainy, icy or
snow covered) roads.
- Hilly or winding roads.
- Very windy areas.
WARNING
OGS046160
Page 319 of 472
5-44
Driving your vehicle
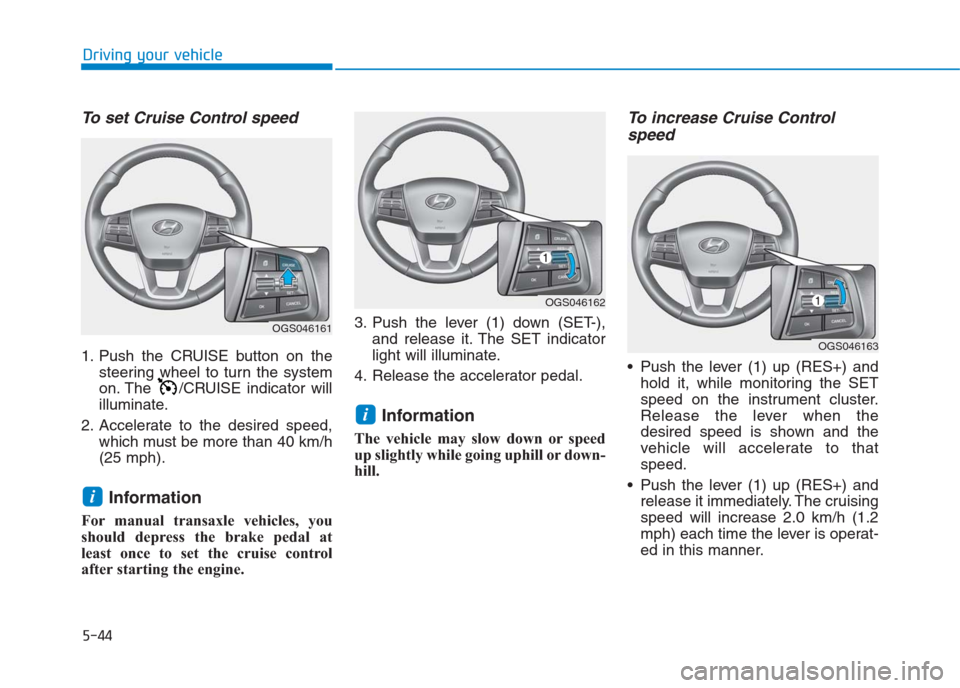
To set Cruise Control speed
1. Push the CRUISE button on the
steering wheel to turn the system
on. The /CRUISE indicator will
illuminate.
2. Accelerate to the desired speed,
which must be more than 40 km/h
(25 mph).
Information
For manual transaxle vehicles, you
should depress the brake pedal at
least once to set the cruise control
after starting the engine.3. Push the lever (1) down (SET-),
and release it. The SET indicator
light will illuminate.
4. Release the accelerator pedal.
Information
The vehicle may slow down or speed
up slightly while going uphill or down-
hill.
To increase Cruise Control
speed
Push the lever (1) up (RES+) and
hold it, while monitoring the SET
speed on the instrument cluster.
Release the lever when the
desired speed is shown and the
vehicle will accelerate to that
speed.
Push the lever (1) up (RES+) and
release it immediately. The cruising
speed will increase 2.0 km/h (1.2
mph) each time the lever is operat-
ed in this manner.
i
i
OGS046162
OGS046163
OGS046161
Page 321 of 472
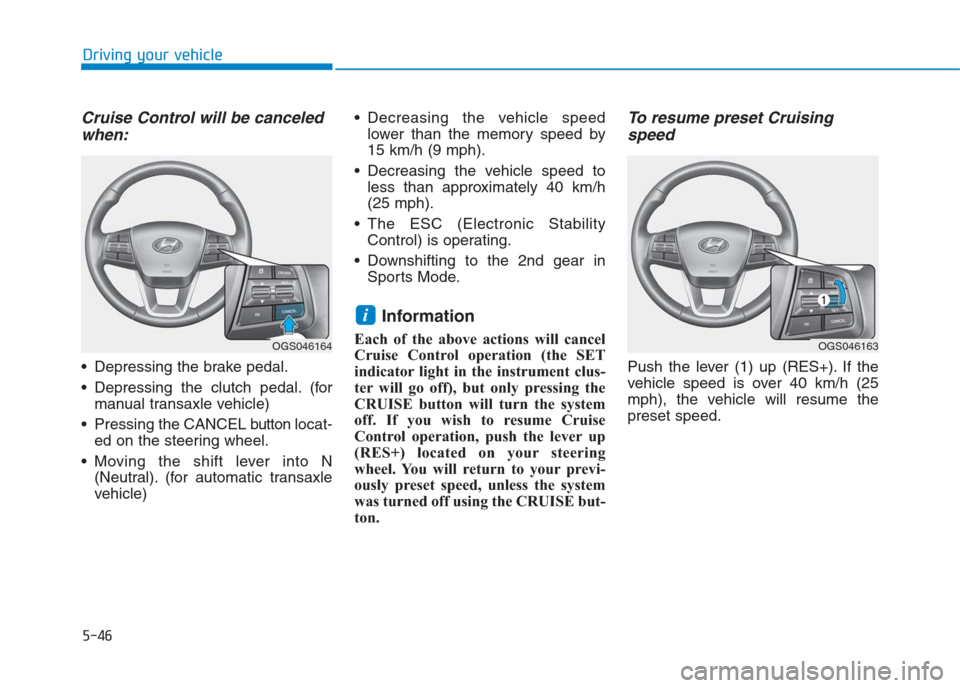
Cruise Control will be canceled
when:
Depressing the brake pedal.
Depressing the clutch pedal. (for
manual transaxle vehicle)
Pressing the CANCEL buttonlocat-
ed on the steering wheel.
Moving the shift lever into N
(Neutral). (for automatic transaxle
vehicle) Decreasing the vehicle speed
lower than the memory speed by
15 km/h (9 mph).
Decreasing the vehicle speed to
less than approximately 40 km/h
(25 mph).
The ESC (Electronic Stability
Control) is operating.
Downshifting to the 2nd gear in
Sports Mode.
Information
Each of the above actions will cancel
Cruise Control operation (the SET
indicator light in the instrument clus-
ter will go off), but only pressing the
CRUISE button will turn the system
off. If you wish to resume Cruise
Control operation, push the lever up
(RES+) located on your steering
wheel. You will return to your previ-
ously preset speed, unless the system
was turned off using the CRUISE but-
ton.
To resume preset Cruising
speed
Push the lever (1) up (RES+). If the
vehicle speed is over 40 km/h (25
mph), the vehicle will resume the
preset speed.
i
5-46
Driving your vehicle
OGS046163OGS046164
Page 333 of 472
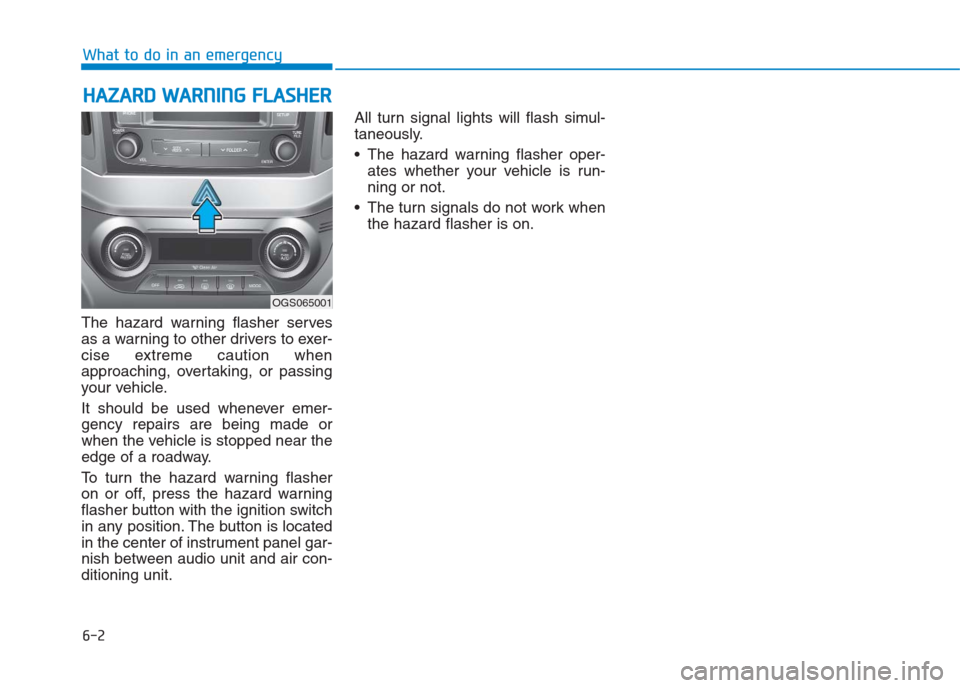
The hazard warning flasher serves
as a warning to other drivers to exer-
cise extreme caution when
approaching, overtaking, or passing
your vehicle.
It should be used whenever emer-
gency repairs are being made or
when the vehicle is stopped near the
edge of a roadway.
To turn the hazard warning flasher
on or off, press the hazard warning
flasher button with the ignition switch
in any position. The button is located
in the center of instrument panel gar-
nish between audio unit and air con-
ditioning unit.All turn signal lights will flash simul-
taneously.
• The hazard warning flasher oper-
ates whether your vehicle is run-
ning or not.
The turn signals do not work when
the hazard flasher is on.
H HA
AZ
ZA
AR
RD
D
W
WA
AR
RN
NI
IN
NG
G
F
FL
LA
AS
SH
HE
ER
R
6-2
What to do in an emergency
OGS065001
Page 359 of 472
7
Fuses ......................................................................7-63
Instrument panel fuse replacement ...........................7-64
Engine compartment panel fuse replacement.........7-66
Fuse/Relay panel description ......................................7-68
Light bulbs.............................................................7-77
Headlight, position light, turn signal light,
and front fog light bulb replacement ....................7-78
Side repeater light bulb replacement.........................7-83
Rear combination light bulb replacement .................7-83
High mounted stop light ................................................7-85
License plate light bulb replacement ........................7-86
Interior light bulb replacement ....................................7-86
Appearance care ..................................................7-88
Exterior care ....................................................................7-88
Interior care......................................................................7-93
Emission control system .....................................7-95
Crankcase emission control system ...........................7-95
Evaporative emission control system.........................7-95
Exhaust emission control system ...............................7-96
Page 421 of 472
7-64
Maintenance
When replacing a blown fuse or
relay with a new one, make sure
the new fuse or relay fits tightly
into the clips. The incomplete
fastening fuse or relay may
cause the vehicle wiring and
electric systems damage and a
possible fire.
Do not remove fuses, relays and
terminals fastened with bolts or
nuts. The fuses, relays and ter-
minals may be fastened incom-
pletely, and it may cause a pos-
sible fire. If fuses, relays and ter-
minals fastened with bolts or
nuts are blown, consult with an
authorized HYUNDAI dealer.
Do not input any other objects
except fuses or relays into
fuse/relay terminals such as a
driver or wiring. It may cause
contact failure and system mal-
function.
(Continued)(Continued)
Check the blown fuse with the
fuse information on the fuse box
cover.
Replace the blown fuse on the
same place after turning off the
ignition switch and all electric
switches and disconnecting the
negative battery cable.
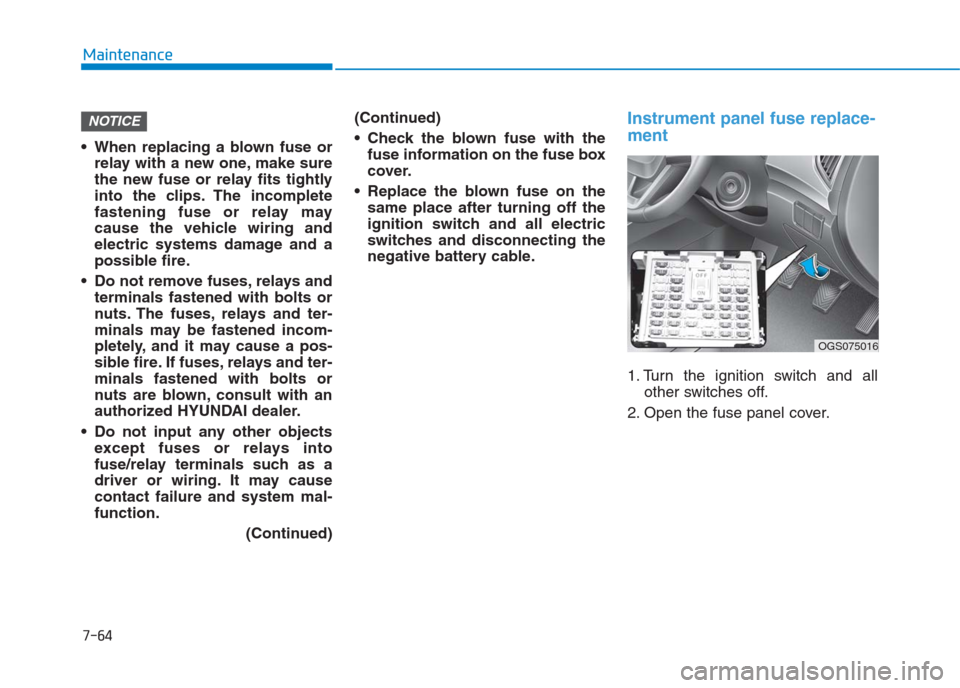
Instrument panel fuse replace-
ment
1. Turn the ignition switch and all
other switches off.
2. Open the fuse panel cover.
NOTICE
OGS075016