clock Hyundai Creta 2019 Owner's Manual
[x] Cancel search | Manufacturer: HYUNDAI, Model Year: 2019, Model line: Creta, Model: Hyundai Creta 2019Pages: 472, PDF Size: 13.39 MB
Page 87 of 472
Light .......................................................................3-78
Exterior lights ..................................................................3-78
Interior lights ....................................................................3-85
Wipers and washers ............................................3-88
Windshield wipers ...........................................................3-89
Windshield washers ........................................................3-89
Rear window wiper and washer switch.....................3-90
Driver assist system ............................................3-91
Rear view camera ...........................................................3-91
Rear parking assist system ..........................................3-92
Climate control system........................................3-95
Defroster ...........................................................................3-95
Manual climate control system ...................................3-96
Automatic climate control system ............................3-105
Windshield defrosting and defogging .....................3-116
Storage compartment ........................................3-120
Center console storage ...............................................3-120
Glove box ........................................................................3-121
Sunglass holder .............................................................3-121
Interior features.................................................3-122
Digital clock ....................................................................3-122
Cigarette lighter ............................................................3-122
Ashtray ............................................................................3-123
Cup holder.......................................................................3-124
Sunvisor ...........................................................................3-125
Power outlet/USB charger .........................................3-125
Clothes hanger ..............................................................3-127
Floor mat anchor(s)......................................................3-127
Luggage net holder ......................................................3-128
Cargo area cover ..........................................................3-129
3
Page 115 of 472
3-30
Convenient features of your vehicle
Opening the fuel filler door
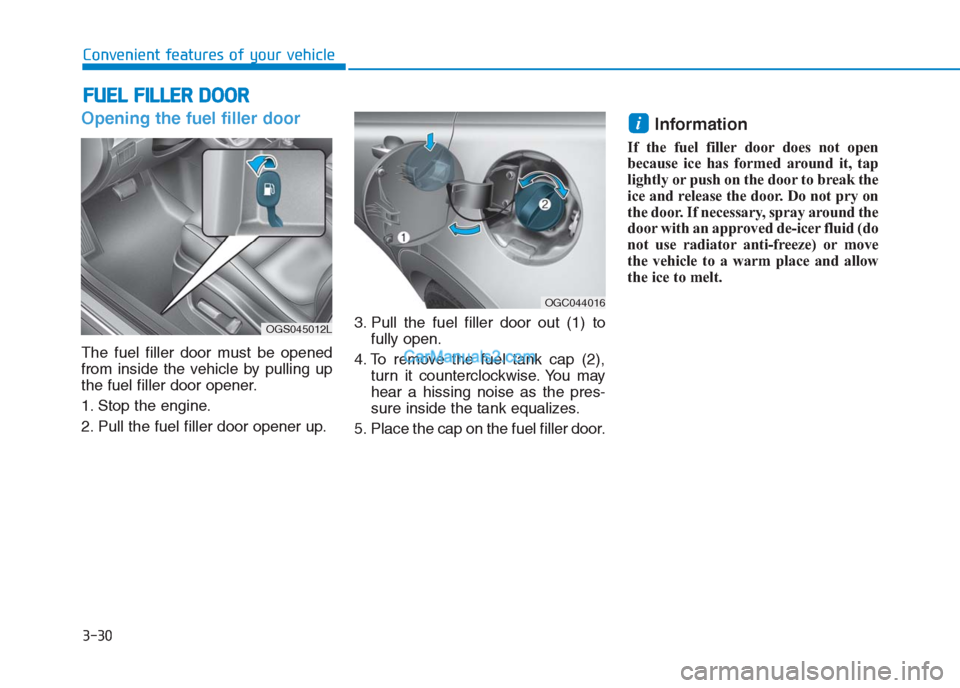
The fuel filler door must be opened
from inside the vehicle by pulling up
the fuel filler door opener.
1. Stop the engine.
2. Pull the fuel filler door opener up.3. Pull the fuel filler door out (1) to
fully open.
4. To remove the fuel tank cap (2),
turn it counterclockwise. You may
hear a hissing noise as the pres-
sure inside the tank equalizes.
5. Place the cap on the fuel filler door.
Information
If the fuel filler door does not open
because ice has formed around it, tap
lightly or push on the door to break the
ice and release the door. Do not pry on
the door. If necessary, spray around the
door with an approved de-icer fluid (do
not use radiator anti-freeze) or move
the vehicle to a warm place and allow
the ice to melt.
i
F FU
UE
EL
L
F
FI
IL
LL
LE
ER
R
D
DO
OO
OR
R
OGS045012L
OGC044016
Page 116 of 472
3-31
Convenient features of your vehicle
3
Closing the fuel filler door
1. To install the fuel tank cap (2), turn
it clockwise until it “clicks” once.
This indicates that the cap is
securely tightened.
2. Close the fuel filler door (1) and
push it lightly and make sure that it
is securely closed.
Gasoline is highly flammable
and explosive. Failure to follow
these guidelines may result in
SERIOUS INJURY or DEATH:
Read and follow all warnings
posted at the gas station.
Before refueling, note the
location of the Emergency
Gasoline Shut-Off, if available,
at the gas station.
(Continued)
(Continued)
Before touching the fuel noz-
zle, you should eliminate the
potential build-up of static
electricity by touching a metal
part of the vehicle, a safe dis-
tance away from the fuel filler
neck, nozzle, or other gas
source, with your bare hand.
Do not use cellular phones
while refueling. Electric cur-
rent and/or electronic interfer-
ence from cellular phones can
potentially ignite fuel vapors
and cause a fire.
Do not get back into a vehicle
once you have begun refuel-
ing. You can generate a build-
up of static electricity by
touching, rubbing or sliding
against any item or fabric
capable of producing static
electricity. Static electricity
discharge can ignite fuel
vapors causing a fire.
(Continued)
(Continued)
If you must re-enter the vehi-
cle, you should once again
eliminate potentially danger-
ous static electricity dis-
charge by touching a metal
part of the vehicle, away from
the fuel filler neck, nozzle or
other gasoline source, with
your bare hand.
When using an approved
portable fuel container, be
sure to place the container on
the ground prior to refueling.
Static electricity discharge
from the container can ignite
fuel vapors causing a fire.
Once refueling has begun,
contact between your bare
hand and the vehicle should
be maintained until the filling
is complete.
Use only approved portable
plastic fuel containers designed
to carry and store gasoline.
(Continued)
WARNING
Page 207 of 472
3-122
Convenient features of your vehicle
I IN
NT
TE
ER
RI
IO
OR
R
F
FE
EA
AT
TU
UR
RE
ES
S
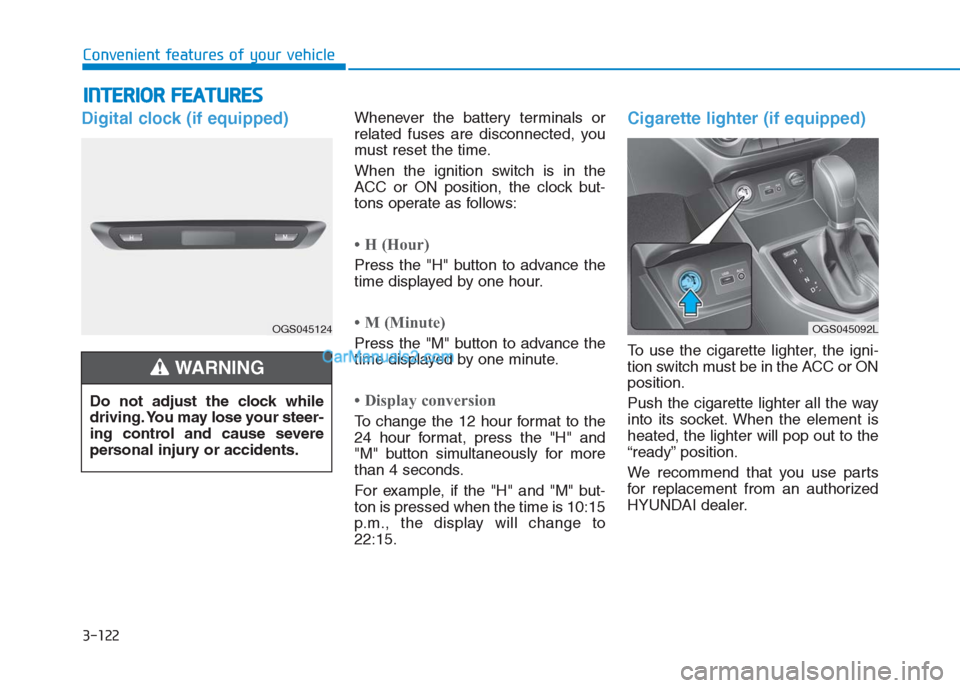
Digital clock (if equipped)Whenever the battery terminals or
related fuses are disconnected, you
must reset the time.
When the ignition switch is in the
ACC or ON position, the clock but-
tons operate as follows:
• H (Hour)
Press the "H" button to advance the
time displayed by one hour.
• M (Minute)
Press the "M" button to advance the
time displayed by one minute.
• Display conversion
To change the 12 hour format to the
24 hour format, press the "H" and
"M" button simultaneously for more
than 4 seconds.
For example, if the "H" and "M" but-
ton is pressed when the time is 10:15
p.m., the display will change to
22:15.
Cigarette lighter (if equipped)
To use the cigarette lighter, the igni-
tion switch must be in the ACC or ON
position.
Push the cigarette lighter all the way
into its socket. When the element is
heated, the lighter will pop out to the
“ready” position.
We recommend that you use parts
for replacement from an authorized
HYUNDAI dealer. Do not adjust the clock while
driving. You may lose your steer-
ing control and cause severe
personal injury or accidents.
WARNING
OGS045124OGS045092L
Page 216 of 472
• If you install an aftermarket HID
head lamp, your vehicle’s audio
and electronic device may mal-
function.
Prevent chemicals such as per-
fume, cosmetic oil, sun cream,
hand cleaner, and air freshener
from contacting the interior
parts because they may cause
damage or discoloration.
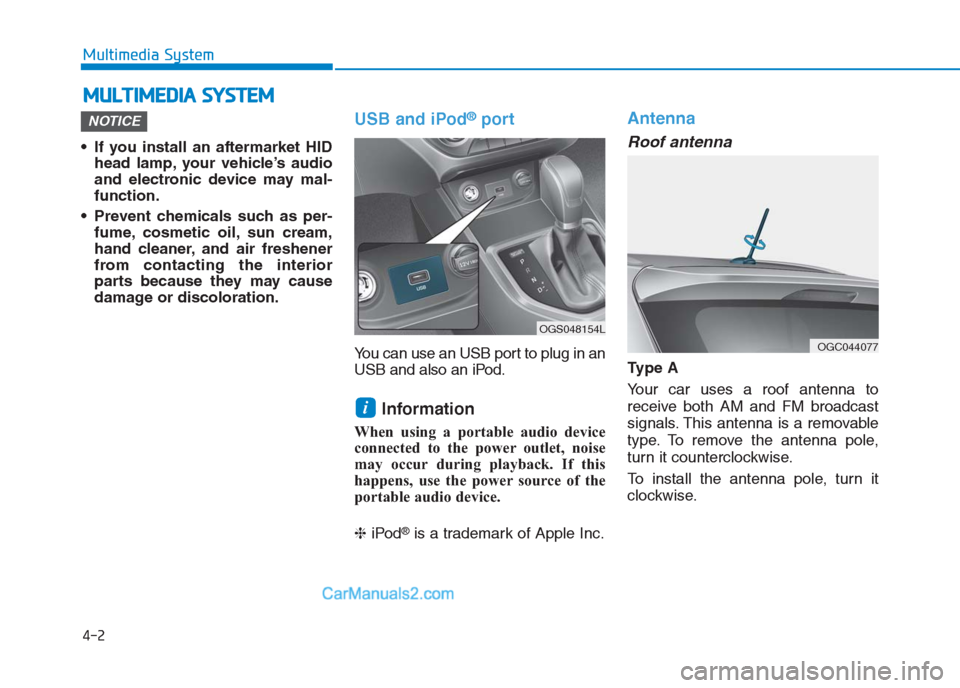
USB and iPod®port
You can use an USB port to plug in an
USB and also an iPod.
Information
When using a portable audio device
connected to the power outlet, noise
may occur during playback. If this
happens, use the power source of the
portable audio device.
❈iPod
®is a trademark of Apple Inc.
Antenna
Roof antenna
Ty p e A
Your car uses a roof antenna to
receive both AM and FM broadcast
signals. This antenna is a removable
type. To remove the antenna pole,
turn it counterclockwise.
To install the antenna pole, turn it
clockwise.
i
NOTICE
M MU
UL
LT
TI
IM
ME
ED
DI
IA
A
S
SY
YS
ST
TE
EM
M
4-2
Multimedia System
OGS048154L
OGC044077
Page 339 of 472
If your temperature gauge indicates
overheating, you experience a loss
of power, or hear loud pinging or
knocking, the engine may be over-
heating. If this happens, you should:
1. Pull off the road and stop as soon
as it is safe to do so.
2. Place the shift lever in P (Park, for
automatic transaxle vehicle) or
neutral (for manual transaxle vehi-
cle) and set the parking brake. If
the air conditioning is ON, turn it
OFF.
3. If engine coolant is running out
under the vehicle or steam is com-
ing out from the hood, stop the
engine. Do not open the hood until
the coolant has stopped running
or the steaming has stopped. If
there is no visible loss of engine
coolant and no steam, leave the
engine running and check to be
sure the engine cooling fan is
operating. If the fan is not running,
turn the engine off.4. Check for coolant leaking from the
radiator, hoses or under the vehi-
cle. (If the air conditioning had
been in use, it is normal for cold
water to be draining from it when
you stop.)
5. If engine coolant is leaking out,
stop the engine immediately and
we recommend that you call an
authorized HYUNDAI dealer for
assistance.
I IF
F
T
TH
HE
E
E
EN
NG
GI
IN
NE
E
O
OV
VE
ER
RH
HE
EA
AT
TS
S
6-8
What to do in an emergency
While the engine is
running, keep hands,
clothing and tools
away from the moving
parts such as the
cooling fan and drive
belt to prevent seri-
ous injury.
WARNING
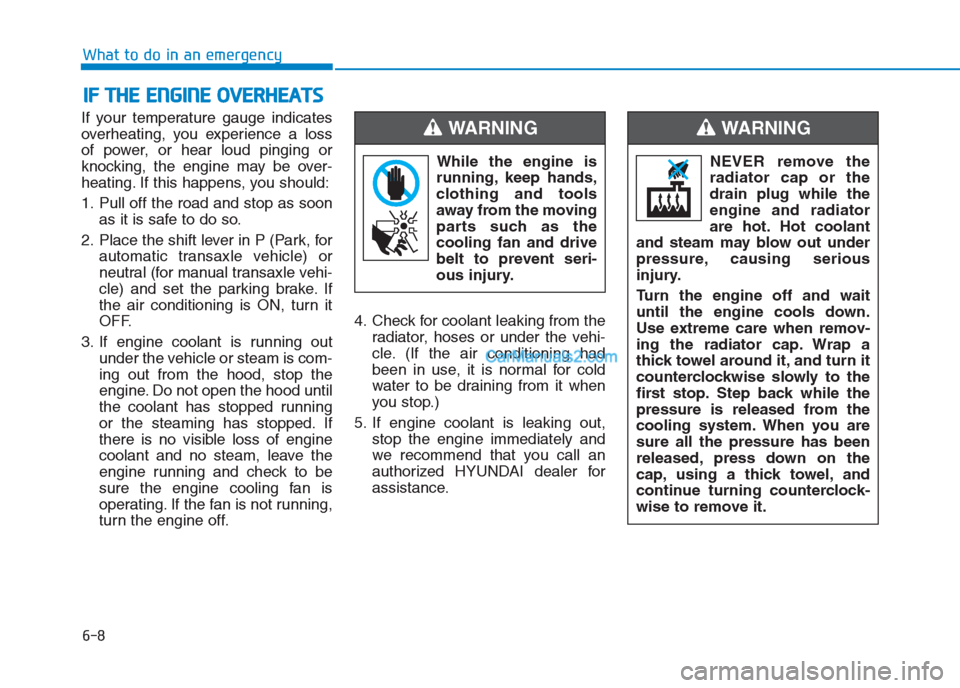
NEVER remove the
radiator cap or the
drain plug while the
engine and radiator
are hot. Hot coolant
and steam may blow out under
pressure, causing serious
injury.
Turn the engine off and wait
until the engine cools down.
Use extreme care when remov-
ing the radiator cap. Wrap a
thick towel around it, and turn it
counterclockwise slowly to the
first stop. Step back while the
pressure is released from the
cooling system. When you are
sure all the pressure has been
released, press down on the
cap, using a thick towel, and
continue turning counterclock-
wise to remove it.
WARNING
Page 347 of 472
6-16
What to do in an emergency
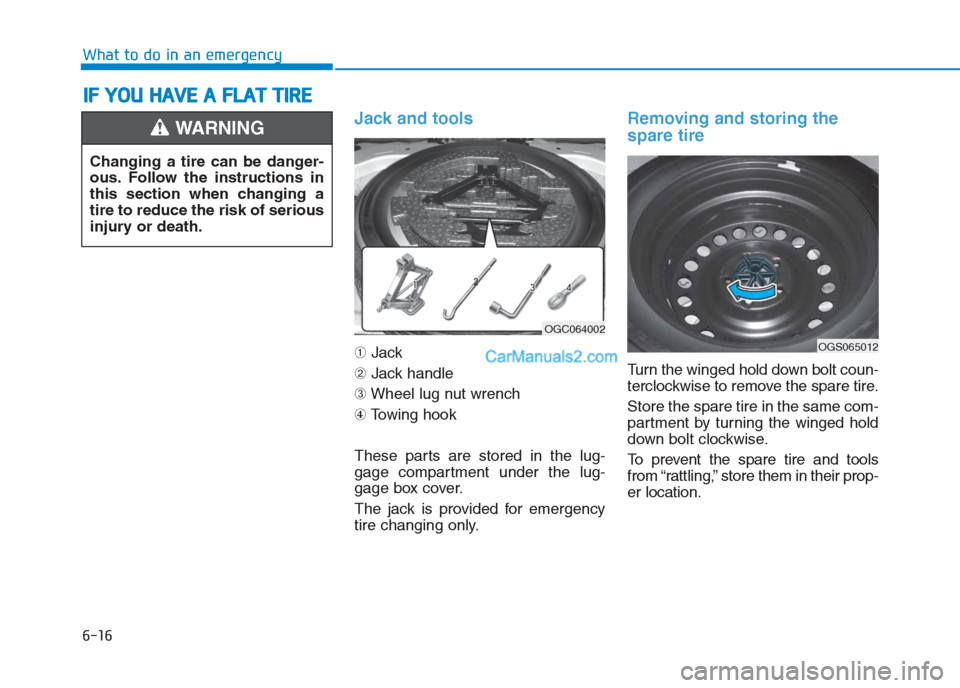
Jack and tools
➀Jack
➁Jack handle
➂Wheel lug nut wrench
④Towing hook
These parts are stored in the lug-
gage compartment under the lug-
gage box cover.
The jack is provided for emergency
tire changing only.
Removing and storing the
spare tire
Turn the winged hold down bolt coun-
terclockwise to remove the spare tire.
Store the spare tire in the same com-
partment by turning the winged hold
down bolt clockwise.
To prevent the spare tire and tools
from “rattling,” store them in their prop-
er location.
I IF
F
Y
YO
OU
U
H
HA
AV
VE
E
A
A
F
FL
LA
AT
T
T
TI
IR
RE
E
Changing a tire can be danger-
ous. Follow the instructions in
this section when changing a
tire to reduce the risk of serious
injury or death.
WARNING
OGS065012
OGC064002
Page 349 of 472
6-18
What to do in an emergency
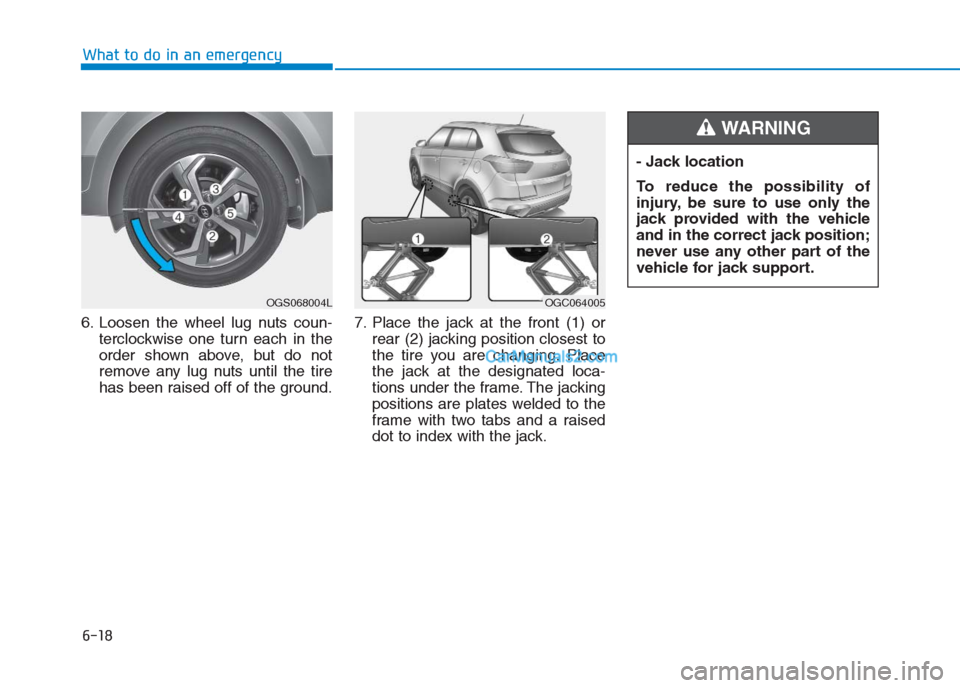
6. Loosen the wheel lug nuts coun-
terclockwise one turn each in the
order shown above, but do not
remove any lug nuts until the tire
has been raised off of the ground.7. Place the jack at the front (1) or
rear (2) jacking position closest to
the tire you are changing. Place
the jack at the designated loca-
tions under the frame. The jacking
positions are plates welded to the
frame with two tabs and a raised
dot to index with the jack.
OGC064005OGS068004L
- Jack location
To reduce the possibility of
injury, be sure to use only the
jack provided with the vehicle
and in the correct jack position;
never use any other part of the
vehicle for jack support.
WARNING
Page 350 of 472
6-19
What to do in an emergency
6
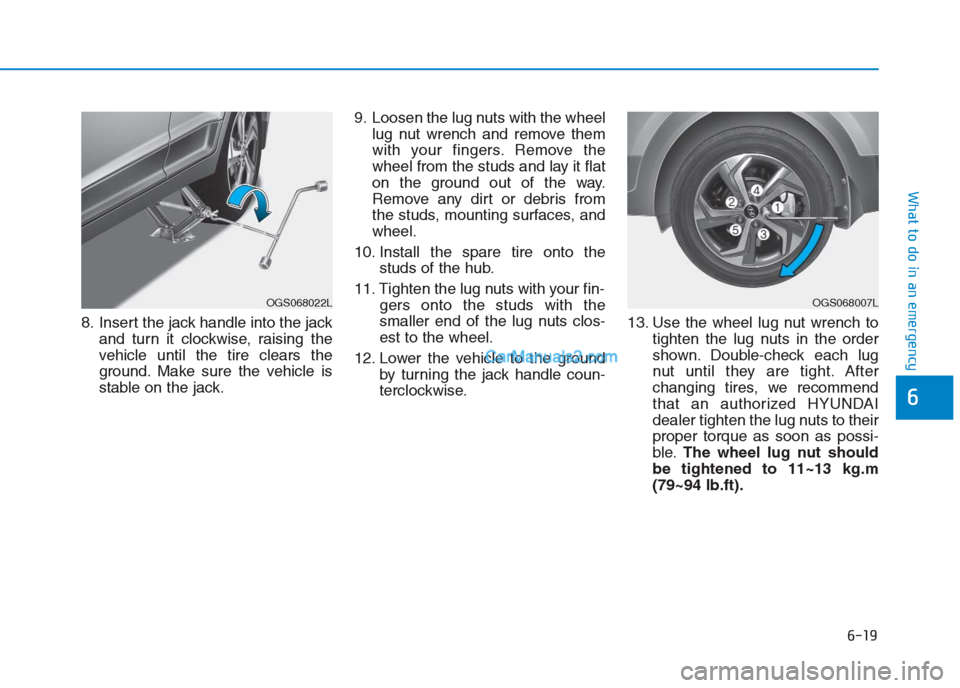
8. Insert the jack handle into the jack
and turn it clockwise, raising the
vehicle until the tire clears the
ground. Make sure the vehicle is
stable on the jack.9. Loosen the lug nuts with the wheel
lug nut wrench and remove them
with your fingers. Remove the
wheel from the studs and lay it flat
on the ground out of the way.
Remove any dirt or debris from
the studs, mounting surfaces, and
wheel.
10. Install the spare tire onto the
studs of the hub.
11. Tighten the lug nuts with your fin-
gers onto the studs with the
smaller end of the lug nuts clos-
est to the wheel.
12. Lower the vehicle to the ground
by turning the jack handle coun-
terclockwise.13. Use the wheel lug nut wrench to
tighten the lug nuts in the order
shown. Double-check each lug
nut until they are tight. After
changing tires, we recommend
that an authorized HYUNDAI
dealer tighten the lug nuts to their
proper torque as soon as possi-
ble.The wheel lug nut should
be tightened to 11~13 kg.m
(79~94 lb.ft).
OGS068007LOGS068022L
Page 354 of 472
6-23
What to do in an emergency
6
When towing your vehicle in an
emergency without wheel dollies:
1. Place the ignition switch in the
ACC position.
2. Place the shift lever in N (Neutral).
3. Release the parking brake.
Failure to place the shift lever in N
(Neutral) when being towed with
the front wheels on the ground
can cause internal damage to the
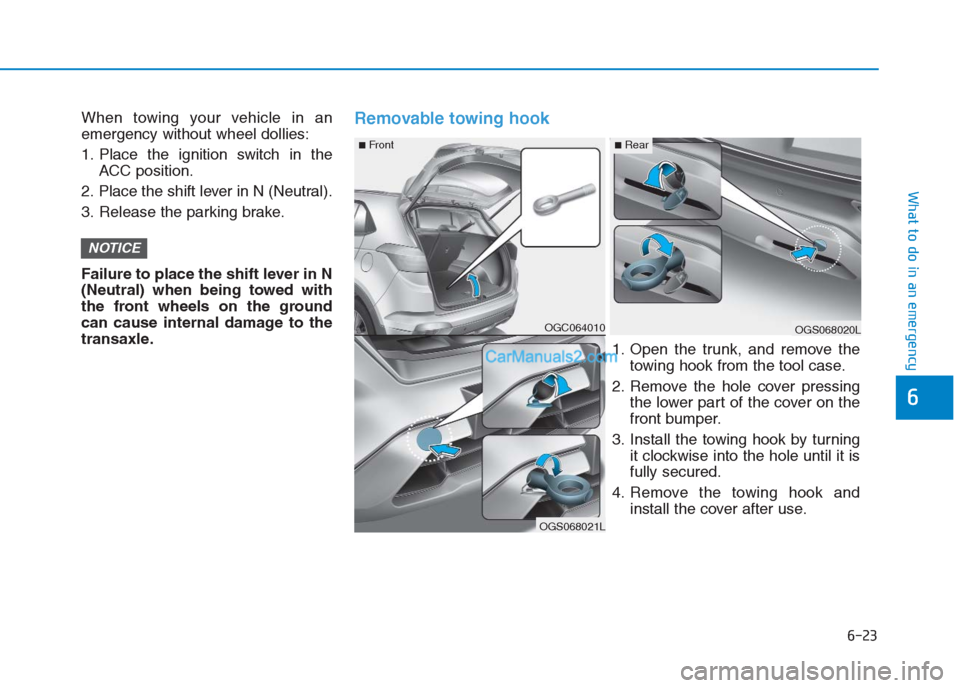
transaxle.Removable towing hook
NOTICE
OGC064010OGS068020L
OGS068021L
■Front■Rear
1. Open the trunk, and remove the
towing hook from the tool case.
2. Remove the hole cover pressing
the lower part of the cover on the
front bumper.
3. Install the towing hook by turning
it clockwise into the hole until it is
fully secured.
4. Remove the towing hook and
install the cover after use.