audio Hyundai Elantra 2009 User Guide
[x] Cancel search | Manufacturer: HYUNDAI, Model Year: 2009, Model line: Elantra, Model: Hyundai Elantra 2009Pages: 345, PDF Size: 19.91 MB
Page 168 of 345
Features of your vehicle94 4
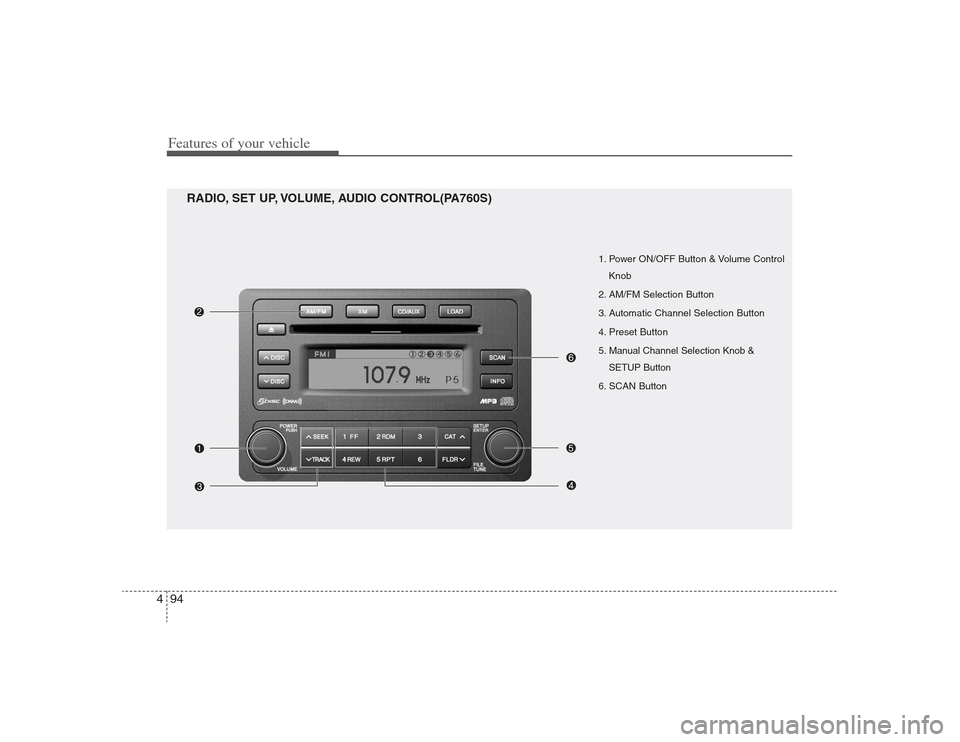
1. Power ON/OFF Button & Volume Control
Knob
2. AM/FM Selection Button
3. Automatic Channel Selection Button
4. Preset Button
5. Manual Channel Selection Knob &
SETUP Button
6. SCAN Button
RADIO, SET UP, VOLUME, AUDIO CONTROL(PA760S)
HD HMA 4-87~.qxd 8/14/2008 11:43 AM Page 94
Page 169 of 345
495
Features of your vehicle
1. Power ON/OFF Button &
Volume Control KnobTurns the set on/off when the ignition
switch is on ACC or ON. If the button is
turned to the right, it increases the vol-
ume and left,decreases the volume.2. AM/FM Selection ButtonTurns to FM or AM mode, and toggles in
the order of FM1
➟ FM2
➟ AM
➟ FM1...
when the button is pressed each time.
3. Automatic Channel Selection
Button ] button is pressed,
it increases the band frequency to auto-
matically select a channel.
Stops at the previous frequency if no
channel is found.
] button is press-
ed, it reduces the band frequency to
automatically select a channel.
Stops at the previous frequency if no
channel is found.
4. Preset ButtonPush [1]~[6] buttons less than 0.8 sec-
ond to play the channel saved in each
button. Push [PRESET] button for 0.8
second or longer to save current channel
to the respective button with a beep.5. Manual Channel Selection
Knob & SETUP ButtonManual Channel Selection knob
Turn this knob while listening to a radio
channel to manually adjust frequency.
Turn clockwise to increase frequency and
counterclockwise to reduce frequency.
SETUP Button
Press this button to turn to the XM
option, SCROLL and adjustment mode. If
no action is taken for 5 seconds after
pressing the button, it will return to the
play mode.(After entering SETUP mode,
move between items using the left, right
and PUSH functions of the [TUNE] but-
ton.)
The setup item changes from SCROLL
➟
TONE
➟ POSITION...Audio Control Knob
In SETUP mode, SCROLL, XM option or
TONE, POSITION settings can be adjust-
ed. After selecting each mode by pushing
Sound Control knob, rotate the knob to
adjust and push again to changes take
effect.
SCROLL option
When "ON" is selected, long file name
scrolls continuously while playing.
TONE adjustment
Sound tone(BASS/MIDDLE/TREBLE) can
be adjusted by rotating the knob. To select
next item, press the knob again.
POSITION adjustment
Sound position(FADER/BALANCE) can
be adjusted by rotating the knob. FADER
adjusts FRONT/REAR position, and BAL-
ANCE adjusts LEFT/RIGHT position of
the speaker sound. To select next item,
press the knob again.
XM option
Selects default information of channel
displayed in XM mode. Category/Channel
or Artist/Title can be selected.
HD HMA 4-87~.qxd 8/14/2008 11:43 AM Page 95
Page 176 of 345
Features of your vehicle102 4
CAUTION IN USING
USB DEVICE
To use an external USB device,
make sure the device is not
mounted when starting up the
vehicle and mount the device
after starting up.
If you start the vehicle when the
USB device is mounted, it may
damage the USB device. (USB is
not ESA)
If the vehicle is started up or
turned off while the external USB
device is connected, the external
USB device may not work.
It may not play inauthentic MP3 or
WMA files.
1) It can only play MP3 files with
the compression rate between
8Kbps~320Kbps.
2) It can only play WMA music
files with the compression rate
between 8Kbps~320Kbps.
Take cautions for static electricity
when mounting or dismounting
the external USB device.
An encoded MP3 PLAYER is not
recognizable.
(Continued)
(Continued)
Depending on the condition of
the external USB device, the con-
nected external USB device can
be unrecognizable.
When the formatted byte/sector
setting of External USB devices is
not either 512BYTE or 2048BYTE,
then the device will not be recog-
nized.
Use only a USB device formatted
to FAT 12/16/32.
USB devices without USB IF
authentication may not be recog-
nizable.
Make sure the USB connection
terminal does not come in contact
with a human body or any object.
If you repeat mounting or dis-
mounting USB device in a short
period of time, it may break the
device.
You might hear a strange noise
when mounting or dismounting a
USB device.
(Continued)
(Continued)
If you dismount the external USB
device during playback in USB
mode, the external USB device can
be damaged or malfunction.
Therefore, mount the external USB
device when the engine is turned
off or in another mode.
Depending on the type and capac-
ity of the external USB device or
the type of the files stored in the
device, there is a difference in the
time taken for recognition of the
device, but this is not an indicator
of trouble and you only have to
wait.
Do not use the USB device for other
purposes than playing music files.
Use of USB accessories such as
recharger or heater using USB I/F
may lower performance or cause
trouble.
If you use devices such as a USB
hub you purchased separately,
the vehicle’s audio system may
not recognize the USB device.
Connect the USB device directly
to the multimedia terminal of the
vehicle.
(Continued)
HD HMA 4-87~.qxd 8/14/2008 11:43 AM Page 102
Page 177 of 345
4103
Features of your vehicle
(Continued)
If USB device is divided by logical
drives, only the music files on the
highest-priority drive are recog-
nized by car audio.
Devices such as MP3 Player/
Cellular phone/Digital camera
those are not recognizable by
standard USB I/F can be unrecog-
nizable.
USB devices other than standard-
ized goods (METAL COVER TYPE
USB) can be unrecognizable.
USB flash memory reader (such
as CF, SD, microSD, etc.) or exter-
nal-HDD type devices can be
unrecognizable.
Music files protected by DRM
(DIGITAL RIGHTS MANAGEMENT)
are not recognizalbe.
The data in the USB memory may
lost while using this AUDIO, It is
recommeded to back up impor-
tant data on a personal.
(Continued)
(Continued)
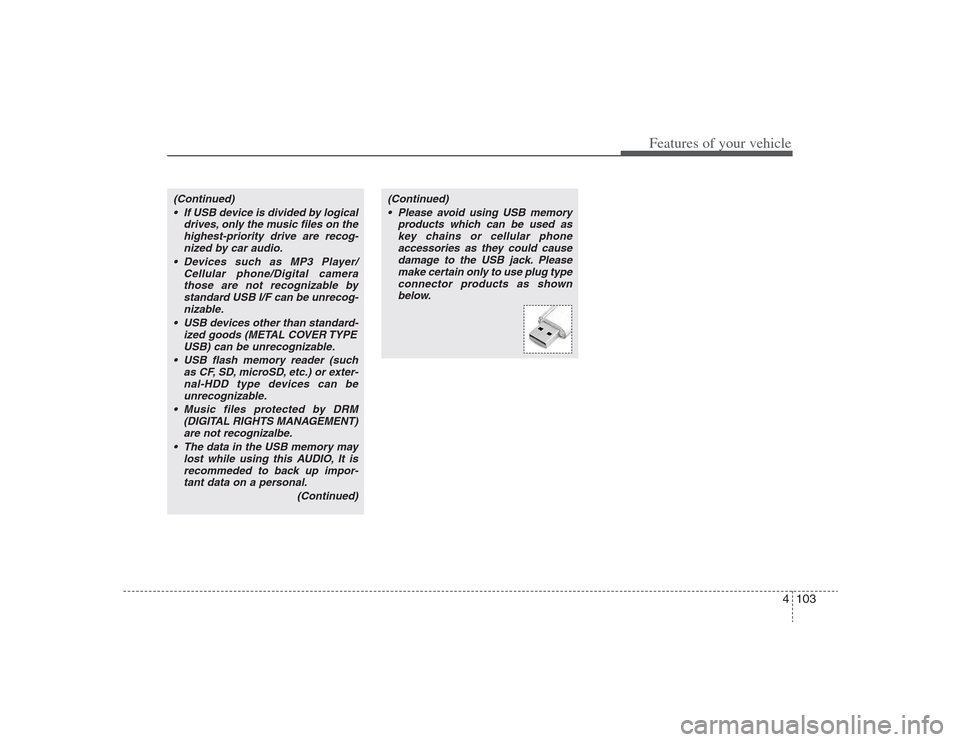
Please avoid using USB memory
products which can be used as
key chains or cellular phone
accessories as they could cause
damage to the USB jack. Please
make certain only to use plug type
connector products as shown
below.
HD HMA 4-87~.qxd 8/14/2008 11:43 AM Page 103
Page 184 of 345
Features of your vehicle110 4✽
✽
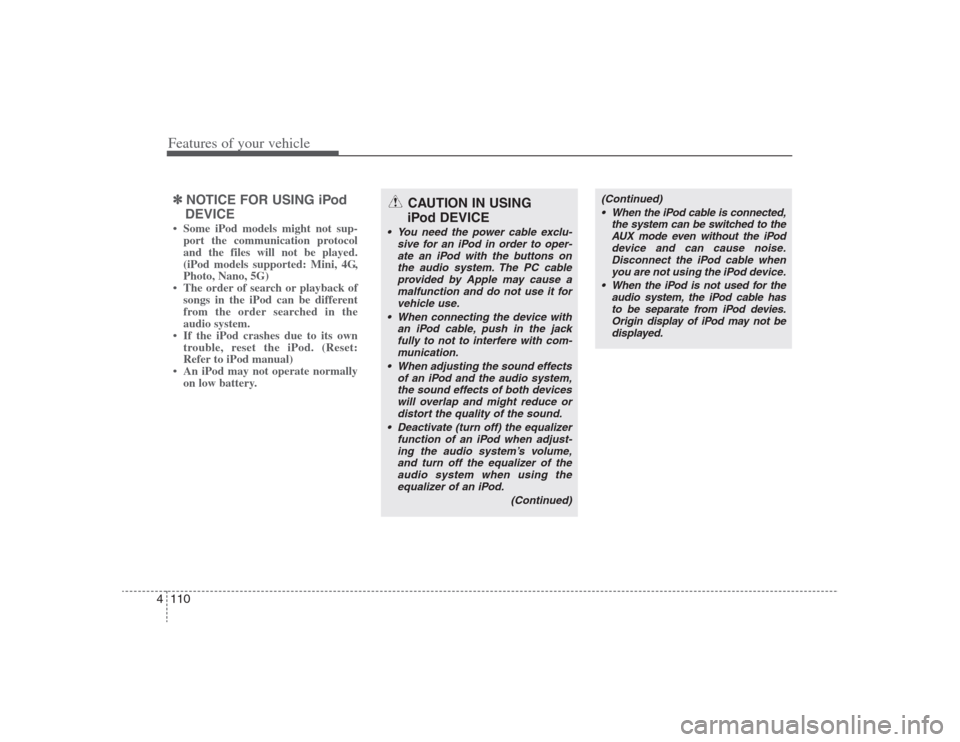
NOTICE FOR USING iPod
DEVICE• Some iPod models might not sup-
port the communication protocol
and the files will not be played.
(iPod models supported: Mini, 4G,
Photo, Nano, 5G)
• The order of search or playback of
songs in the iPod can be different
from the order searched in the
audio system.
• If the iPod crashes due to its own
trouble, reset the iPod. (Reset:
Refer to iPod manual)
• An iPod may not operate normally
on low battery.
CAUTION IN USING
iPod DEVICE
You need the power cable exclu-
sive for an iPod in order to oper-
ate an iPod with the buttons on
the audio system. The PC cable
provided by Apple may cause a
malfunction and do not use it for
vehicle use.
When connecting the device with
an iPod cable, push in the jack
fully to not to interfere with com-
munication.
When adjusting the sound effects
of an iPod and the audio system,
the sound effects of both devices
will overlap and might reduce or
distort the quality of the sound.
Deactivate (turn off) the equalizer
function of an iPod when adjust-
ing the audio system’s volume,
and turn off the equalizer of the
audio system when using the
equalizer of an iPod.
(Continued)
(Continued)
When the iPod cable is connected,
the system can be switched to the
AUX mode even without the iPod
device and can cause noise.
Disconnect the iPod cable when
you are not using the iPod device.
When the iPod is not used for the
audio system, the iPod cable has
to be separate from iPod devies.
Origin display of iPod may not be
displayed.
HD HMA 4-87~.qxd 8/14/2008 11:44 AM Page 110
Page 292 of 345
Maintenance30 7
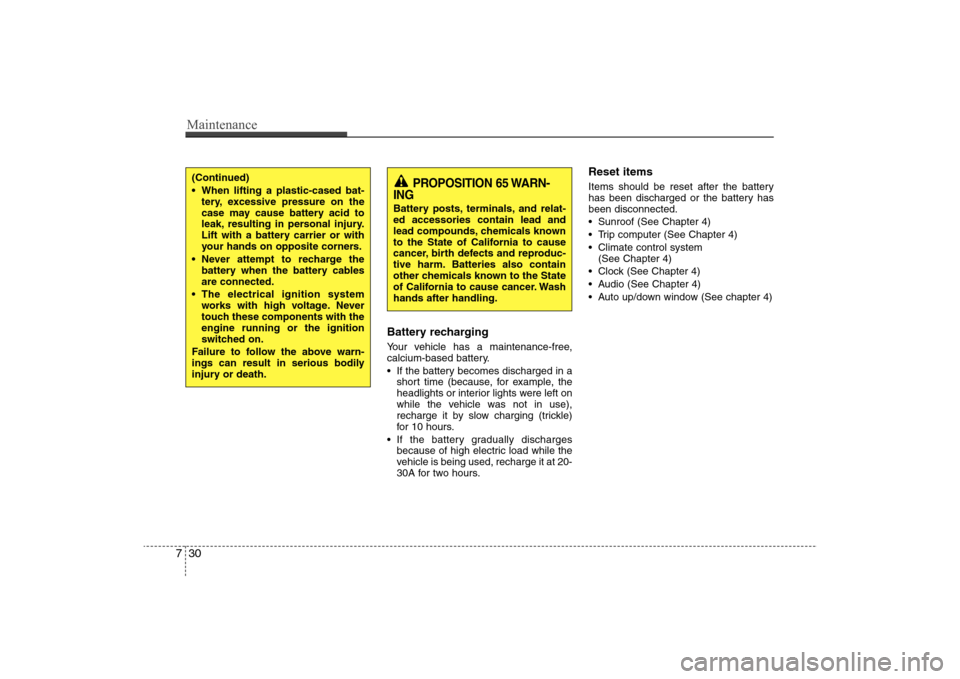
Battery recharging Your vehicle has a maintenance-free,
calcium-based battery.
If the battery becomes discharged in a
short time (because, for example, the
headlights or interior lights were left on
while the vehicle was not in use),
recharge it by slow charging (trickle)
for 10 hours.
If the battery gradually discharges
because of high electric load while the
vehicle is being used, recharge it at 20-
30A for two hours.
Reset itemsItems should be reset after the battery
has been discharged or the battery has
been disconnected.
Sunroof (See Chapter 4)
Trip computer (See Chapter 4)
Climate control system
(See Chapter 4)
Clock (See Chapter 4)
Audio (See Chapter 4)
Auto up/down window (See chapter 4)
(Continued)
When lifting a plastic-cased bat-
tery, excessive pressure on the
case may cause battery acid to
leak, resulting in personal injury.
Lift with a battery carrier or with
your hands on opposite corners.
Never attempt to recharge the
battery when the battery cables
are connected.
The electrical ignition system
works with high voltage. Never
touch these components with the
engine running or the ignition
switched on.
Failure to follow the above warn-
ings can result in serious bodily
injury or death.
PROPOSITION 65 WARN-
ING
Battery posts, terminals, and relat-
ed accessories contain lead and
lead compounds, chemicals known
to the State of California to cause
cancer, birth defects and reproduc-
tive harm. Batteries also contain
other chemicals known to the State
of California to cause cancer. Wash
hands after handling.
Page 309 of 345
747
Maintenance
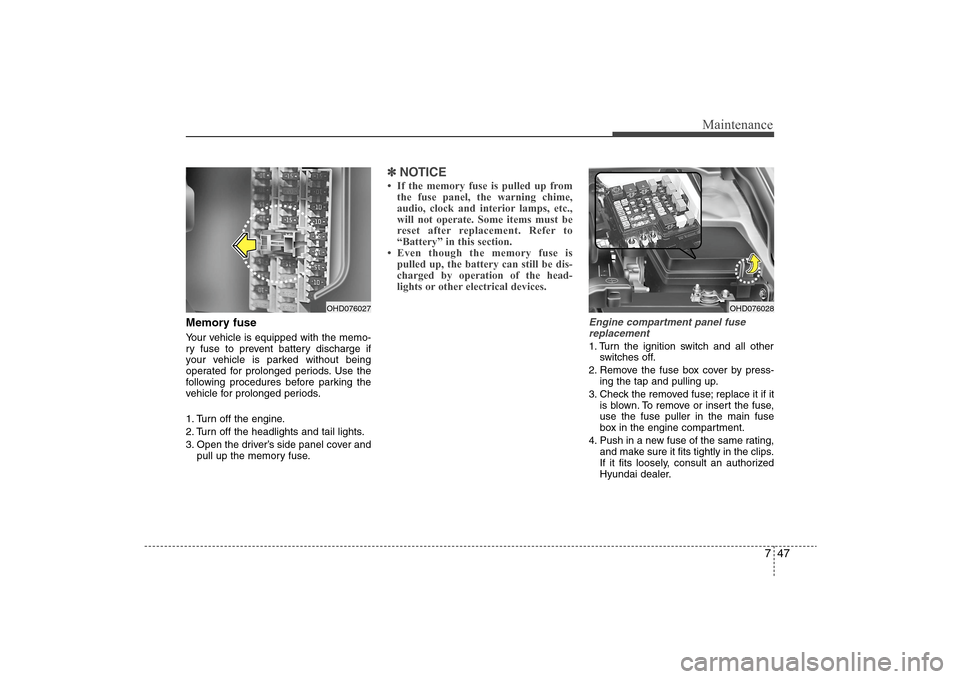
Memory fuseYour vehicle is equipped with the memo-
ry fuse to prevent battery discharge if
your vehicle is parked without being
operated for prolonged periods. Use the
following procedures before parking the
vehicle for prolonged periods.
1. Turn off the engine.
2. Turn off the headlights and tail lights.
3. Open the driver’s side panel cover and
pull up the memory fuse.
✽ ✽
NOTICE• If the memory fuse is pulled up from
the fuse panel, the warning chime,
audio, clock and interior lamps, etc.,
will not operate. Some items must be
reset after replacement. Refer to
“Battery” in this section.
• Even though the memory fuse is
pulled up, the battery can still be dis-
charged by operation of the head-
lights or other electrical devices.
Engine compartment panel fuse
replacement1. Turn the ignition switch and all other
switches off.
2. Remove the fuse box cover by press-
ing the tap and pulling up.
3. Check the removed fuse; replace it if it
is blown. To remove or insert the fuse,
use the fuse puller in the main fuse
box in the engine compartment.
4. Push in a new fuse of the same rating,
and make sure it fits tightly in the clips.
If it fits loosely, consult an authorized
Hyundai dealer.
OHD076027
OHD076028
Page 312 of 345
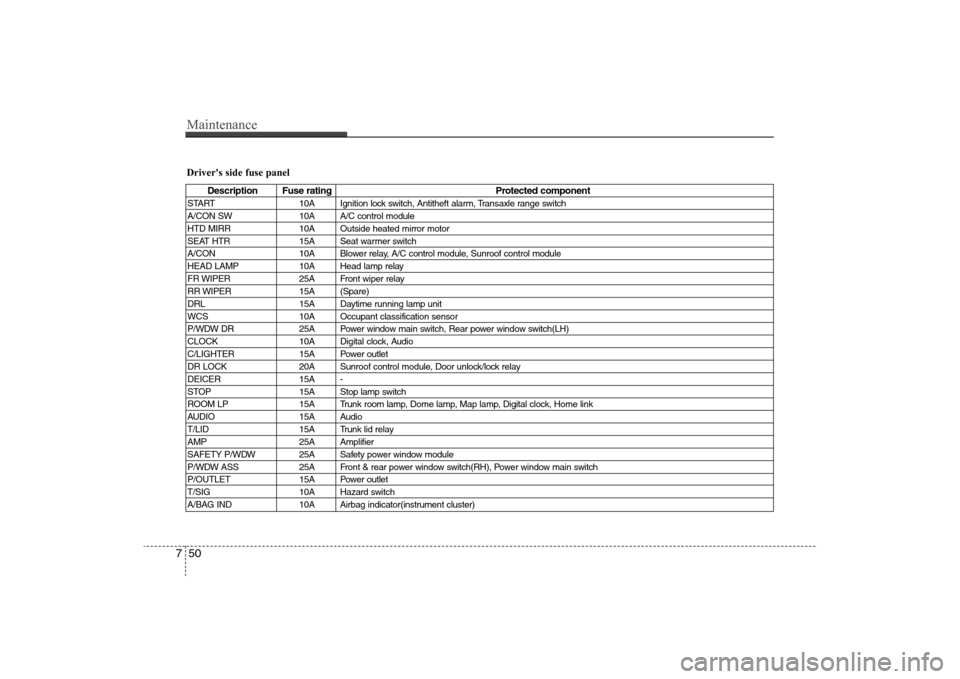
Maintenance50 7Driver's side fuse panel
Description Fuse rating Protected component
START 10A Ignition lock switch, Antitheft alarm, Transaxle range switch
A/CON SW 10A A/C control module
HTD MIRR 10A Outside heated mirror motor
SEAT HTR 15A Seat warmer switch
A/CON 10A Blower relay, A/C control module, Sunroof control module
HEAD LAMP 10A Head lamp relay
FR WIPER 25A Front wiper relay
RR WIPER 15A (Spare)
DRL 15A Daytime running lamp unit
WCS 10A Occupant classification sensor
P/WDW DR 25A Power window main switch, Rear power window switch(LH)
CLOCK 10A Digital clock, Audio
C/LIGHTER 15A Power outlet
DR LOCK 20A Sunroof control module, Door unlock/lock relay
DEICER 15A -
STOP 15A Stop lamp switch
ROOM LP 15A Trunk room lamp, Dome lamp, Map lamp, Digital clock, Home link
AUDIO 15A Audio
T/LID 15A Trunk lid relay
AMP 25A Amplifier
SAFETY P/WDW 25A Safety power window module
P/WDW ASS 25A Front & rear power window switch(RH), Power window main switch
P/OUTLET 15A Power outlet
T/SIG 10A Hazard switch
A/BAG IND 10A Airbag indicator(instrument cluster)
Page 341 of 345
Index2I
Air cleaner ··································································· 7-23
Airbag-advanced supplemental restraint system ········· 3-30
Driver's and passenger's front air bag ······················ 3-39
SRS components and functions ······························· 3-31
Occupant classification system ································ 3-33
Side air bag ······························································· 3-44
Curtain air bag ·························································· 3-45
Air bag warning label ··············································· 3-56
Appearance care ·························································· 7-59
Audio system ······························································· 4-87
M420 ········································································ 4-92
M445 ········································································ 4-97
M465 ······································································ 4-103
Automatic climate control system ······························· 4-69
Automatic transaxle ····················································· 5-10
Ignition key interlock system ··································· 5-14
Automatic transaxle operation ································· 5-11
Transaxle ranges ······················································· 5-12
Shift lock system ······················································ 5-14
Automatic transaxle fluid ············································ 7-20
Battery ········································································· 7-29
Before driving ································································ 5-3
Binding arbitration (U.S.A only) ··································· 8-5
Brake system ······························································· 5-16Anti-lock brake system (ABS) ································· 5-19
Parking brake ··························································· 5-18
Power brakes ···························································· 5-16
Brakes and clutch fluid ················································ 7-19
Bulb wattage ·································································· 9-2
California perchlorate notice ·········································7-67
Child restraint system ·················································· 3-22
Tether anchor system ··············································· 3-26
Child seat lower anchors ·········································· 3-28
Placing a passenger seat belt into the auto lock
mode ········································································· 3-24
Climate control air filter ·············································· 7-25
Consumer information ··················································· 8-4
Cruise control system ·················································· 5-26
Defroster ······································································ 4-59
Dimensions ···································································· 9-2
Door locks ····································································· 4-8
Central door lock switch ············································ 4-9
Child-protector rear door lock ·································· 4-11
Economical operation ·················································· 5-30AB
CDE