fuel Hyundai Elantra 2009 Owner's Guide
[x] Cancel search | Manufacturer: HYUNDAI, Model Year: 2009, Model line: Elantra, Model: Hyundai Elantra 2009Pages: 345, PDF Size: 19.91 MB
Page 221 of 345
Driving your vehicle34 5Higher speed motoringTires:Adjust the tire inflation pressures to
specification. Low tire inflation pressures
will result in overheating and possible
failure of the tires.
Avoid using worn or damaged tires which
may result in reduced traction or tire fail-
ure.✽ ✽
NOTICENever exceed the maximum tire inflation
pressure shown on the tires.
Fuel, engine coolant and engine oil:High speed travel consumes more fuel
than urban motoring. Do not forget to
check both engine coolant and engine
oil.Drive belt:A loose or damaged drive belt may result
in overheating of the engine.
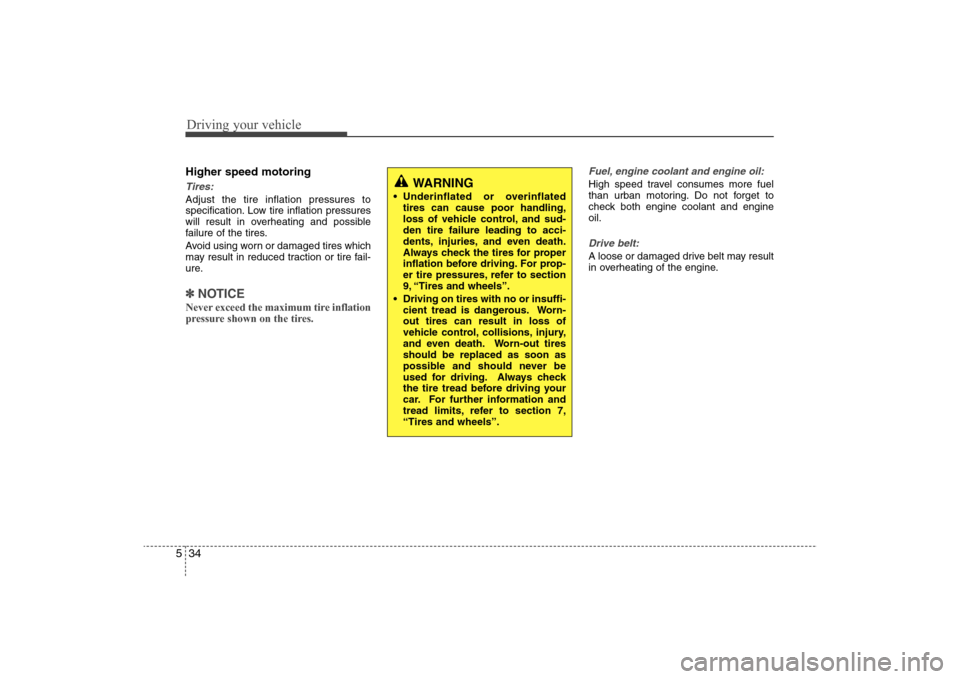
WARNING
Underinflated or overinflated
tires can cause poor handling,
loss of vehicle control, and sud-
den tire failure leading to acci-
dents, injuries, and even death.
Always check the tires for proper
inflation before driving. For prop-
er tire pressures, refer to section
9, “Tires and wheels”.
Driving on tires with no or insuffi-
cient tread is dangerous. Worn-
out tires can result in loss of
vehicle control, collisions, injury,
and even death. Worn-out tires
should be replaced as soon as
possible and should never be
used for driving. Always check
the tire tread before driving your
car. For further information and
tread limits, refer to section 7,
“Tires and wheels”.
Page 226 of 345
539
Driving your vehicle
If you are considering towing with your
car, you should first check with your
state’s Department of Motor Vehicles to
determine their legal requirements.
Since laws vary from state to state the
requirements for towing trailers, cars, or
other types of vehicles or apparatus may
differ. Ask an authorized Hyundai dealer
for further details before towing.
Your vehicle can tow a trailer. To identify
what the vehicle trailering capacity is for
your vehicle, you should read the infor-
mation in “Weight of the trailer” that
appears later in this section.
Remember that trailering is different than
just driving your vehicle by itself.
Trailering means changes in handling,
durability, and fuel economy. Successful,
safe trailering requires correct equip-
ment, and it has to be used properly.This section contains many time-tested,
important trailering tips and safety rules.
Many of these are important for your
safety and that of your passengers.
Please read this section carefully before
you pull a trailer.
Load-pulling components such as the
engine, transaxle, wheel assemblies, and
tires are forced to work harder against
the load of the added weight. The engine
is required to operate at relatively higher
speeds and under greater loads. This
additional burden generates extra heat.
The trailer also adds considerably to
wind resistance, increasing the pulling
requirements.TRAILER TOWING
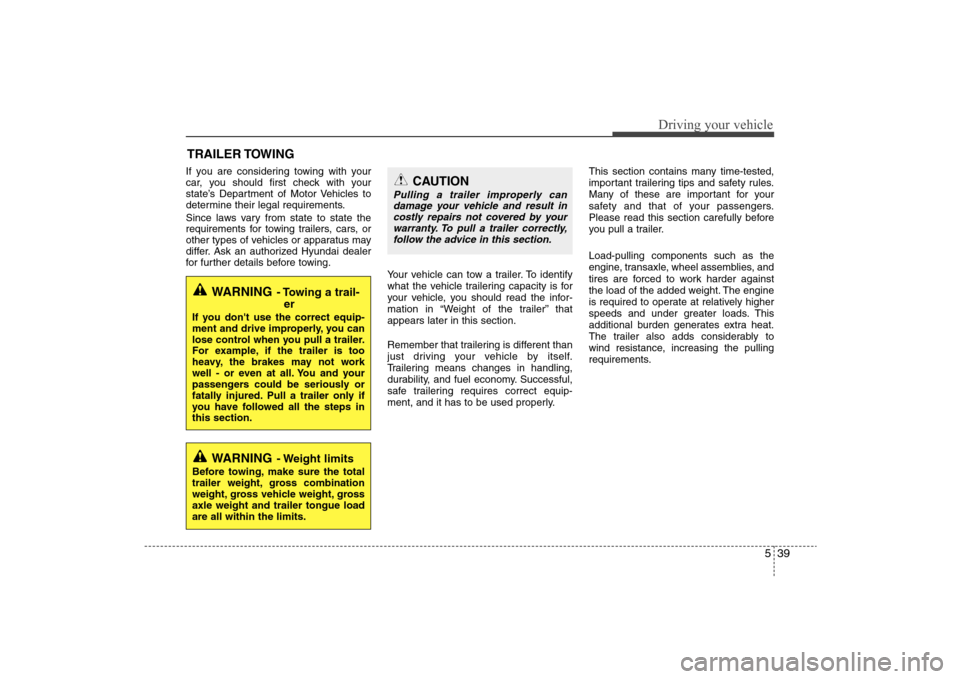
WARNING
- Towing a trail-
er
If you don't use the correct equip-
ment and drive improperly, you can
lose control when you pull a trailer.
For example, if the trailer is too
heavy, the brakes may not work
well - or even at all. You and your
passengers could be seriously or
fatally injured. Pull a trailer only if
you have followed all the steps in
this section.
WARNING
- Weight limits
Before towing, make sure the total
trailer weight, gross combination
weight, gross vehicle weight, gross
axle weight and trailer tongue load
are all within the limits.
CAUTION
Pulling a trailer improperly can
damage your vehicle and result in
costly repairs not covered by your
warranty. To pull a trailer correctly,
follow the advice in this section.
Page 236 of 345
549
Driving your vehilcle
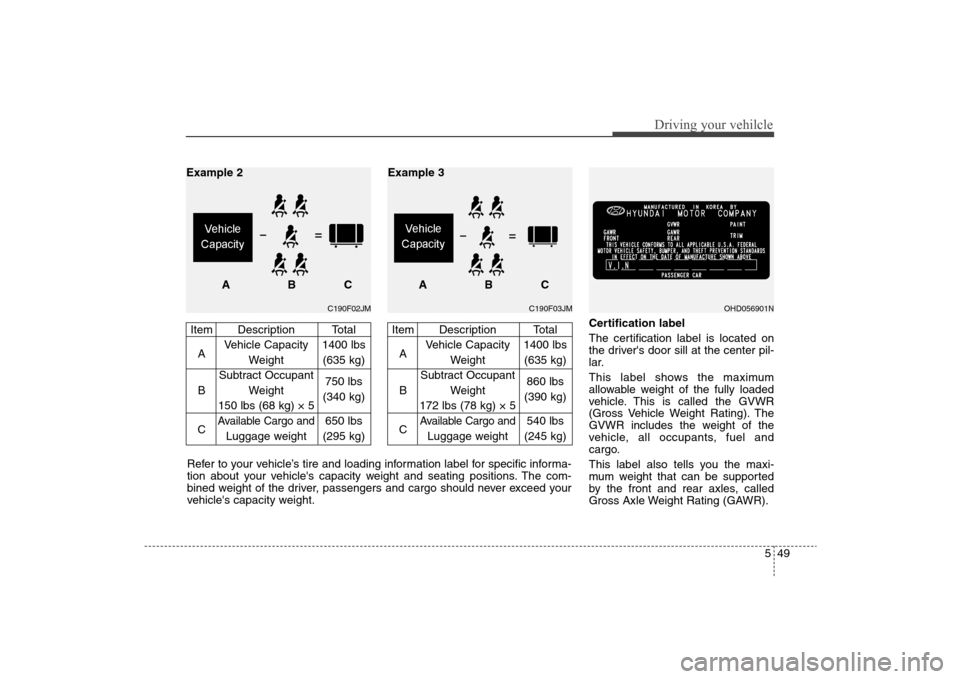
Certification label
The certification label is located on
the driver's door sill at the center pil-
lar.
This label shows the maximum
allowable weight of the fully loaded
vehicle. This is called the GVWR
(Gross Vehicle Weight Rating). The
GVWR includes the weight of the
vehicle, all occupants, fuel and
cargo.
This label also tells you the maxi-
mum weight that can be supported
by the front and rear axles, called
Gross Axle Weight Rating (GAWR).
C190F02JM
Item Description Total
AVehicle Capacity 1400 lbs
Weight (635 kg)
Subtract Occupant
B Weight 750 lbs
150 lbs (68 kg) × 5(340 kg)
C
Available Cargo and
650 lbs
Luggage weight (295 kg)
ABC Example 2
C190F03JM
Item Description Total
AVehicle Capacity 1400 lbs
Weight (635 kg)
Subtract Occupant
B Weight 860 lbs
172 lbs (78 kg) × 5(390 kg)
C
Available Cargo and
540 lbs
Luggage weight (245 kg)
ABC Example 3
Refer to your vehicle’s tire and loading information label for specific informa-
tion about your vehicle's capacity weight and seating positions. The com-
bined weight of the driver, passengers and cargo should never exceed your
vehicle's capacity weight.
OHD056901N
Page 239 of 345
Driving your vehicle52 5This section will guide you in the proper
loading of your vehicle and/or trailer, to
keep your loaded vehicle weight within its
design rating capability, with or without a
trailer. Properly loading your vehicle will
provide maximum return of the vehicle
design performance. Before loading your
vehicle, familiarize yourself with the fol-
lowing terms for determining your vehi-
cle's weight ratings, with or without a
trailer, from the vehicle's specifications
and the compliance label:
Base curb weight
This is the weight of the vehicle including
a full tank of fuel and all standard equip-
ment. It does not include passengers,
cargo, or optional equipment.
Vehicle curb weight
This is the weight of your new vehicle
when you picked it up from your dealer
plus any aftermarket equipment.
Cargo weight
This figure includes all weight added to
the Base Curb Weight, including cargo
and optional equipment.GAW (Gross axle weight)
This is the total weight placed on each
axle (front and rear) - including vehicle
curb weight and all payload.
GAWR (Gross axle weight rating)This is the maximum allowable weight
that can be carried by a single axle (front
or rear). These numbers are shown on
the compliance label.
The total load on each axle must never
exceed its GAWR.
GVW (Gross vehicle weight)
This is the Base Curb Weight plus actual
Cargo Weight plus passengers.
GVWR (Gross vehicle weight rating)
This is the maximum allowable weight of
the fully loaded vehicle (including all
options, equipment, passengers and
cargo). The GVWR is shown on the com-
pliance label located on the driver’s door
sill.
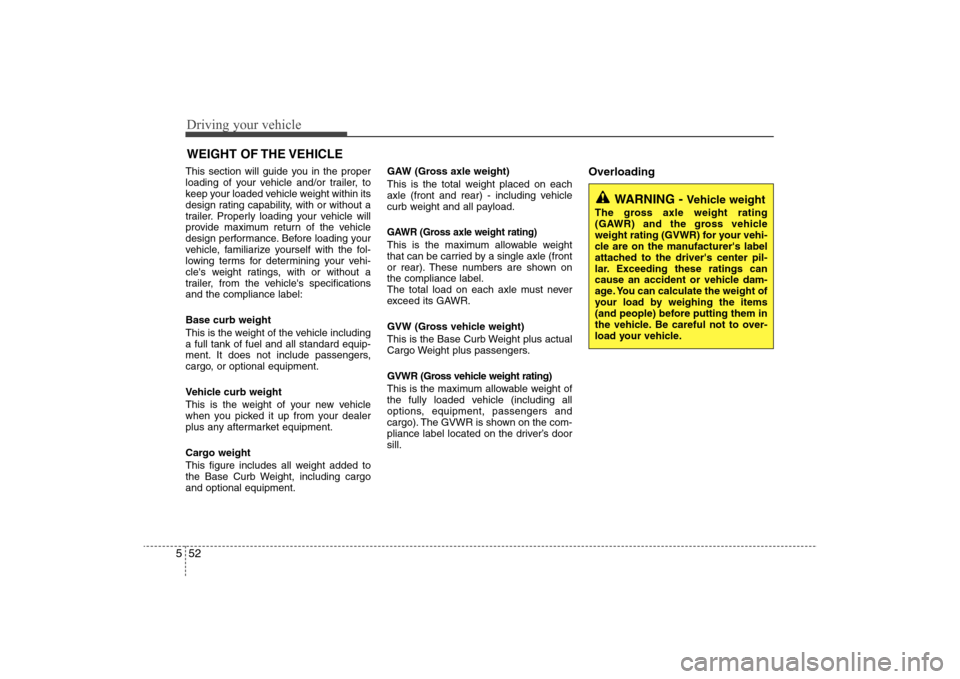
Overloading
WEIGHT OF THE VEHICLE
WARNING -
Vehicle weight
The gross axle weight rating
(GAWR) and the gross vehicle
weight rating (GVWR) for your vehi-
cle are on the manufacturer's label
attached to the driver's center pil-
lar. Exceeding these ratings can
cause an accident or vehicle dam-
age. You can calculate the weight of
your load by weighing the items
(and people) before putting them in
the vehicle. Be careful not to over-
load your vehicle.
Page 242 of 345
63
What to do in an emergency
4. When changing a flat tire, follow the
instruction provided later in this sec-
tion.If engine stalls while driving1. Reduce your speed gradually, keeping
a straight line. Move cautiously off the
road to a safe place.
2. Turn on your emergency flashers.
3. Try to start the engine again. If your
vehicle will not start, contact an
authorized Hyundai dealer or seek
other qualified assistance.
If engine doesn't turn over or
turns over slowly1. If your car has an automatic transaxle,
be sure the gear selector lever is in N
(Neutral) or P (Park) and the emer-
gency brake is set.
2. Check the battery connections to be
sure they are clean and tight.
3. Turn on the interior light. If the light
dims or goes out when you operate the
starter, the battery is discharged.
4. Check the starter connections to be
sure they are securely tightened.
5. Do not push or pull the vehicle to start
it. See instructions for "Jump starting".
If engine turns over normally but
does not start1. Check fuel level.
2. With the ignition switch in the OFF
position, check all connectors at igni-
tion, coil and spark plugs. Reconnect
any that may be disconnected or
loose.
3. Check the fuel line in the engine com-
partment.
4. If the engine still does not start, call an
authorized Hyundai dealer or seek
other qualified assistance.
IF THE ENGINE WILL NOT START
WARNING
If the engine will not start, do not
push or pull the car to start it. This
could result in a collision or cause
other damage. In addition, push or
pull starting may cause the catalyt-
ic converter to be overloaded and
create a fire hazard.
Page 246 of 345
67
What to do in an emergency
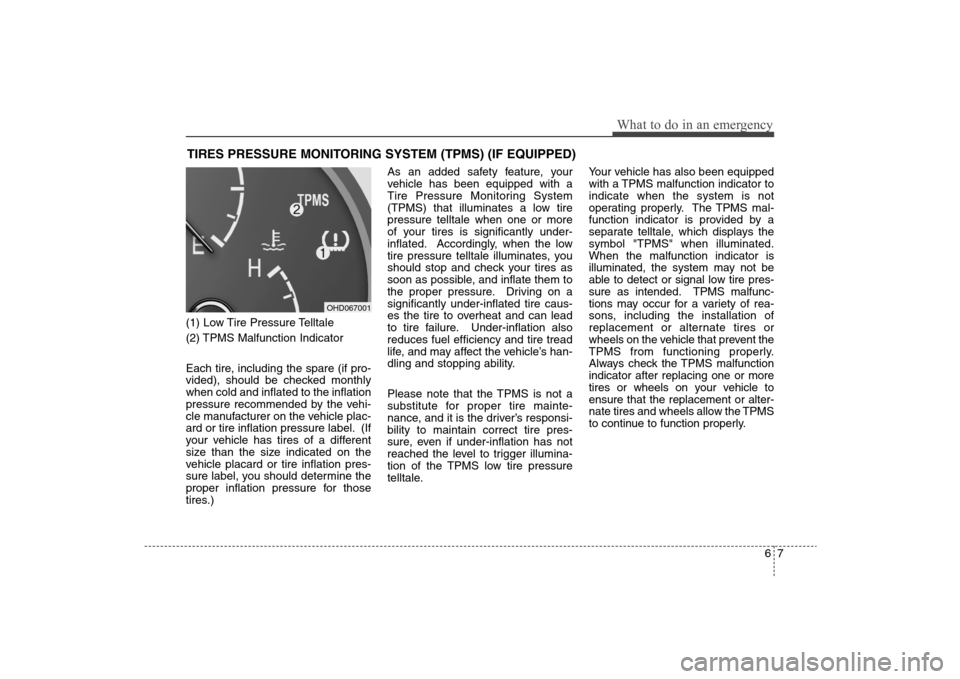
TIRES PRESSURE MONITORING SYSTEM (TPMS) (IF EQUIPPED) (1) Low Tire Pressure Telltale
(2) TPMS Malfunction Indicator
Each tire, including the spare (if pro-
vided), should be checked monthly
when cold and inflated to the inflation
pressure recommended by the vehi-
cle manufacturer on the vehicle plac-
ard or tire inflation pressure label. (If
your vehicle has tires of a different
size than the size indicated on the
vehicle placard or tire inflation pres-
sure label, you should determine the
proper inflation pressure for those
tires.)As an added safety feature, your
vehicle has been equipped with a
Tire Pressure Monitoring System
(TPMS) that illuminates a low tire
pressure telltale when one or more
of your tires is significantly under-
inflated. Accordingly, when the low
tire pressure telltale illuminates, you
should stop and check your tires as
soon as possible, and inflate them to
the proper pressure. Driving on a
significantly under-inflated tire caus-
es the tire to overheat and can lead
to tire failure. Under-inflation also
reduces fuel efficiency and tire tread
life, and may affect the vehicle’s han-
dling and stopping ability.
Please note that the TPMS is not a
substitute for proper tire mainte-
nance, and it is the driver’s responsi-
bility to maintain correct tire pres-
sure, even if under-inflation has not
reached the level to trigger illumina-
tion of the TPMS low tire pressure
telltale.Your vehicle has also been equipped
with a TPMS malfunction indicator to
indicate when the system is not
operating properly. The TPMS mal-
function indicator is provided by a
separate telltale, which displays the
symbol "TPMS" when illuminated.
When the malfunction indicator is
illuminated, the system may not be
able to detect or signal low tire pres-
sure as intended. TPMS malfunc-
tions may occur for a variety of rea-
sons, including the installation of
replacement or alternate tires or
wheels on the vehicle that prevent the
TPMS from functioning properly.
Always check the TPMS malfunction
indicator after replacing one or more
tires or wheels on your vehicle to
ensure that the replacement or alter-
nate tires and wheels allow the TPMS
to continue to function properly.
OHD067001
Page 267 of 345
75
Maintenance
OWNER MAINTENANCE The following lists are vehicle checks and
inspections that should be performed by
the owner or an authorized Hyundai
dealer at the frequencies indicated to
help ensure safe, dependable operation
of your vehicle.
Any adverse conditions should be
brought to the attention of your dealer as
soon as possible.
These Owner Maintenance Checks are
generally not covered by warranties and
you may be charged for labor, parts and
lubricants used.
Owner maintenance schedule When you stop for fuel: Check the engine oil level.
Check coolant level in coolant reser-
voir.
Check the windshield washer fluid
level.
Look for low or under-inflated tires.
While operating your vehicle: Note any changes in the sound of the
exhaust or any smell of exhaust fumes
in the vehicle.
Check for vibrations in the steering
wheel. Notice any increased steering
effort or looseness in the steering
wheel, or change in its straight-ahead
position.
Notice if your vehicle constantly turns
slightly or “pulls” to one side when trav-
eling on smooth, level road.
When stopping, listen and check for
unusual sounds, pulling to one side,
increased brake pedal travel or “hard-
to-push” brake pedal.
If any slipping or changes in the oper-
ation of your transaxle occurs, check
the transaxle fluid level.
Check automatic transaxle P (Park)
function.
Check parking brake.
Check for fluid leaks under your vehicle
(water dripping from the air condition-
ing system during or after use is nor-
mal).
WARNING
Be careful when checking your
engine coolant level when the
engine is hot. Scalding hot coolant
and steam may blow out under
pressure. This could cause burns
or other serious injury.
Page 270 of 345
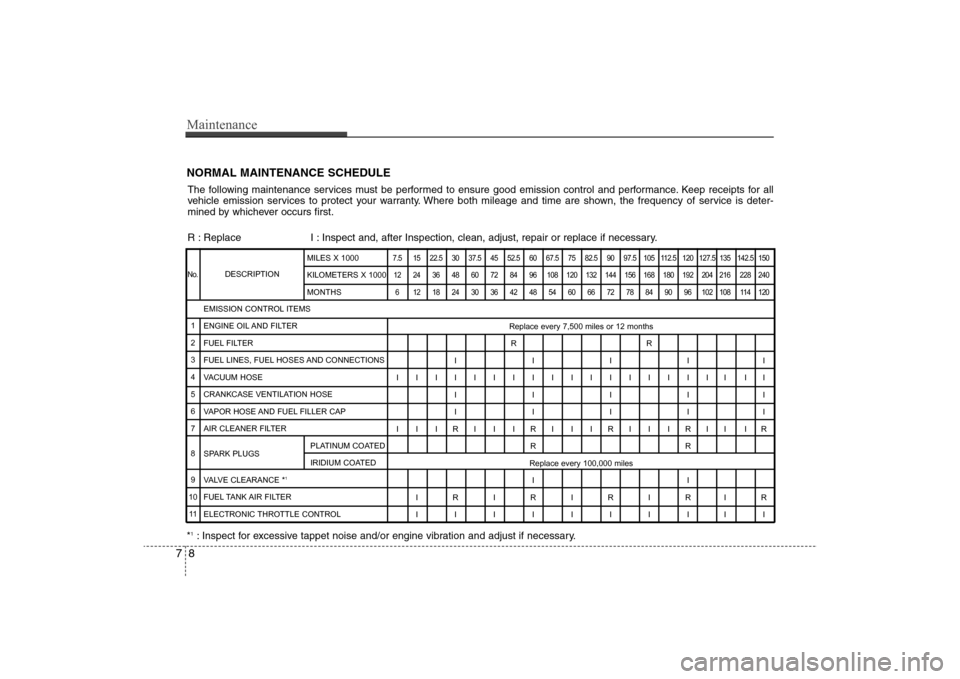
Maintenance8 7NORMAL MAINTENANCE SCHEDULEThe following maintenance services must be performed to ensure good emission control and performance. Keep receipts for all
vehicle emission services to protect your warranty. Where both mileage and time are shown, the frequency of service is deter-
mined by whichever occurs first.
R : Replace I : Inspect and, after Inspection, clean, adjust, repair or replace if necessary.
DESCRIPTION
7.5 15 22.5 30 37.5 45 52.5 60 67.5 75 82.5 90 97.5 105 112.5 120 127.5 135 142.5 150
12 24 36 48 60 72 84 96 108 120 132 144 156 168 180 192 204 216 228 240
6 121824303642485460667278849096102108114120
Replace every 7,500 miles or 12 months
RR
IIIII
IIIIIIIIIIIIIIIIII II
IIIII
IIIII
I I IRI I IRI I IRI I IRII IR
RR
Replace every 100,000 miles
II
IRIRIRIRIR
IIIIIIIIII EMISSION CONTROL ITEMS
ENGINE OIL AND FILTER
FUEL FILTER
FUEL LINES, FUEL HOSES AND CONNECTIONS
VACUUM HOSE
CRANKCASE VENTILATION HOSE
VAPOR HOSE AND FUEL FILLER CAP
AIR CLEANER FILTER
SPARK PLUGSPLATINUM COATED
IRIDIUM COATED
VALVE CLEARANCE *
1
FUEL TANK AIR FILTER
ELECTRONIC THROTTLE CONTROL
No.1
2
3
4
5
6
7
8
9
10
11MILES X 1000
KILOMETERS X 1000
MONTHS*1: Inspect for excessive tappet noise and/or engine vibration and adjust if necessary.
Page 274 of 345
Maintenance12 7EXPLANATION OF SCHEDULED MAINTENANCE ITEMSEngine oil and filterThe engine oil and filter should be
changed at the intervals specified in the
maintenance schedule. If the car is being
driven in severe conditions, more fre-
quent oil and filter changes are required.Drive beltsInspect all drive belts for evidence of
cuts, cracks, excessive wear or oil satu-
ration and replace if necessary. Drive
belts should be checked periodically for
proper tension and adjusted as neces-
sary.
Fuel filterA clogged filter can limit the speed at
which the vehicle may be driven, damage
the emission system and cause multiple
issues such as hard starting. If an exces-
sive amount of foreign matter accumu-
lates in the fuel tank, the filter may
require replacement more frequently.
After installing a new filter, run the engine
for several minutes, and check for leaks
at the connections. Fuel filters should be
installed by trained technicians.
Fuel lines, fuel hoses and con-
nectionsCheck the fuel lines, fuel hoses and con-
nections for leakage and damage. Have
a trained technician replace any dam-
aged or leaking parts immediately.
Page 275 of 345
713
Maintenance
Timing beltInspect all parts related to the timing belt
for damage and deformation. Replace
any damaged parts immediately.Vapor hose and fuel filler capThe vapor hose and fuel filler cap should
be inspected at those intervals specified
in the maintenance schedule. Make sure
that a new vapor hose or fuel filler cap is
correctly replaced.
Vacuum crankcase ventilation
hosesInspect the surface of hoses for evidence
of heat and/or mechanical damage. Hard
and brittle rubber, cracking, tears, cuts,
abrasions, and excessive swelling indi-
cate deterioration. Particular attention
should be paid to examine those hose
surfaces nearest to high heat sources,
such as the exhaust manifold.
Inspect the hose routing to assure that
the hoses do not come in contact with
any heat source, sharp edges or moving
component which might cause heat dam-
age or mechanical wear. Inspect all hose
connections, such as clamps and cou-
plings, to make sure they are secure, and
that no leaks are present. Hoses should
be replaced immediately if there is any
evidence of deterioration or damage.
Air cleaner filterA Genuine Hyundai air cleaner filter is
recommended when the filter is
replaced.Spark plugsMake sure to install new spark plugs of
the correct heat range.Valve clearanceInspect excessive valve noise and/or
engine vibration and adjust if necessary.
A qualified technician should perform the
operation.Cooling systemCheck the cooling system parts, such as
radiator, coolant reservoir, hoses and
connections for leakage and damage.
Replace any damaged parts.CoolantThe coolant should be changed at the
intervals specified in the maintenance
schedule.