Hyundai Elantra 2015 Owner's Manual - RHD (UK. Australia)
Manufacturer: HYUNDAI, Model Year: 2015, Model line: Elantra, Model: Hyundai Elantra 2015Pages: 498, PDF Size: 9.45 MB
Page 111 of 498
431
Features of your vehicle
✽NOTICE
• Make sure to refuel your
vehicle according to the "Fuel
Requirements" suggested in chap-
ter 1.
• Do not spill fuel on the exterior
surfaces of the vehicle. Any type of
fuel spilled on painted surfaces
may damage the paint.(Continued)
• When refuelling, always move
the shift lever to the P (Park)
position (for automatic
transaxle) or first gear or R
(Reverse, for manual transaxle),
set the parking brake, and
place the ignition switch to the
LOCK/OFF position. Sparks
produced by electrical compo-
nents related to the engine can
ignite fuel vapourscausing a
fire.
• Do not use matches or a
lighter and do not smoke or
leave a lit cigarette in your
vehicle whilst at a service sta-
tion, especially during refu-
elling.
• Do not over-fill or top-off your
vehicle tank, which can cause
petrol spillage.
(Continued)(Continued)
• If a fire breaks out during refu-
elling, leave the vicinity of the
vehicle, and immediately con-
tact the manager of the serv-
ice station and then contact
the local fire department.
Follow any safety instructions
they provide.
• If pressurised fuel sprays out,
it can cover your clothes or
skin and thus subject you to
the risk of fire and burns.
Always remove the fuel cap
carefully and slowly. If the cap
is venting fuel or if you hear a
hissing sound, wait until the
condition stops before com-
pletely removing the cap.
• Always check that the fuel cap
is installed securely to pre-
vent fuel spillage in the event
of an accident.
CAUTION
If the fuel filler cap requires
replacement, use only a genuine
HYUNDAI cap or the equivalent
specified for your vehicle. An
incorrect fuel filler cap can
result in a serious malfunction
of the fuel system or emission
control system.
Page 112 of 498
Features of your vehicle
32 4
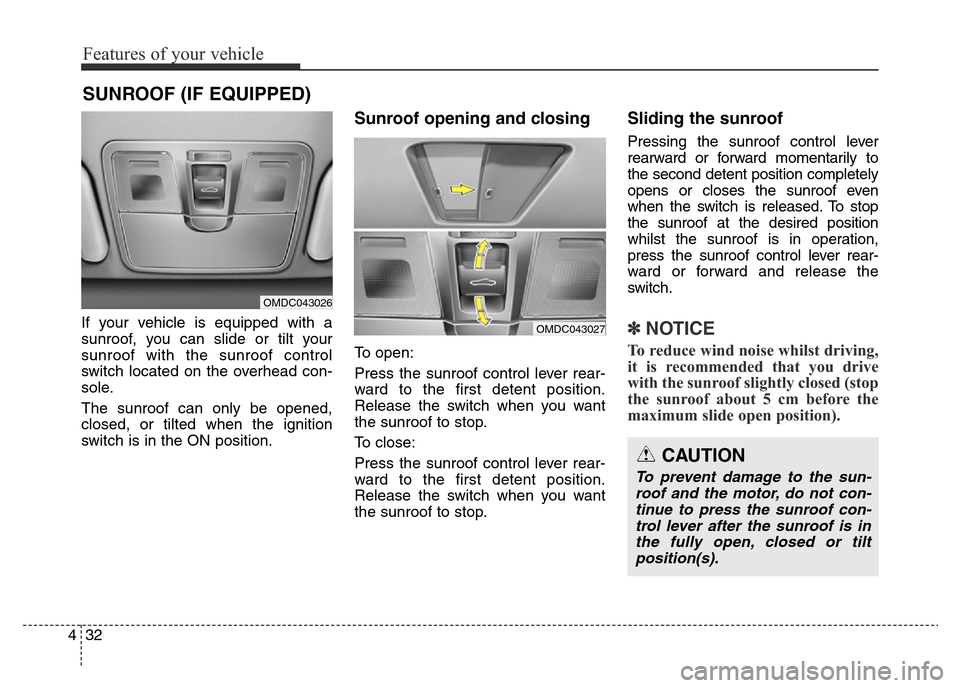
If your vehicle is equipped with a
sunroof, you can slide or tilt your
sunroof with the sunroof control
switch located on the overhead con-
sole.
The sunroof can only be opened,
closed, or tilted when the ignition
switch is in the ON position.
Sunroof opening and closing
To open:
Press the sunroof control lever rear-
ward to the first detent position.
Release the switch when you want
the sunroof to stop.
To close:
Press the sunroof control lever rear-
ward to the first detent position.
Release the switch when you want
the sunroof to stop.
Sliding the sunroof
Pressing the sunroof control lever
rearward or forward momentarily to
the second detent position completely
opens or closes the sunroof even
when the switch is released. To stop
the sunroof at the desired position
whilst the sunroof is in operation,
press the sunroof control lever rear-
ward or forward and release the
switch.
✽NOTICE
To reduce wind noise whilst driving,
it is recommended that you drive
with the sunroof slightly closed (stop
the sunroof about 5 cm before the
maximum slide open position).
SUNROOF (IF EQUIPPED)
OMDC043026
OMDC043027
CAUTION
To prevent damage to the sun-
roof and the motor, do not con-
tinue to press the sunroof con-
trol lever after the sunroof is in
the fully open, closed or tilt
position(s).
Page 113 of 498
433
Features of your vehicle
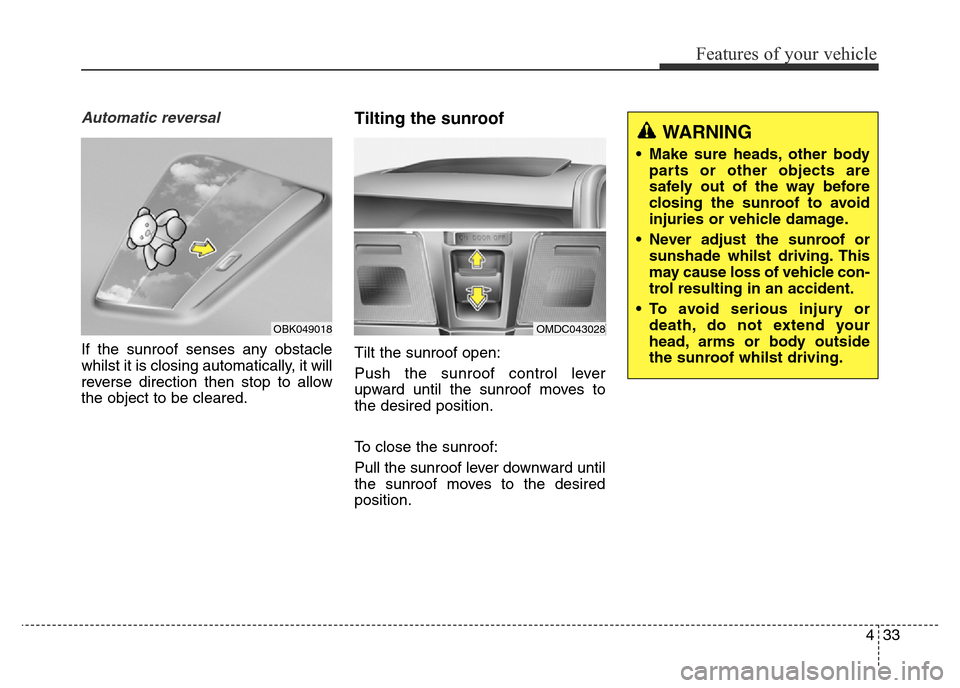
Automatic reversal
If the sunroof senses any obstacle
whilst it is closing automatically, it will
reverse direction then stop to allow
the object to be cleared.
Tilting the sunroof
Tilt the sunroof open:
Push the sunroof control lever
upward until the sunroof moves to
the desired position.
To close the sunroof:
Pull the sunroof lever downward until
the sunroof moves to the desired
position.
OMDC043028OBK049018
WARNING
• Make sure heads, other body
parts or other objects are
safely out of the way before
closing the sunroof to avoid
injuries or vehicle damage.
• Never adjust the sunroof or
sunshade whilst driving. This
may cause loss of vehicle con-
trol resulting in an accident.
• To avoid serious injury or
death, do not extend your
head, arms or body outside
the sunroof whilst driving.
Page 114 of 498
Features of your vehicle
34 4
✽NOTICE
After washing the vehicle or after a
rain, be sure to wipe off the water on
the sunroof before operating the
sunroof.
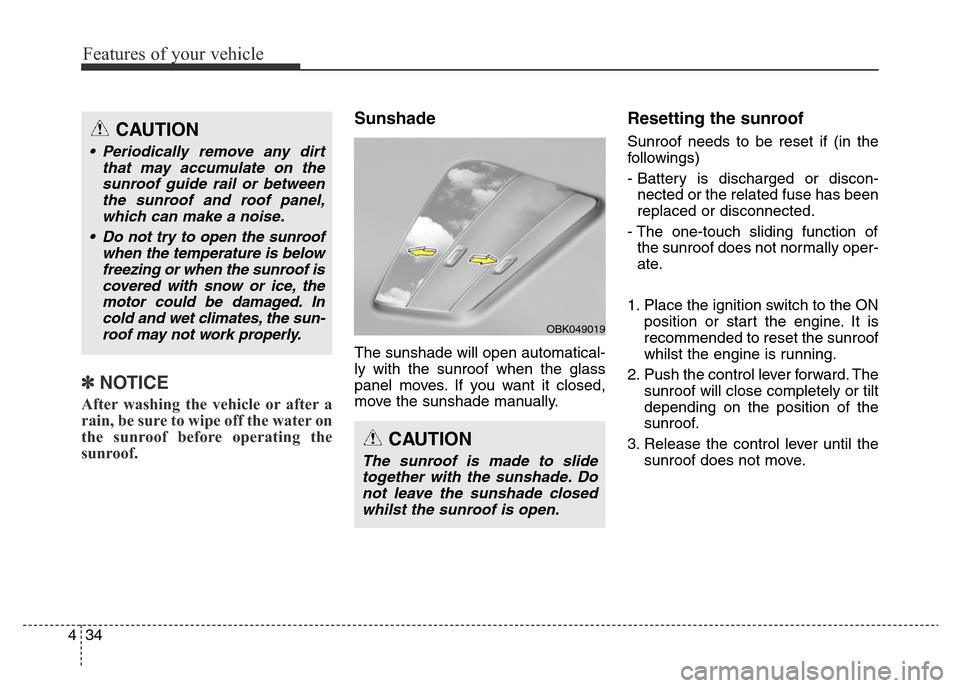
Sunshade
The sunshade will open automatical-
ly with the sunroof when the glass
panel moves. If you want it closed,
move the sunshade manually.
Resetting the sunroof
Sunroof needs to be reset if (in the
followings)
- Battery is discharged or discon-
nected or the related fuse has been
replaced or disconnected.
- The one-touch sliding function of
the sunroof does not normally oper-
ate.
1. Place the ignition switch to the ON
position or start the engine. It is
recommended to reset the sunroof
whilst the engine is running.
2. Push the control lever forward. The
sunroof will close completely or tilt
depending on the position of the
sunroof.
3. Release the control lever until the
sunroof does not move.
CAUTION
The sunroof is made to slide
together with the sunshade. Do
not leave the sunshade closed
whilst the sunroof is open.
OBK049019
CAUTION
• Periodically remove any dirt
that may accumulate on the
sunroof guide rail or between
the sunroof and roof panel,
which can make a noise.
• Do not try to open the sunroof
when the temperature is below
freezing or when the sunroof is
covered with snow or ice, the
motor could be damaged. In
cold and wet climates, the sun-
roof may not work properly.
Page 115 of 498
435
Features of your vehicle
4. Push the control lever forward
about 10 seconds.
- When the sunroof is in the closed
position :
The glass will tilt and slightly
move up and down.
- When the sunroof is in the tilt
position:
The glass will slightly move up
and down.
Do not release the lever until the
operation is completed.
If you release the lever during opera-
tion, try again from step 2.5. Within 3 seconds, push the control
lever forward until the sunroof
operates as follows:
Tilt down →Slide Open →Slide
Close.
Do not release the lever until the
operation is completed.
If you release the lever during opera-
tion, try again from step 2.
6. Release the sunroof control lever
after all operation has completed.
(The sunroof system has been
reset.)✽NOTICE
• If the sunroof does not reset when
the vehicle battery is disconnected
or discharged, or related fuse is
blown, the sunroof may not oper-
ate normally.
• For more detailed information, we
recommend that you contact an
authorised HYUNDAI dealer.
Page 116 of 498
Features of your vehicle
36 4
Electric power steering (EPS)
The system assists you with steering
the vehicle. If the engine is off or if
the power steering system becomes
inoperative, the vehicle may still be
steered, but it will require increased
steering effort.
Also, the steering effort becomes
heavier as the vehicle’s speed
increases and becomes lighter as
the vehicle’s speed decreases for
better control of the steering wheel.
Should you notice any change in the
effort required to steer during normal
vehicle operation, we recommend
that the system be checked by an
authorised HYUNDAI dealer.
✽NOTICE
The following may occur during
normal vehicle operation:
• The steering effort may be high
immediately after placing the igni-
tion switch in the ON position.
This happens as the system per-
forms the EPS system diagnostics.
When the diagnostics is complet-
ed, the steering wheel will return
to its normal condition.
• A click noise may be heard from
the EPS relay after the ignition
switch is placed in the ON or
LOCK/OFF position.
• Motor noise may be heard when
the vehicle is at stop or at a low
driving speed.
• When you operate the steering
wheel in low temperatures, abnor-
mal noise may occur. If the tem-
perature rises, the noise will disap-
pear. This is a normal condition.
STEERING WHEEL
CAUTION
If the Electric Power Steering
System does not operate nor-
mally, the warning light ( ) will
illuminate on the instrument
cluster. The steering wheel may
become difficult to control or
operate. Take your vehicle to an
authorised HYUNDAI dealer and
have the system checked as
soon as possible.
Page 117 of 498
437
Features of your vehicle
Tilt steering / Telescope steering
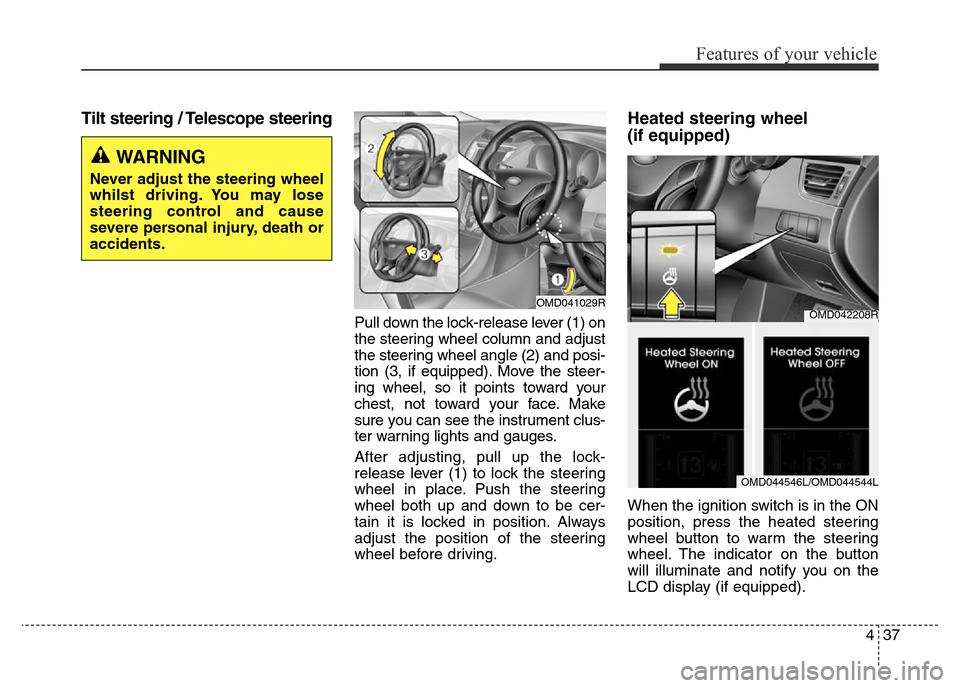
Pull down the lock-release lever (1) on
the steering wheel column and adjust
the steering wheel angle (2) and posi-
tion (3, if equipped). Move the steer-
ing wheel, so it points toward your
chest, not toward your face. Make
sure you can see the instrument clus-
ter warning lights and gauges.
After adjusting, pull up the lock-
release lever (1) to lock the steering
wheel in place. Push the steering
wheel both up and down to be cer-
tain it is locked in position. Always
adjust the position of the steering
wheel before driving.
Heated steering wheel
(if equipped)
When the ignition switch is in the ON
position, press the heated steering
wheel button to warm the steering
wheel. The indicator on the button
will illuminate and notify you on the
LCD display (if equipped).
WARNING
Never adjust the steering wheel
whilst driving. You may lose
steering control and cause
severe personal injury, death or
accidents.
OMD041029ROMD042208R
OMD044546L/OMD044544L
Page 118 of 498
Features of your vehicle
38 4
To turn the heated steering wheel off,
press the button again. The indicator
on the button will turn off and notify
you on the LCD display (if equipped).
✽NOTICE
The heated steering wheel will turn
off automatically approximately 30
minutes after the heated steering
wheel is turned on.
Flex steering wheel
(if equipped)
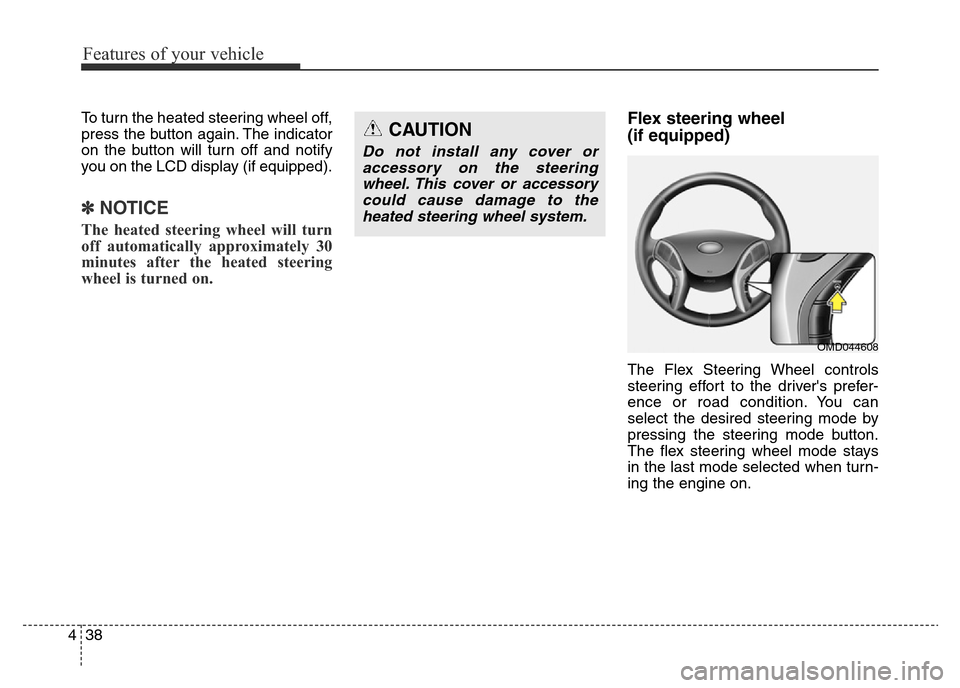
The Flex Steering Wheel controls
steering effort to the driver's prefer-
ence or road condition. You can
select the desired steering mode by
pressing the steering mode button.
The flex steering wheel mode stays
in the last mode selected when turn-
ing the engine on.
CAUTION
Do not install any cover or
accessory on the steering
wheel. This cover or accessory
could cause damage to the
heated steering wheel system.
OMD044608
Page 119 of 498
439
Features of your vehicle
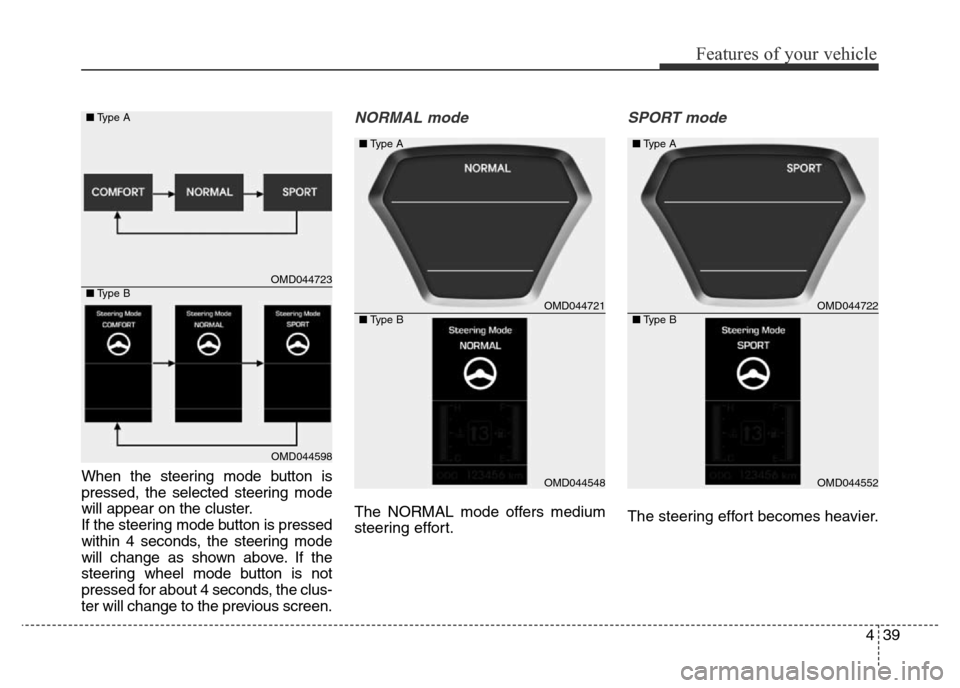
When the steering mode button is
pressed, the selected steering mode
will appear on the cluster.
If the steering mode button is pressed
within 4 seconds, the steering mode
will change as shown above. If the
steering wheel mode button is not
pressed for about 4 seconds, the clus-
ter will change to the previous screen.
NORMAL mode
The NORMAL mode offers medium
steering effort.
SPORT mode
The steering effort becomes heavier.
OMD044723
OMD044598 ■Type A
■Type B
OMD044721
OMD044548 ■Type A
■Type B
OMD044722
OMD044552 ■Type A
■Type B
Page 120 of 498
Features of your vehicle
40 4
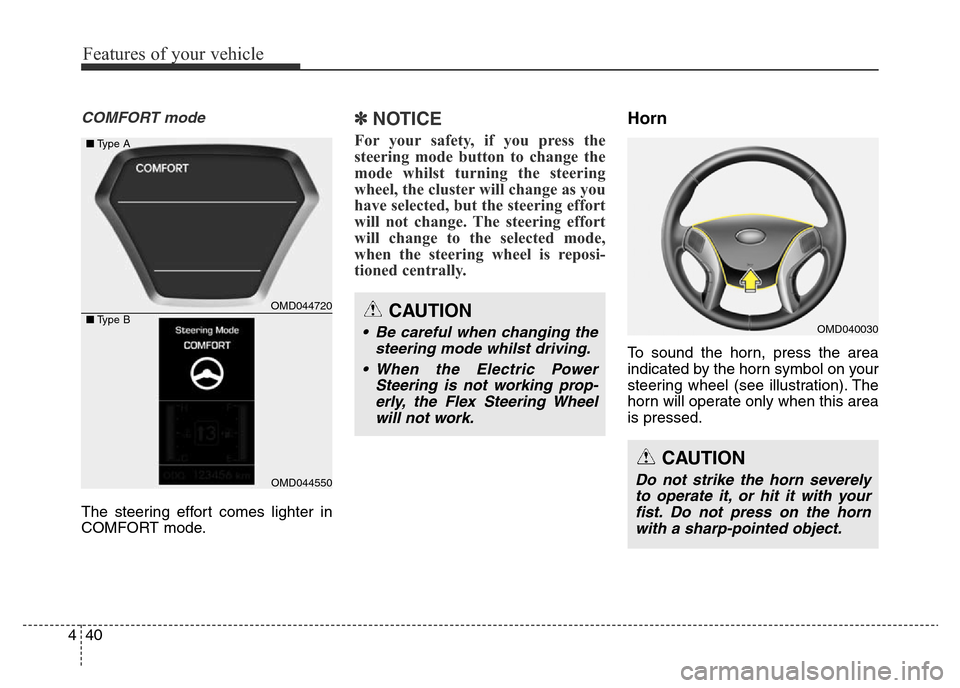
COMFORT mode
The steering effort comes lighter in
COMFORT mode.
✽NOTICE
For your safety, if you press the
steering mode button to change the
mode whilst turning the steering
wheel, the cluster will change as you
have selected, but the steering effort
will not change. The steering effort
will change to the selected mode,
when the steering wheel is reposi-
tioned centrally.
Horn
To sound the horn, press the area
indicated by the horn symbol on your
steering wheel (see illustration). The
horn will operate only when this area
is pressed.
CAUTION
• Be careful when changing the
steering mode whilst driving.
• When the Electric Power
Steering is not working prop-
erly, the Flex Steering Wheel
will not work.OMD040030
CAUTION
Do not strike the horn severely
to operate it, or hit it with your
fist. Do not press on the horn
with a sharp-pointed object.
OMD044720
OMD044550 ■Type A
■Type B