rear Hyundai Elantra Coupe 2014 Service Manual
[x] Cancel search | Manufacturer: HYUNDAI, Model Year: 2014, Model line: Elantra Coupe, Model: Hyundai Elantra Coupe 2014Pages: 550, PDF Size: 45.11 MB
Page 102 of 550
Features of your vehicle
16 4
Operating door locks from
inside the vehicle
With the door lock button
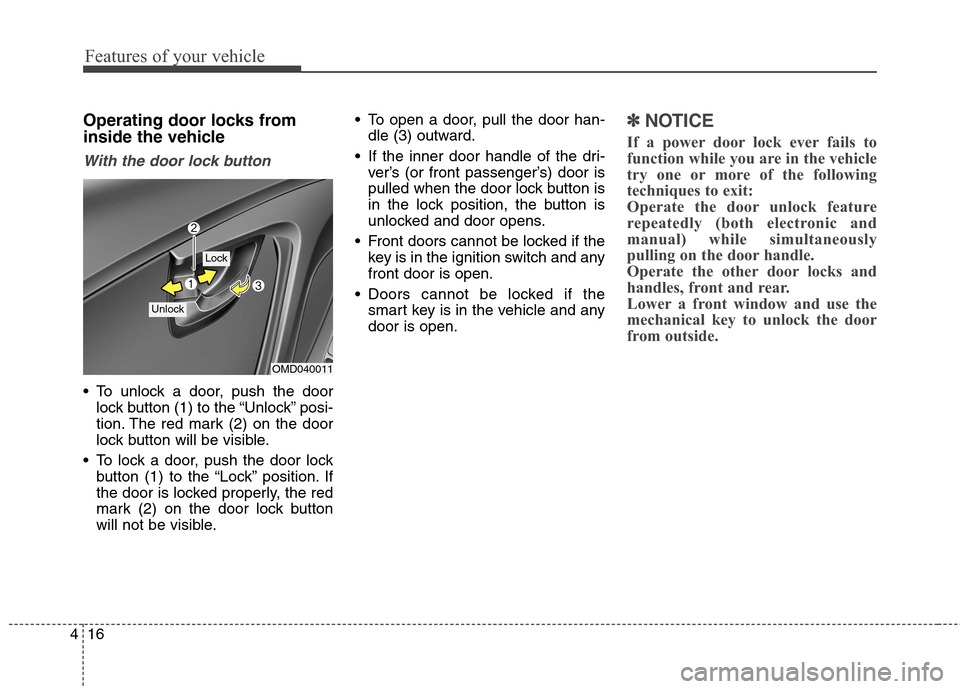
To unlock a door, push the door
lock button (1) to the “Unlock” posi-
tion. The red mark (2) on the door
lock button will be visible.
To lock a door, push the door lock
button (1) to the “Lock” position. If
the door is locked properly, the red
mark (2) on the door lock button
will not be visible. To open a door, pull the door han-
dle (3) outward.
If the inner door handle of the dri-
ver’s (or front passenger’s) door is
pulled when the door lock button is
in the lock position, the button is
unlocked and door opens.
Front doors cannot be locked if the
key is in the ignition switch and any
front door is open.
Doors cannot be locked if the
smart key is in the vehicle and any
door is open.
✽ ✽
NOTICE
If a power door lock ever fails to
function while you are in the vehicle
try one or more of the following
techniques to exit:
Operate the door unlock feature
repeatedly (both electronic and
manual) while simultaneously
pulling on the door handle.
Operate the other door locks and
handles, front and rear.
Lower a front window and use the
mechanical key to unlock the door
from outside.
OMD040011
Lock
Unlock
Page 105 of 550
419
Features of your vehicle
Child-safety rear door locks
The child safety lock is provided to
help prevent children seated in the
rear from accidentally opening the
rear doors. The rear door safety locks
should be used whenever children
are in the vehicle.
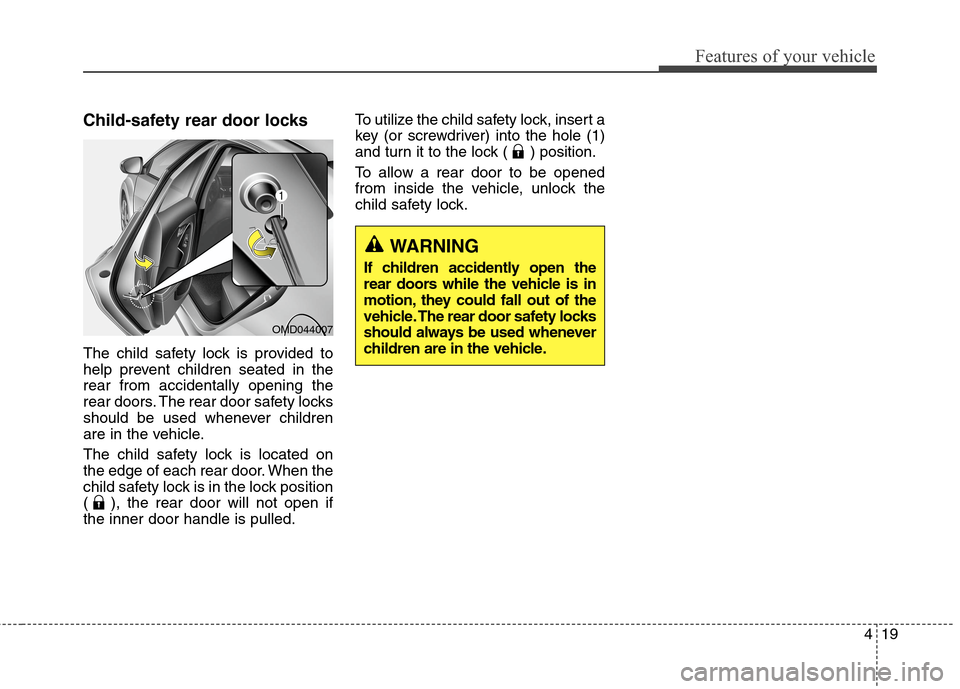
The child safety lock is located on
the edge of each rear door. When the
child safety lock is in the lock position
( ), the rear door will not open if
the inner door handle is pulled.To utilize the child safety lock, insert a
key (or screwdriver) into the hole (1)
and turn it to the lock ( ) position.
To allow a rear door to be opened
from inside the vehicle, unlock the
child safety lock.
WARNING
If children accidently open the
rear doors while the vehicle is in
motion, they could fall out of the
vehicle. The rear door safety locks
should always be used whenever
children are in the vehicle.
OMD044007
Page 106 of 550
Features of your vehicle
20 4
This system helps to protect your
vehicle and valuables. The horn will
sound and the hazard warning lights
will blink continuously if any of the
following occurs:
- A door is opened without using the
remote key or smart key.
- The trunk is opened without using
the remote key or smart key.
- The engine hood is opened.
The alarm continues for 30 seconds,
then the system resets. To turn off
the alarm, unlock the doors with the
remote key or smart key.
The Theft Alarm System automati-
cally sets 30 seconds after you lock
the doors and the trunk. For the sys-
tem to activate, you must lock the
doors and the trunk from outside the
vehicle with the remote key or smart
key or by pressing the button on the
outside of the door handles with the
smart key in your possession.
The hazard warning lights will blink
and the chime will sound once to
indicate the system is armed.Once the security system is set, open-
ing any door, the trunk, or the hood
without using the remote key or smart
key will cause the alarm to activate.
The Theft Alarm System will not set if
the hood, the trunk, or any door is
not fully closed. If the system will not
set, check the hood, the trunk, or the
doors are fully closed.
Do not attempt to alter this system or
add other devices to it.✽ ✽
NOTICE
• Do not lock the doors until all pas-
sengers have left the vehicle. If the
remaining passenger leaves the
vehicle when the system is armed,
the alarm will be activated.
• If the vehicle is not disarmed with
the remote key or smart key, open
the doors by using the mechanical
key and place the ignition switch in
the ON position (for remote key)
or start the engine (for smart key)
by directly pressing the Engine
Start/Stop button with the smart
key.
• When the system is disarmed but a
door or trunk is not opened within
30 seconds, the system will be
rearmed.
THEFT-ALARM SYSTEM
Page 110 of 550
Features of your vehicle
24 4
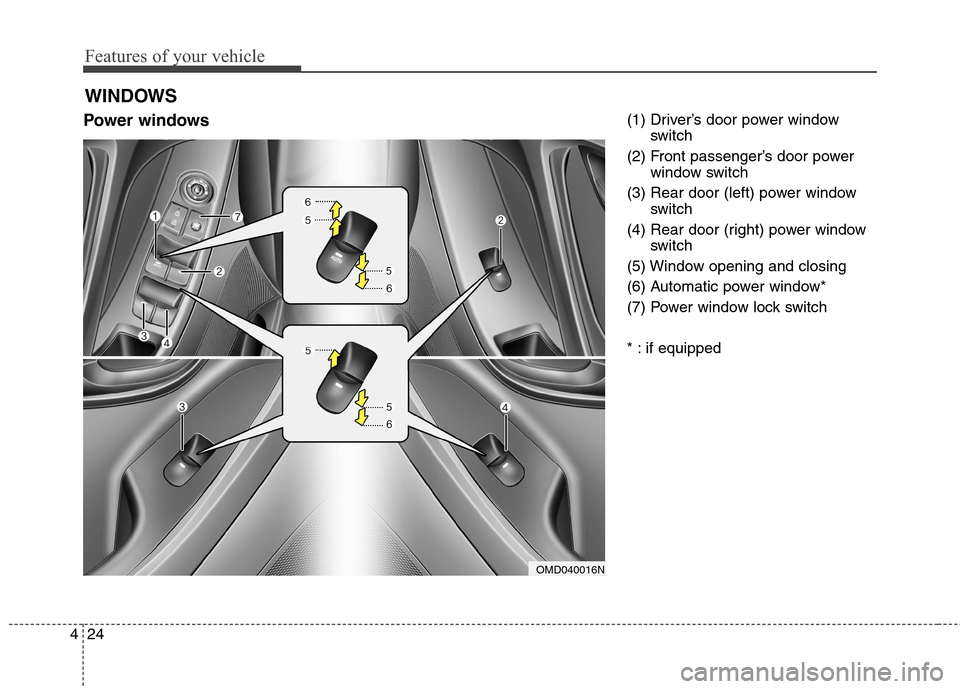
Power windows (1) Driver’s door power window
switch
(2) Front passenger’s door power
window switch
(3) Rear door (left) power window
switch
(4) Rear door (right) power window
switch
(5) Window opening and closing
(6) Automatic power window*
(7) Power window lock switch
* : if equipped
WINDOWS
OMD040016N
Page 111 of 550
425
Features of your vehicle
The ignition switch must be in the ON
position to be able to raise or lower
the windows. Each door has a Power
Window switch to control that door's
window. The driver has a Power
Window Lock switch which can block
the operation of passenger windows.
The power windows will operate for
approximately 30 seconds after the
ignition switch is placed in the ACC
or LOCK/OFF position. However, if
the front doors are opened, the
Power Windows cannot be operated
even within the 30 second period.✽ ✽
NOTICE
• In cold and wet climates, power
windows may not work properly
due to freezing conditions.
• While driving with the rear win-
dows down or with the sunroof (if
equipped) opened (or partially
opened), your vehicle may demon-
strate a wind buffeting or pulsation
noise. This noise is normal and can
be reduced or eliminated by taking
the following actions. If the noise
occurs with one or both of the rear
windows down, partially lower
both front windows approximately
one inch. If you experience the
noise with the sunroof open, slight-
ly close the sunroof.
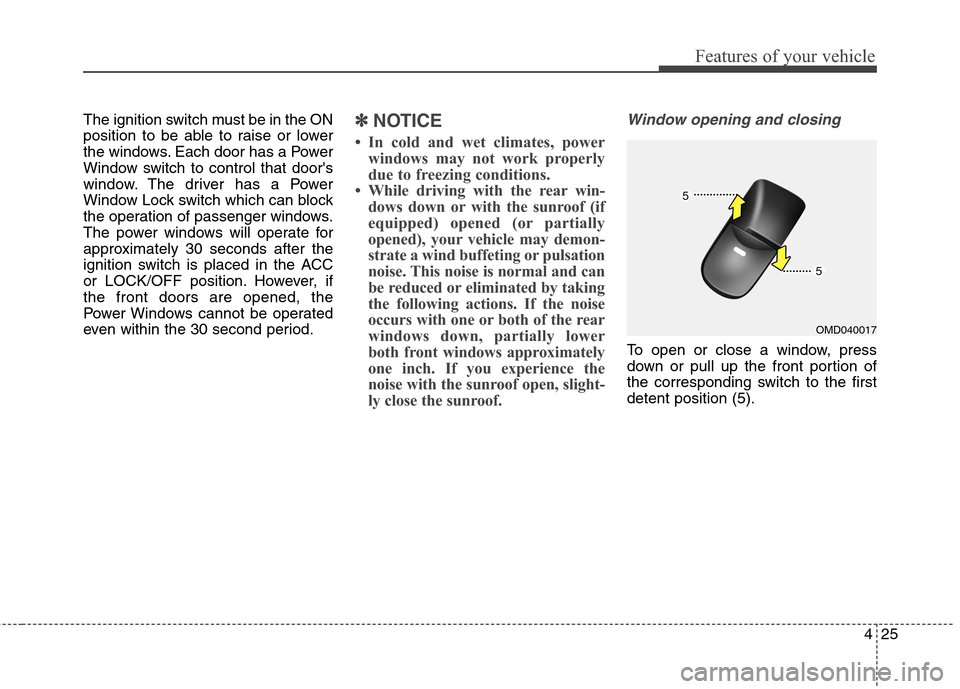
Window opening and closing
To open or close a window, press
down or pull up the front portion of
the corresponding switch to the first
detent position (5).
OMD040017
Page 113 of 550
427
Features of your vehicle
Automatic reversal (if equipped)
If a window senses any obstacle while
it is closing automatically, it will stop
and lower approximately 12 inches.
(30 cm) to allow the object to be
cleared.
If the window detects the resistance
while the power window switch is
pulled up continuously, the window will
stop upward movement then lower
approximately 1 inches. (2.5 cm).
If the power window switch is pulled
up continuously again within 5 sec-
onds after the window is lowered by
the automatic window reversal fea-
ture, the automatic window reversal
will not operate.
✽ ✽
NOTICE
The automatic reverse feature is
only active when the “auto up” fea-
ture is used by fully pulling up the
switch to the second detent.
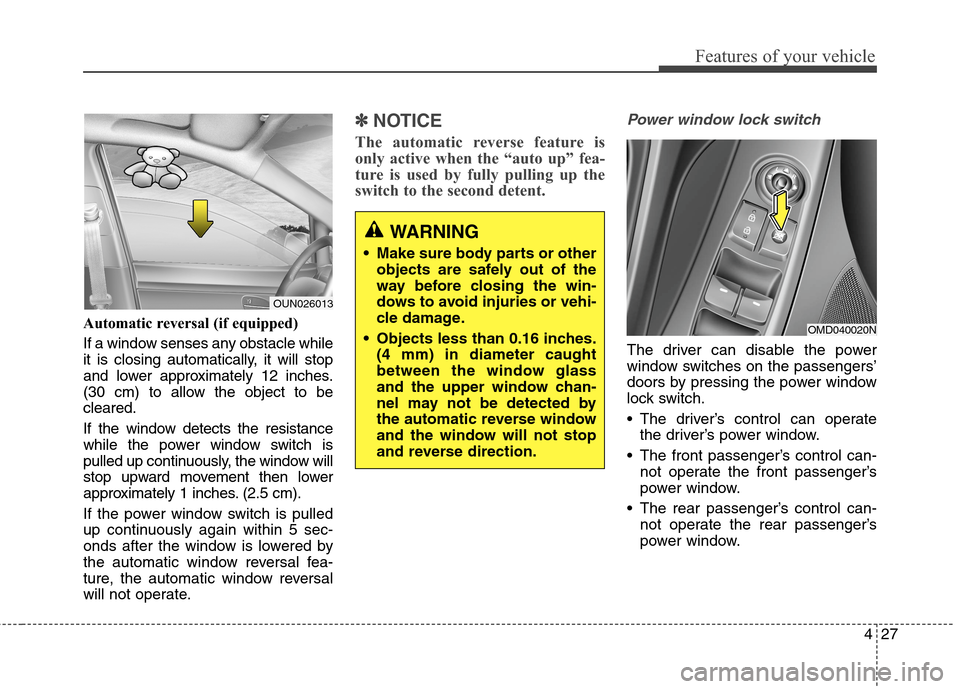
Power window lock switch
The driver can disable the power
window switches on the passengers’
doors by pressing the power window
lock switch.
The driver’s control can operate
the driver’s power window.
The front passenger’s control can-
not operate the front passenger’s
power window.
The rear passenger’s control can-
not operate the rear passenger’s
power window.
OMD040020N
WARNING
Make sure body parts or other
objects are safely out of the
way before closing the win-
dows to avoid injuries or vehi-
cle damage.
Objects less than 0.16 inches.
(4 mm) in diameter caught
between the window glass
and the upper window chan-
nel may not be detected by
the automatic reverse window
and the window will not stop
and reverse direction.
OUN026013
Page 128 of 550
Features of your vehicle
42 4
Inside rearview mirror
Before you start driving, adjust the
rearview mirror to the center on the
view through the rear window.
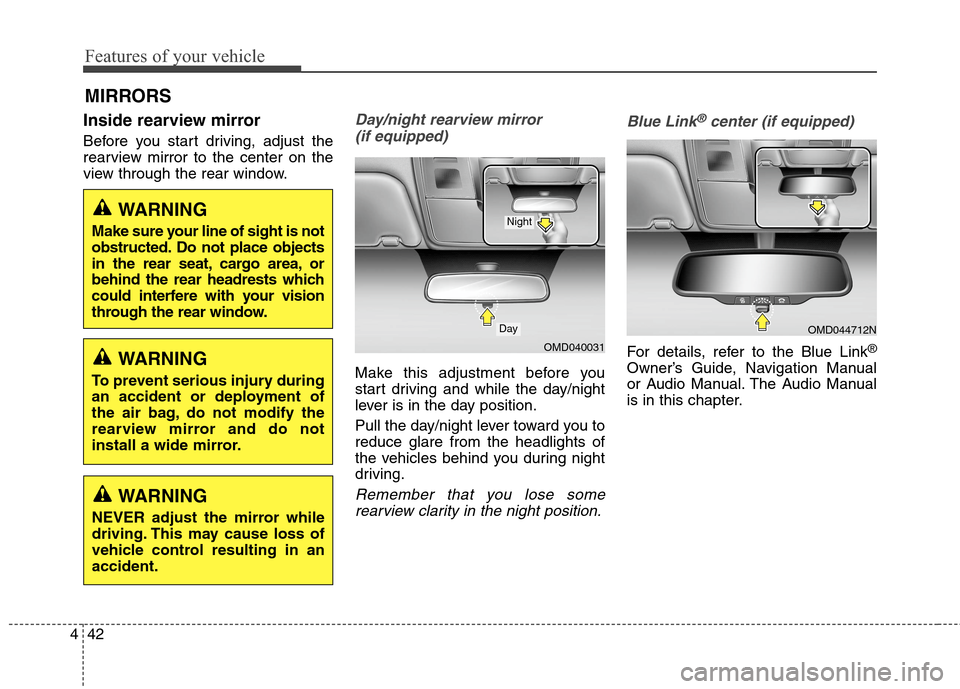
Day/night rearview mirror
(if equipped)
Make this adjustment before you
start driving and while the day/night
lever is in the day position.
Pull the day/night lever toward you to
reduce glare from the headlights of
the vehicles behind you during night
driving.
Remember that you lose some
rearview clarity in the night position.Blue Link
®center (if equipped)
For details, refer to the Blue Link®
Owner’s Guide, Navigation Manual
or Audio Manual. The Audio Manual
is in this chapter.
MIRRORS
WARNING
Make sure your line of sight is not
obstructed. Do not place objects
in the rear seat, cargo area, or
behind the rear headrests which
could interfere with your vision
through the rear window.
WARNING
To prevent serious injury during
an accident or deployment of
the air bag, do not modify the
rearview mirror and do not
install a wide mirror.
WARNING
NEVER adjust the mirror while
driving. This may cause loss of
vehicle control resulting in an
accident.
OMD040031
Day
Night
OMD044712N
Page 129 of 550
443
Features of your vehicle
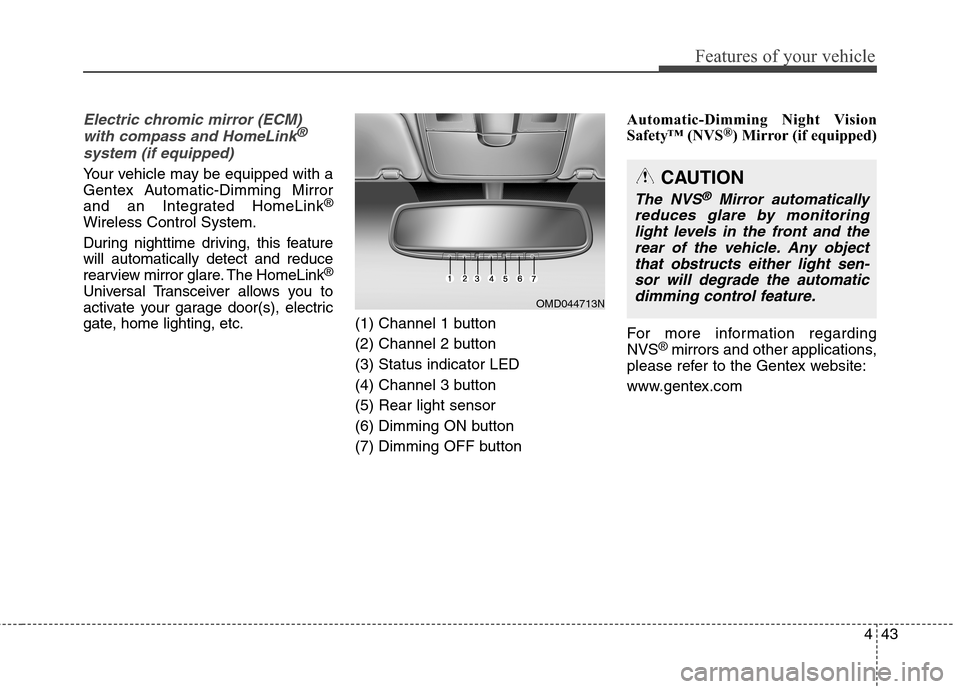
Electric chromic mirror (ECM)
with compass and HomeLink®
system (if equipped)
Your vehicle may be equipped with a
Gentex Automatic-Dimming Mirror
and an Integrated HomeLink
®
Wireless Control System.
During nighttime driving, this feature
will automatically detect and reduce
rearview mirror glare. The HomeLink
®
Universal Transceiver allows you to
activate your garage door(s), electric
gate, home lighting, etc.
(1) Channel 1 button
(2) Channel 2 button
(3) Status indicator LED
(4) Channel 3 button
(5) Rear light sensor
(6) Dimming ON button
(7) Dimming OFF buttonAutomatic-Dimming Night Vision
Safety™ (NVS
®) Mirror (if equipped)
For more information regarding
NVS
®mirrors and other applications,
please refer to the Gentex website:
www.gentex.com
OMD044713N
CAUTION
The NVS®Mirror automatically
reduces glare by monitoring
light levels in the front and the
rear of the vehicle. Any object
that obstructs either light sen-
sor will degrade the automatic
dimming control feature.
Page 134 of 550
Features of your vehicle
48 4
This device complies with Part 15
of the FCC Rules.
Operation is subject to the following
two conditions:
1. This device may not cause harm-
ful interference, and
2. This device must accept any inter-
ference received, including inter-
ference that may cause undesired
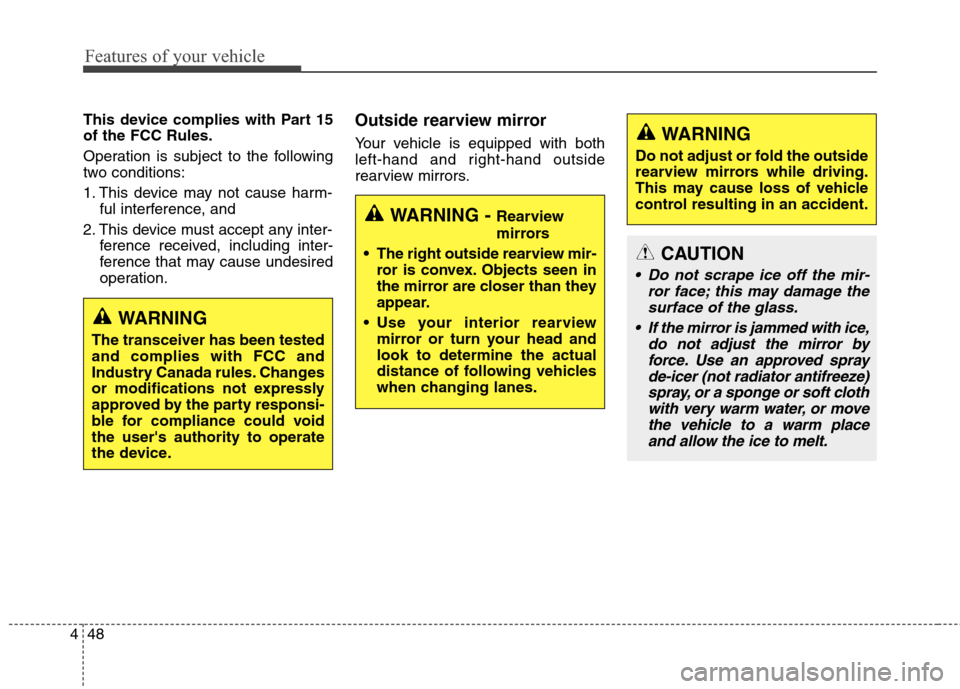
operation.Outside rearview mirror
Your vehicle is equipped with both
left-hand and right-hand outside
rearview mirrors.
WARNING
The transceiver has been tested
and complies with FCC and
Industry Canada rules. Changes
or modifications not expressly
approved by the party responsi-
ble for compliance could void
the user's authority to operate
the device.
WARNING - Rearview
mirrors
The right outside rearview mir-
ror is convex. Objects seen in
the mirror are closer than they
appear.
Use your interior rearview
mirror or turn your head and
look to determine the actual
distance of following vehicles
when changing lanes.
WARNING
Do not adjust or fold the outside
rearview mirrors while driving.
This may cause loss of vehicle
control resulting in an accident.
CAUTION
Do not scrape ice off the mir-
ror face; this may damage the
surface of the glass.
If the mirror is jammed with ice,
do not adjust the mirror by
force. Use an approved spray
de-icer (not radiator antifreeze)
spray, or a sponge or soft cloth
with very warm water, or move
the vehicle to a warm place
and allow the ice to melt.
Page 135 of 550
449
Features of your vehicle
Blind zone mirror
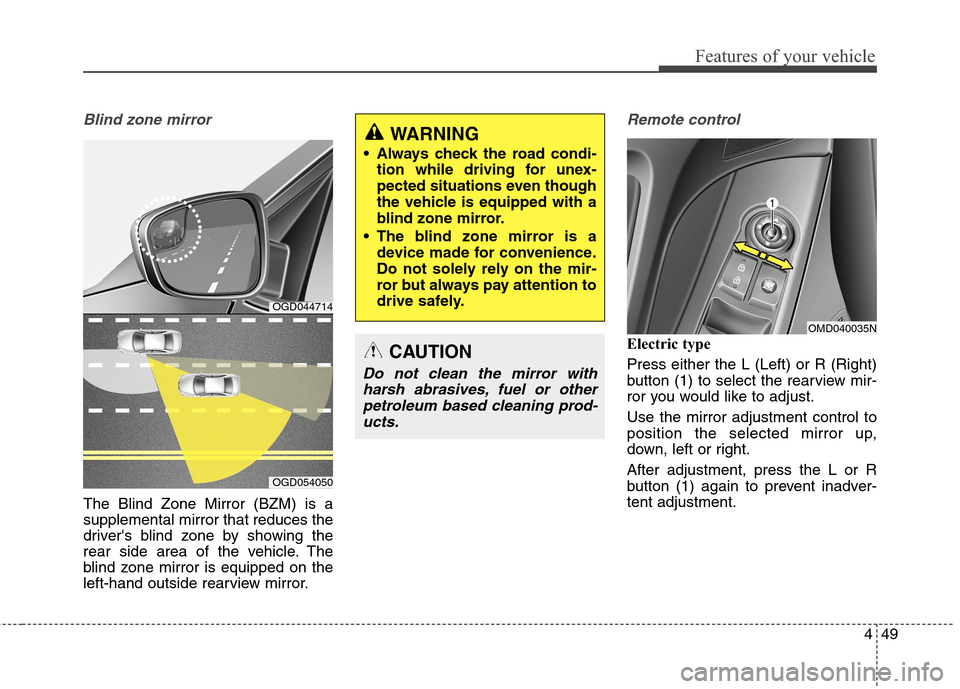
The Blind Zone Mirror (BZM) is a
supplemental mirror that reduces the
driver's blind zone by showing the
rear side area of the vehicle. The
blind zone mirror is equipped on the
left-hand outside rearview mirror.
Remote control
Electric type
Press either the L (Left) or R (Right)
button (1) to select the rearview mir-
ror you would like to adjust.
Use the mirror adjustment control to
position the selected mirror up,
down, left or right.
After adjustment, press the L or R
button (1) again to prevent inadver-
tent adjustment.
OMD040035N
OGD044714
OGD054050
WARNING
Always check the road condi-
tion while driving for unex-
pected situations even though
the vehicle is equipped with a
blind zone mirror.
The blind zone mirror is a
device made for convenience.
Do not solely rely on the mir-
ror but always pay attention to
drive safely.
CAUTION
Do not clean the mirror with
harsh abrasives, fuel or other
petroleum based cleaning prod-
ucts.