rear Hyundai Elantra Coupe 2014 Repair Manual
[x] Cancel search | Manufacturer: HYUNDAI, Model Year: 2014, Model line: Elantra Coupe, Model: Hyundai Elantra Coupe 2014Pages: 550, PDF Size: 45.11 MB
Page 206 of 550
Features of your vehicle
120 4
✽
✽
NOTICE
• If you install an after market HID
(high intensity discharge) head
lamp, your vehicle's audio and
electronic devices may malfunc-
tion.
• Prevent chemicals such as per-
fume, cosmetic oil, sun cream,
hand cleaner, and air freshener
from contacting the interior parts
because they may cause damage
or discoloration.
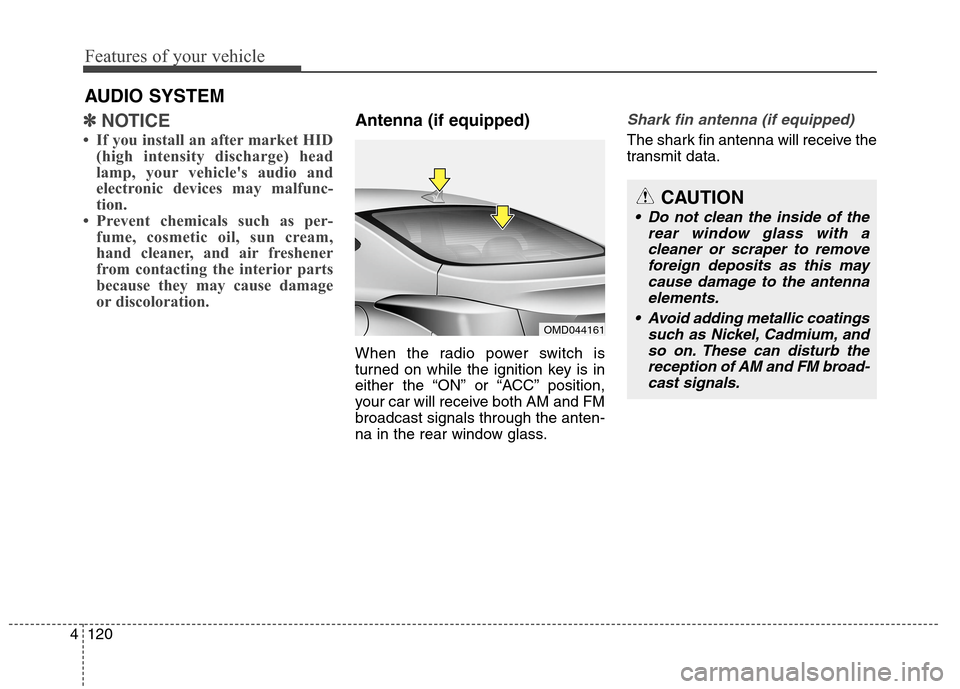
Antenna (if equipped)
When the radio power switch is
turned on while the ignition key is in
either the “ON” or “ACC” position,
your car will receive both AM and FM
broadcast signals through the anten-
na in the rear window glass.
Shark fin antenna (if equipped)
The shark fin antenna will receive the
transmit data.
AUDIO SYSTEM
OMD044161
CAUTION
• Do not clean the inside of the
rear window glass with a
cleaner or scraper to remove
foreign deposits as this may
cause damage to the antenna
elements.
Avoid adding metallic coatings
such as Nickel, Cadmium, and
so on. These can disturb the
reception of AM and FM broad-
cast signals.
Page 335 of 550
4249
Features of your vehicle
REAR VIEW CAMERA
(if equipped)
The system has been equipped
with a rear view camera for user
safety by allowing a wider rear
range of vision.
The rear view camera will automat-
ically operate when the ignition key
is turned ON and the shift lever is
set to R (Revers).
The rear view camera will automat-
ically stop operating when shift
lever is selected out of R (Reverse).
CAUTION
The rear view camera has been
equipped with an optical lens
to provide a wider range of
vision and may appear differ-
ent from the actual distance.
For safety, directly check the
rear and left/right sides.
Page 342 of 550
Before entering the vehicle
• Be sure all windows, outside mir-
ror(s), and outside lights are clean
and unobstructed.
Remove frost, snow, or ice.
Visually check the tires for uneven
wear and damage.
Check under the vehicle for any
sign of leaks.
Be sure there are no obstacles
behind you if you intend to back up.
Before starting
Make sure the hood, the trunk, and
the doors are securely closed and
locked.
Adjust the position of the seat and
steering wheel.
Adjust the inside and outside
rearview mirrors.
Verify all the lights work.
Fasten your seatbelt. Check that all
passengers have fastened their
seatbelts.
Check the gauges and indicators in
the instrument panel and the mes-
sages on the instrument display
when the ignition switch is in the
ON position.
Check that any items you are car-
rying are stored properly or fas-
tened down securely.
53
Driving your vehicle
WARNING - CALIFORNIA
PROPOSITION 65 WARNING
Engine exhaust and a wide vari-
ety of automobile components
including components found in
the interior furnishings in a
vehicle, contain or emit harmful
chemicals known to the State of
California to cause cancer and
birth defects and reproductive
harm. In addition, certain fluids
contained in vehicles and cer-
tain products of components
contain or emit chemicals
known to the State of California
to cause cancer and birth
defects or other reproductive
harm.
BEFORE DRIVING
Page 369 of 550
Driving your vehicle
30 5
Disc brakes wear indicator
When your brake pads are worn and
new pads are required, you will hear
a high pitched warning sound from
your front or rear brakes. You may
hear this sound come and go or it
may occur whenever you depress
the brake pedal.
Please remember some driving con-
ditions or climates may cause a
brake squeal when you first apply (or
lightly apply) the brakes. This is nor-
mal and does not indicate a problem
with your brakes.
✽ ✽
NOTICE
Always replace brake pads as com-
plete front or rear axle sets.
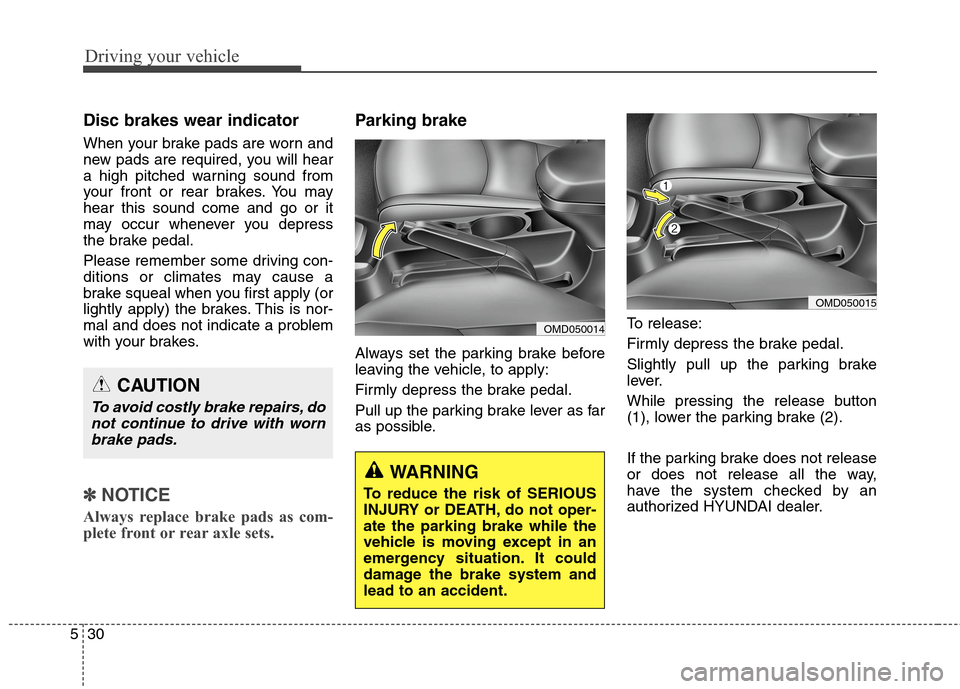
Parking brake
Always set the parking brake before
leaving the vehicle, to apply:
Firmly depress the brake pedal.
Pull up the parking brake lever as far
as possible.To release:
Firmly depress the brake pedal.
Slightly pull up the parking brake
lever.
While pressing the release button
(1), lower the parking brake (2).
If the parking brake does not release
or does not release all the way,
have the system checked by an
authorized HYUNDAI dealer.
OMD050014
CAUTION
To avoid costly brake repairs, do
not continue to drive with worn
brake pads.
WARNING
To reduce the risk of SERIOUS
INJURY or DEATH, do not oper-
ate the parking brake while the
vehicle is moving except in an
emergency situation. It could
damage the brake system and
lead to an accident.
OMD050015
Page 377 of 550
Driving your vehicle
38 5
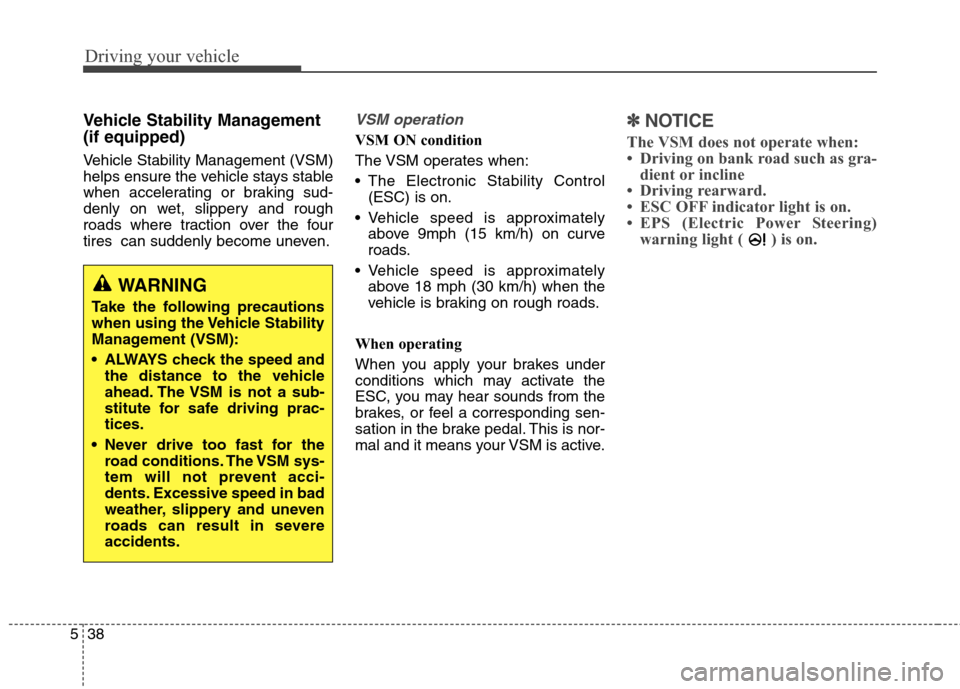
Vehicle Stability Management
(if equipped)
Vehicle Stability Management (VSM)
helps ensure the vehicle stays stable
when accelerating or braking sud-
denly on wet, slippery and rough
roads where traction over the four
tires can suddenly become uneven.
VSM operation
VSM ON condition
The VSM operates when:
The Electronic Stability Control
(ESC) is on.
Vehicle speed is approximately
above 9mph (15 km/h) on curve
roads.
Vehicle speed is approximately
above 18 mph (30 km/h) when the
vehicle is braking on rough roads.
When operating
When you apply your brakes under
conditions which may activate the
ESC, you may hear sounds from the
brakes, or feel a corresponding sen-
sation in the brake pedal. This is nor-
mal and it means your VSM is active.
✽ ✽
NOTICE
The VSM does not operate when:
• Driving on bank road such as gra-
dient or incline
• Driving rearward.
• ESC OFF indicator light is on.
• EPS (Electric Power Steering)
warning light ( ) is on.
WARNING
Take the following precautions
when using the Vehicle Stability
Management (VSM):
ALWAYS check the speed and
the distance to the vehicle
ahead. The VSM is not a sub-
stitute for safe driving prac-
tices.
Never drive too fast for the
road conditions. The VSM sys-
tem will not prevent acci-
dents. Excessive speed in bad
weather, slippery and uneven
roads can result in severe
accidents.
Page 394 of 550
555
Driving your vehicle
Two labels on your driver’s door sill
show how much weight your vehicle
was designed to carry: the Tire and
Loading Information Label and the
Certification Label.
Before loading your vehicle, familiar-
ize yourself with the following terms
for determining your vehicle's weight
ratings, from the vehicle's specifica-
tions and the Certification Label:
Base Curb Weight
This is the weight of the vehicle
including a full tank of fuel and all
standard equipment. It does not
include passengers, cargo, or option-
al equipment.
Vehicle Curb Weight
This is the weight of your new vehicle
when you picked it up from your deal-
er plus any aftermarket equipment.Cargo Weight
This figure includes all weight added
to the Base Curb Weight, including
cargo and optional equipment.
GAW (Gross Axle Weight)
This is the total weight placed on
each axle (front and rear) - including
vehicle curb weight and all payload.
GAWR (Gross Axle Weight Rating)
This is the maximum allowable
weight that can be carried by a single
axle (front or rear). These numbers
are shown on the Certification Label.
The total load on each axle must
never exceed its GAWR.GVW (Gross Vehicle Weight)
This is the Base Curb Weight plus
actual Cargo Weight plus passen-
gers.
GVWR (Gross Vehicle Weight
Rating)
This is the maximum allowable
weight of the fully loaded vehicle
(including all options, equipment,
passengers and cargo). The GVWR
is shown on the Certification Label
located on the driver’s door sill.
VEHICLE LOAD LIMIT
Page 396 of 550
557
Driving your vehicle
Vehicle capacity weight
849 lbs. (385 kg)
Vehicle capacity weight is the maxi-
mum combined weight of occupants
and cargo. If your vehicle is equipped
with a trailer, the combined weight
includes the tongue load.
Seating capacity
Total : 5 persons
(Front seat : 2 persons,
Rear seat : 3 persons)
Seating capacity is the maximum
number of occupants including a
driver, your vehicle may carry.
However, the seating capacity may
be reduced based upon the weight of
all of the occupants, and the weight
of the cargo being carried or towed.
Do not overload the vehicle as there
is a limit to the total weight, or load
limit including occupants and cargo,
the vehicle can carry.
Towing capacity
We do not recommend using this
vehicle for trailer towing.
Cargo capacity
The cargo capacity of your vehicle
will increase or decrease depending
on the weight and the number of
occupants and the tongue load, if
your vehicle is equipped with a trail-
er.
Page 399 of 550
Driving your vehicle
60 5
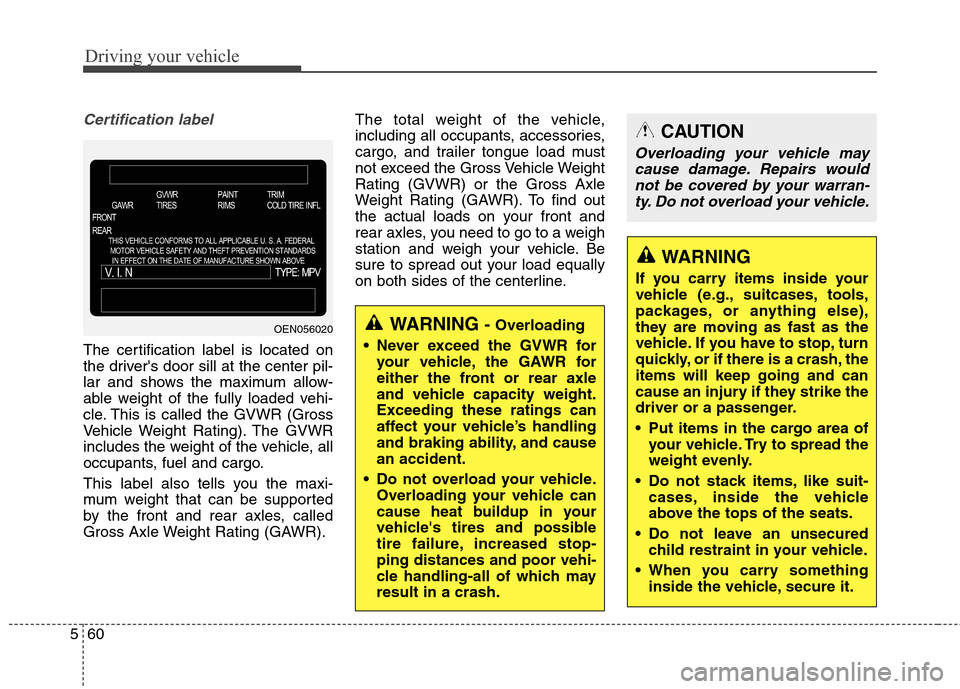
Certification label
The certification label is located on
the driver's door sill at the center pil-
lar and shows the maximum allow-
able weight of the fully loaded vehi-
cle. This is called the GVWR (Gross
Vehicle Weight Rating). The GVWR
includes the weight of the vehicle, all
occupants, fuel and cargo.
This label also tells you the maxi-
mum weight that can be supported
by the front and rear axles, called
Gross Axle Weight Rating (GAWR).The total weight of the vehicle,
including all occupants, accessories,
cargo, and trailer tongue load must
not exceed the Gross Vehicle Weight
Rating (GVWR) or the Gross Axle
Weight Rating (GAWR). To find out
the actual loads on your front and
rear axles, you need to go to a weigh
station and weigh your vehicle. Be
sure to spread out your load equally
on both sides of the centerline.
OEN056020
WARNING
If you carry items inside your
vehicle (e.g., suitcases, tools,
packages, or anything else),
they are moving as fast as the
vehicle. If you have to stop, turn
quickly, or if there is a crash, the
items will keep going and can
cause an injury if they strike the
driver or a passenger.
Put items in the cargo area of
your vehicle. Try to spread the
weight evenly.
Do not stack items, like suit-
cases, inside the vehicle
above the tops of the seats.
Do not leave an unsecured
child restraint in your vehicle.
When you carry something
inside the vehicle, secure it.
WARNING - Overloading
Never exceed the GVWR for
your vehicle, the GAWR for
either the front or rear axle
and vehicle capacity weight.
Exceeding these ratings can
affect your vehicle’s handling
and braking ability, and cause
an accident.
Do not overload your vehicle.
Overloading your vehicle can
cause heat buildup in your
vehicle's tires and possible
tire failure, increased stop-
ping distances and poor vehi-
cle handling-all of which may
result in a crash.
CAUTION
Overloading your vehicle may
cause damage. Repairs would
not be covered by your warran-
ty. Do not overload your vehicle.
Page 416 of 550
What to do in an emergency
16 6
Changing tires Follow these steps to change your
vehicle’s tire:
1.Park on a level, firm surface.
2.Move the shift lever into P (Park,
for automatic transaxle vehicle) or
neutral (for manual transaxle vehi-
cle), apply the parking brake, and
place the ignition switch in the
LOCK/OFF position.
3.Press the hazard warning flasher
button.
4.Remove the wheel lug nut wrench,
jack, jack handle, and spare tire
from the vehicle.
5.Block both the front and rear of the
tire diagonally opposite of the tire
you are changing.
WARNING
A vehicle can slip or roll off of a
jack causing serious injury or
death to you or those nearby.
Take the following safety pre-
cautions:
Never place any portion of
your body under a vehicle that
is supported by a jack.
NEVER attempt to change a
tire in the lane of traffic.
ALWAYS move the vehicle
completely off the road on
level, firm ground away from
traffic before trying to change
a tire. If you cannot find a
level, firm place off the road,
call a towing service for assis-
tance.
Be sure to use the jack pro-
vided with the vehicle.
(Continued)
(Continued)
ALWAYS place the jack on the
designated jacking positions
on the vehicle and NEVER on
the bumpers or any other part
of the vehicle for jacking sup-
port.
Do not start or run the engine
while the vehicle is on the
jack.
Do not allow anyone to remain
in the vehicle while it is on the
jack.
Keep children away from the
road and the vehicle.
Page 427 of 550
627
What to do in an emergency
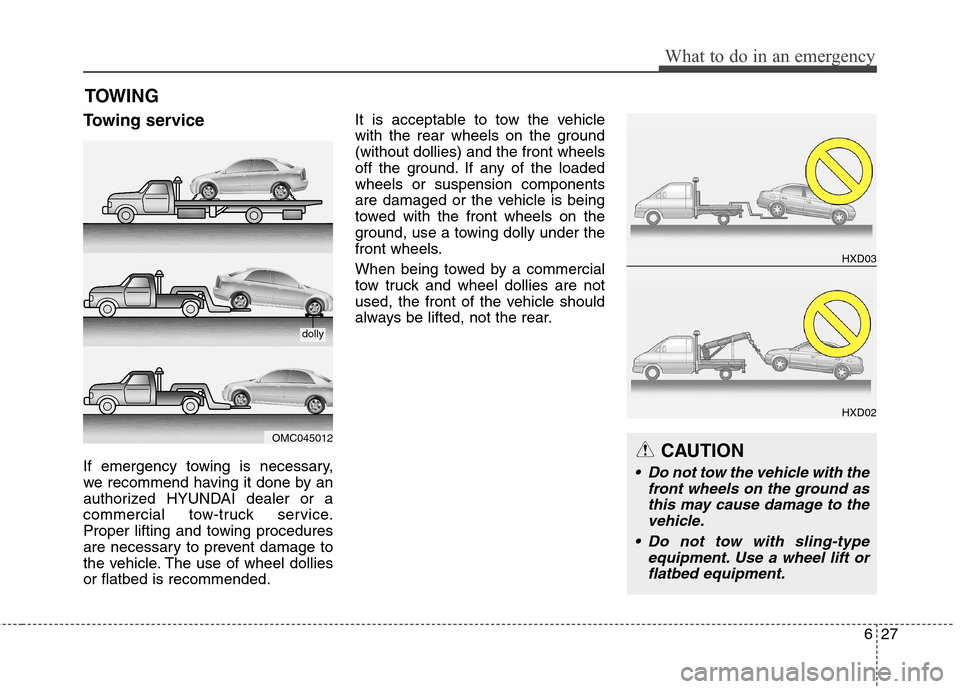
Towing service
If emergency towing is necessary,
we recommend having it done by an
authorized HYUNDAI dealer or a
commercial tow-truck service.
Proper lifting and towing procedures
are necessary to prevent damage to
the vehicle. The use of wheel dollies
or flatbed is recommended.It is acceptable to tow the vehicle
with the rear wheels on the ground
(without dollies) and the front wheels
off the ground. If any of the loaded
wheels or suspension components
are damaged or the vehicle is being
towed with the front wheels on the
ground, use a towing dolly under the
front wheels.
When being towed by a commercial
tow truck and wheel dollies are not
used, the front of the vehicle should
always be lifted, not the rear.
TOWING
OMC045012
HXD03
HXD02
dolly
CAUTION
Do not tow the vehicle with the
front wheels on the ground as
this may cause damage to the
vehicle.
Do not tow with sling-type
equipment. Use a wheel lift or
flatbed equipment.