lights Hyundai Elantra GT 2018 Owner's Guide
[x] Cancel search | Manufacturer: HYUNDAI, Model Year: 2018, Model line: Elantra GT, Model: Hyundai Elantra GT 2018Pages: 478, PDF Size: 13.64 MB
Page 158 of 478
3-73
Convenient features of your vehicle
3
Warning mode
If one of followings occurs, warning
messages will be displayed on the
LCD display for several seconds.
- Lower washer fluid (if equipped)
- Exterior lamp malfunction (if equipped)
- Blind Spot Detection (BSD) mal- function (if equipped)
- Autonomous Emergency Braking (AEB) malfunction
- Smart cruise control malfunction
- Tire Pressure Monitoring System (TPMS) malfunction
User settings mode
In this mode, you can change the
settings of the instrument cluster,
doors, lamps, etc.
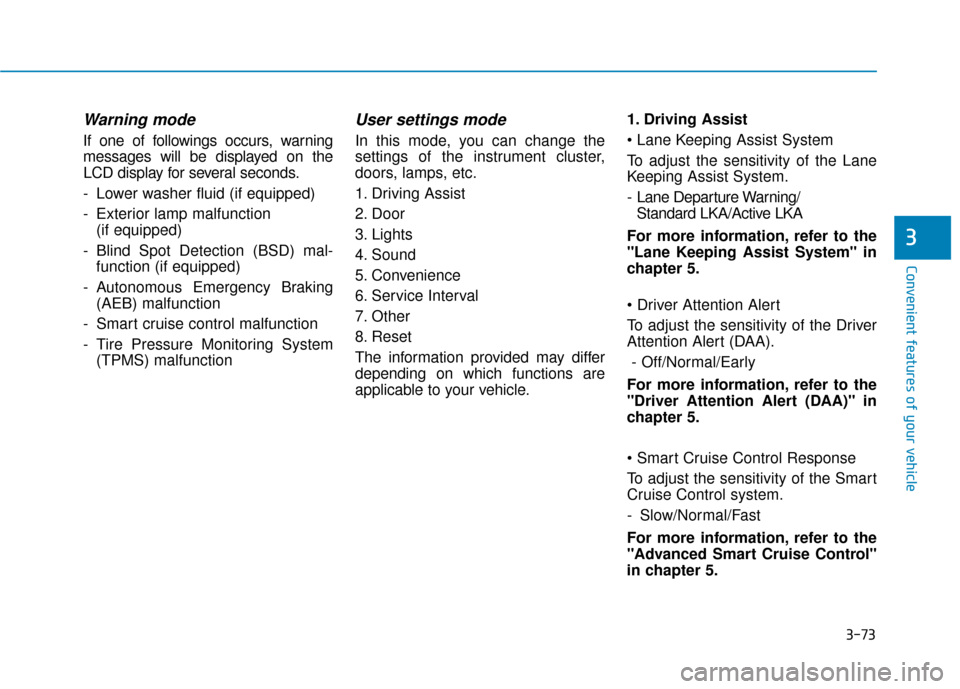
1. Driving Assist
2. Door
3. Lights
4. Sound
5. Convenience
6. Service Interval
7. Other
8. Reset
The information provided may differ
depending on which functions are
applicable to your vehicle. 1. Driving Assist
To adjust the sensitivity of the Lane
Keeping Assist System.
- Lane Departure Warning/
Standard LKA/Active LKA
For more information, refer to the
"Lane Keeping Assist System" in
chapter 5.
To adjust the sensitivity of the Driver
Attention Alert (DAA). - Off/Normal/Early
For more information, refer to the
"Driver Attention Alert (DAA)" in
chapter 5.
To adjust the sensitivity of the Smart
Cruise Control system.
- Slow/Normal/Fast
For more information, refer to the
"Advanced Smart Cruise Control"
in chapter 5.
Page 160 of 478
3-75
Convenient features of your vehicle
3
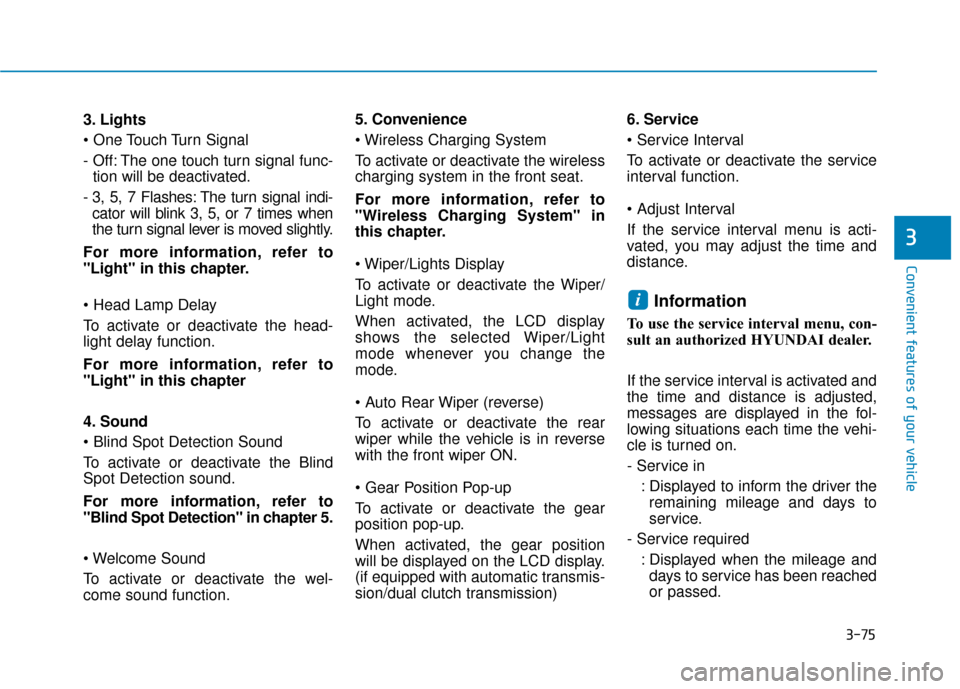
3. Lights
- Off: The one touch turn signal func-tion will be deactivated.
- 3, 5, 7 Flashes: The turn signal indi- cator will blink 3, 5, or 7 times when
the turn signal lever is moved slightly.
For more information, refer to
"Light" in this chapter.
To activate or deactivate the head-
light delay function.
For more information, refer to
"Light" in this chapter
4. Sound
To activate or deactivate the Blind
Spot Detection sound.
For more information, refer to
"Blind Spot Detection" in chapter 5.
To activate or deactivate the wel-
come sound function. 5. Convenience
To activate or deactivate the wireless
charging system in the front seat.
For more information, refer to
"Wireless Charging System" in
this chapter.
To activate or deactivate the Wiper/
Light mode.
When activated, the LCD display
shows the selected Wiper/Light
mode whenever you change the
mode.
To activate or deactivate the rear
wiper while the vehicle is in reverse
with the front wiper ON.
To activate or deactivate the gear
position pop-up.
When activated, the gear position
will be displayed on the LCD display.
(if equipped with automatic transmis-
sion/dual clutch transmission)
6. Service
To activate or deactivate the service
interval function.
If the service interval menu is acti-
vated, you may adjust the time and
distance.
Information
To use the service interval menu, con-
sult an authorized HYUNDAI dealer.
If the service interval is activated and
the time and distance is adjusted,
messages are displayed in the fol-
lowing situations each time the vehi-
cle is turned on.
- Service in
: Displayed to inform the driver theremaining mileage and days to
service.
- Service required : Displayed when the mileage anddays to service has been reached
or passed.
i
Page 166 of 478
3-81
Convenient features of your vehicle
3
L
LI
IG
G H
H T
TI
IN
N G
G
Exterior Lights
Lighting control
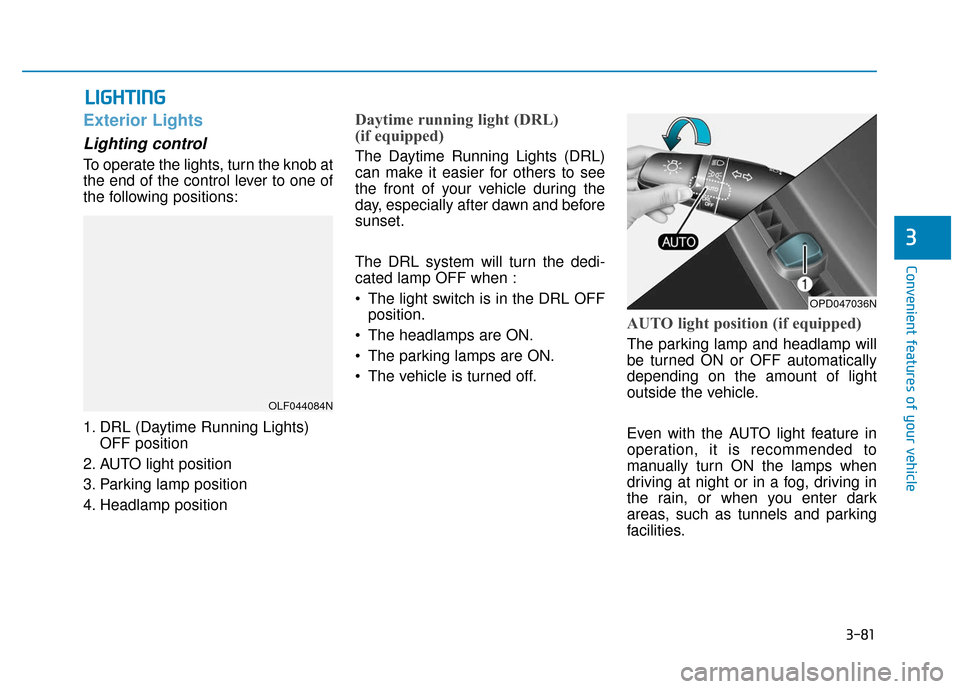
To operate the lights, turn the knob at
the end of the control lever to one of
the following positions:
1. DRL (Daytime Running Lights)
OFF position
2. AUTO light position
3. Parking lamp position
4. Headlamp position
Daytime running light (DRL)
(if equipped)
The Daytime Running Lights (DRL)
can make it easier for others to see
the front of your vehicle during the
day, especially after dawn and before
sunset.
The DRL system will turn the dedi-
cated lamp OFF when :
• The light switch is in the DRL OFF position.
The headlamps are ON.
The parking lamps are ON.
The vehicle is turned off.
AUTO light position (if equipped)
The parking lamp and headlamp will
be turned ON or OFF automatically
depending on the amount of light
outside the vehicle.
Even with the AUTO light feature in
operation, it is recommended to
manually turn ON the lamps when
driving at night or in a fog, driving in
the rain, or when you enter dark
areas, such as tunnels and parking
facilities.
OLF044084N
OPD047036N
Page 169 of 478
3-84
3. The Smart High Beam will turn onwhen vehicle speed is above
25 mph (40 km/h).
when the Smart High Beam is
operating, the Smart High Beam
will turn off and the high beam will
be on continuously.
you when the high beam is off, the
high beam will turn on without the
Smart High Beam canceled.
When you let go of the light switch,
the lever will move to the middle
and the high beam will turn off.
you when the high beam is on by
the Smart High Beam, the low
beam will be on and the Smart
High Beam will turn off.
headlamp position, the Smart
High Beam will turn off and the
low beam will be on continuously. When the Smart High Beam is oper-
ating, the high beam switches to low
beam in the below conditions.
- When the headlamp of an on-com-
ing vehicle is detected.
- When the tail lamp of a vehicle in front is detected.
- When headlamp/tail lamp of bicy- cle/motorcycle is detected.
- When the surrounding is bright enough high beams are not needed.
- When streetlights or other lights are detected.
- When the light switch is not in the AUTO position.
- When the Smart High Beam is off.
- When vehicle speed is below 15 mph (24 km/h).
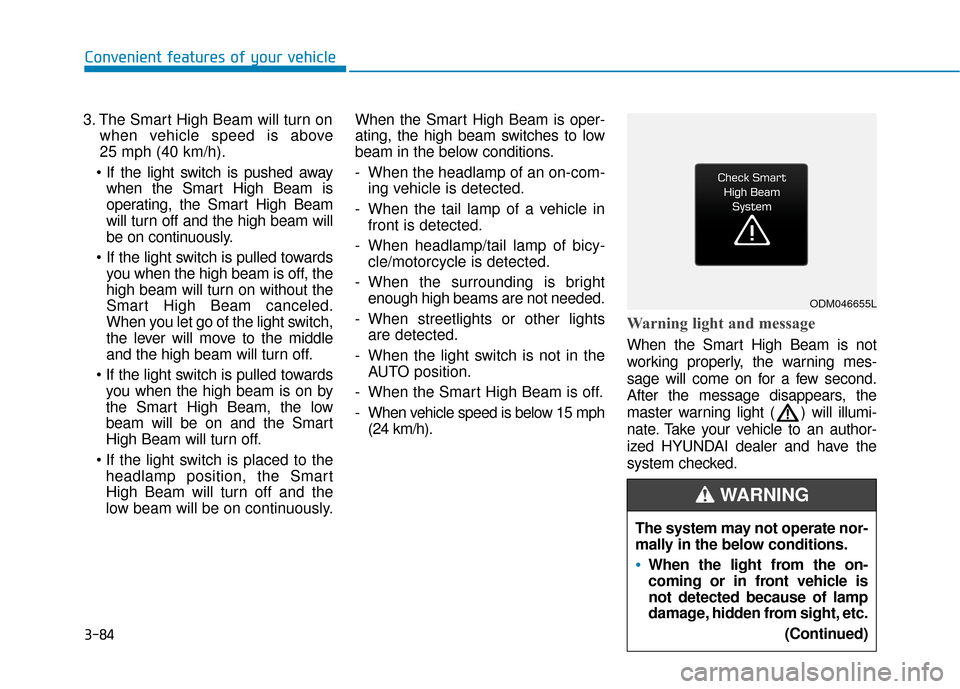
Warning light and message
When the Smart High Beam is not
working properly, the warning mes-
sage will come on for a few second.
After the message disappears, the
master warning light ( ) will illumi-
nate. Take your vehicle to an author-
ized HYUNDAI dealer and have the
system checked.
Convenient features of your vehicle
ODM046655L
The system may not operate nor-
mally in the below conditions.
When the light from the on-
coming or in front vehicle is
not detected because of lamp
damage, hidden from sight, etc.
(Continued)
WARNING
Page 172 of 478
3-87
Convenient features of your vehicle
3
Headlamp delay function (if equipped)
If the key is removed from the ignition
switch or placed in the ACC position
or the LOCK/OFF position with the
headlamps ON, the headlamps
(and/or parking lamps) remain on for
about 5 minutes. However, if the dri-
ver’s door is opened and closed, the
headlights are turned off after 15
seconds. Also, with the engine off if
the driver's door is opened and
closed, the headlamps (and/or park-
ing lamps) are turned off after 15
seconds.
The headlamps (and/or parking
lamps) can be turned off by pressing
the lock button on the remote key or
smart key twice or turning the light
switch to the OFF or AUTO position.
You can activate or deactivate the
Headlamp Delay function from the
User Settings Mode (Light) on the
LCD display.
For more information, refer to the
"LCD Display" section in this
chapter. If the driver gets out of the vehicle
through other doors (except dri-
ver's door), the battery saver func-
tion does not operate and the
headlamp delay function does not
turn off automatically. Therefore, It
causes the battery to be dis-
charged. In this case, make sure
to turn off the lamp before getting
out of the vehicle.
Interior Lights
Do not use the interior lights for
extended periods when the vehi-
cle is turned off or the battery will
discharge.
Interior lamp AUTO cut
The interior lamps will automatically
go off approximately 20 minutes after
the engine is turned off and the
doors are closed. If a door is opened,
the lamp will go off 40 minutes after
the engine is turned off. If the doors
are locked by the remote key or
smart key and the vehicle enters the
armed stage of the theft alarm sys-
tem, the lamps will go off five sec-
onds later.
NOTICE
NOTICE
Do not use the interior lights
when driving in the dark. The inte-
rior lights may obscure your view
and cause an accident.
WARNING
Page 223 of 478
5-4
Driving your vehicle
Before Entering the Vehicle
• Be sure all windows, outside mir-ror(s), and outside lights are clean
and unobstructed.
Remove frost, snow, or ice.
Visually check the tires for uneven wear and damage.
Check under the vehicle for any sign of leaks.
Be sure there are no obstacles behind you if you intend to back up.
Before Starting
Make sure the hood, the liftgate,and the doors are securely closed
and locked.
Adjust the position of the seat and steering wheel.
Adjust the inside and outside rearview mirrors.
Verify all the lights work.
Fasten your seatbelt. Check that all passengers have fastened their
seatbelts.
Check the gauges and indicators in the instrument panel and the mes-
sages on the instrument display
when the ignition switch is in the
ON position.
Check that any items you are car- rying are stored properly or fas-
tened down securely.
CALIFORNIA PROPOSITION 65
WARNING
Engine exhaust and a wide vari-
ety of automobile components
including components found in
the interior furnishings in a
vehicle, contain or emit harmful
chemicals known to the State of
California to cause cancer and
birth defects and reproductive
harm. In addition, certain fluids
contained in vehicles and cer-
tain products of components
contain or emit chemicals
known to the State of California
to cause cancer and birth
defects or other reproductive
harm.WARNING
B B
E
EF
FO
O R
RE
E
D
D R
RI
IV
V I
IN
N G
G
Page 226 of 478
5-7
Driving your vehicle
5
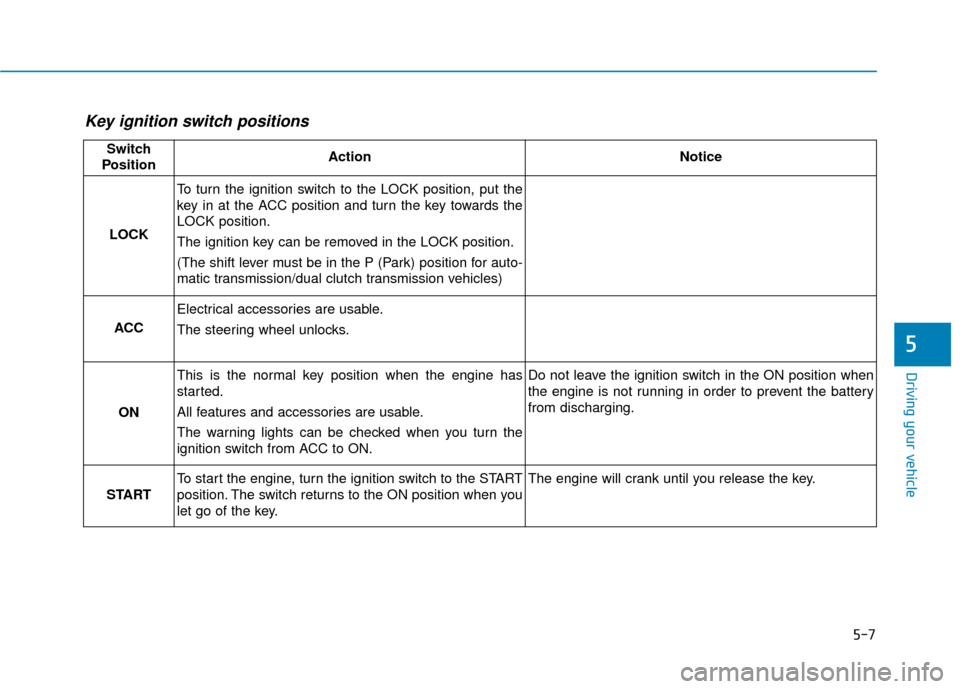
Key ignition switch positions
Switch
PositionActionNotice
LOCK
To turn the ignition switch to the LOCK position, put the
key in at the ACC position and turn the key towards the
LOCK position.
The ignition key can be removed in the LOCK position.
(The shift lever must be in the P (Park) position for auto-
matic transmission/dual clutch transmission vehicles)
ACC
Electrical accessories are usable.
The steering wheel unlocks.
ON
This is the normal key position when the engine has
started.
All features and accessories are usable.
The warning lights can be checked when you turn the
ignition switch from ACC to ON.Do not leave the ignition switch in the ON position when
the engine is not running in order to prevent the battery
from discharging.
START
To start the engine, turn the ignition switch to the START
position. The switch returns to the ON position when you
let go of the key.The engine will crank until you release the key.
Page 230 of 478
5-11
Driving your vehicle
5
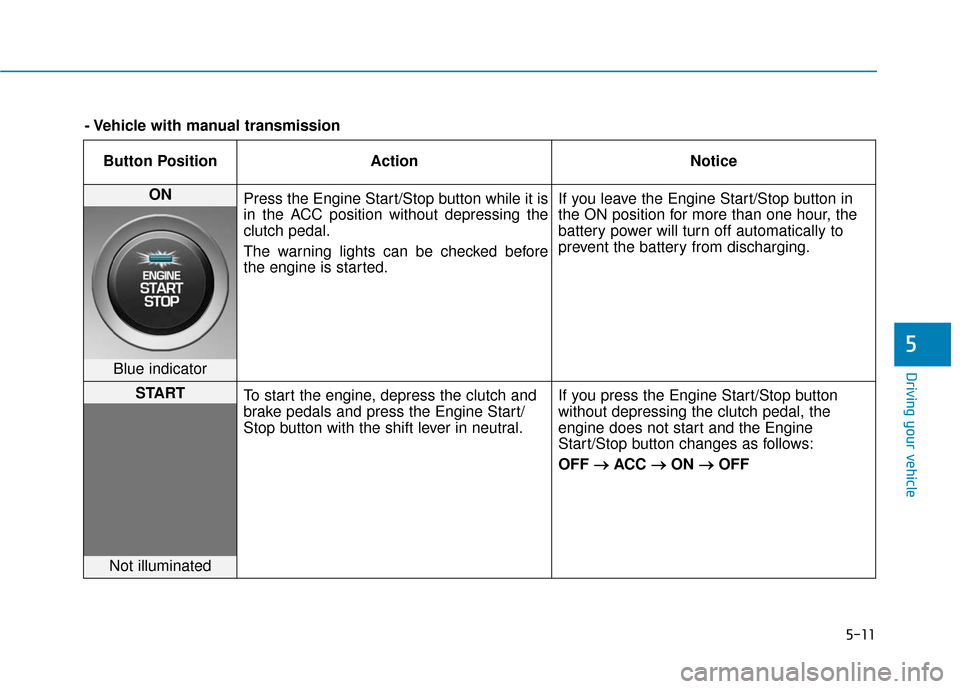
Button PositionAction Notice
ON
Press the Engine Start/Stop button while it is
in the ACC position without depressing the
clutch pedal.
The warning lights can be checked before
the engine is started. If you leave the Engine Start/Stop button in
the ON position for more than one hour, the
battery power will turn off automatically to
prevent the battery from discharging.
Blue indicator
START
To start the engine, depress the clutch and
brake pedals and press the Engine Start/
Stop button with the shift lever in neutral. If you press the Engine Start/Stop button
without depressing the clutch pedal, the
engine does not start and the Engine
Start/Stop button changes as follows:
OFF
→ →
ACC →
→
ON →
→
OFF
Not illuminated
- Vehicle with manual transmission
Page 232 of 478
5-13
Driving your vehicle
5
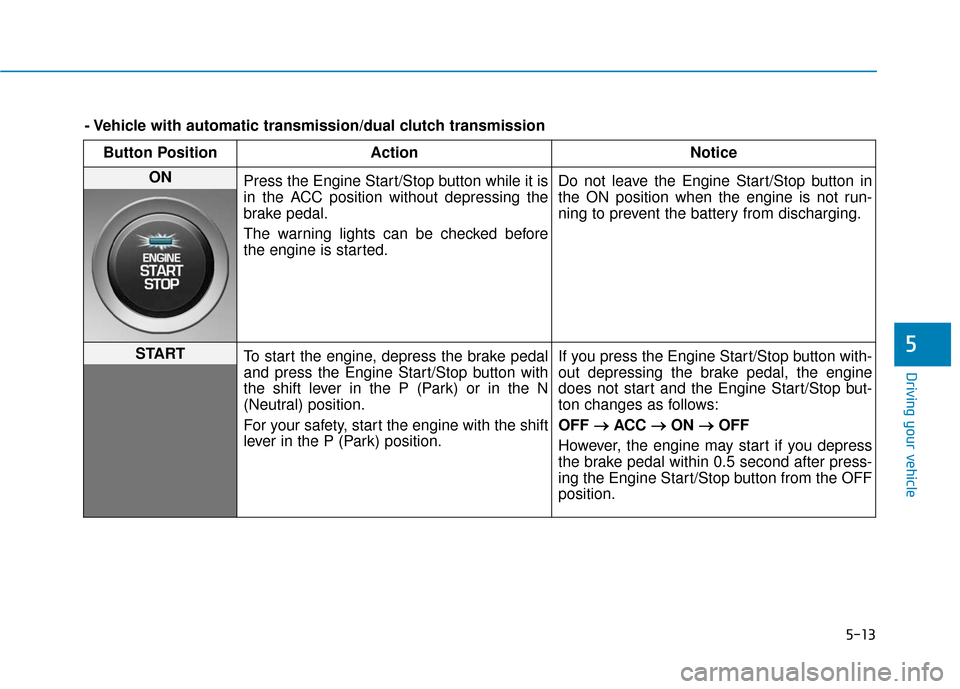
Button PositionAction Notice
ON
Press the Engine Start/Stop button while it is
in the ACC position without depressing the
brake pedal.
The warning lights can be checked before
the engine is started. Do not leave the Engine Start/Stop button in
the ON position when the engine is not run-
ning to prevent the battery from discharging.
START
To start the engine, depress the brake pedal
and press the Engine Start/Stop button with
the shift lever in the P (Park) or in the N
(Neutral) position.
For your safety, start the engine with the shift
lever in the P (Park) position. If you press the Engine Start/Stop button with-
out depressing the brake pedal, the engine
does not start and the Engine Start/Stop but-
ton changes as follows:
OFF
→ →
ACC →
→
ON →
→
OFF
However, the engine may start if you depress
the brake pedal within 0.5 second after press-
ing the Engine Start/Stop button from the OFF
position.
- Vehicle with automatic transmission/dual clutch transmission
Page 268 of 478
5-49
Driving your vehicle
5
ESC operation
ESC ON condition
When the ignition switch is in the ON
position, the ESC and the ESC OFF
indicator lights illuminate for approxi-
mately three seconds. After both
lights go off, the ESC is enabled.
When operating
When the ESC is in opera-
tion, the ESC indicator light
blinks:
When you apply your brakes under conditions which may lock the
wheels, you may hear sounds from
the brakes, or feel a corresponding
sensation in the brake pedal. This
is normal and it means your ESC is
active.
When the ESC activates, the engine may not respond to the
accelerator as it does under rou-
tine conditions.
If the Cruise Control was in use when the ESC activates, the
Cruise Control automatically disen-
gages. The Cruise Control can be
reengaged when the road condi-
tions allow. See "Cruise Control
System" later in this chapter. (if
equipped)
When moving out of the mud or driving on a slippery road, the
engine RPM (revolutions per
minute) may not increase even if
you press the accelerator pedal
deeply. This is to maintain the sta-
bility and traction of the vehicle and
does not indicate a problem.
ESC OFF condition
To cancel ESC operation :
State 1
Press the ESC OFF button briefly.
The ESC OFF indicator light and
message "Traction Control disabled“
will illuminate. In this state, the trac-
tion
control function of ESC (engine man-
agement) is disabled, but the brake
control function of ESC (braking
management) still operates.
Never drive too fast for the road
conditions or too quickly when
cornering. The ESC system will
not prevent accidents.
Excessive speed in turns, abrupt
maneuvers, and hydroplaning
on wet surfaces can result in
severe accidents.WARNING