ignition Hyundai Elantra GT 2018 Repair Manual
[x] Cancel search | Manufacturer: HYUNDAI, Model Year: 2018, Model line: Elantra GT, Model: Hyundai Elantra GT 2018Pages: 478, PDF Size: 13.64 MB
Page 272 of 478
5-53
Driving your vehicle
5
Hill-Start Assist Control (HAC)
The Hill-Start Assist Control (HAC)
helps prevent the vehicle from rolling
backwards when starting a vehicle
from a stop on a hill. The system
operates the brakes automatically for
approximately 2 seconds and releas-
es the brake after 2 seconds or when
the accelerator pedal is depressed.
The HAC does not operate whenthe shift lever is in P (Park) or N
(Neutral)
The HAC activates even though the ESC (Electronic Stability
Control) is off but does not acti-
vate when the ESC has malfunc-
tioned.
Good Braking Practices
Wet brakes can be dangerous! The
brakes may get wet if the vehicle is
driven through standing water or if it
is washed. Your vehicle will not stop
as quickly if the brakes are wet. Wet
brakes may cause the vehicle to pull
to one side. To dry the brakes, apply the brakes
lightly until the braking action returns
to normal, taking care to keep the
vehicle under control at all times. If
the braking action does not return to
normal, stop as soon as it is safe to
do so and call an authorized
HYUNDAI dealer for assistance.
DO NOT drive with your foot resting
on the brake pedal. Even light, but
constant pedal pressure can result in
the brakes overheating, brake wear,
and possibly even brake failure.
If a tire goes flat while you are driv-
ing, apply the brakes gently and
keep the vehicle pointed straight
ahead while you slow down. When
you are moving slowly enough for it
to be safe to do so, pull off the road
and stop in a safe location.
Keep your foot firmly on the brake
pedal when the vehicle is stopped to
prevent the vehicle from rolling for-
ward.
NOTICE
Always be ready to depress the
accelerator pedal when starting
off on a incline. The HAC activates
only for approximately 2 seconds.
WARNING
Whenever leaving the vehicle or
parking, always come to a com-
plete stop and continue to
depress the brake pedal. Move
the shift lever into the 1
stgear
(for manual transmission vehi-
cle) or P (Park, for automatic
transmission vehicle) position,
then apply the parking brake,
and place the ignition switch in
the LOCK/OFF position.
Vehicles parked with the park-
ing brake not applied or not
fully engaged may roll inadver-
tently and may cause injury to
the driver and others. ALWAYS
apply the parking brake before
exiting the vehicle.
WARNING
Page 275 of 478
5-56
Driving your vehicle
BSD (Blind Spot Detection) /
LCA (Lane Change Assist)
Operating conditions
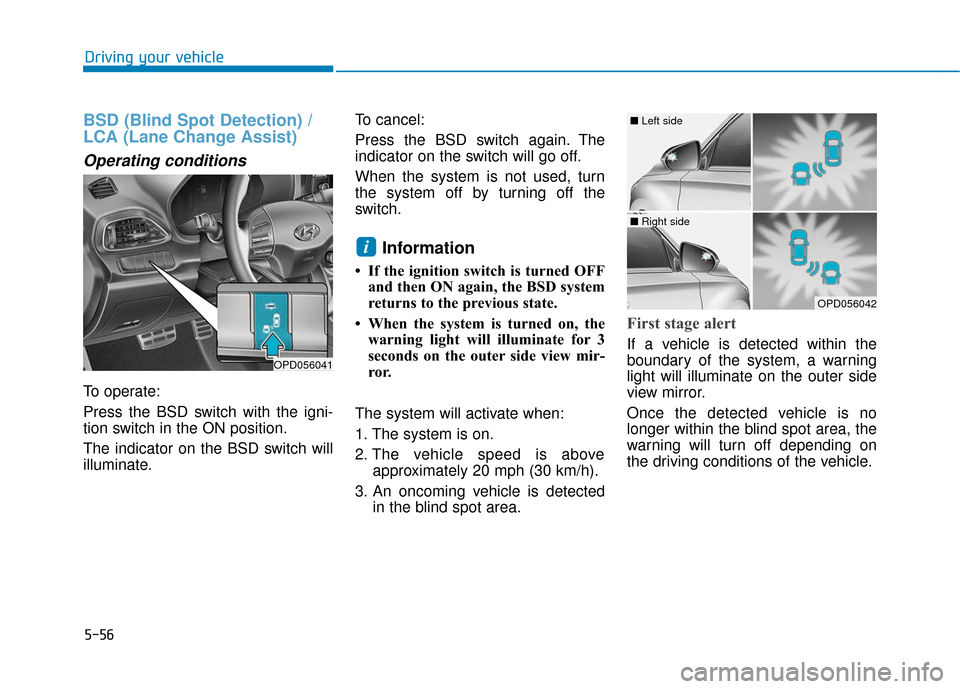
To operate:
Press the BSD switch with the igni-
tion switch in the ON position.
The indicator on the BSD switch will
illuminate.To cancel:
Press the BSD switch again. The
indicator on the switch will go off.
When the system is not used, turn
the system off by turning off the
switch.
Information
• If the ignition switch is turned OFF
and then ON again, the BSD system
returns to the previous state.
• When the system is turned on, the warning light will illuminate for 3
seconds on the outer side view mir-
ror.
The system will activate when:
1. The system is on.
2. The vehicle speed is above approximately 20 mph (30 km/h).
3. An oncoming vehicle is detected in the blind spot area.
First stage alert
If a vehicle is detected within the
boundary of the system, a warning
light will illuminate on the outer side
view mirror.
Once the detected vehicle is no
longer within the blind spot area, the
warning will turn off depending on
the driving conditions of the vehicle.
i
OPD056041
OPD056042
■ Left side
■ Right side
Page 281 of 478
5-62
Driving your vehicle
The Automatic Emergency Braking
(AEB) system is designed to help
detect and monitor the vehicle ahead
or detect a pedestrian (if equipped)
in the roadway through radar signals
and camera recognition to warn the
driver that a collision is imminent,
and if necessary, apply emergency
braking.
System Setting and Activation
System setting
The driver can activate the AEB by placing the ignition switch to the
ON position and by selecting:
'User Settings → Driving Assist →
Autonomous Emergency Braking'
The AEB deactivates, when the driv-
er deselects the system setting.
A A U
U T
TO
O M
M A
AT
TI
IC
C
(
( A
A U
U T
TO
O N
NO
O M
M O
OU
US
S)
)
E
E M
M E
ER
R G
G E
EN
N C
CY
Y
B
B R
RA
A K
KI
IN
N G
G
(
( A
A E
EB
B )
)
(
( I
IF
F
E
E Q
Q U
UI
IP
P P
PE
ED
D )
)
Take the following precautions
when using the Automatic
Emergency Braking (AEB):
This system is only a supple-
mental system and it is not
intended to, nor does it replace
the need for extreme care and
attention of the driver. The
sensing range and objects
detectable by the sensors are
limited. Pay attention to the
road conditions at all times.
NEVER drive too fast in accor-
dance with the road condi-
tions or while cornering.
Always drive cautiously to
prevent unexpected and sud-
den situations from occur-
ring. AEB does not stop the
vehicle completely and is not
a collision avoidance system.
WARNING
Page 294 of 478
5-75
Driving your vehicle
5
(Continued)
The system detects lane lines
and controls the steering
wheel by a camera, therefore,
if the lane lines are hard to
detect, the system may not
work properly.
Please refer to "Limitations of
the system".
Do not remove or damage the
related parts of LKAS.
You may not hear a warning
sound of LKAS because of
excessive audio sound.
Do not place objects on the
dashboard that reflects light
such as mirrors, white paper,
etc. The system may malfunc-
tion if the sunlight is reflected.(Continued)
LKAS Operation
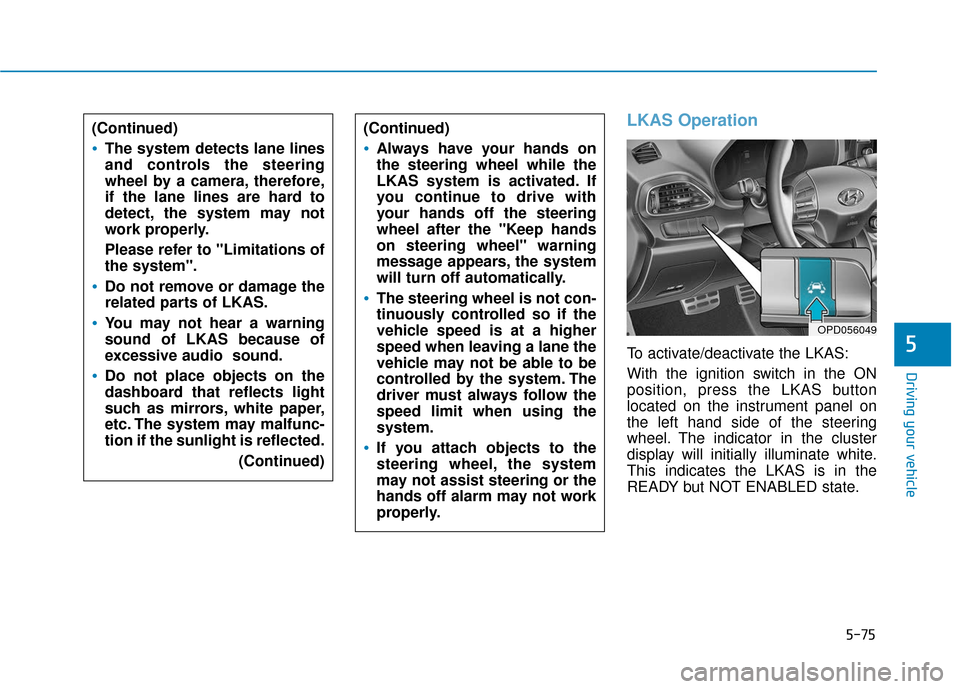
To activate/deactivate the LKAS:
With the ignition switch in the ON
position, press the LKAS button
located on the instrument panel on
the left hand side of the steering
wheel. The indicator in the cluster
display will initially illuminate white.
This indicates the LKAS is in the
READY but NOT ENABLED state.
(Continued)
Always have your hands on
the steering wheel while the
LKAS system is activated. If
you continue to drive with
your hands off the steering
wheel after the "Keep hands
on steering wheel" warning
message appears, the system
will turn off automatically.
The steering wheel is not con-
tinuously controlled so if the
vehicle speed is at a higher
speed when leaving a lane the
vehicle may not be able to be
controlled by the system. The
driver must always follow the
speed limit when using the
system.
If you attach objects to the
steering wheel, the system
may not assist steering or the
hands off alarm may not work
properly.
OPD056049
Page 298 of 478
5-79
Driving your vehicle
5
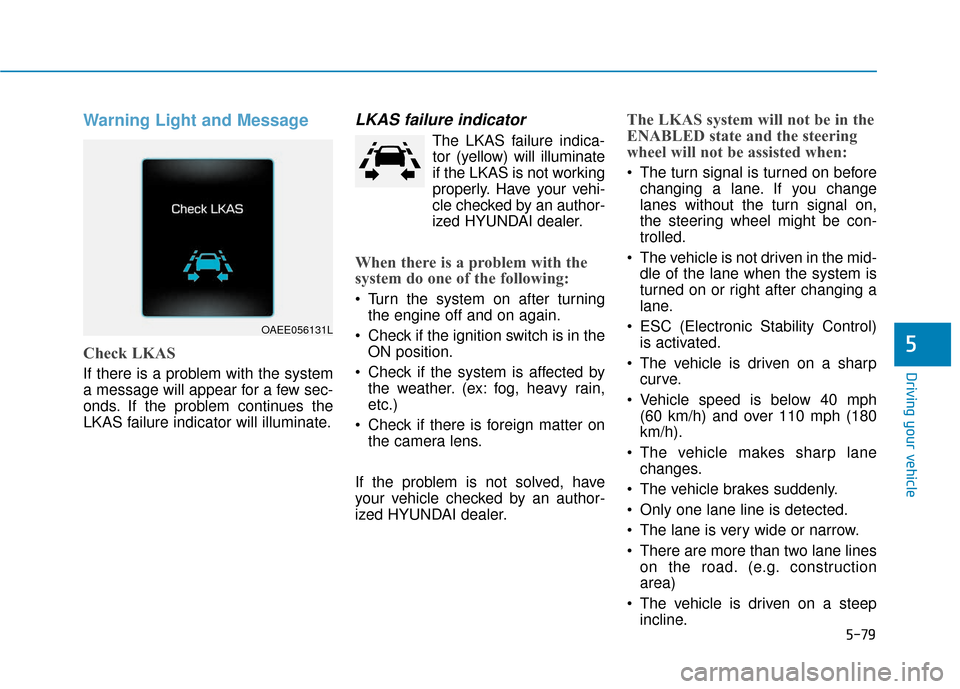
Warning Light and Message
Check LKAS
If there is a problem with the system
a message will appear for a few sec-
onds. If the problem continues the
LKAS failure indicator will illuminate.
LKAS failure indicator
The LKAS failure indica-tor (yellow) will illuminate
if the LKAS is not working
properly. Have your vehi-
cle checked by an author-
ized HYUNDAI dealer.
When there is a problem with the
system do one of the following:
Turn the system on after turning the engine off and on again.
Check if the ignition switch is in the ON position.
Check if the system is affected by the weather. (ex: fog, heavy rain,
etc.)
Check if there is foreign matter on the camera lens.
If the problem is not solved, have
your vehicle checked by an author-
ized HYUNDAI dealer.
The LKAS system will not be in the
ENABLED state and the steering
wheel will not be assisted when:
The turn signal is turned on before changing a lane. If you change
lanes without the turn signal on,
the steering wheel might be con-
trolled.
The vehicle is not driven in the mid- dle of the lane when the system is
turned on or right after changing a
lane.
ESC (Electronic Stability Control) is activated.
The vehicle is driven on a sharp curve.
Vehicle speed is below 40 mph (60 km/h) and over 110 mph (180
km/h).
The vehicle makes sharp lane changes.
The vehicle brakes suddenly.
Only one lane line is detected.
The lane is very wide or narrow.
There are more than two lane lines on the road. (e.g. construction
area)
The vehicle is driven on a steep incline.
OAEE056131L
Page 306 of 478
5-87
Driving your vehicle
5
Information
• During normal cruise control opera-tion, when the SET switch is activat-
ed or reactivated after applying the
brakes, the cruise control will ener-
gize after approximately 3 seconds.
This delay is normal.
• Before activating the cruise control function, the system will check to
verify that the brake switch is oper-
ating normally. Depress the brake
pedal at least once after turning ON
the ignition or starting the engine.
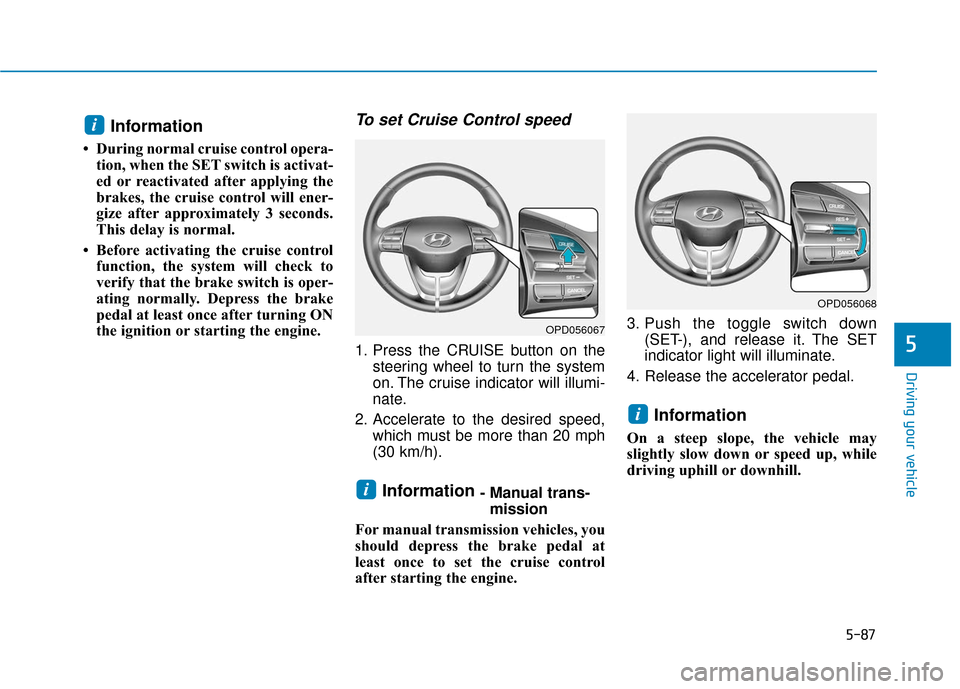
To set Cruise Control speed
1. Press the CRUISE button on the steering wheel to turn the system
on. The cruise indicator will illumi-
nate.
2. Accelerate to the desired speed, which must be more than 20 mph
(30 km/h).
Information - Manual trans-mission
For manual transmission vehicles, you
should depress the brake pedal at
least once to set the cruise control
after starting the engine. 3. Push the toggle switch down
(SET-), and release it. The SET
indicator light will illuminate.
4. Release the accelerator pedal.
Information
On a steep slope, the vehicle may
slightly slow down or speed up, while
driving uphill or downhill.
i
i
i
OPD056067
OPD056068
Page 332 of 478
5-113
Driving your vehicle
5
Check spark plugs and ignitionsystem
Inspect your spark plugs as
described in chapter 7 and replace
them if necessary. Also check all
ignition wiring and components to be
sure they are not cracked, worn or
damaged in any way.
Use approved window washeranti-freeze in system
To keep the water in the window
washer system from freezing, add an
approved window washer anti-freeze
solution in accordance with instruc-
tions on the container. Window wash-
er anti-freeze is available from an
authorized HYUNDAI dealer and
most auto parts outlets. Do not use
engine coolant or other types of anti-
freeze as these may damage the
paint finish.
Do not let your parking brakefreeze
Under some conditions your parking
brake can freeze in the engaged
position. This is most likely to happen
when there is an accumulation of
snow or ice around or near the rear
brakes or if the brakes are wet. If
there is a risk the parking brake may
freeze, apply it only temporarily while
you put the gear selector lever in P
and block the rear wheels so the car
cannot roll. Then release the parking
brake.
Do not let ice and snow accu-mulate underneath
Under some conditions, snow and
ice can build up under the fenders
and interfere with the steering. When
driving in severe winter conditions
where this may happen, you should
periodically check underneath the
car to be sure the movement of the
front wheels and the steering com-
ponents is not obstructed.
Don't place foreign objects ormaterials in the engine com-partment
Placement of foreign object or mate-
rials which prevent cooling of the
engine, in the engine compartment,
may cause a failure or combustion.
The manufacturer is not responsible
for the damage caused by such
placement.
To keep locks from freezing
To keep the locks from freezing,
squirt an approved de-icer fluid or
glycerine into the key opening. If a
lock is covered with ice, squirt it with
an approved de-icing fluid to remove
the ice. If the lock is frozen internally,
you may be able to thaw it out by
using a heated key. Handle the heat-
ed key with care to avoid injury.
Page 341 of 478
6-3
What to do in an emergency
If you Have a Flat Tire While
Driving
If a tire goes flat while you are driving:
Take your foot off the acceleratorpedal and let the vehicle slow down
while driving straight ahead. Do not
apply the brakes immediately or
attempt to pull off the road as this
may cause loss of vehicle control
resulting in an accident. When the
vehicle has slowed to such a speed
that it is safe to do so, brake care-
fully and pull off the road. Drive off
the road as far as possible and park
on firm, level ground. If you are on
a divided highway, do not park in
the median area between the two
traffic lanes.
When the vehicle is stopped, press the hazard warning flasher button,
move the shift lever into P (Park),
and apply the parking brake, and
place the ignition switch in the
LOCK/OFF position.
Have all passengers get out of the vehicle. Be sure they all get out on
the side of the vehicle that is away
from traffic.
When changing a flat tire, follow the instructions provided later in
this chapter.
If the Engine Doesn't Turn
Over or Turns Over Slowly
Be sure the shift lever is in N
(Neutral) or P (Park). The engine
starts only when the shift lever is in
N (Neutral) or P (Park).
Check the battery connections to be sure they are clean and tight.
Turn on the interior light. If the light dims or goes out when you operate
the starter, the battery is drained.
Do not push or pull the vehicle to
start it. This could cause damage to
your vehicle. See instructions for
"Jump Starting" provided in this
chapter.
If the Engine Turns Over
Normally but Doesn't Start
Check the fuel level and add fuel if
necessary.
If the engine still does not start, have
your vehicle checked by an author-
ized HYUNDAI dealer.
6
I I F
F
T
T H
H E
E
E
E N
N G
GI
IN
N E
E
W
W I
IL
L L
L
N
N O
O T
T
S
S T
T A
A R
RT
T
Push or pull starting the vehicle
may cause the catalytic con-
verter to overload which can
lead to damage to the emission
control system.
CAUTION
Page 343 of 478
6-5
What to do in an emergency
6
Information
An inappropriately disposedbattery can be harmful to the
environment and human
health. Dispose of the battery
according to your local law(s)
or regulations.
To prevent damage to your vehicle:
Only use a 12-volt power supply (battery or jumper system) to
jump start your vehicle.
Do not attempt to jump start your vehicle by push-starting.
Jump starting procedure
1. Position the vehicles close enough that the jumper cables will reach,
but do not allow the vehicles to
touch.
2. Avoid fans or any moving parts in the engine compartment at all
times, even when the vehicles are
turned off.
3. Turn off all electrical devices such as radios, lights, air conditioning,
etc. Put the vehicles in P (Park)
and set the parking brakes. Turn
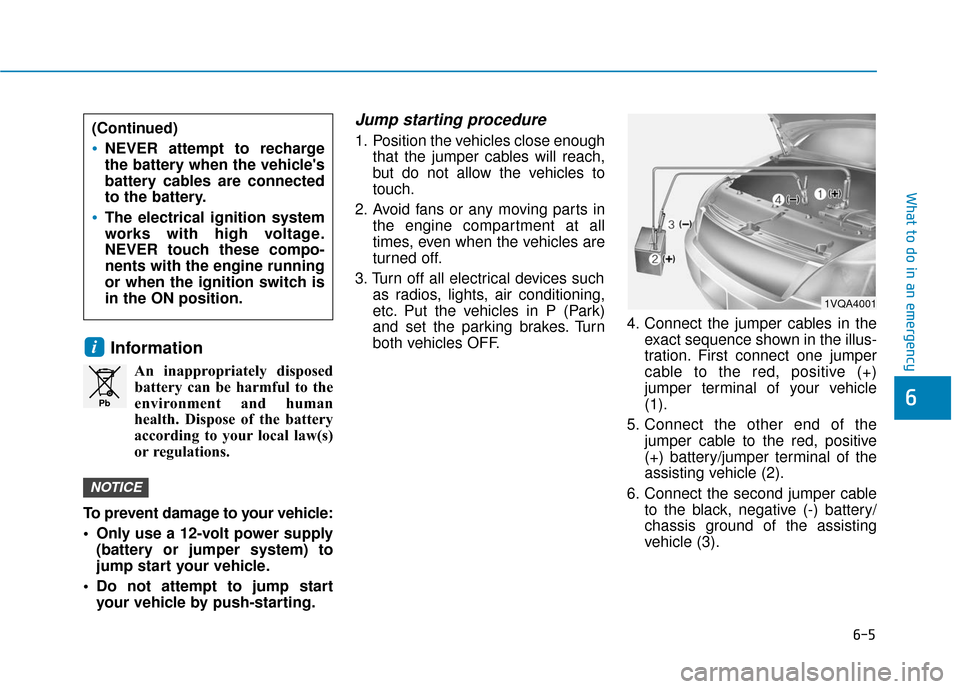
both vehicles OFF. 4. Connect the jumper cables in the
exact sequence shown in the illus-
tration. First connect one jumper
cable to the red, positive (+)
jumper terminal of your vehicle
(1).
5. Connect the other end of the jumper cable to the red, positive
(+) battery/jumper terminal of the
assisting vehicle (2).
6. Connect the second jumper cable to the black, negative (-) battery/
chassis ground of the assisting
vehicle (3).
NOTICE
i
Pb
(Continued)
NEVER attempt to recharge
the battery when the vehicle's
battery cables are connected
to the battery.
The electrical ignition system
works with high voltage.
NEVER touch these compo-
nents with the engine running
or when the ignition switch is
in the ON position.
1VQA4001
Page 348 of 478
6-10
What to do in an emergency
If any of the below happens, have
the system checked by an author-
ized HYUNDAI dealer.
1. The Low Tire Pressure TPMS Malfunction Indicator does not
illuminate for 3 seconds when
the ignition switch is placed to
the ON position or engine is
running.
2. The TPMS Malfunction Indicator remains illuminated after blink-
ing for approximately 1 minute.
3. The Low Tire Pressure LCD dis- play remains illuminated
Low Tire Pressure
Telltale
Low Tire Pressure LCD
Display with Position Indicator
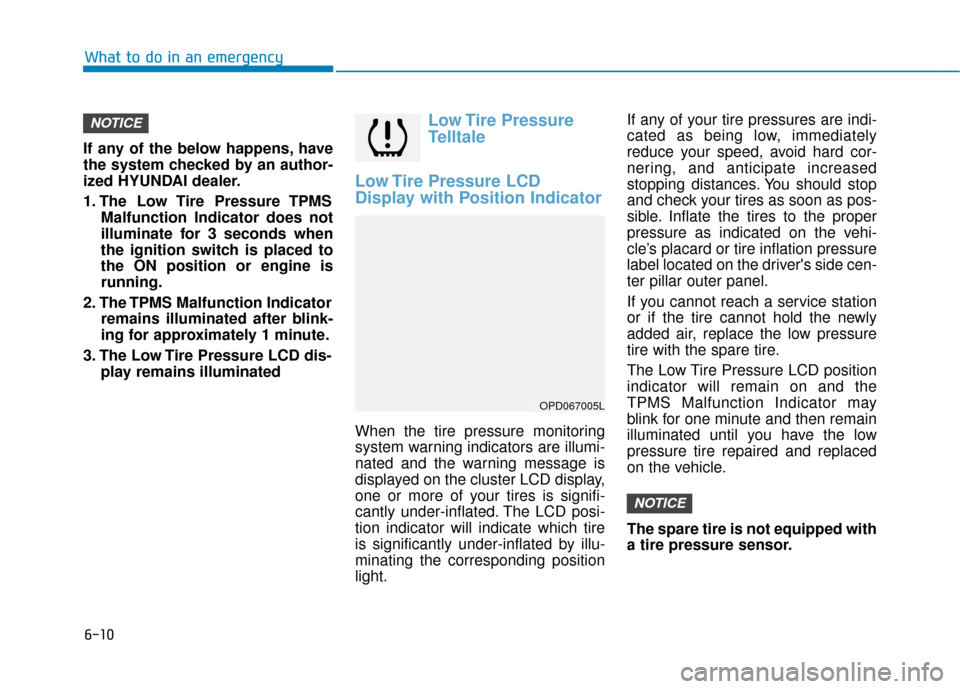
When the tire pressure monitoring
system warning indicators are illumi-
nated and the warning message is
displayed on the cluster LCD display,
one or more of your tires is signifi-
cantly under-inflated. The LCD posi-
tion indicator will indicate which tire
is significantly under-inflated by illu-
minating the corresponding position
light. If any of your tire pressures are indi-
cated as being low, immediately
reduce your speed, avoid hard cor-
nering, and anticipate increased
stopping distances. You should stop
and check your tires as soon as pos-
sible. Inflate the tires to the proper
pressure as indicated on the vehi-
cle’s placard or tire inflation pressure
label located on the driver's side cen-
ter pillar outer panel.
If you cannot reach a service station
or if the tire cannot hold the newly
added air, replace the low pressure
tire with the spare tire.
The Low Tire Pressure LCD position
indicator will remain on and the
TPMS Malfunction Indicator may
blink for one minute and then remain
illuminated until you have the low
pressure tire repaired and replaced
on the vehicle.
The spare tire is not equipped with
a tire pressure sensor.
NOTICE
NOTICE
OPD067005L