display HYUNDAI ELANTRA GT 2019 Owners Manual
[x] Cancel search | Manufacturer: HYUNDAI, Model Year: 2019, Model line: ELANTRA GT, Model: HYUNDAI ELANTRA GT 2019Pages: 486, PDF Size: 78.59 MB
Page 69 of 486
2-51
Safety system of your vehicle
2
8. Front impact sensors
9. Side pressure sensors
10. Emergency Fastening DeviceSystem
11. Occupant classification system The SRSCM (Supplemental
Restraint System Control Module)
continually monitors all SRS compo-
nents while the ignition switch is in
the ON position to determine if a
crash impact is severe enough to
require air bag deployment or pre-
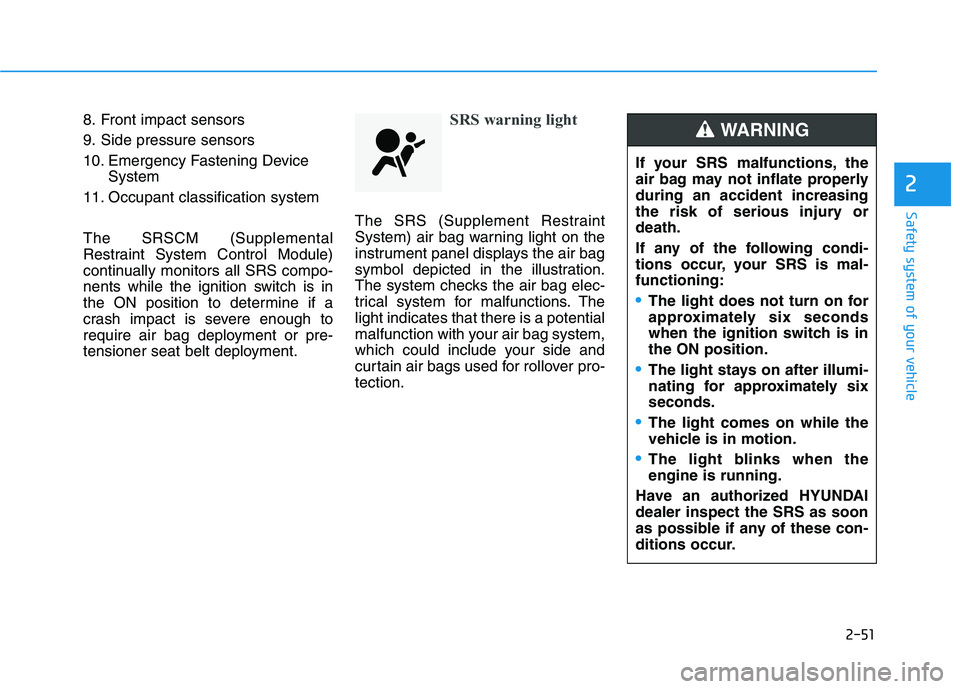
tensioner seat belt deployment.SRS warning light
The SRS (Supplement Restraint
System) air bag warning light on the
instrument panel displays the air bag
symbol depicted in the illustration.
The system checks the air bag elec-
trical system for malfunctions. Thelight indicates that there is a potential
malfunction with your air bag system,
which could include your side and
curtain air bags used for rollover pro-tection.
If your SRS malfunctions, the
air bag may not inflate properlyduring an accident increasing
the risk of serious injury ordeath.
If any of the following condi-
tions occur, your SRS is mal-functioning:
The light does not turn on for
approximately six seconds
when the ignition switch is inthe ON position.
The light stays on after illumi-
nating for approximately sixseconds.
The light comes on while the
vehicle is in motion.
The light blinks when the engine is running.
Have an authorized HYUNDAIdealer inspect the SRS as soon
as possible if any of these con-
ditions occur.
WARNING
Page 86 of 486
Convenient features of your vehicle
Accessing Your Vehicle .........................................3-3Remote Key.........................................................................3-3
Smart Key ............................................................................3-6
Immobilizer System .........................................................3-11
Door Locks ............................................................3-14 Operating Door Locks from Outside the Vehicle ....3-14
Operating Door Locks from Inside the Vehicle .......3-16
Auto Door Lock/Unlock Features ...............................3-18
Child-Protector Rear Door Locks ...............................3-18
Theft-alarm System ............................................3-19
Steering Wheel .....................................................3-19 Electric Power Steering (EPS) .....................................3-19
Tilt Steering / Telescope Steering ..............................3-20
Horn ....................................................................................3-21
Heated Steering Wheel ..................................................3-21
Mirrors ...................................................................3-22 Inside Rearview Mirror ..................................................3-22
Side View Mirrors ...........................................................3-30
Windows ................................................................3-32 Power Windows ...............................................................3-33 Panoramic Sunroof ..............................................3-36
Sunshade ...........................................................................3-37
Sliding the Sunroof .........................................................3-37
Tilting the Sunroof .........................................................3-38
Closing the Sunroof........................................................3-38
Resetting the Sunroof ...................................................3-40
Sunroof Open Warning ..................................................3-40
Exterior Features .................................................3-41 Hood ...................................................................................3-41
Tailgate...............................................................................3-42
Fuel Filler Door ................................................................3-44
Instrument Cluster ...............................................3-47 Instrument Cluster Control............................................3-48
Gauges and Meters ........................................................3-49
Transmission Shift Indicator .........................................3-52
Warning and Indicator Lights .......................................3-54
LCD Display Messages ...................................................3-65
LCD Display ...........................................................3-71 LCD Display Control ........................................................3-71
LCD Display Modes .........................................................3-72
Trip Computer .......................................................3-79
3
Page 89 of 486
3-4
Unlocking
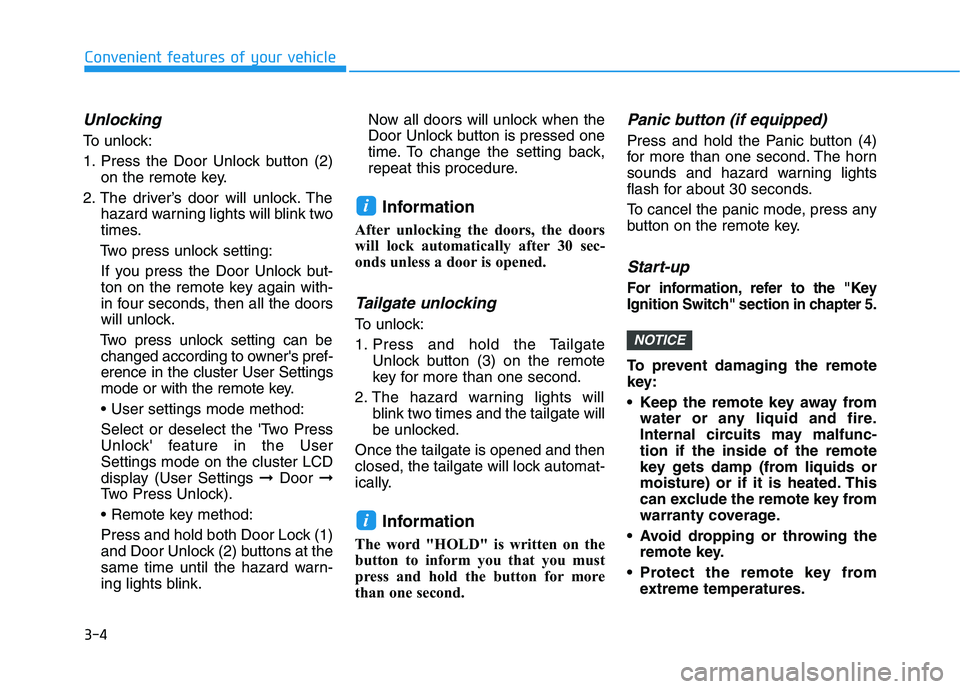
To unlock:
1. Press the Door Unlock button (2)on the remote key.
2. The driver’s door will unlock. The hazard warning lights will blink two
times.
Two press unlock setting:
If you press the Door Unlock but-
ton on the remote key again with-
in four seconds, then all the doors
will unlock.
Two press unlock setting can be changed according to owner's pref-erence in the cluster User Settings
mode or with the remote key.
Select or deselect the 'Two Press
Unlock' feature in the UserSettings mode on the cluster LCD
display (User Settings ➞Door ➞
Two Press Unlock).
Press and hold both Door Lock (1)
and Door Unlock (2) buttons at the
same time until the hazard warn-
ing lights blink. Now all doors will unlock when the
Door Unlock button is pressed one
time. To change the setting back,
repeat this procedure.
Information
After unlocking the doors, the doors
will lock automatically after 30 sec-
onds unless a door is opened.
Tailgate unlocking
To unlock:
1. Press and hold the Tailgate Unlock button (3) on the remote
key for more than one second.
2. The hazard warning lights will blink two times and the tailgate will
be unlocked.
Once the tailgate is opened and then
closed, the tailgate will lock automat-
ically.
Information
The word "HOLD" is written on the
button to inform you that you must
press and hold the button for more
than one second.
Panic button (if equipped)
Press and hold the Panic button (4)
for more than one second. The horn
sounds and hazard warning lights
flash for about 30 seconds.
To cancel the panic mode, press any
button on the remote key.
Start-up
For information, refer to the "Key
Ignition Switch" section in chapter 5.
To prevent damaging the remote
key:
• Keep the remote key away from water or any liquid and fire.
Internal circuits may malfunc-tion if the inside of the remote
key gets damp (from liquids or
moisture) or if it is heated. This
can exclude the remote key from
warranty coverage.
Avoid dropping or throwing the remote key.
Protect the remote key from extreme temperatures.
NOTICE
i
i
Convenient features of your vehicle
Page 93 of 486
3-8
Convenient features of your vehicle
3. The driver's door will unlock. Thehazard warning lights will blink two
times.
Two press unlock setting:
If you press the driver's outside
door handle button or Door Unlock
button on the smart key again
within four seconds, then all the
doors will unlock.
Two press unlock setting can be changed according to owner's
preference in the cluster User
Settings mode or with the smart
key.
Select or deselect the 'Two Press
Unlock' feature in the UserSettings mode on the cluster LCD
display (User Settings ➞Door ➞
Two Press Unlock).
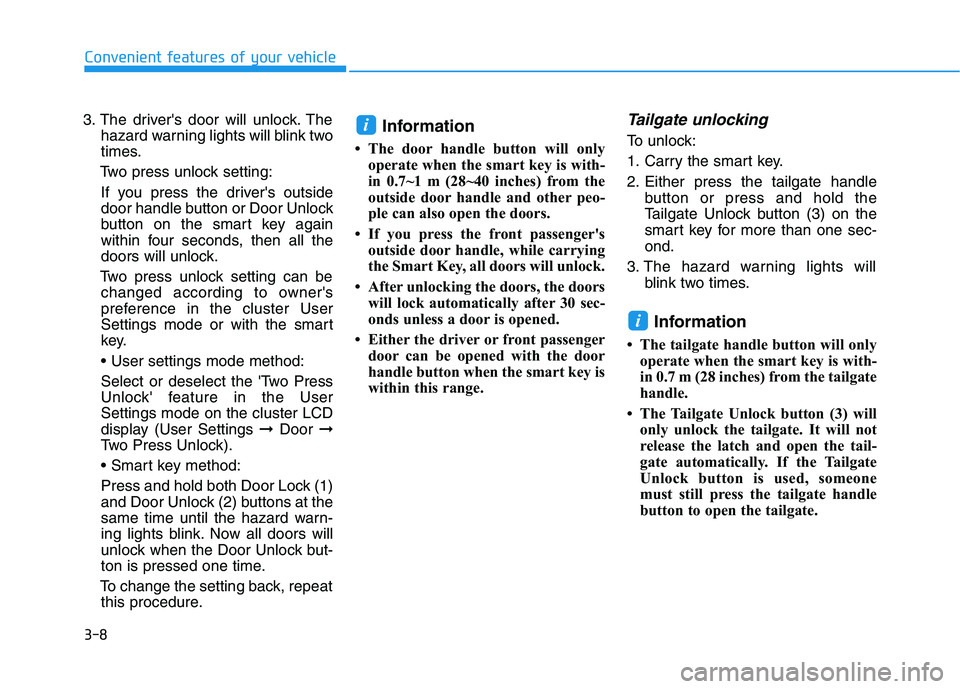
Press and hold both Door Lock (1)
and Door Unlock (2) buttons at the
same time until the hazard warn-
ing lights blink. Now all doors will
unlock when the Door Unlock but-
ton is pressed one time.
To change the setting back, repeat this procedure. Information
The door handle button will only operate when the smart key is with-
in 0.7~1 m (28~40 inches) from the
outside door handle and other peo-
ple can also open the doors.
If you press the front passenger's outside door handle, while carrying
the Smart Key, all doors will unlock.
After unlocking the doors, the doors will lock automatically after 30 sec-
onds unless a door is opened.
Either the driver or front passenger door can be opened with the door
handle button when the smart key is
within this range.Tailgate unlocking
To unlock:
1. Carry the smart key.
2. Either press the tailgate handle button or press and hold the
Tailgate Unlock button (3) on the
smart key for more than one sec-ond.
3. The hazard warning lights will blink two times.
Information
The tailgate handle button will only operate when the smart key is with-
in 0.7 m (28 inches) from the tailgate
handle.
The Tailgate Unlock button (3) will only unlock the tailgate. It will not
release the latch and open the tail-
gate automatically. If the Tailgate
Unlock button is used, someone
must still press the tailgate handle
button to open the tailgate.
i
i
Page 103 of 486
3-18
Convenient features of your vehicle
Auto Door Lock/Unlock Features
Impact sensing door unlock
All doors will be automatically
unlocked when an impact causes the
air bags to deploy.
Speed sensing door lock
All doors will be automatically locked
(when set on cluster) when vehicle
speed exceeds 15 km/h (9 mph). All of the doors will be automatically
unlocked after the vehicle is turned
off.
You can activate or deactivate the
Auto Door Lock/Unlock features fromthe User Settings mode on the LCD
display.
For more information, refer to the
"LCD Display" section in this
chapter.
Child-Protector Rear Door Locks
The child safety lock is provided to
help prevent children seated in therear from accidentally opening the
rear doors. The rear door safety locks
should be used whenever children
are in the vehicle.
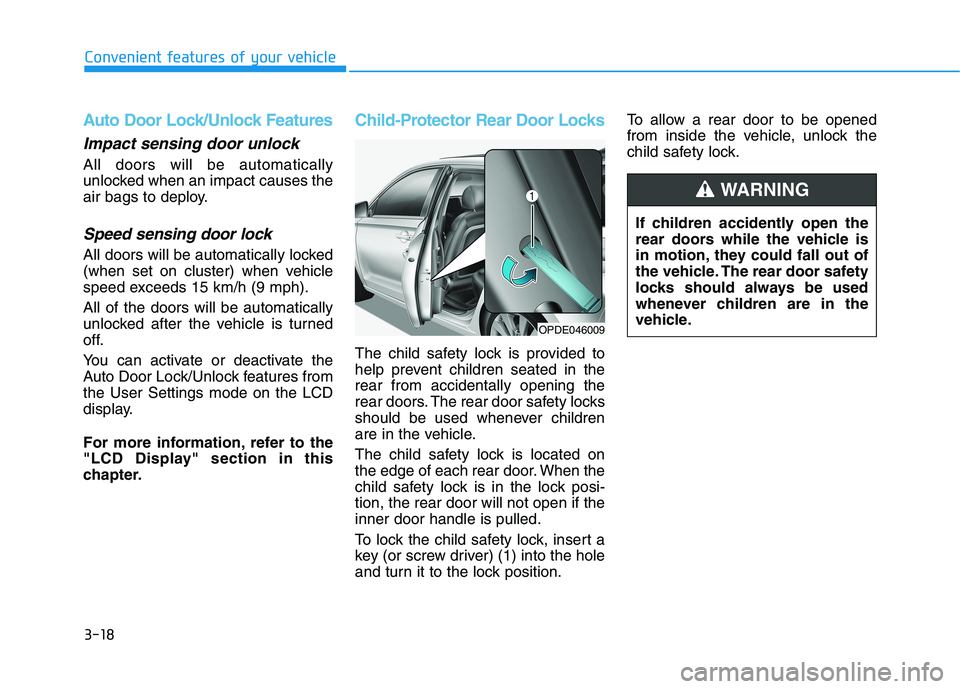
The child safety lock is located on
the edge of each rear door. When the
child safety lock is in the lock posi-tion, the rear door will not open if theinner door handle is pulled.
To lock the child safety lock, insert a
key (or screw driver) (1) into the hole
and turn it to the lock position.To allow a rear door to be opened
from inside the vehicle, unlock the
child safety lock.
If children accidently open the
rear doors while the vehicle is
in motion, they could fall out of
the vehicle. The rear door safety
locks should always be used
whenever children are in the
vehicle.
WARNING
OPDE046009
Page 108 of 486
3-23
Convenient features of your vehicle
3
BlueLink®center (if equipped)
For details, refer to the BlueLink®
Owner's Guide, Navigation Manual
or Audio Manual.
Electric chromic mirror (ECM) with HomeLink®system,
compass and BlueLink®
(if equipped)
Your vehicle may be equipped with a
Gentex Automatic-Dimming Mirror
with a Z-Nav™ Electronic Compass
Display and an IntegratedHomeLink ®
Wireless Control
System.
During nighttime driving, this feature will automatically detect and reduce
rearview mirror glare while the com-
pass indicates the direction the vehi-
cle is pointed. The HomeLink ®
Universal Transceiver allows you to
activate your garage door(s), electric
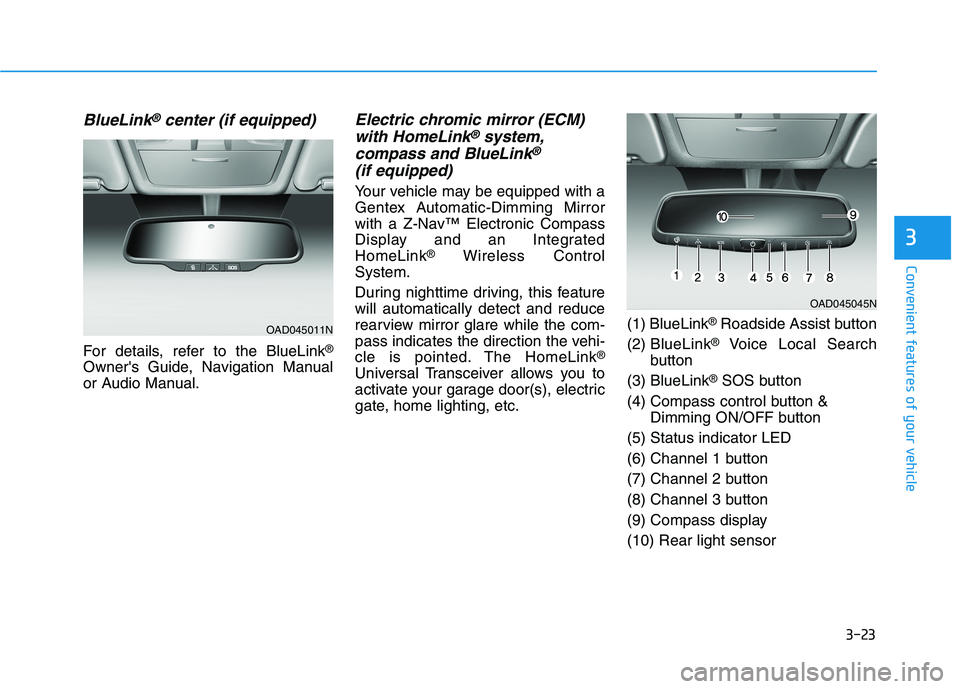
gate, home lighting, etc. (1) BlueLink
®
Roadside Assist button
(2) BlueLink ®
Voice Local Search
button
(3) BlueLink ®
SOS button
(4) Compass control button & Dimming ON/OFF button
(5) Status indicator LED
(6) Channel 1 button
(7) Channel 2 button
(8) Channel 3 button
(9) Compass display(10) Rear light sensor
OAD045045N
OAD045011N
Page 109 of 486
3-24
Convenient features of your vehicle
Automatic-Dimming Night Vision
Safety™ (NVS®
) Mirror
(if equipped)
The NVS ®
Mirror automatically
reduces glare by monitoring light lev- els in the front and the rear of the
vehicle. Any object that obstructs
either light sensor will degrade the
automatic dimming control feature.
For more information regarding NVS ®
mirrors and other applica-
tions, please refer to the Gentexwebsite:
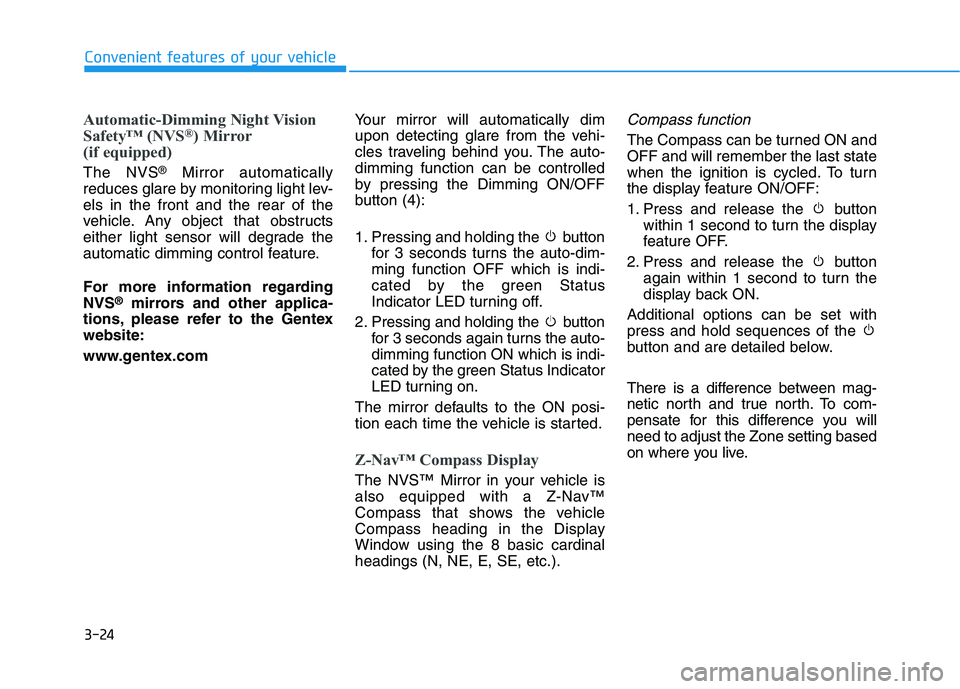
www.gentex.com Your mirror will automatically dim
upon detecting glare from the vehi-
cles traveling behind you. The auto-dimming function can be controlled
by pressing the Dimming ON/OFF
button (4):
1. Pressing and holding the button
for 3 seconds turns the auto-dim- ming function OFF which is indi-
cated by the green Status
Indicator LED turning off.
2. Pressing and holding the button for 3 seconds again turns the auto-dimming function ON which is indi-
cated by the green Status Indicator
LED turning on.
The mirror defaults to the ON posi-
tion each time the vehicle is started.
Z-Nav™ Compass Display
The NVS™ Mirror in your vehicle is
also equipped with a Z-Nav™
Compass that shows the vehicle
Compass heading in the Display
Window using the 8 basic cardinalheadings (N, NE, E, SE, etc.).
Compass function
The Compass can be turned ON andOFF and will remember the last state
when the ignition is cycled. To turn
the display feature ON/OFF:
1. Press and release the button within 1 second to turn the display
feature OFF.
2. Press and release the button again within 1 second to turn the
display back ON.
Additional options can be set withpress and hold sequences of the
button and are detailed below.
There is a difference between mag-
netic north and true north. To com-
pensate for this difference you willneed to adjust the Zone setting based
on where you live.
Page 110 of 486
3-25
Convenient features of your vehicle
3
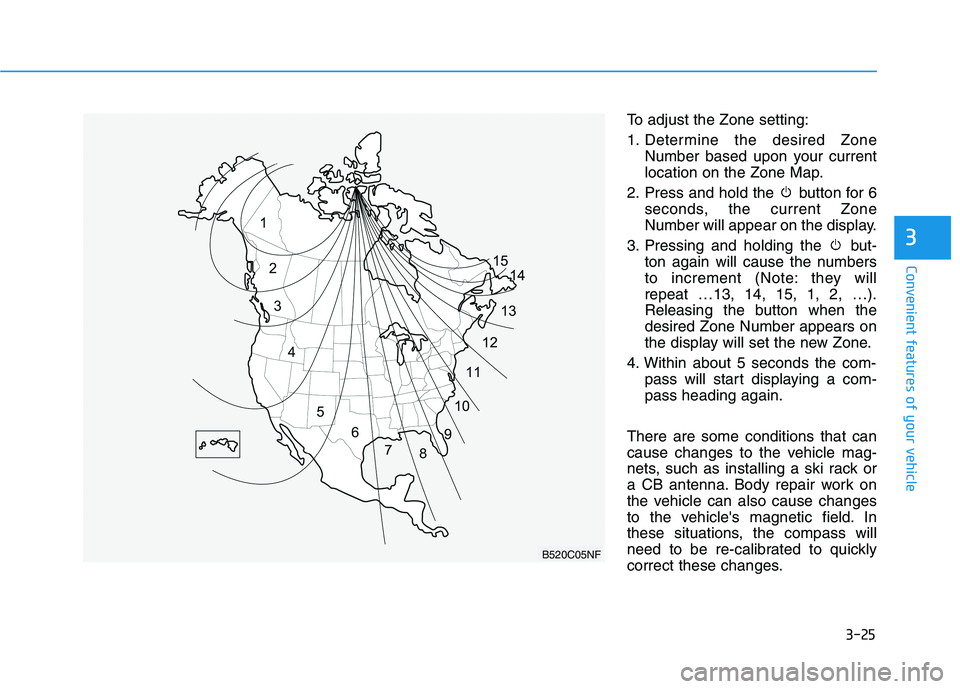
To adjust the Zone setting:
1. Determine the desired ZoneNumber based upon your current
location on the Zone Map.
2. Press and hold the button for 6 seconds, the current Zone
Number will appear on the display.
3. Pressing and holding the but- ton again will cause the numbers
to increment (Note: they willrepeat …13, 14, 15, 1, 2, …).
Releasing the button when thedesired Zone Number appears on
the display will set the new Zone.
4. Within about 5 seconds the com- pass will start displaying a com-pass heading again.
There are some conditions that can
cause changes to the vehicle mag-
nets, such as installing a ski rack or
a CB antenna. Body repair work on
the vehicle can also cause changes
to the vehicle's magnetic field. In
these situations, the compass will
need to be re-calibrated to quickly
correct these changes.
B520C05NF
Page 111 of 486
3-26
Convenient features of your vehicle
If you need to recalibrate the com- pass:
1. Press and hold the button formore than 9 seconds. When the
compass memory is cleared a "C"
will appear in the display.
2. Drive the vehicle in 2 complete cir- cles at less than 8 km/h (5 mph).Integrated HomeLink ®
Wireless
Control System
The HomeLink ®
Wireless Control
System can replace up to three
hand-held radio-frequency (RF)
transmitters with a single built-in
device. This innovative feature will
learn the radio frequency codes of
most current transmitters to operate
devices such as gate operators,
garage door openers, entry door
locks, security systems, even home
lighting. Both standard and rolling
code-equipped transmitters can be
programmed by following the out-
lined procedures. Additional HomeLink ®
information
can be found at: www.homelink.com
or by calling 1-800-355-3515.
Retain the original transmitter of the
RF device you are programming for
use in other vehicles as well as forfuture HomeLink ®
programming. It is
also suggested that upon the sale of
the vehicle, the programmedHomeLink ®
buttons be erased for
security purposes.Before programming HomeLink ®
to a garage door opener or gate
operator, make sure people and
objects are out of the way of the
device to prevent potential harm
or damage. Do not use theHomeLink ®
with any garage
door opener that lacks the safe-
ty stop and reverse features
required by federal safety stan-
dards (this includes any garage
door opener model manufac-
tured before April 1, 1982). A
garage door that cannot detectan object - signaling the door to
stop and reverse - does not meet
current federal safety standards.
Using a garage door opener
without these features increases
the risk of serious injury ordeath.
WARNING
Page 125 of 486
3-40
Convenient features of your vehicle
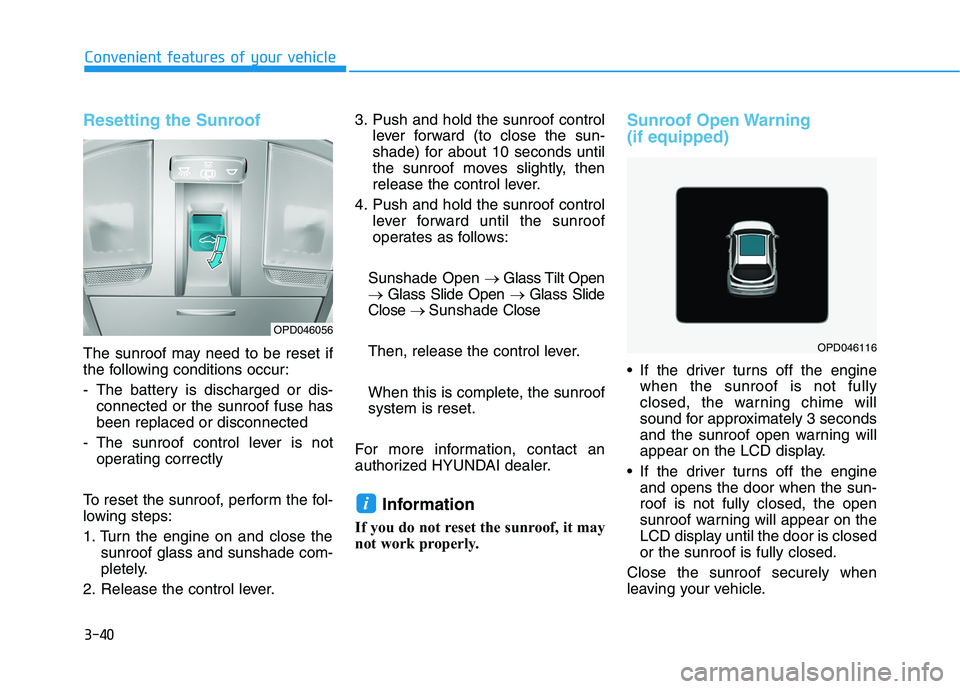
Resetting the Sunroof
The sunroof may need to be reset if
the following conditions occur:
- The battery is discharged or dis-connected or the sunroof fuse has been replaced or disconnected
- The sunroof control lever is not operating correctly
To reset the sunroof, perform the fol-
lowing steps:
1. Turn the engine on and close the sunroof glass and sunshade com-
pletely.
2. Release the control lever. 3. Push and hold the sunroof control
lever forward (to close the sun-
shade) for about 10 seconds until
the sunroof moves slightly, then
release the control lever.
4. Push and hold the sunroof control lever forward until the sunroof
operates as follows:
Sunshade Open � Glass Tilt Open
� Glass Slide Open � Glass Slide
Close � Sunshade Close
Then, release the control lever.
When this is complete, the sunroof system is reset.
For more information, contact an
authorized HYUNDAI dealer. Information
If you do not reset the sunroof, it may
not work properly.
Sunroof Open Warning (if equipped)
If the driver turns off the engine when the sunroof is not fully
closed, the warning chime will
sound for approximately 3 seconds
and the sunroof open warning will
appear on the LCD display.
If the driver turns off the engine and opens the door when the sun-roof is not fully closed, the open
sunroof warning will appear on the
LCD display until the door is closedor the sunroof is fully closed.
Close the sunroof securely when
leaving your vehicle.
i
OPD046116
OPD046056