Hyundai Elantra Touring 2011 Owner's Manual
Manufacturer: HYUNDAI, Model Year: 2011, Model line: Elantra Touring, Model: Hyundai Elantra Touring 2011Pages: 402, PDF Size: 37.54 MB
Page 201 of 402
4125
Features of your vehicle
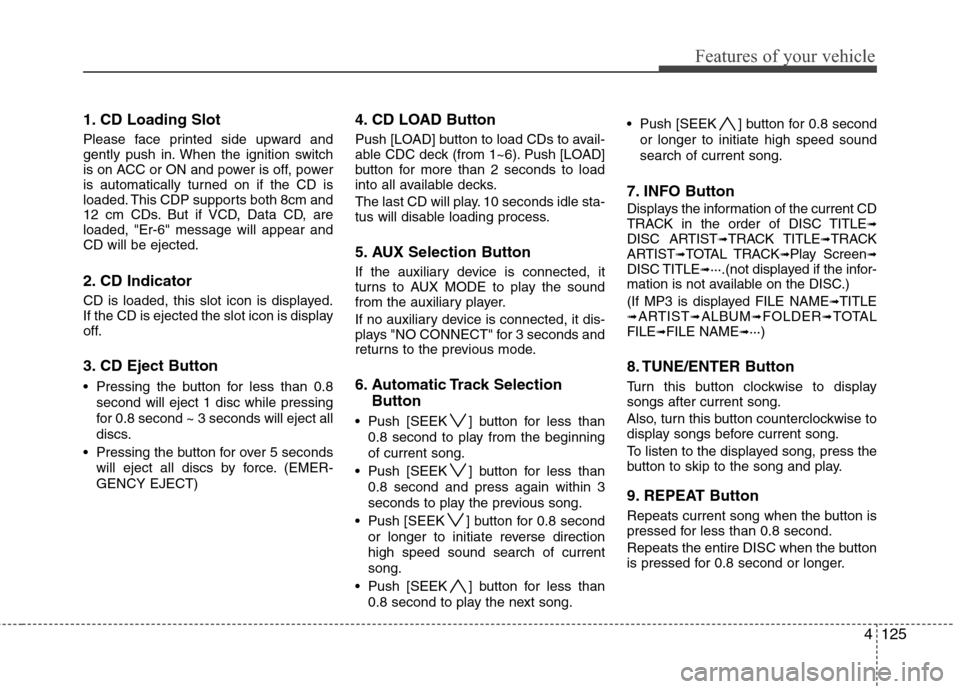
1. CD Loading Slot
Please face printed side upward and
gently push in. When the ignition switch
is on ACC or ON and power is off, power
is automatically turned on if the CD is
loaded. This CDP supports both 8cm and
12 cm CDs. But if VCD, Data CD, are
loaded, "Er-6" message will appear and
CD will be ejected.
2. CD Indicator
CD is loaded, this slot icon is displayed.
If the CD is ejected the slot icon is display
off.
3. CD Eject Button
Pressing the button for less than 0.8
second will eject 1 disc while pressing
for 0.8 second ~ 3 seconds will eject all
discs.
Pressing the button for over 5 seconds
will eject all discs by force. (EMER-
GENCY EJECT)
4. CD LOAD Button
Push [LOAD] button to load CDs to avail-
able CDC deck (from 1~6). Push [LOAD]
button for more than 2 seconds to load
into all available decks.
The last CD will play. 10 seconds idle sta-
tus will disable loading process.
5. AUX Selection Button
If the auxiliary device is connected, it
turns to AUX MODE to play the sound
from the auxiliary player.
If no auxiliary device is connected, it dis-
plays "NO CONNECT" for 3 seconds and
returns to the previous mode.
6. Automatic Track Selection
Button
Push [SEEK ] button for less than
0.8 second to play from the beginning
of current song.
Push [SEEK ] button for less than
0.8 second and press again within 3
seconds to play the previous song.
Push [SEEK ] button for 0.8 second
or longer to initiate reverse direction
high speed sound search of current
song.
Push [SEEK ] button for less than
0.8 second to play the next song. Push [SEEK ] button for 0.8 second
or longer to initiate high speed sound
search of current song.
7. INFO Button
Displays the information of the current CD
TRACK in the order of DISC TITLE➟DISC ARTIST➟TRACK TITLE➟TRACK
ARTIST➟TOTAL TRACK➟Play Screen➟DISC TITLE➟···.(not displayed if the infor-
mation is not available on the DISC.)
(If MP3 is displayed FILE NAME
➟TITLE➟ARTIST➟ALBUM➟FOLDER➟TOTAL
FILE➟FILE NAME➟···)
8. TUNE/ENTER Button
Turn this button clockwise to display
songs after current song.
Also, turn this button counterclockwise to
display songs before current song.
To listen to the displayed song, press the
button to skip to the song and play.
9. REPEAT Button
Repeats current song when the button is
pressed for less than 0.8 second.
Repeats the entire DISC when the button
is pressed for 0.8 second or longer.
Page 202 of 402
Features of your vehicle
126 4
10. RANDOM Play Button
Turns on/off the randomization of the play
list of files in the currently played DISC.
To cancel the mode, press the key once
again.
11. DISC Selection Button
[DISC ] Change Button
Changes disc to the previous disc.
[DISC ] Change Button
Changes disc to the next disc.
12. SCAN Play Button
Plays first 10 seconds of each song in the
DISC.
To cancel the mode, press the key once
again.
13. FOLDER Moving Button
Moves [FLDR ] button child folder of
the current folder and displays the first
song in the folder. Press TUNE/ENTER
button to move to the folder displayed.
It will play the first song in the folder.
Moves [FLDR ] button parent folder
and displays the first song in the folder.
Press TUNE/ENTER button to move to
the folder displayed. It will play the first
song in the folder.
Page 203 of 402
4127
Features of your vehicle
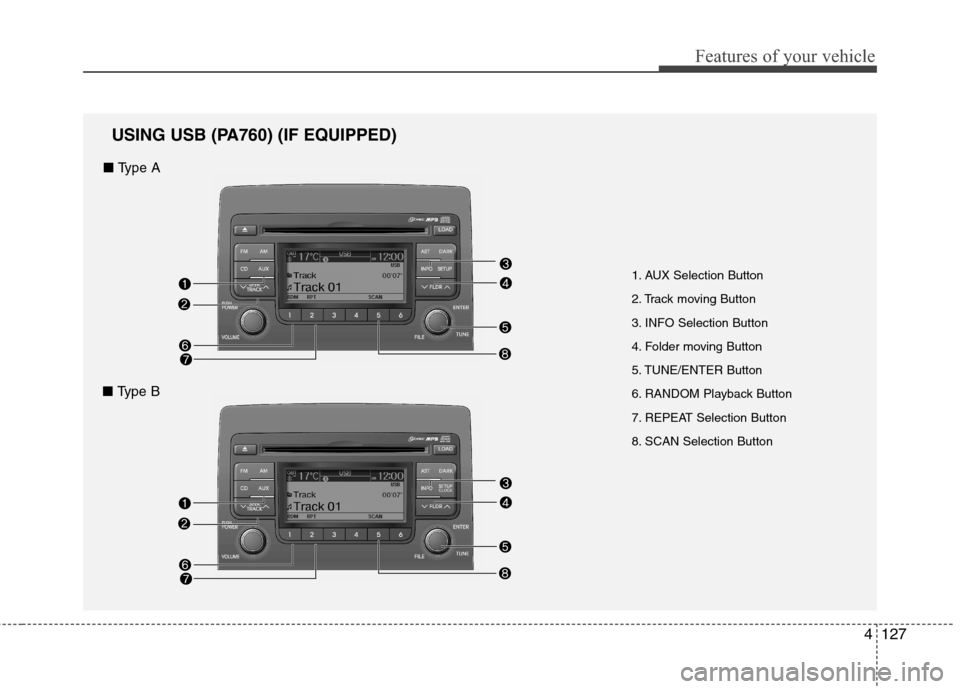
1. AUX Selection Button
2. Track moving Button
3. INFO Selection Button
4. Folder moving Button
5. TUNE/ENTER Button
6. RANDOM Playback Button
7. REPEAT Selection Button
8. SCAN Selection Button
USING USB (PA760) (IF EQUIPPED)
■ Type A
■ Type B
Page 204 of 402
Features of your vehicle
128 4
In case USB is connected to the multi-
media jack inside the console on the right
hand side of the driver’s seat. When USB
is connected, the ‘USB’ icon will be dis-
played on the top right corner of the dis-
play screen.
1.AUX Selection Button
If USB is not connected, it switches to the
USB mode from the Radio and CD mode
to play the song files stored in the USB.
If AUX is not connected, it is invalid key.
2. Track Moving Button
Press the [SEEK ] button for less
than 0.8 second to play from the begin-
ning of the song currently played.
Press the button for less than 0.8 sec-
ond and press it again within 1 second
to move to and play the previous track.
Press the button for 0.8 second or
longer to play the song in reverse
direction in fast speed.
Press the [SEEK ] button button for
less than 0.8 second to move to the
next track.
Press the button for 0.8 second or
longer to play the song in forward
direction in fast speed.
3. INFO Button
Displays the information of the file cur-
rently played in the order of FILE NAME
➟TITLE➟ARTIST➟ALBUM➟FOLDER➟TOTAL FILE➟FILE NAME➟… (Displays
no information if the file has no song
information.)
4. Folder moving Button
Moves [FLDR ] button child folder of
the current folder and displays the first
song in the folder. Press TUNE/ENTER
button to move to the folder displayed.
It will play the first song in the folder.
Moves [FLDR ] button parent folder
and displays the first song in the folder.
Press TUNE/ENTER button to move to
the folder displayed. It will play the first
song in the folder.
5. TUNE/ENTER Button
Turn this button clockwise to display the
songs next to the currently played song.
Turn the button counterclockwise to dis-
play the songs before the currently
played song.
Press the button to skip to and play the
selected song.
6. RANDOM Playback Button
Press the button for less than 0.8 second
to start or stop the random playback of
the songs in the current folder.
Press the button for more than 0.8 sec-
ond to randomly play the entire songs in
the USB device.
Press the button again to cancel the mode.
7. REPEAT Button
Press the button for less than 0.8 second
to repeat the song currently played.
Press the button for more than 0.8 sec-
ond to repeat the entire songs in the USB
device.
8. SCAN Button
Plays 10 seconds of each song in the USB
device.
Press the button once again to cancel
scanning.
Page 205 of 402
4129
Features of your vehicle
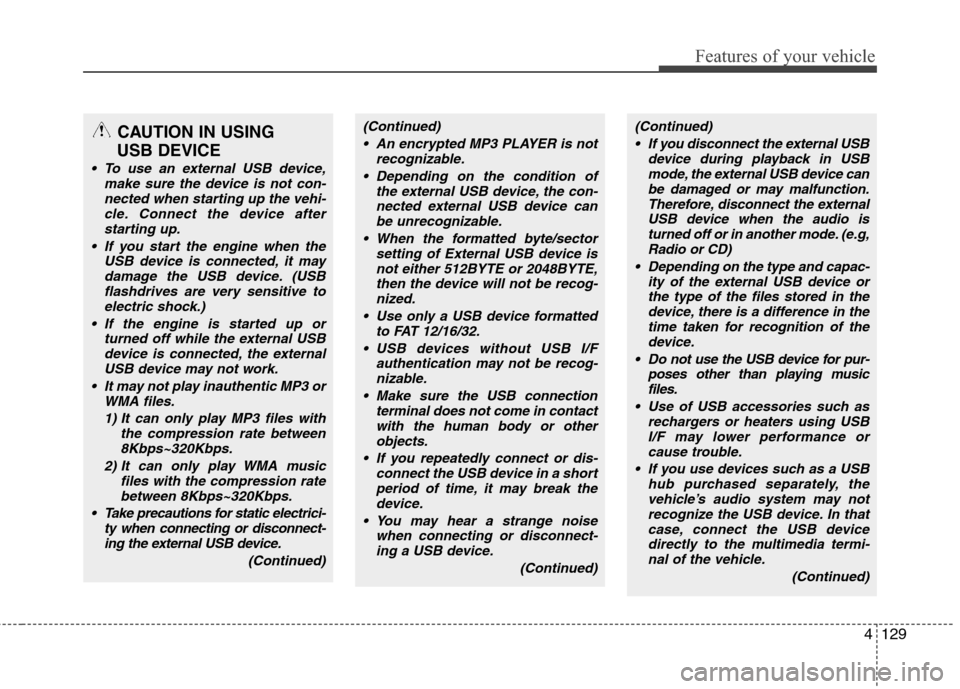
CAUTION IN USING
USB DEVICE
To use an external USB device,
make sure the device is not con-
nected when starting up the vehi-
cle. Connect the device after
starting up.
If you start the engine when the
USB device is connected, it may
damage the USB device. (USB
flashdrives are very sensitive to
electric shock.)
If the engine is started up or
turned off while the external USB
device is connected, the external
USB device may not work.
It may not play inauthentic MP3 or
WMA files.
1) It can only play MP3 files with
the compression rate between
8Kbps~320Kbps.
2) It can only play WMA music
files with the compression rate
between 8Kbps~320Kbps.
Take precautions for static electrici-
ty when connecting or disconnect-
ing the external USB device.
(Continued)
(Continued)
An encrypted MP3 PLAYER is not
recognizable.
Depending on the condition of
the external USB device, the con-
nected external USB device can
be unrecognizable.
When the formatted byte/sector
setting of External USB device is
not either 512BYTE or 2048BYTE,
then the device will not be recog-
nized.
Use only a USB device formatted
to FAT 12/16/32.
USB devices without USB I/F
authentication may not be recog-
nizable.
Make sure the USB connection
terminal does not come in contact
with the human body or other
objects.
If you repeatedly connect or dis-
connect the USB device in a short
period of time, it may break the
device.
You may hear a strange noise
when connecting or disconnect-
ing a USB device.
(Continued)(Continued)
If you disconnect the external USB
device during playback in USB
mode, the external USB device can
be damaged or may malfunction.
Therefore, disconnect the external
USB device when the audio is
turned off or in another mode. (e.g,
Radio or CD)
Depending on the type and capac-
ity of the external USB device or
the type of the files stored in the
device, there is a difference in the
time taken for recognition of the
device.
Do not use the USB device for pur-
poses other than playing music
files.
Use of USB accessories such as
rechargers or heaters using USB
I/F may lower performance or
cause trouble.
If you use devices such as a USB
hub purchased separately, the
vehicle’s audio system may not
recognize the USB device. In that
case, connect the USB device
directly to the multimedia termi-
nal of the vehicle.
(Continued)
Page 206 of 402
Features of your vehicle
130 4
(Continued)
If the USB device is divided by
logical drives, only the music files
on the highest-priority drive are
recognized by car audio.
Devices such as MP3 Player/
Cellular phone/Digital camera can
be unrecognizable by standard
USB I/F can be unrecognizable.
Some non-standard USB devices
(METAL COVER TYPE USB) can
be unrecognizable.
Some USB flash memory readers
(such as CF, SD, microSD, etc.) or
external-HDD type devices can be
unrecognizable.
Music files protected by DRM
(DIGITAL RIGHTS MANAGE-
MENT) are not recognizable.
The data in the USB memory may
be lost while using this audio.
Always back up important data on
a personal storage device.
(Continued)(Continued)
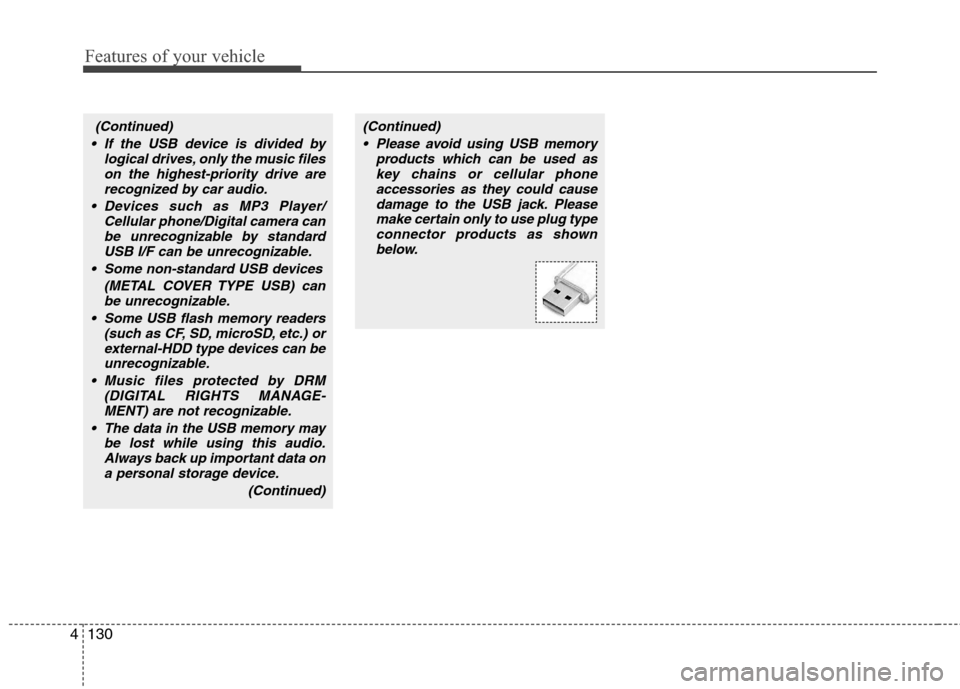
Please avoid using USB memory
products which can be used as
key chains or cellular phone
accessories as they could cause
damage to the USB jack. Please
make certain only to use plug type
connector products as shown
below.
Page 207 of 402
4131
Features of your vehicle
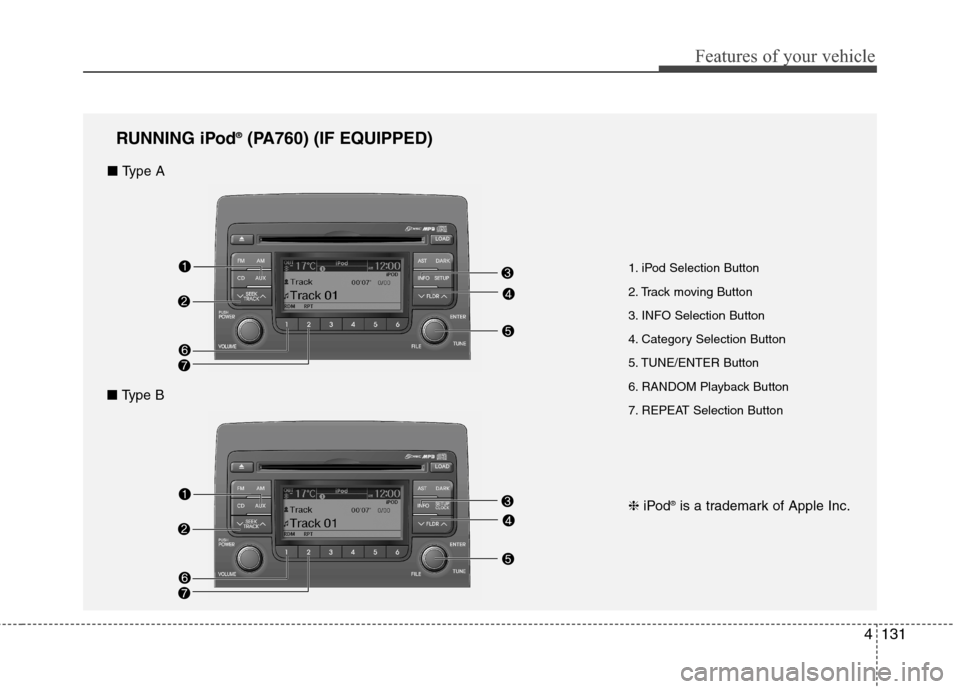
1. iPod Selection Button
2. Track moving Button
3. INFO Selection Button
4. Category Selection Button
5. TUNE/ENTER Button
6. RANDOM Playback Button
7. REPEAT Selection Button
RUNNING iPod®(PA760) (IF EQUIPPED)
■ Type A
■ Type B
❈iPod®is a trademark of Apple Inc.
Page 208 of 402
Features of your vehicle
132 4
In case the iPod exclusive cable is con-
nected to the multimedia jack inside the
console on the right hand side of the dri-
ver’s seat. When the iPod is connected,
the ‘iPod’ icon will be displayed on the top
right corner of the display screen.
1. iPod Selection Button
If iPod is connected, it switches to the
iPod mode from the Radio and CD mode
to play the song files stored in the iPod.
If there are no CD and AUX, it displays
‘NO MEDIA’.
2. Track Moving Button
Press the [SEEK ] button for less
than 0.8 second to play from the begin-
ning of the song currently played.
Press the button for less than 0.8 sec-
ond and press it again within 1 second
to move to and play the previous track.
Press the button for 0.8 second or
longer to play the song in reverse
direction in fast speed.
Press the [SEEK ] button for less
than 0.8 second to move to the next
track.
Press the button for 0.8 second or
longer to play the song in forward
direction in fast speed.
3. INFO Button
Displays the information of the file cur-
rently played in the order of FILE NAME
➟TITLE➟ARTIST➟ALBUM➟FILE
NAME➟…
(Displays no information if the file has no
song information.)
4. Category Selection Button
Moves to the upper category from cur-
rently played category of the iPod.
You will be able to search through the
lower category of the selected category.
The order of iPod’s category is SONG,
ALBUMS, ARTISTS, GENRES, and
iPod. (Refer to the iPod user’s manual for
more information)
5. TUNE/ENTER Button
When you turn the button clockwise, it
will display the songs (category) next to
the song currently played (category in
the same level).
Also, when you turn the button counter-
clockwise, it will display the songs (cate-
gory) before the song currently played
(category in the same level).If you want to listen to the song displayed
in the song category, press the button,
then it will skip to the selected song and
play.
6. RANDOM Playback Button
Press the button for less than 0.8 second
to activate or deactivate the random play-
back of the songs within the current cat-
egory.
Press the button for longer than 0.8 sec-
ond to randomly play all songs in the
entire album of the iPod.
Press the button once again to cancel the
mode.
7. REPEAT Button
Repeats the song currently played.
Page 209 of 402
4133
Features of your vehicle
✽ ✽
NOTICE FOR USING THE
iPod®DEVICE
• Some iPod models might not sup-
port the communication protocol
and the files will not be played.
Supported iPod models:
- iPod Mini
- iPod 4th(Photo) ~ 6th(Classic)
generation
- iPod Nano 1st~4th generation
- iPod Touch 1st~2nd generation
• The order of search or playback of
songs in the iPod can be different
from the order searched in the
audio system.
• If the iPod disabled due to its own
malfunction, reset the iPod. (Reset:
Refer to iPod manual)
• An iPod may not operate normally
on low battery.
• Some iPod devices, such as the
iPhone, can be connected through the
Bluetooth
®interface. The device
must have audio Bluetooth®capabili-
ty (such as for stereo headphone
Bluetooth
®). The device can play, but
it will not be controlled by the audio
system.
CAUTION IN USING THE
iPod
®DEVICE
The Hyundai iPod Power Cable is
needed in order to operate iPod
with the audio buttons on the
audio system. The USB cable pro-
vided by Apple may cause mal-
function and should not be used
for Hyundai vehicles.
❋ The Hyundai iPod Power Cable
may be purchased through your
Hyundai Dealership.
When connecting iPod with the
iPod Power Cable, insert the con-
nector to the multimedia socket
completely. If not inserted com-
pletely, communications between
iPod and audio may be interrupted.
When adjusting the sound effects
of the iPod and the audio system,
the sound effects of both devices
will overlap and might reduce or
distort the quality of the sound.
(Continued)
(Continued)
Deactivate (turn off) the equalizer
function of an iPod when adjust-
ing the audio system’s volume,
and turn off the equalizer of the
audio system when using the
equalizer of an iPod.
When the iPod cable is connect-
ed, the system can be switched to
AUX mode even without iPod
device and may cause noise.
Disconnect the iPod cable when
you are not using the iPod device.
When not using iPod with car
audio, detach the iPod cable from
iPod. Otherwise, iPod may remain
in accessory mode, and may not
work properly.
Page 210 of 402
Features of your vehicle
134 4
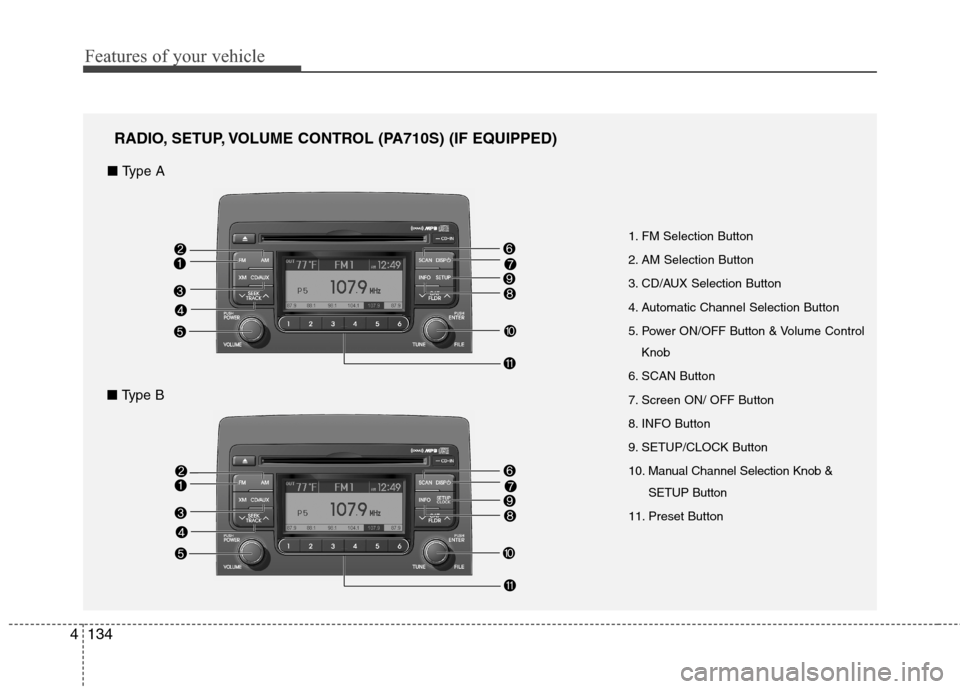
1. FM Selection Button
2. AM Selection Button
3. CD/AUX Selection Button
4. Automatic Channel Selection Button
5. Power ON/OFF Button & Volume Control
Knob
6. SCAN Button
7. Screen ON/ OFF Button
8. INFO Button
9. SETUP/CLOCK Button
10. Manual Channel Selection Knob &
SETUP Button
11. Preset Button
RADIO, SETUP, VOLUME CONTROL (PA710S) (IF EQUIPPED)
■ Type A
■ Type B