door lock Hyundai Equus 2010 Owner's Manual
[x] Cancel search | Manufacturer: HYUNDAI, Model Year: 2010, Model line: Equus, Model: Hyundai Equus 2010Pages: 374, PDF Size: 41.29 MB
Page 15 of 374
Your vehicle at a glance
2
2
INTERIOR OVERVIEW
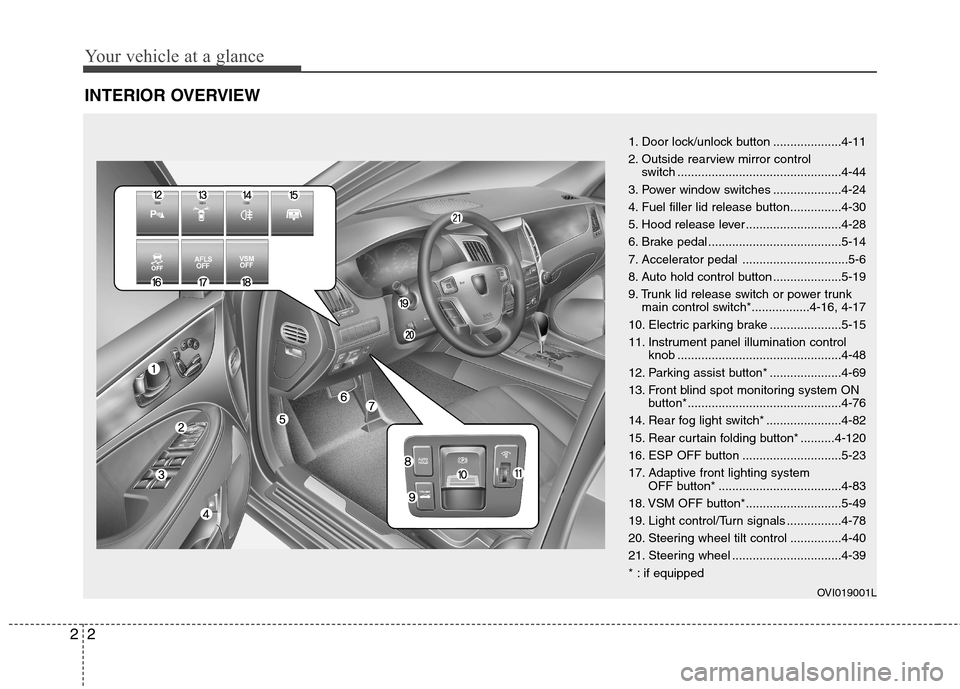
1. Door lock/unlock button ....................4-11
2. Outside rearview mirror control
switch ................................................4-44
3. Power window switches ....................4-24
4. Fuel filler lid release button...............4-30
5. Hood release lever ............................4-28
6. Brake pedal .......................................5-14
7. Accelerator pedal ...............................5-6
8. Auto hold control button ....................5-19
9. Trunk lid release switch or power trunk main control switch*.................4-16, 4-17
10. Electric parking brake .....................5-15
11. Instrument panel illumination control knob ................................................4-48
12. Parking assist button* .....................4-69
13. Front blind spot monitoring system ON button*.............................................4-76
14. Rear fog light switch* ......................4-82
15. Rear curtain folding button* ..........4-120
16. ESP OFF button .............................5-23
17. Adaptive front lighting system OFF button* ....................................4-83
18. VSM OFF button*............................5-49
19. Light control/Turn signals ................4-78
20. Steering wheel tilt control ...............4-40
21. Steering wheel ................................4-39
* : if equipped
OVI019001L
Page 29 of 374
311
Safety features of your vehicle
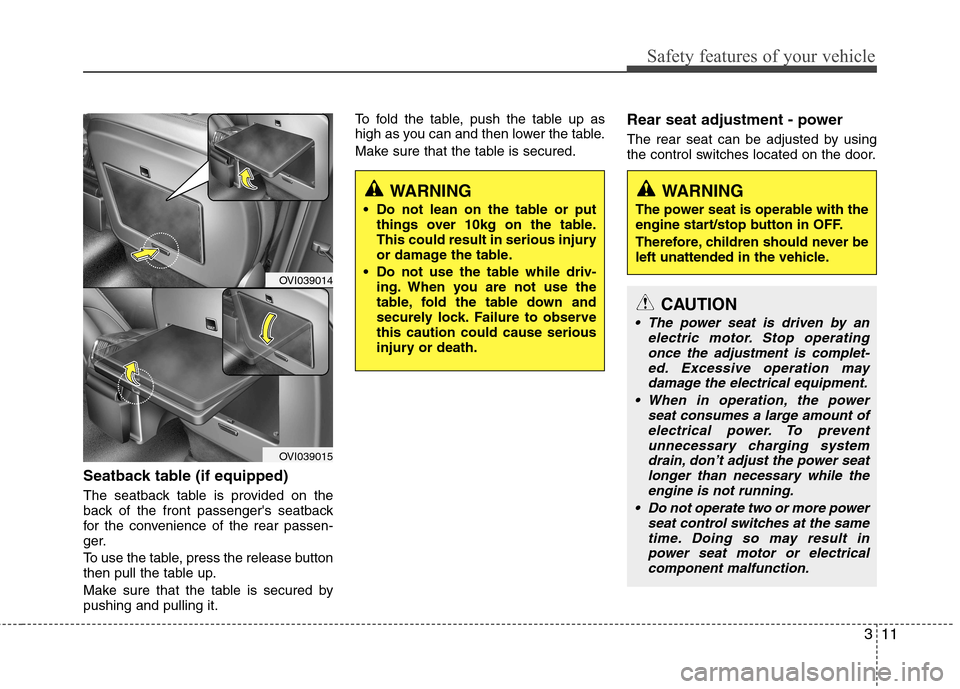
Seatback table (if equipped)
The seatback table is provided on the
back of the front passenger's seatback
for the convenience of the rear passen-
ger.
To use the table, press the release button
then pull the table up.
Make sure that the table is secured by pushing and pulling it.To fold the table, push the table up as
high as you can and then lower the table.
Make sure that the table is secured.
Rear seat adjustment - power
The rear seat can be adjusted by using
the control switches located on the door.
OVI039014
OVI039015
WARNING
Do not lean on the table or put things over 10kg on the table.
This could result in serious injury
or damage the table.
Do not use the table while driv- ing. When you are not use the
table, fold the table down and
securely lock. Failure to observethis caution could cause serious
injury or death.WARNING
The power seat is operable with the
engine start/stop button in OFF.
Therefore, children should never be
left unattended in the vehicle.
CAUTION
The power seat is driven by an electric motor. Stop operatingonce the adjustment is complet- ed. Excessive operation may
damage the electrical equipment.
When in operation, the power seat consumes a large amount ofelectrical power. To prevent unnecessary charging system
drain, don’t adjust the power seatlonger than necessary while the engine is not running.
Do not operate two or more power seat control switches at the same
time. Doing so may result inpower seat motor or electrical component malfunction.
Page 41 of 374
323
Safety features of your vehicle
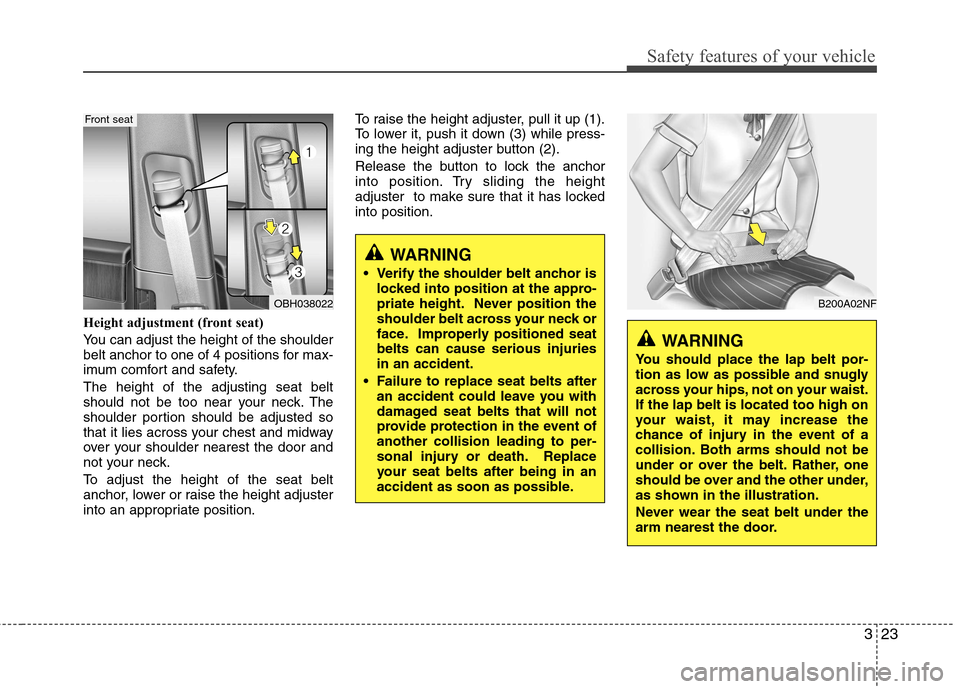
Height adjustment (front seat)
You can adjust the height of the shoulder
belt anchor to one of 4 positions for max-
imum comfort and safety. The height of the adjusting seat belt
should not be too near your neck. The
shoulder portion should be adjusted so
that it lies across your chest and midway
over your shoulder nearest the door and
not your neck.
To adjust the height of the seat belt
anchor, lower or raise the height adjuster
into an appropriate position.To raise the height adjuster, pull it up (1).
To lower it, push it down (3) while press-
ing the height adjuster button (2).
Release the button to lock the anchor
into position. Try sliding the height
adjuster to make sure that it has lockedinto position.
WARNING
Verify the shoulder belt anchor is locked into position at the appro-
priate height. Never position the
shoulder belt across your neck or
face. Improperly positioned seatbelts can cause serious injuriesin an accident.
Failure to replace seat belts after an accident could leave you with
damaged seat belts that will not
provide protection in the event ofanother collision leading to per-
sonal injury or death. Replace
your seat belts after being in an
accident as soon as possible.
B200A02NF
WARNING
You should place the lap belt por-
tion as low as possible and snugly
across your hips, not on your waist.If the lap belt is located too high on
your waist, it may increase the
chance of injury in the event of a
collision. Both arms should not be
under or over the belt. Rather, one
should be over and the other under,
as shown in the illustration.
Never wear the seat belt under the
arm nearest the door.
OBH038022
Front seat
Page 62 of 374
Safety features of your vehicle
44
3
WARNING
Extreme Hazard! Do not use a rearward facing child restraint on
a seat protected by an air bag in
front of it!
Never put a child restraint in the front passenger’s seat. If the front
passenger air bag inflates, it cancause serious or fatal injuries.
When children are seated in the rear outboard seats of a vehicle
equipped with side and/or curtain
air bags, be sure to install the
child restraint system as far away
from the door side as possible,
and securely lock the childrestraint system in position.
Inflation of side and/or curtain air
bags could cause serious injury
or death to an infant or child.
Noise and smoke
When the air bags inflate, they make a
loud noise and they leave smoke and
powder in the air inside of the vehicle.
This is normal and is a result of the igni-
tion of the air bag inflator. After the air
bag inflates, you may feel substantial dis-
comfort in breathing due to the contact of
your chest with both the seat belt and the
air bag, as well as from breathing the
smoke and powder. Open your doors
and/or windows as soon as possible
after impact in order to reduce dis-
comfort and prevent prolonged expo-
sure to the smoke and powder.
Though the smoke and powder are non-
toxic, they may cause irritation to the skin
(eyes, nose and throat, etc). If this is the
case, wash and rinse with cold waterimmediately and consult a doctor if the
symptom persists.
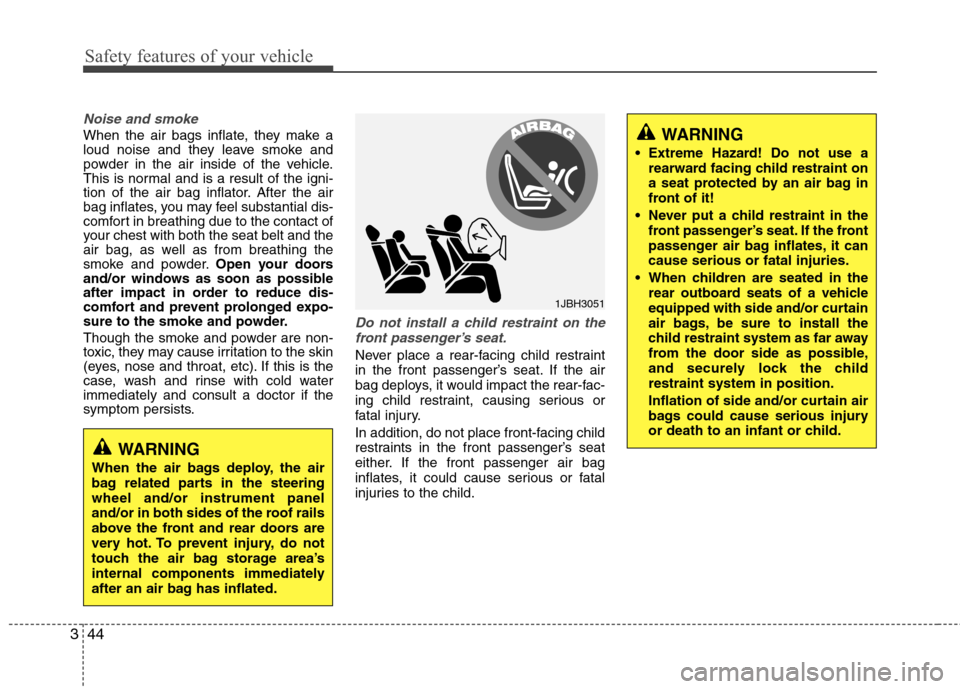
Do not install a child restraint on the
front passenger’s seat.
Never place a rear-facing child restraint
in the front passenger’s seat. If the air
bag deploys, it would impact the rear-fac-
ing child restraint, causing serious or
fatal injury.
In addition, do not place front-facing child
restraints in the front passenger’s seat
either. If the front passenger air bag
inflates, it could cause serious or fatal
injuries to the child.
1JBH3051
WARNING
When the air bags deploy, the air
bag related parts in the steeringwheel and/or instrument panel
and/or in both sides of the roof rails
above the front and rear doors are
very hot. To prevent injury, do not
touch the air bag storage area’s
internal components immediately
after an air bag has inflated.
Page 70 of 374
Safety features of your vehicle
52
3
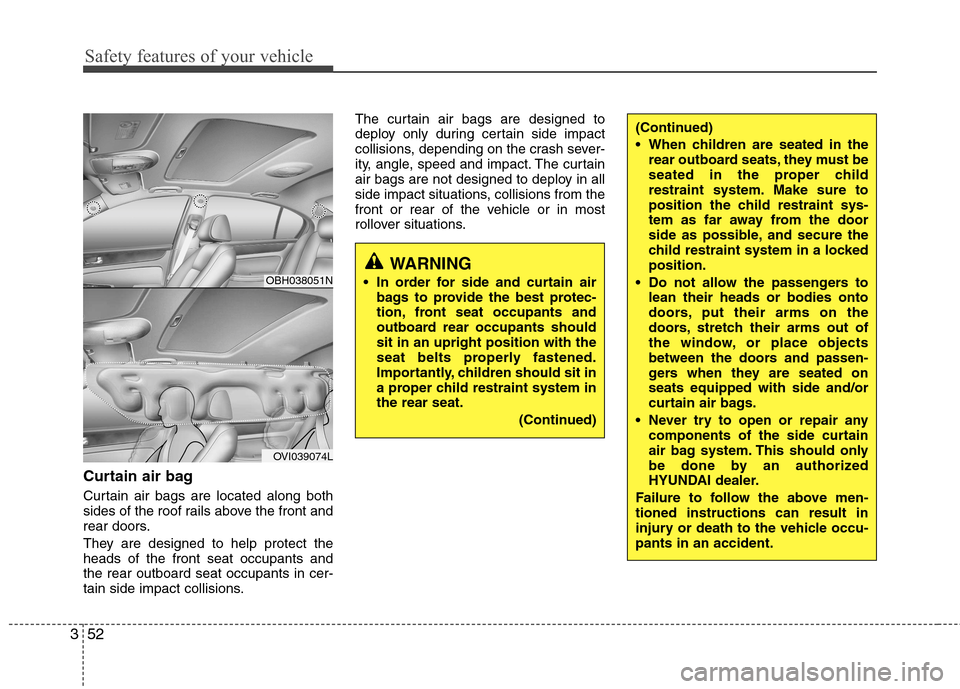
Curtain air bag
Curtain air bags are located along both
sides of the roof rails above the front and
rear doors.
They are designed to help protect the heads of the front seat occupants andthe rear outboard seat occupants in cer-
tain side impact collisions. The curtain air bags are designed to
deploy only during certain side impact
collisions, depending on the crash sever-
ity, angle, speed and impact. The curtain
air bags are not designed to deploy in all
side impact situations, collisions from the
front or rear of the vehicle or in most
rollover situations.
WARNING
In order for side and curtain air bags to provide the best protec-
tion, front seat occupants and
outboard rear occupants shouldsit in an upright position with the
seat belts properly fastened.
Importantly, children should sit in
a proper child restraint system inthe rear seat.
(Continued)OBH038051N
OVI039074L
(Continued)
When children are seated in therear outboard seats, they must be
seated in the proper child
restraint system. Make sure to
position the child restraint sys-
tem as far away from the door
side as possible, and secure the
child restraint system in a lockedposition.
Do not allow the passengers to lean their heads or bodies onto
doors, put their arms on the
doors, stretch their arms out of
the window, or place objects
between the doors and passen-
gers when they are seated onseats equipped with side and/or
curtain air bags.
Never try to open or repair any components of the side curtain
air bag system. This should only
be done by an authorized
HYUNDAI dealer.
Failure to follow the above men-tioned instructions can result in
injury or death to the vehicle occu-pants in an accident.
Page 79 of 374
4
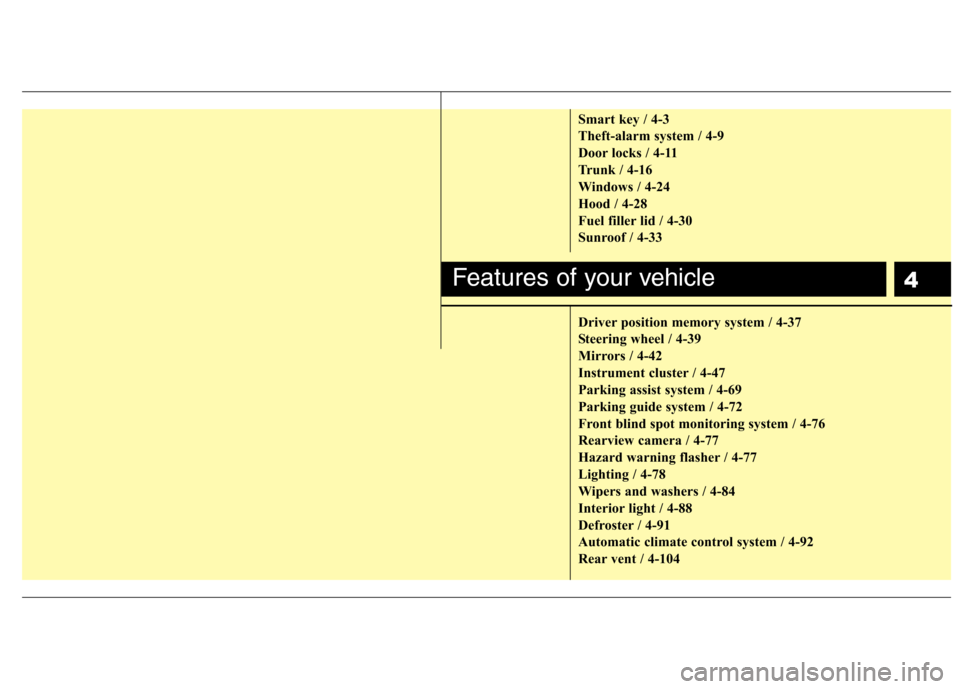
Smart key / 4-3
Theft-alarm system / 4-9
Door locks / 4-11
Trunk / 4-16
Windows / 4-24
Hood / 4-28
Fuel filler lid / 4-30
Sunroof / 4-33
Driver position memory system / 4-37
Steering wheel / 4-39
Mirrors / 4-42
Instrument cluster / 4-47
Parking assist system / 4-69
Parking guide system / 4-72
Front blind spot monitoring system / 4-76
Rearview camera / 4-77
Hazard warning flasher / 4-77
Lighting / 4-78
Wipers and washers / 4-84
Interior light / 4-88
Defroster / 4-91
Automatic climate control system / 4-92
Rear vent / 4-104
Features of your vehicle
Page 81 of 374

43
Features of your vehicle
With a smart key, you can lock or unlock
a door (and trunk) and even start the
engine without inserting the key.
Smart key functions
Carrying the smart key, you can lock and
unlock the vehicle doors (and trunk).
Also, you may start the engine. Refer to
the following for more details.Locking
Pressing the button of the outside door
handles with all doors (and trunk) closed
and any door unlocked, locks all the
doors (and trunk). The hazard warning
lights blink once to indicate that all doors
(and trunk) are locked. The button will
only operate when the smart key is with-in 0.7~1 m (28~40 in.) from the outside
door handle. If you put your hand in the
outside door handle to check that the
doors lock, doors may open.
If you want to make sure that a door has
locked or not, you should check the door
lock button inside the vehicle or check
that the hazard warning lights blink once.Even though you press the outside door
handle buttons, the doors will not lock
and the chime will sound for 3 seconds if
any of following occur:
• The smart key is in the vehicle.
The engine start/stop button is in ACC
or ON position.
Any door except the trunk is open.
Unlocking
Carrying the smart key with you while all
doors locked and if you put your hand in
the outside door handle for approximate-
ly 0.5 second, all doors will unlock. The
hazard warning lights blink twice to indi-
cate that all doors (and trunk) are
unlocked. You can open the door by
pulling the outside door handle. The
smart key is only recognized in the area0.7~1 m (28~40 in.) from the outside
door handle.
When the smart key is recognized in the area of 0.7~1 m (28~40 in.) from the out-
side door handle, other people can alsoopen the door without possession of the
smart key.
SMART KEY
OVI049001OVI049005
UnlockLock
Page 82 of 374

Features of your vehicle
4
4
Trunk unlocking (if equipped)
When all doors are locked, if you are within 0.7~1 m (28~40 in.) from the out-
side trunk handle with your smart key in
your possession, the trunk will unlock
and open when you press the trunk han-
dle switch.
Also, once the trunk is opened and then
closed, the trunk will be locked automati-
cally.
If you close the trunk when the smart key
is in the trunk, the chime will sound for 5
seconds. The trunk will unlock and open
when you press the trunk handle switch.
Start-up
You can start the engine without inserting
the key. For detailed information refer to
“Engine start/stop button” in section 5. Buttons on the smart key
Lock (1)
All doors (and trunk) are locked if the lock
button is pressed while all doors areclosed.
If all doors (and trunk) are closed, the
hazard warning lights blink once to indi-
cate that all doors (and trunk) are locked.However, if any door (or trunk) remains
open, the hazard warning lights will not
operate. If all doors (and trunk) are
closed after the lock button is pressed,
the hazard warning lights blink.
If you press the lock button one more time within 4 seconds after all doors are
locked by pressing the lock button, the
outside rearview mirror will be folded. (if equipped)
Unlock (2)
All doors (and trunk) are unlocked if the
unlock button is pressed.
The hazard warning lights will blink twice
to indicate that all doors (and trunk) are
unlocked.
However, after pressing this button, the
doors (and trunk) will lock automatically
unless you open any door within 30 sec-
onds.
If you press the unlock button one more time within 4 seconds after all doors are
unlocked by pressing the unlock button,
the outside rearview mirror will be unfold-
ed. (if equipped)OVI049004
Page 83 of 374
45
Features of your vehicle
Trunk unlock (3)
Without power trunk
The trunk is unlocked if the button is
pressed for more than 1 second when all
doors are locked.
The hazard warning lights will blink twice
to indicate that the trunk is unlocked.
Once the trunk is opened and then
closed with all doors locked, the trunk will
be locked automatically.
With power trunk
The trunk is opened automatically if the
button is pressed for more than 1 sec-ond.
The hazard warning lights will blink twice
to indicate that the trunk will swing
upward.
Alarm (4)
The horn sounds and the hazard warning
lights blink for about 30 seconds if this
button is pressed for more than 0.5 sec-
ond. To stop the horn and lights, press
any button on the transmitter.Smart key precautions✽✽
NOTICE
If, for some reason, you happen to lose your smart key, you will not be able to
start the engine. Tow the vehicle, if
necessary, and contact an authorized
HYUNDAI dealer.
A maximum of 2 smart keys can be
registered to a single vehicle. If you
lose a smart key, you should immedi-
ately take the vehicle and key to your
authorized HYUNDAI dealer to pro-
tect it from potential theft.
The smart key will not work if any of
following occur:
- The smart key is close to a radiotransmitter such as a radio station or
an airport which can interfere with
normal operation of the smart key.
- You keep the smart key near a
mobile two-way radio system or a
cellular phone.
- Another vehicle’s smart key is being operated close to your vehicle.
When the smart key does not work
correctly, open and close the door with
the mechanical key. If you have a
problem with the smart key, contact
an authorized HYUNDAI dealer.
CAUTION
The power trunk can be operated
when the engine is not running.However, the power trunk con-sumes large amounts of vehicleelectric power. To prevent the bat-
tery from being discharged, do notoperate them consecutively (more than approximately 10 times).
Page 84 of 374

Features of your vehicle
6
4
Restrictions in handling keys
When leaving keys with parking lot and
valet attendants, the following proce-
dures will ensure that your vehicle’s trunk
and glove box compartment can not be
opened in your absence. To activate the trunk lock system so that
the trunk can only be opened with the
mechanical key, perform the following: 1.
Depress and hold the release button
(1) and remove the mechanical key (2).
2. Unlock the glove box by using the
mechanical key then open it.
3. Set the trunk lid control button to OFF position (not depressed).
4. Close and lock the glove box using the mechanical key.
When leaving your keys with a parking lot
attendant or valet, perform steps 1 to 4
above, remove the mechanical key from
the smart key and leave the smart key
with the attendant. In this manner the
smart key can only be used to start the
engine and operate door locks.
OVI049003OVI049002
CAUTION
Keep the smart key away from water or any liquid. If the keyless
entry system is inoperative due toexposure to water or liquids, it willnot be covered by your manufactur- er’s vehicle warranty.
CAUTION
Changes or modifications notexpressly approved by the partyresponsible for compliance couldvoid the user’s authority to operate
the equipment. If the keyless entrysystem is inoperative due to changes or modifications notexpressly approved by the party
responsible for compliance, it will not be covered by your manufactur-er’s vehicle warranty.