start stop button Hyundai Equus 2014 Owner's Guide
[x] Cancel search | Manufacturer: HYUNDAI, Model Year: 2014, Model line: Equus, Model: Hyundai Equus 2014Pages: 479, PDF Size: 10.15 MB
Page 119 of 479
Features of your vehicle
30 4
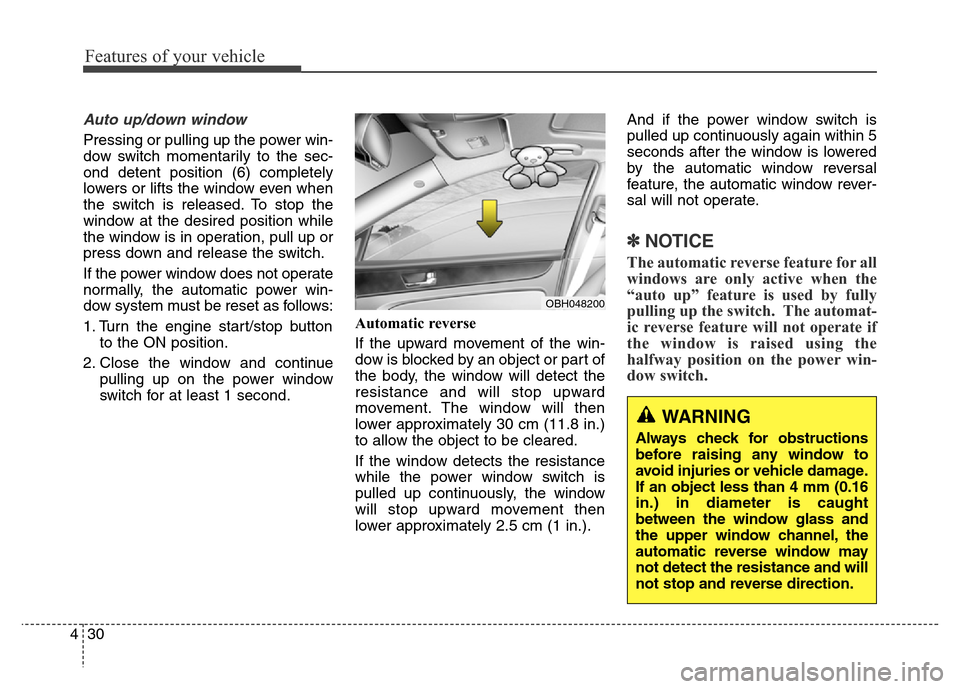
Auto up/down window
Pressing or pulling up the power win-
dow switch momentarily to the sec-
ond detent position (6) completely
lowers or lifts the window even when
the switch is released. To stop the
window at the desired position while
the window is in operation, pull up or
press down and release the switch.
If the power window does not operate
normally, the automatic power win-
dow system must be reset as follows:
1. Turn the engine start/stop button
to the ON position.
2. Close the window and continue
pulling up on the power window
switch for at least 1 second.Automatic reverse
If the upward movement of the win-
dow is blocked by an object or part of
the body, the window will detect the
resistance and will stop upward
movement. The window will then
lower approximately 30 cm (11.8 in.)
to allow the object to be cleared.
If the window detects the resistance
while the power window switch is
pulled up continuously, the window
will stop upward movement then
lower approximately 2.5 cm (1 in.).And if the power window switch is
pulled up continuously again within 5
seconds after the window is lowered
by the automatic window reversal
feature, the automatic window rever-
sal will not operate.
✽NOTICE
The automatic reverse feature for all
windows are only active when the
“auto up” feature is used by fully
pulling up the switch. The automat-
ic reverse feature will not operate if
the window is raised using the
halfway position on the power win-
dow switch.
OBH048200
WARNING
Always check for obstructions
before raising any window to
avoid injuries or vehicle damage.
If an object less than 4 mm (0.16
in.) in diameter is caught
between the window glass and
the upper window channel, the
automatic reverse window may
not detect the resistance and will
not stop and reverse direction.
Page 120 of 479
431
Features of your vehicle
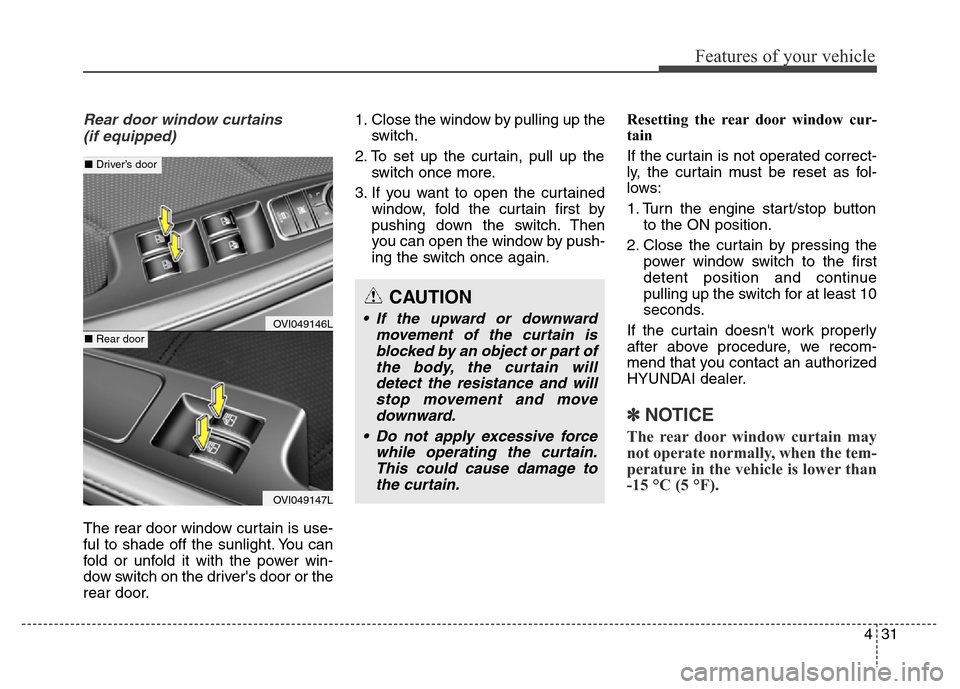
Rear door window curtains
(if equipped)
The rear door window curtain is use-
ful to shade off the sunlight. You can
fold or unfold it with the power win-
dow switch on the driver's door or the
rear door.1. Close the window by pulling up the
switch.
2. To set up the curtain, pull up the
switch once more.
3. If you want to open the curtained
window, fold the curtain first by
pushing down the switch. Then
you can open the window by push-
ing the switch once again.Resetting the rear door window cur-
tain
If the curtain is not operated correct-
ly, the curtain must be reset as fol-
lows:
1. Turn the engine start/stop button
to the ON position.
2. Close the curtain by pressing the
power window switch to the first
detent position and continue
pulling up the switch for at least 10
seconds.
If the curtain doesn't work properly
after above procedure, we recom-
mend that you contact an authorized
HYUNDAI dealer.
✽NOTICE
The rear door window curtain may
not operate normally, when the tem-
perature in the vehicle is lower than
-15 °C (5 °F).
CAUTION
• If the upward or downward
movement of the curtain is
blocked by an object or part of
the body, the curtain will
detect the resistance and will
stop movement and move
downward.
• Do not apply excessive force
while operating the curtain.
This could cause damage to
the curtain.OVI049146L
OVI049147L
■Driver’s door
■Rear door
Page 127 of 479
Features of your vehicle
38 4
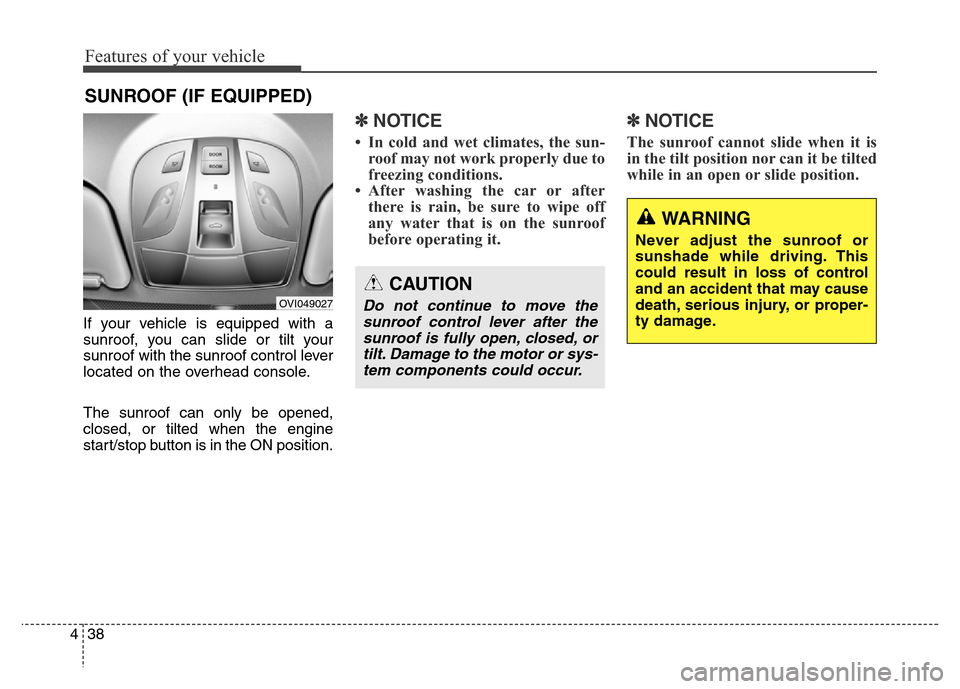
If your vehicle is equipped with a
sunroof, you can slide or tilt your
sunroof with the sunroof control lever
located on the overhead console.
The sunroof can only be opened,
closed, or tilted when the engine
start/stop button is in the ON position.
✽NOTICE
• In cold and wet climates, the sun-
roof may not work properly due to
freezing conditions.
• After washing the car or after
there is rain, be sure to wipe off
any water that is on the sunroof
before operating it.
✽NOTICE
The sunroof cannot slide when it is
in the tilt position nor can it be tilted
while in an open or slide position.
SUNROOF (IF EQUIPPED)
OVI049027
CAUTION
Do not continue to move the
sunroof control lever after the
sunroof is fully open, closed, or
tilt. Damage to the motor or sys-
tem components could occur.
WARNING
Never adjust the sunroof or
sunshade while driving. This
could result in loss of control
and an accident that may cause
death, serious injury, or proper-
ty damage.
Page 130 of 479
441
Features of your vehicle
Resetting the sunroof
Sunroof needs to be reset if (in the
followings)
- Battery is discharged or disconnect-
ed or the related fuse has been
replaced or disconnected.
- The one-touch sliding function of the
sunroof does not normally operate.
1.Turn the engine start/stop button to
the ON position and close the sun-
roof completely.
2.Release the control lever.
3.Pull and hold the control lever
downward until the sunroof tilts
and slightly moves up and down.
Then, release the lever.
4.Pull and hold the control lever
downward until the sunroof is oper-
ated as follows;
TILT DOWN
→SLIDE OPEN →
SLIDE CLOSE
Then, release the control lever.
When this is complete, the sunroof
system is reset.❈For more detailed information, we
recommend that you contact an
authorized HYUNDAI dealer.
CAUTION
If the sunroof is not reset when
the vehicle battery is discon-
nected or discharged, or related
fuse is blown, the sunroof may
operate improperly.
Page 131 of 479
Features of your vehicle
42 4
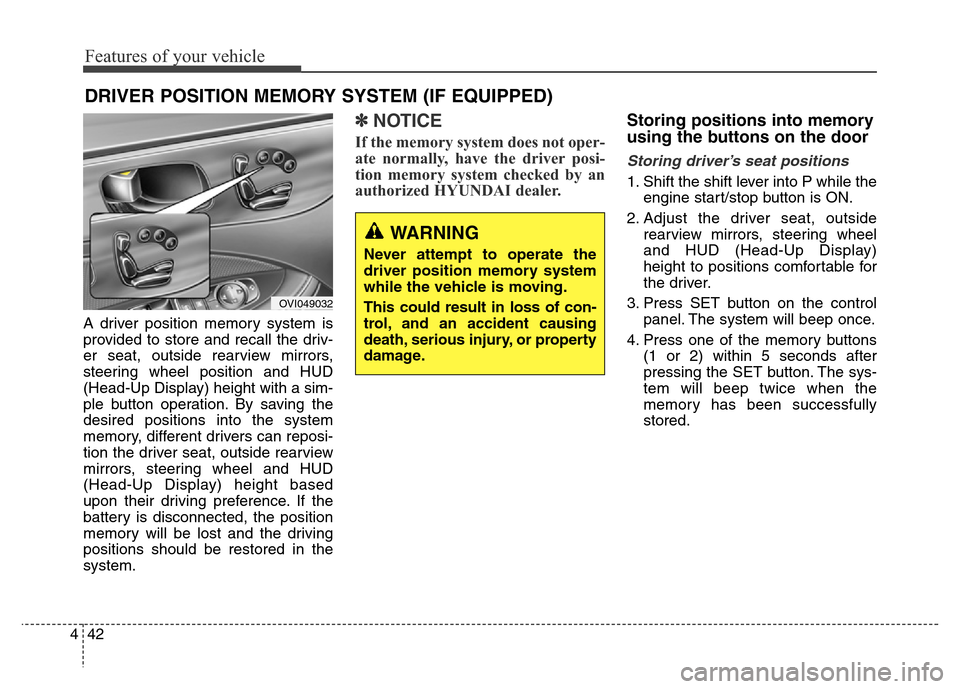
A driver position memory system is
provided to store and recall the driv-
er seat, outside rearview mirrors,
steering wheel position and HUD
(Head-Up Display) height with a sim-
ple button operation. By saving the
desired positions into the system
memory, different drivers can reposi-
tion the driver seat, outside rearview
mirrors, steering wheel and HUD
(Head-Up Display) height based
upon their driving preference. If the
battery is disconnected, the position
memory will be lost and the driving
positions should be restored in the
system.
✽NOTICE
If the memory system does not oper-
ate normally, have the driver posi-
tion memory system checked by an
authorized HYUNDAI dealer.
Storing positions into memory
using the buttons on the door
Storing driver’s seat positions
1. Shift the shift lever into P while the
engine start/stop button is ON.
2. Adjust the driver seat, outside
rearview mirrors, steering wheel
and HUD (Head-Up Display)
height to positions comfortable for
the driver.
3. Press SET button on the control
panel. The system will beep once.
4. Press one of the memory buttons
(1 or 2) within 5 seconds after
pressing the SET button. The sys-
tem will beep twice when the
memory has been successfully
stored.
DRIVER POSITION MEMORY SYSTEM (IF EQUIPPED)
WARNING
Never attempt to operate the
driver position memory system
while the vehicle is moving.
This could result in loss of con-
trol, and an accident causing
death, serious injury, or property
damage.
OVI049032
Page 132 of 479
443
Features of your vehicle
Recalling positions from memory
1. Shift the shift lever into P while the
engine start/stop button is ON.
2. To recall the position in memory,
press the desired memory button
(1 or 2). The system will beep
once, and then the driver seat,
outside rearview mirrors, steering
wheel and HUD (Head-Up
Display) height will automatically
adjust to the stored positions.
Adjusting one of the control knobs for
the driver seat, outside rearview mir-
ror and steering wheel while the sys-
tem is recalling the stored positions
will cause the movement for that
component to stop and move in the
direction that the control knob is
moved. Other components will con-
tinue to the recalled position.
Easy access function
(if equipped)
The steering wheel will move away
from the driver and the seat will
move rearward, when the engine
start/stop button is turned to the OFF
position.
The steering wheel will move toward
the driver and the seat will move for-
ward, when the engine start/stop but-
ton is turned to the ACC or ON posi-
tion.
WARNING
Use caution when recalling
adjustment memory while sitting
in the vehicle. Push the seat posi-
tion control knob to the desired
position immediately if the seat
moves too far in any direction.
Page 134 of 479
445
Features of your vehicle
Tilt/Telescopic steering
Tilt/Telescopic steering allows you to
adjust the steering wheel before you
drive. You can also raise it to give
your legs more room when you exit
and enter the vehicle.
The steering wheel should be posi-
tioned so that it is comfortable for
you to drive, while permitting you to
see the instrument panel warning
lights and gauges.
Electric type
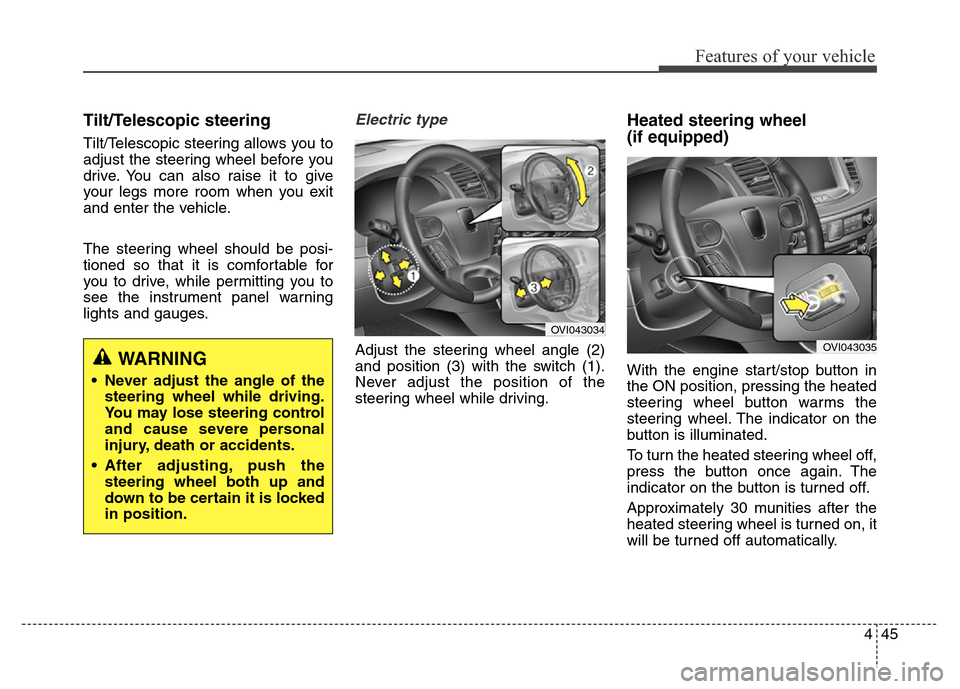
Adjust the steering wheel angle (2)
and position (3) with the switch (1).
Never adjust the position of the
steering wheel while driving.
Heated steering wheel
(if equipped)
With the engine start/stop button in
the ON position, pressing the heated
steering wheel button warms the
steering wheel. The indicator on the
button is illuminated.
To turn the heated steering wheel off,
press the button once again. The
indicator on the button is turned off.
Approximately 30 munities after the
heated steering wheel is turned on, it
will be turned off automatically.WARNING
• Never adjust the angle of the
steering wheel while driving.
You may lose steering control
and cause severe personal
injury, death or accidents.
• After adjusting, push the
steering wheel both up and
down to be certain it is locked
in position.
OVI043034
OVI043035
Page 142 of 479
453
Features of your vehicle
Reverse parking aid function
(if equipped)
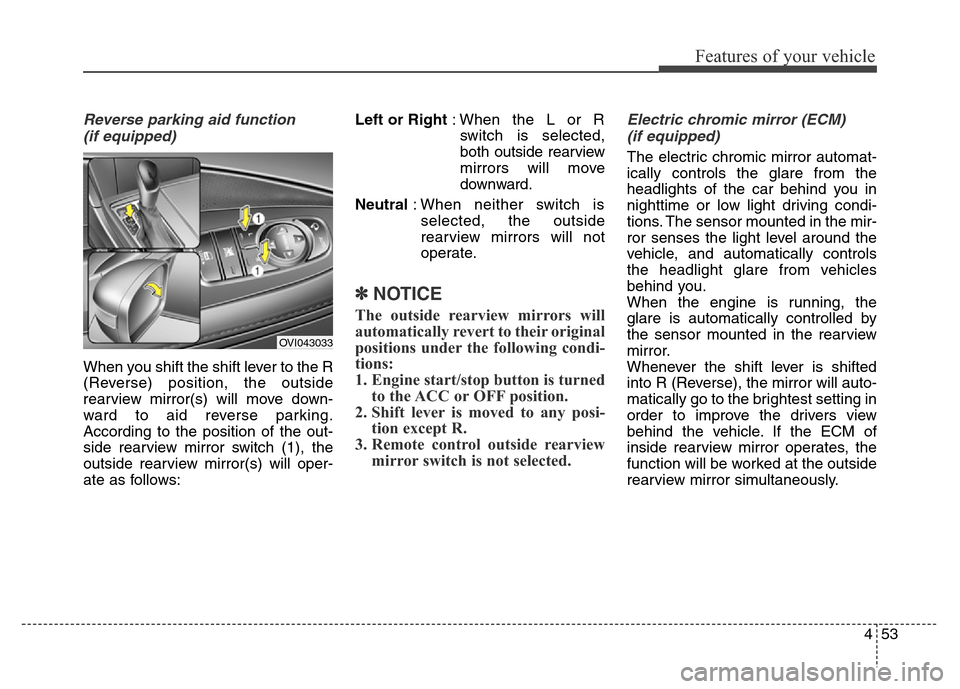
When you shift the shift lever to the R
(Reverse) position, the outside
rearview mirror(s) will move down-
ward to aid reverse parking.
According to the position of the out-
side rearview mirror switch (1), the
outside rearview mirror(s) will oper-
ate as follows:Left or Right: When the L or R
switch is selected,
both outside rearview
mirrors will move
downward.
Neutral: When neither switch is
selected, the outside
rearview mirrors will not
operate.
✽NOTICE
The outside rearview mirrors will
automatically revert to their original
positions under the following condi-
tions:
1. Engine start/stop button is turned
to the ACC or OFF position.
2. Shift lever is moved to any posi-
tion except R.
3. Remote control outside rearview
mirror switch is not selected.
Electric chromic mirror (ECM)
(if equipped)
The electric chromic mirror automat-
ically controls the glare from the
headlights of the car behind you in
nighttime or low light driving condi-
tions. The sensor mounted in the mir-
ror senses the light level around the
vehicle, and automatically controls
the headlight glare from vehicles
behind you.
When the engine is running, the
glare is automatically controlled by
the sensor mounted in the rearview
mirror.
Whenever the shift lever is shifted
into R (Reverse), the mirror will auto-
matically go to the brightest setting in
order to improve the drivers view
behind the vehicle. If the ECM of
inside rearview mirror operates, the
function will be worked at the outside
rearview mirror simultaneously.
OVI043033
Page 143 of 479
Features of your vehicle
54 4
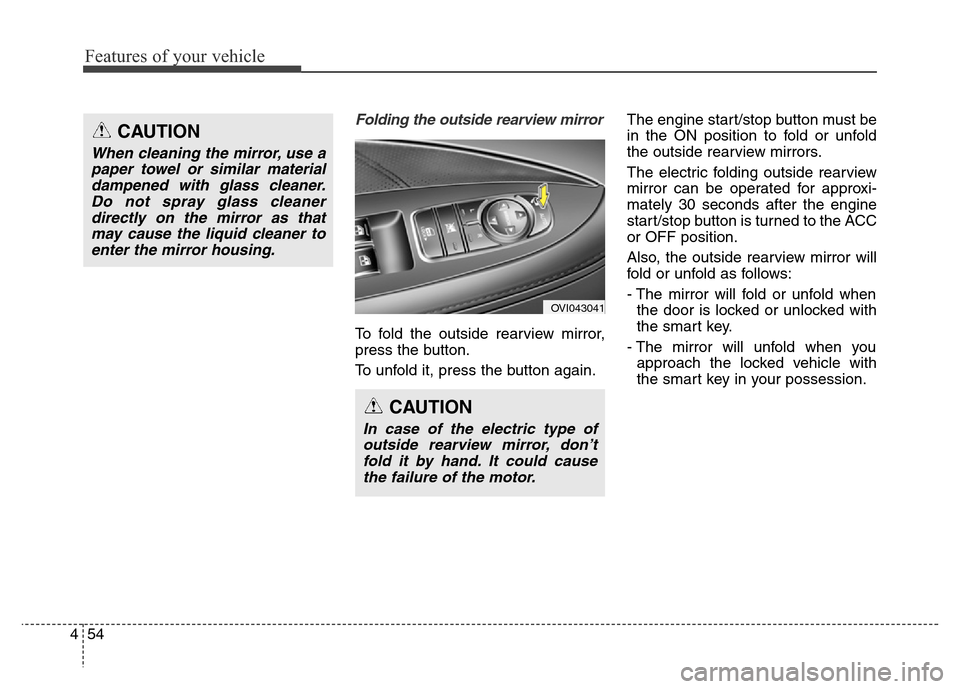
Folding the outside rearview mirror
To fold the outside rearview mirror,
press the button.
To unfold it, press the button again.The engine start/stop button must be
in the ON position to fold or unfold
the outside rearview mirrors.
The electric folding outside rearview
mirror can be operated for approxi-
mately 30 seconds after the engine
start/stop button is turned to the ACC
or OFF position.
Also, the outside rearview mirror will
fold or unfold as follows:
- The mirror will fold or unfold when
the door is locked or unlocked with
the smart key.
- The mirror will unfold when you
approach the locked vehicle with
the smart key in your possession.
OVI043041
CAUTION
In case of the electric type of
outside rearview mirror, don’t
fold it by hand. It could cause
the failure of the motor.
CAUTION
When cleaning the mirror, use a
paper towel or similar material
dampened with glass cleaner.
Do not spray glass cleaner
directly on the mirror as that
may cause the liquid cleaner to
enter the mirror housing.
Page 145 of 479
Features of your vehicle
56 4
Instrument cluster control
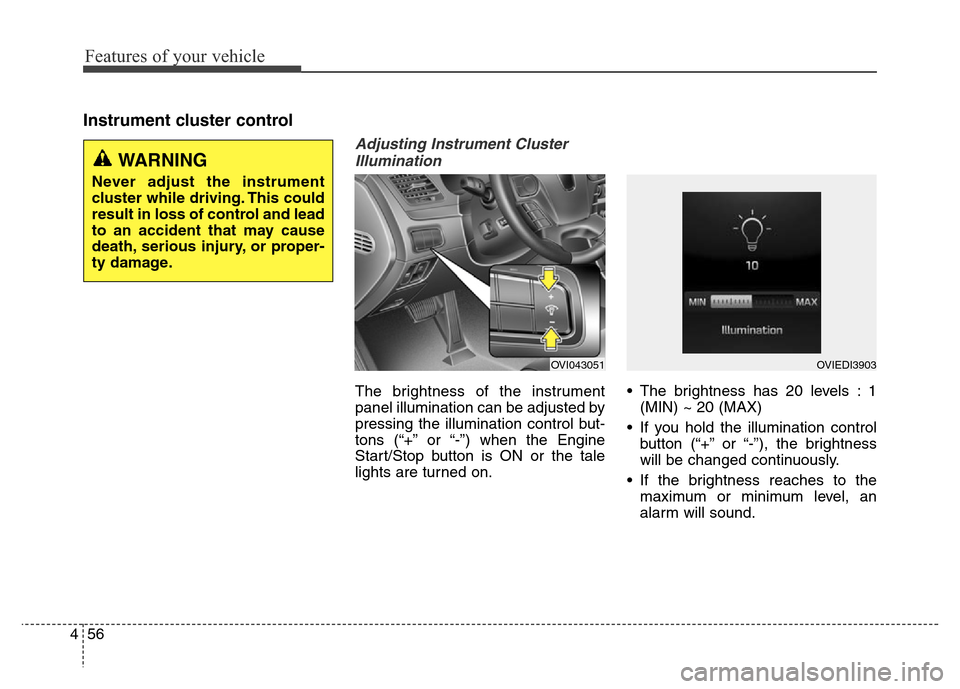
Adjusting Instrument Cluster
Illumination
The brightness of the instrument
panel illumination can be adjusted by
pressing the illumination control but-
tons (“+” or “-”) when the Engine
Start/Stop button is ON or the tale
lights are turned on.• The brightness has 20 levels : 1
(MIN) ~ 20 (MAX)
• If you hold the illumination control
button (“+” or “-”), the brightness
will be changed continuously.
• If the brightness reaches to the
maximum or minimum level, an
alarm will sound.
OVI043051OVIEDI3903
WARNING
Never adjust the instrument
cluster while driving. This could
result in loss of control and lead
to an accident that may cause
death, serious injury, or proper-
ty damage.