headlights Hyundai Getz 2003 Owner's Manual
[x] Cancel search | Manufacturer: HYUNDAI, Model Year: 2003, Model line: Getz, Model: Hyundai Getz 2003Pages: 444, PDF Size: 13.82 MB
Page 60 of 444
FEATURES OF YOUR HYUNDAI 1- 45
B260F01A-AAT
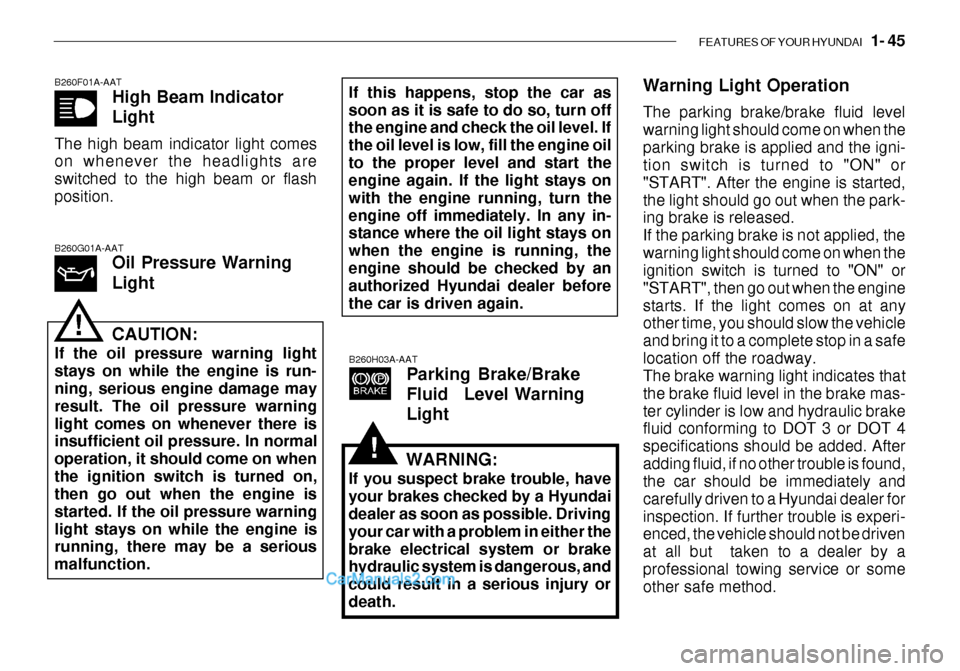
High Beam Indicator Light
The high beam indicator light comes on whenever the headlights are switched to the high beam or flashposition.
B260H03A-AATParking Brake/Brake
Fluid Level WarningLight
B260G01A-AATOil Pressure Warning Light
!CAUTION:
If the oil pressure warning light stays on while the engine is run- ning, serious engine damage may result. The oil pressure warninglight comes on whenever there is insufficient oil pressure. In normal operation, it should come on whenthe ignition switch is turned on, then go out when the engine is started. If the oil pressure warninglight stays on while the engine is running, there may be a serious malfunction. If this happens, stop the car assoon as it is safe to do so, turn off the engine and check the oil level. If the oil level is low, fill the engine oilto the proper level and start the engine again. If the light stays on with the engine running, turn theengine off immediately. In any in- stance where the oil light stays on when the engine is running, theengine should be checked by an authorized Hyundai dealer before the car is driven again.
Warning Light Operation The parking brake/brake fluid level warning light should come on when theparking brake is applied and the igni- tion switch is turned to "ON" or "START". After the engine is started,the light should go out when the park- ing brake is released. If the parking brake is not applied, thewarning light should come on when the ignition switch is turned to "ON" or "START", then go out when the enginestarts. If the light comes on at any other time, you should slow the vehicle and bring it to a complete stop in a safelocation off the roadway. The brake warning light indicates that the brake fluid level in the brake mas-ter cylinder is low and hydraulic brake fluid conforming to DOT 3 or DOT 4 specifications should be added. Afteradding fluid, if no other trouble is found, the car should be immediately and carefully driven to a Hyundai dealer forinspection. If further trouble is experi- enced, the vehicle should not be driven at all but taken to a dealer by aprofessional towing service or some other safe method.
WARNING:
If you suspect brake trouble, have your brakes checked by a Hyundai dealer as soon as possible. Driving your car with a problem in either thebrake electrical system or brake hydraulic system is dangerous, and could result in a serious injury ordeath.
!
Page 68 of 444
FEATURES OF YOUR HYUNDAI 1- 53
HTB018A
HTB015
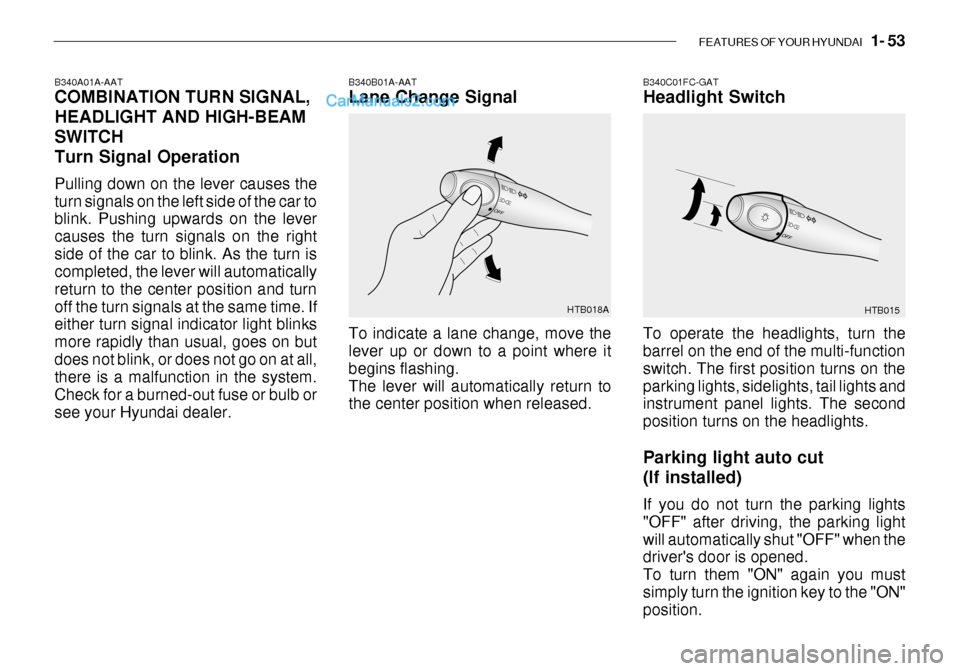
B340B01A-AAT Lane Change Signal
B340C01FC-GATHeadlight Switch
To indicate a lane change, move the lever up or down to a point where it begins flashing.The lever will automatically return to the center position when released. To operate the headlights, turn thebarrel on the end of the multi-function switch. The first position turns on theparking lights, sidelights, tail lights and instrument panel lights. The second position turns on the headlights. Parking light auto cut (If installed) If you do not turn the parking lights "OFF" after driving, the parking lightwill automatically shut "OFF" when the driver's door is opened. To turn them "ON" again you mustsimply turn the ignition key to the "ON" position.
B340A01A-AAT COMBINATION TURN SIGNAL, HEADLIGHT AND HIGH-BEAMSWITCHTurn Signal Operation Pulling down on the lever causes the turn signals on the left side of the car to blink. Pushing upwards on the lever causes the turn signals on the rightside of the car to blink. As the turn is completed, the lever will automatically return to the center position and turnoff the turn signals at the same time. If either turn signal indicator light blinks more rapidly than usual, goes on butdoes not blink, or does not go on at all, there is a malfunction in the system. Check for a burned-out fuse or bulb orsee your Hyundai dealer.
Page 69 of 444

1- 54 FEATURES OF YOUR HYUNDAI
HTB017 B350A01A-AAT WINDSHIELD WIPER AND WASHER SWITCH
B340E01A-AAT Headlight Flasher To flash the headlights, pull the switch lever toward you, then release it. The headlights can be flashed even thoughthe headlight switch is in the "OFF" position. The windshield wiper switch has threepositions:
1. Intermittent wiper operation
2. Low-speed operation
3. High-speed operation NOTE: To prevent damage to the wiper system, do not attempt to wipe away heavy accumulations of snow orice. Accumulated snow and ice should be removed manually. If there is only a light layer of snow orHTB019
B340D01A-AAT High-beam Switch To turn on the headlight high beams, push the lever forward (away fromyou). The high beam indicator light will come on at the same time. For low beams, pull the lever back toward you.
B340F01A-GAT Daytime Running Lights (If Installed) Your Hyundai is equipped with day- time running lights. The daytime run- ning lights are used to improve visibil-ity for oncoming traffic. Your vehicle daytime running lights are designed to remain on continuously when the en-gine is operating even though the head- light switch is in the "OFF" position. However, the daytime running lightswill be off while the parking brake is applied.
Page 81 of 444

1- 66 FEATURES OF YOUR HYUNDAI
B520A01A-AAT DAY/NIGHT INSIDE REARVIEW MIRROR Your Hyundai is equipped with a day/ night inside rearview mirror. The "night" position is selected by flipping the tabat the bottom of the mirror toward you. In the "night" position, the glare of headlights of cars behind you is re-duced. HTB103B510D01HP-AAT OUTSIDE REARVIEW MIRROR
HEATER (If Installed) The outside rearview mirror heater is actuated in connection with the rear window defroster. To heat the outsiderearview mirror glass, push in the switch for the rear window defroster. The rearview mirror glass will be heated fordefrosting or defogging and will give you improved rear vision in inclement weather conditions. Push the switchagain to turn the heater off. The out- side rearview mirror heater automati- cally turns itself off after 20 minutes. B510C01A-AAT FOLDING THE OUTSIDE REAR- VIEW MIRRORS To fold the outside rearview mirrors, push them towards the rear. The outside rearview mirrors can befolded rearward for parking in narrow areas.
HTB039
HTB205
WARNING:
Do not adjust or fold the outsiderearview mirrors while the vehicle is moving. This could result in lossof control, and an accident which could cause death, serious injury or property damage.
!
Page 154 of 444
2- 18 DRIVING YOUR HYUNDAI
C190C03S-GAT Trailer Brakes If your trailer is equipped with a braking system, make sure it conforms to fed-eral and/or local regulations and that it is properly installed and operating cor- rectly. NOTE: If you tow a trailer or vehicle, your car will require more frequent main- tenance due to the additional load.See "Maintenance Under Severe Usage Conditions" on page 5-5.
CAUTION:
o Never connect a trailer brake sys- tem directly to the vehicle brake system.
o When towing a trailer on steep
grades (in excess of 12%) payclose attention to the engine cool- ant temperature gauge to ensure the engine does not overheat. Ifthe needle of the coolant tem- perature gauge moves across the dial towards "H" (HOT), pull overand stop as soon as it is safe to do so, and allow the engine to
!
C180A01A-AAT USE OF LIGHTS Check your lights regularly for correct operation and always keep them clean.When driving during the day in condi- tions of poor visibility, it is helpful to drive with headlights on low beam.This enables you to be seen as well as to see. C190A02A-GAT TRAILER OR VEHICLE TOWING If you are considering towing with your car, you should first check with your Province Department of Motor Vehicles to determine their legal requirements.Since laws vary from province to prov- ince, the requirements for towing trail- ers, cars, other types of vehicles, orapparatus may differ. Ask your Hyundai dealer for further details before towing. C190B01S-AAT Trailer Hitches Select the proper hitch and ball combi- nation, making sure that it's location iscompatible with that of the trailer or vehicle being towed. Use a quality non-equalizing hitch whichdistributes the tongue load uniformly throughout the chassis. The hitch should be bolted securely to the car and installed by a qualified technician. DO NOT USE A HITCHDESIGNED FOR TEMPORARY IN- STALLATION AND NEVER USE ONE THAT ATTACHES ONLY TO THEBUMPER.
!
CAUTION
Do not do any towing with your car during its first 2,000 km (1,200 miles) in order to allow the engine to prop- erly break in. Failure to heed thiscaution may result in serious en- gine or transaxle damage.
Page 220 of 444

6- 32 DO-IT-YOURSELF MAINTENANCE
If the vehicle has had front body repair and the headlight assembly has been replaced, the headlight aiming should be checked using the aiming screen asshown in the illustration. Turn on the headlight switch. (Low Beam Position)
1. Adjust headlights so that main axis
of light is parallel to center line of the body and is aligned with point "P"shown in the illustration.
2. Dotted lines in the illustration show
the center of headlights.
G290B01TB-GAT Adjustment After Headlight As- sembly Replacement
SPECIFICATIONS: "H" Horizontal center line of headlightsfrom ground. : 656 mm (26.8 in.) "W" Distance between each headlight center.: 1,100 mm (43.3 in.) "L" Distance between the headlights and the wall that the lights are tested against.: 3,000 mm (118 in.).
G290B01L
LW
H
H Cut-off line
Ground line
"P"
Horizontal line15mm (0.59in.)
30mm (1.18 in.) Vertical line G270A01TB-GAT REPLACEMENT OF BULBS Headlight Bulb Before attempting to replace a head- light bulb, be sure the switch is turned to the "OFF" position.The next paragraph shows how to reach headlight bulbs so they may be changed. Be sure to replace theburned-out bulb with one of the same number and wattage rating.
CAUTION:
Keep the lamps out of contact with petroleum product, such as oil,gasoline, etc.
!
Page 298 of 444

1- 38 FEATURES OF YOUR HYUNDAI
!
SB210J1-E
HIGH BEAM INDICATOR LIGHT
The high beam indicator light will illumi- nate whenever the headlights are switched to high beam of flash position.
B260H03A-EATPARKING BRAKE/
BRAKE FLUID LEVEL WARNING LIGHT
SB210K1-E
OIL PRESSURE WARNING LIGHT
!CAUTION:
If the oil pressure light illuminates when the engine is running, an in- sufficient oil pressure level for con- tinued safe operation of the engineexists. Continued operation of the engine in this condition may result in serious engine damage. Under normal circumstances, the light will illuminate when the igni-tion is turned "on" and will be extin- guished when the engine is started. If the oil pressure warning light illu-minates whilst the engine is run- ning, stop the engine immediately and check the engine oil level. If thelevel is insufficient, add the required amount of oil as indicated by theengine oil dipstick. If the light fails to extinguish when the engine is re- started, do not continue to operatethe vehicle. If the oil pressure light illuminates during normal operation and thecause is not an insufficient oil level, or the light fails to illuminate when the ignition is turned "on", contactthe nearest Hyundai dealer before further operating the vehicle.
Warning light operation The parking brake/brake fluid level warn- ing light will be illuminated wheneverthe ignition switch is turned to the "ON" position irrespective of whether or not the parking brake is applied and mustbe extinguished when the engine starts and the parking brake released. If the warning light fails to extinguish orilluminates at any other time, the ve- hicle must be brought to rest in a safe location and the level of brake fluid inthe reservoir checked. If the fluid level is incorrect, fluid conforming to DOT 3 or DOT 4 specifications should be added.If, after correcting the brake fluid level, the warning light continues to be illumi- nated, the advice of the nearest Hyundaidealer must be sought before the ve- hicle is driven again. Your Hyundai is equipped with a diago-nally split dual braking system which will ensure that in the event of one of the brake circuits becoming defective, ap-proximately fifty per cent of the normal braking performance will be available. If failure of one of the circuits occurs,the required amount of pedal effort, pedal travel and stopping distance will be increased. Use of the gearbox is
WARNING:
In the event of problems being sus-pected with the braking system, theadvice of the nearest Hyundai dealer must be sought before the vehicle is driven. Driving the vehicle with ei-ther an electrical or hydraulic brak- ing system defect may be danger- ous, resulting in accident or per-sonal injury.
Page 307 of 444
FEATURES OF YOUR HYUNDAI 1- 47
HTB017-DHTB015-D
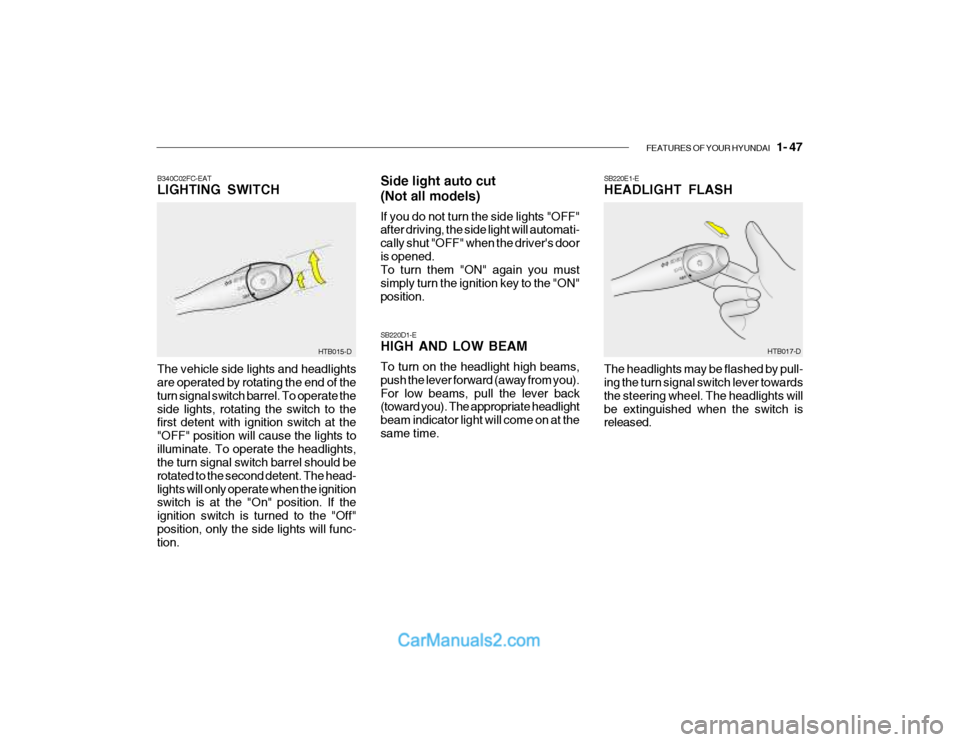
B340C02FC-EAT LIGHTING SWITCH
The vehicle side lights and headlights are operated by rotating the end of the turn signal switch barrel. To operate theside lights, rotating the switch to the first detent with ignition switch at the "OFF" position will cause the lights toilluminate. To operate the headlights, the turn signal switch barrel should be rotated to the second detent. The head-lights will only operate when the ignition switch is at the "On" position. If the ignition switch is turned to the "Off"position, only the side lights will func- tion. Side light auto cut (Not all models) If you do not turn the side lights "OFF" after driving, the side light will automati- cally shut "OFF" when the driver's dooris opened. To turn them "ON" again you must simply turn the ignition key to the "ON"position. SB220D1-E HIGH AND LOW BEAM To turn on the headlight high beams, push the lever forward (away from you). For low beams, pull the lever back (toward you). The appropriate headlight beam indicator light will come on at thesame time.
SB220E1-E HEADLIGHT FLASH The headlights may be flashed by pull- ing the turn signal switch lever towards the steering wheel. The headlights willbe extinguished when the switch is released.
Page 319 of 444

FEATURES OF YOUR HYUNDAI 1- 59
!
SB370A1-E INTERIOR REAR VIEW MIRROR The interior mirror is of the day/night type to enable the glare of headlights from following vehicles to be eliminatedduring night time driving. The tab located at the bottom of the mirror should be set to the positionnearest the windscreen for normal day time driving, and flipped towards the rear of the vehicle to eliminate glareduring night time driving. To adjust the field of vision, the mirror may be moved by hand upon the mounting. NOTE: The mirror should always be ad- justed prior to setting the vehicle inmotion. HTB103B510D01HP-EAT OUTSIDE REARVIEW MIRROR HEATER (Not all models) The outside rearview mirror heater is actuated in connection with the rear window defroster. To heat the outsiderearview mirror glass, push in the switch for the rear window defroster. The rear- view mirror glass will be heated fordefrosting or defogging and will give you improved rear vision in inclement weather conditions. Push the switchagain to turn the heater off. The outside rearview mirror heater automatically turns itself off after 20 minutes. SB360C1-F FOLDING THE OUTSIDE REAR VIEW MIRRORS To fold the outside rear view mirrors, push them towards the rear. The outside rear view mirrors can befolded rearward for parking in restricted areas.
HTB039
HTB205
WARNING:
Do not adjust or fold the outside rear view mirrors while the vehicle ismoving. This could result in loss of control, and an accident causing death, serious injury or propertydamage.
Page 418 of 444
6- 28 DO-IT-YOURSELF MAINTENANCE
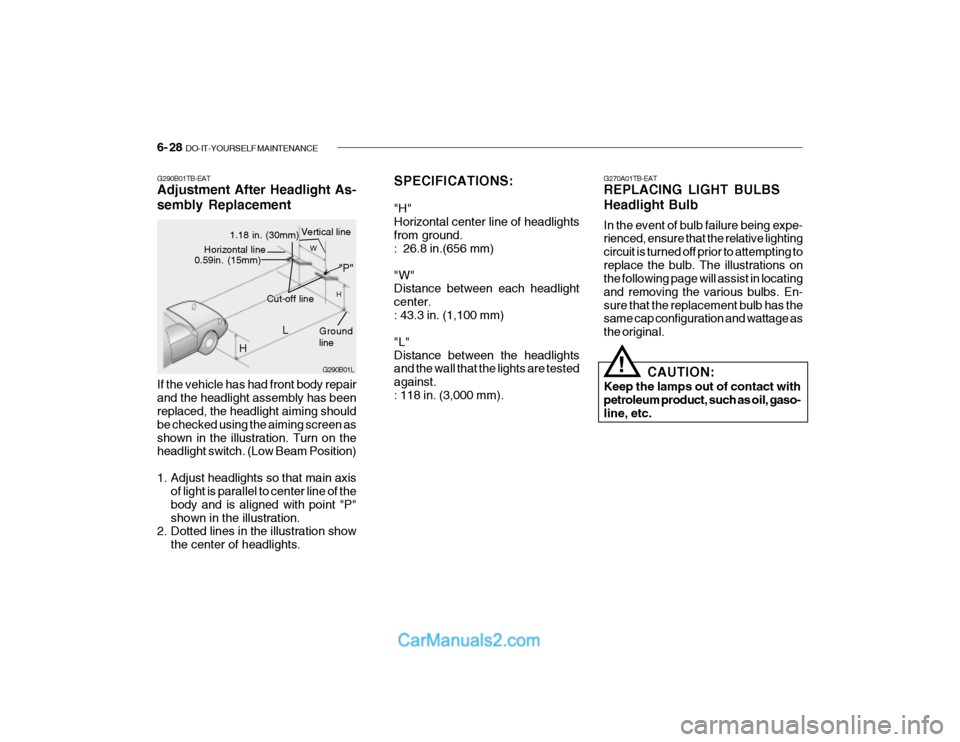
SPECIFICATIONS: "H" Horizontal center line of headlightsfrom ground. : 26.8 in.(656 mm) "W" Distance between each headlight center.: 43.3 in. (1,100 mm) "L" Distance between the headlights and the wall that the lights are tested against.: 118 in. (3,000 mm). G270A01TB-EAT REPLACING LIGHT BULBS Headlight Bulb In the event of bulb failure being expe- rienced, ensure that the relative lighting circuit is turned off prior to attempting toreplace the bulb. The illustrations on the following page will assist in locating and removing the various bulbs. En-sure that the replacement bulb has the same cap configuration and wattage as the original.
!
CAUTION:
Keep the lamps out of contact with petroleum product, such as oil, gaso- line, etc.
If the vehicle has had front body repair and the headlight assembly has been replaced, the headlight aiming should be checked using the aiming screen asshown in the illustration. Turn on the headlight switch. (Low Beam Position)
1. Adjust headlights so that main axis
of light is parallel to center line of the body and is aligned with point "P"shown in the illustration.
2. Dotted lines in the illustration show
the center of headlights.
G290B01TB-EAT Adjustment After Headlight As- sembly ReplacementG290B01L
L
W
H
H Cut-off line
Ground line
"P"
Horizontal line0.59in. (15mm)
1.18 in. (30mm) Vertical line