Hyundai Getz 2009 Owner's Manual - RHD (UK, Australia)
Manufacturer: HYUNDAI, Model Year: 2009, Model line: Getz, Model: Hyundai Getz 2009Pages: 191, PDF Size: 6.3 MB
Page 141 of 191

5- 8 VEHICLE MAINTENANCE REQUIREMENTS
F070H01A-DAT
o Rear Brake Drums/Linings,
Hand Brake
Check the rear brake drums and lin- ings for scoring, burning, leaking fluid, broken parts, and excessive wear. Inspect the hand brake system in-cluding the hand brake lever and ca- bles. For detailed service procedures, refer to the Shop Manual.
F060H01A-AAT
o Air Cleaner Filter A Genuine Hyundai air cleaner filter is recommended when filter is replaced. F060J01A-AAT
o Spark Plugs Make sure to install new spark plugs of the correct heat range. F070C02A-AAT
o Coolant The coolant should be changed at the intervals specified in the mainte-nance schedule.
F070F01A-AAT
o Brake Hoses and Lines
Visually check for proper installation,chafing, cracks, deterioration and anyleakage. Replace any deteriorated or damaged parts immediately. F070G02A-AAT
o Brake Fluid
Check brake fluid level in the brake fluid reservoir. The level should be between "MIN" and "MAX" marks on the side of the reservoir. Use onlyhydraulic brake fluid conforming to DOT 3 or DOT 4.
F070E05A-DAT
o Automatic Transaxle Fluid
The fluid level should be in the "HOT" range of the dipstick, after the engine and transaxle are at normal operating temperature. Check the automatictransaxle fluid level with the engine running and the transaxle in neutral, with the hand brake properly applied.Use Hyundai Genuine ATF SP-III, DIA- MOND ATF SP-III, SK ATF SP-III or other brands appraoved by HyundaiMotor Co., when adding or changing fluid.
Page 142 of 191

VEHICLE MAINTENANCE REQUIREMENTS 5- 9
F070L01A-AAT
o Suspension Mounting Bolts
Check the suspension connections
for looseness or damage. Retighten to the specified torque. F070M01Y-AAT
o Steering Gear Box, Linkage &
Boots / Lower Arm Ball Joint, Upper Arm Ball Joint
With the vehicle stopped and engine off, check for excessive free-play inthe steering wheel.Check the linkage for bends or dam-age. Check the dust boots and balljoints for deterioration, cracks, or dam- age. Replace any damaged parts. F070N01A-AAT
o Power Steering Pump, Belt
and Hoses
Check the power steering pump and
hoses for leakage and damage. Re- place any damaged or leaking partsimmediately. Inspect the power steer- ing belt for evidence of cuts, cracks, excessive wear, oiliness and propertension. Replace or adjust it if neces- sary. F070P01A-AAT
o Driveshafts and Boots
Check the drive shafts, boots and clamps for cracks, deterioration, or damage. Replace any damaged parts and, if necessary, repack the grease. F070Q01A-AAT
o Air Conditioning Refrigerant Check the air conditioning lines and connections for leakage and damage. Check air conditioning performance according to the relevant shop manualif necessary.
F070J01A-AAT
o Brake Pads, Calipers and
Rotors
Check the pads for excessive wear,
discs for run out and wear, and cali-pers for fluid leakage.
F070K01A-AAT
o Exhaust Pipe and Muffler
Visually inspect the exhaust pipes,
muffler and hangers for cracks, dete-rioration, or damage. Start the engineand listen carefully for any exhaust gas leakage. Tighten connections or replace parts as necessary.
Page 143 of 191

6. Do-It-Yourself Maintenance
Engine compartment ........................................................................ 6-2
General checks ................................................................................ 6-3
Checking the engine oil .................................................................... 6-4
Checking the engine coolant ............................................................ 6-6
Changing the air cleaner filter ........................................................... 6-7
Filling the washer reservoir .............................................................. 6-9Checking the transaxle oil (manual)............................................... 6-10
Checking the transaxle fluid (Automatic)....................................... 6-11
Checking the brakes ...................................................................... 6-13
Air conditioning care ....................................................................... 6-14
Checking drive belts ...................................................................... 6-18
Checking and replacing fuses ........................................................ 6-18
Checking the battery ...................................................................... 6-20
Checking electric cooling fans ....................................................... 6-22
Power steering fluid level ............................................................... 6-22
Replacement of bulbs .................................................................... 6-24
Fuse panel description ................................................................... 6-30
6
Page 144 of 191
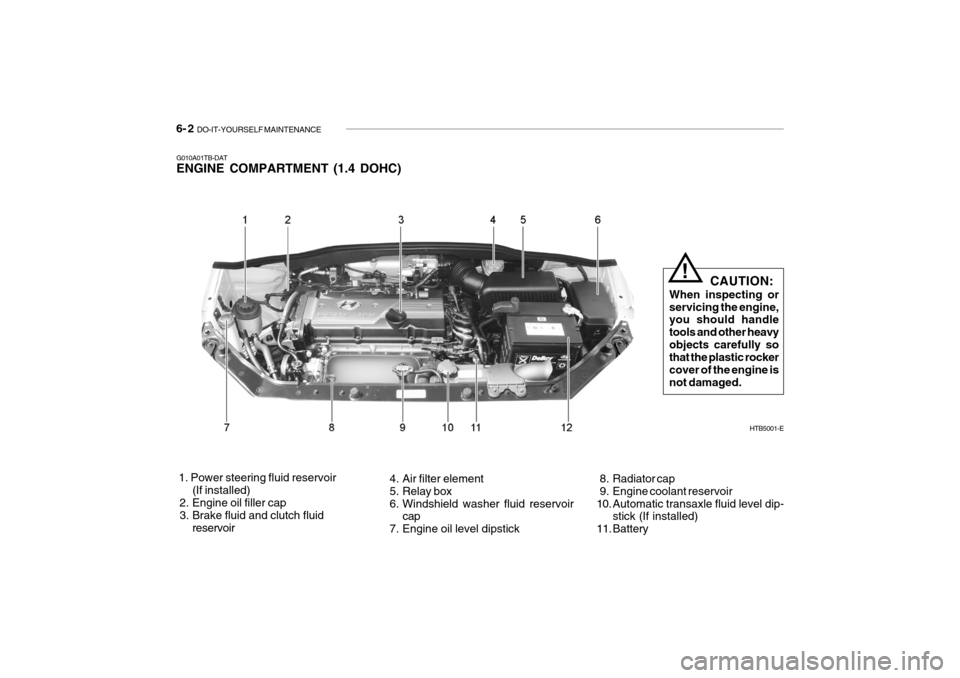
6- 2 DO-IT-YOURSELF MAINTENANCE
G010A01TB-DAT ENGINE COMPARTMENT (1.4 DOHC) 1. Power steering fluid reservoir
(If installed)
2. Engine oil filler cap
3. Brake fluid and clutch fluid
reservoir 4. Air filter element
5. Relay box
6. Windshield washer fluid reservoir
cap
7. Engine oil level dipstick 8. Radiator cap
9. Engine coolant reservoir
10. Automatic transaxle fluid level dip-
stick (If installed)
11. Battery HTB5001-E
CAUTION:
When inspecting or servicing the engine, you should handle tools and other heavyobjects carefully so that the plastic rocker cover of the engine isnot damaged.!
Page 145 of 191

DO-IT-YOURSELF MAINTENANCE 6- 3
G020A01A-AAT GENERAL CHECKS Engine Compartment The following should be checked regu-larly:
o Engine oil level and condition
o Transaxle fluid level and condition
o Brake fluid level
o Clutch fluid level
o Engine coolant level
o Windshield washer fluid level
o Accessory drive belt condition
o Engine coolant hose condition
o Fluid leaks (on or below compo-
nents)
o Power steering fluid level
o Battery condition G020C01A-DAT Vehicle Interior The following should be checked each time when the vehicle is driven:
o Lights operation
o Windshield wiper operation
o Horn operation
o Defroster, heating system operation
(and air conditioning, if installed)
o Steering operation and condition
o Mirror condition and operation
o Turn signal light operation
o Accelerator pedal operation
o Brake operation, including hand brake
o Manual transaxle operation, includ- ing clutch operation
o Automatic transaxle operation, in- cluding "Park" mechanism operation
o Seat control condition and operation
o Seat belt condition and operation
o Sunvisor operation If you notice anything that does not operate correctly or appears to be functioning incorrectly, inspect it care- fully and seek assistance from yourHyundai dealer if service is needed.
G020B01A-DAT Vehicle Exterior The following should be checked monthly:
o Overall appearance and condition
o Air filter condition
o Wheel condition and wheel nut torque
o Exhaust system condition
o Light condition and operation
o Windshield glass condition
o Wiper blade condition
o Paint condition and body corrosion
o Fluid leaks
o Door and bonnet lock condition
o Tyre pressure and condition (includ-
ing spare tyre)
Page 146 of 191
6- 4 DO-IT-YOURSELF MAINTENANCE
!
G020D01TG-DAT MAINTENANCE PRECAUTIONS Improper or incomplete service may result in problems. This section givesinstructions only for the maintenance items that are easy to perform. Several procedures should be done byan authorised Hyundai dealer. NOTE: Improper owner maintenance dur- ing the warranty period may affectwarranty coverage. WARNING:
o Performing maintenance work on a vehicle can be dangerous. Youcan be seriously injured whileperforming some maintenance procedures. If you lack sufficient knowledge and experience or theproper tools and equipment to do the work, have it done by an authorised Hyundai dealer.
o Working under the bonnet with the engine running is dangerous.It becomes even more dangerouswhen you wear jewelry or loose clothing. These can become en- tangled in moving parts and resultin injury. Therefore, if you must run the engine while working un- der the bonnet, make certain thatyou remove all jewelry (especially rings, bracelets, watches, and necklaces) and all neckties,scarves, and similar loose cloth- ing before getting near the engine or cooling fans.
G030B01JM
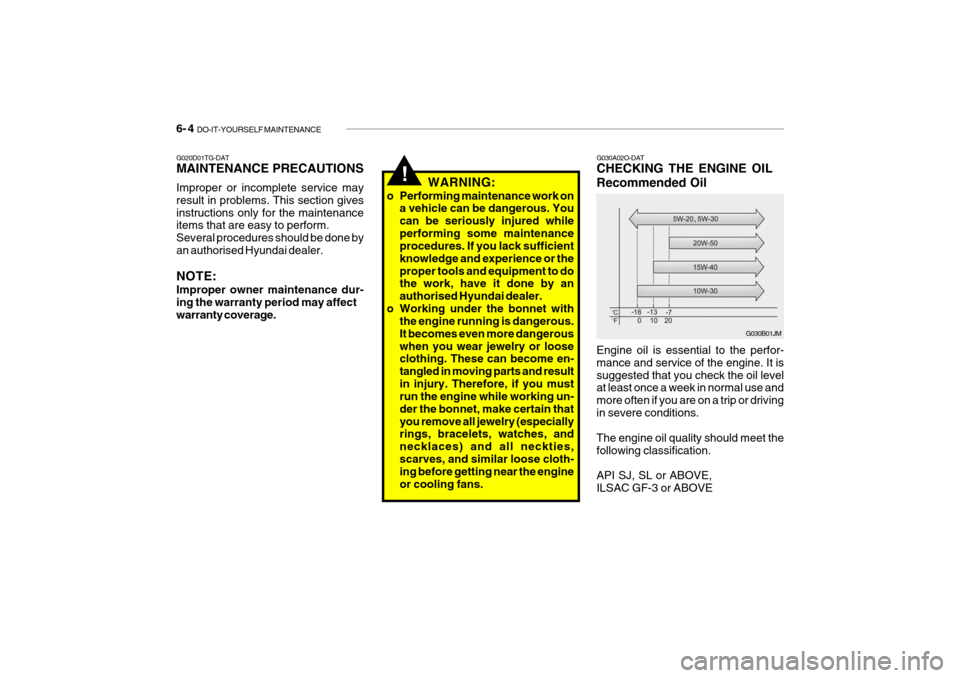
G030A02O-DAT CHECKING THE ENGINE OIL Recommended Oil Engine oil is essential to the perfor- mance and service of the engine. It issuggested that you check the oil level at least once a week in normal use and more often if you are on a trip or drivingin severe conditions. The engine oil quality should meet the following classification. API SJ, SL or ABOVE, ILSAC GF-3 or ABOVE
Page 147 of 191
DO-IT-YOURSELF MAINTENANCE 6- 5
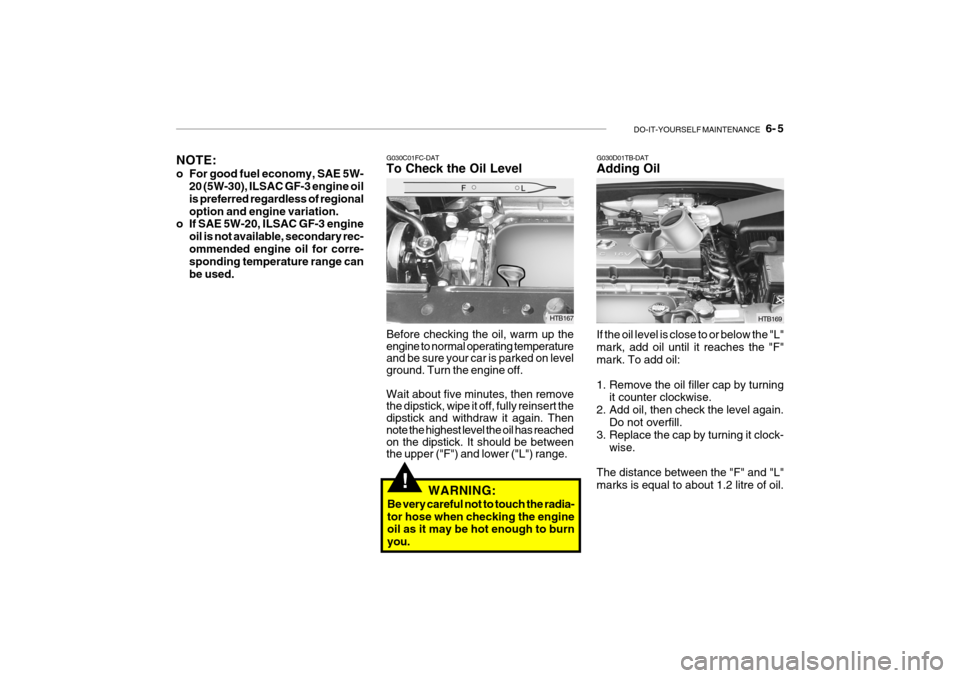
G030C01FC-DAT To Check the Oil Level Before checking the oil, warm up the engine to normal operating temperature and be sure your car is parked on level ground. Turn the engine off. Wait about five minutes, then remove the dipstick, wipe it off, fully reinsert the dipstick and withdraw it again. Then note the highest level the oil has reached on the dipstick. It should be between the upper ("F") and lower ("L") range. G030D01TB-DAT Adding Oil
HTB169
If the oil level is close to or below the "L" mark, add oil until it reaches the "F" mark. To add oil:
1. Remove the oil filler cap by turning it counter clockwise.
2. Add oil, then check the level again. Do not overfill.
3. Replace the cap by turning it clock-
wise.
The distance between the "F" and "L" marks is equal to about 1.2 litre of oil.
NOTE:
o For good fuel economy, SAE 5W-
20 (5W-30), ILSAC GF-3 engine oil is preferred regardless of regionaloption and engine variation.
o If SAE 5W-20, ILSAC GF-3 engine
oil is not available, secondary rec-ommended engine oil for corre- sponding temperature range can be used.
HTB167
!WARNING:
Be very careful not to touch the radia- tor hose when checking the engine oil as it may be hot enough to burn you.
Page 148 of 191
6- 6 DO-IT-YOURSELF MAINTENANCE
!
G050A01TG-AAT CHECKING THE ENGINE COOL- ANT
WARNING:
Do not remove the radiator cap when the engine is hot. When the engine is hot, the engine coolant is under pres-sure and may erupt through the open- ing if the cap is removed. You could be seriously burned if you do notobserve this precaution. Do not re- move the radiator cap until the radia- tor is cool to touch. NOTE: It is recommended that the engine coolant should be changed by anauthorised Hyundai dealer.
HTB170
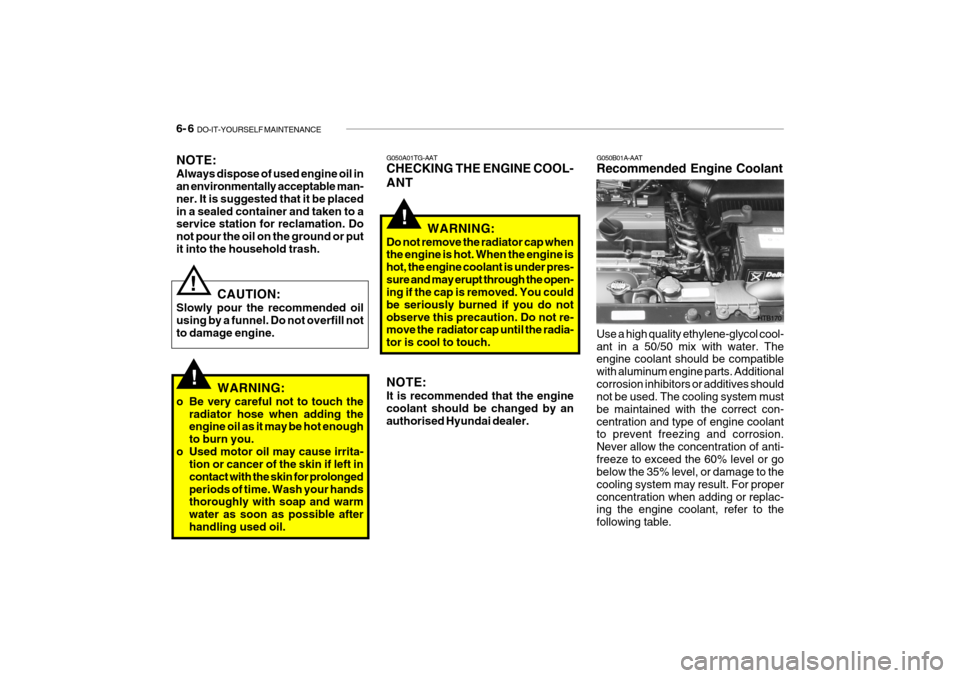
G050B01A-AAT Recommended Engine Coolant Use a high quality ethylene-glycol cool- ant in a 50/50 mix with water. The engine coolant should be compatible with aluminum engine parts. Additionalcorrosion inhibitors or additives should not be used. The cooling system must be maintained with the correct con-centration and type of engine coolant to prevent freezing and corrosion. Never allow the concentration of anti-freeze to exceed the 60% level or go below the 35% level, or damage to the cooling system may result. For properconcentration when adding or replac- ing the engine coolant, refer to the following table.
NOTE: Always dispose of used engine oil in an environmentally acceptable man- ner. It is suggested that it be placedin a sealed container and taken to a service station for reclamation. Do not pour the oil on the ground or putit into the household trash.
!
CAUTION:
Slowly pour the recommended oil using by a funnel. Do not overfill notto damage engine.
!WARNING:
o Be very careful not to touch the radiator hose when adding the engine oil as it may be hot enough to burn you.
o Used motor oil may cause irrita- tion or cancer of the skin if left incontact with the skin for prolongedperiods of time. Wash your hands thoroughly with soap and warm water as soon as possible afterhandling used oil.
Page 149 of 191

DO-IT-YOURSELF MAINTENANCE 6- 7
G050C02A-DAT To Check the Coolant Level The coolant level can be seen on the side of the plastic coolant reservoir.The level of the coolant should be between the "LOW" and "FULL" lines on the reservoir when the engine is cold. If the level is below the "LOW" mark, add engine coolant to bring it upbetween "LOW" and "FULL". If the level is low, inspect for coolant leaks and recheck the fluid level frequently.If the level drops again, visit your Hyundai dealer for an inspection and diagnosis of the reason for the coolantleak.
35% 40%50%60%
Ambient
temperature °C ( °F)-15 (5)
-25 (-13)-35 (-31)-45 (-49)
Antifreeze solution Water
Engine coolant concentration
65% 60%50%40%
!WARNING:
The cooling fan is controlled by en- gine coolant temperature and may sometimes operate even when the engine is not running. Use extremecaution when working near the blades of the cooling fan so that you are not injured by a rotating fanblade. As the engine coolant tem- perature decreases, the fan will auto- matically shut off. This is a normalcondition.
HTB168
G070A01TB-AAT CHANGING THE AIR CLEANER FILTER
1. Remove the engine cover (If installed)
2. Unsnap the clips around the cover.
3. Lift the cover off.
4. Remove the old filter and replace
with the new one. Genuine Hyundai Replacement Parts are recom- mended.
CAUTION:
Operating your vehicle without aproper air filter in place can result in excessive engine wear.
!
Page 150 of 191
6- 8 DO-IT-YOURSELF MAINTENANCE
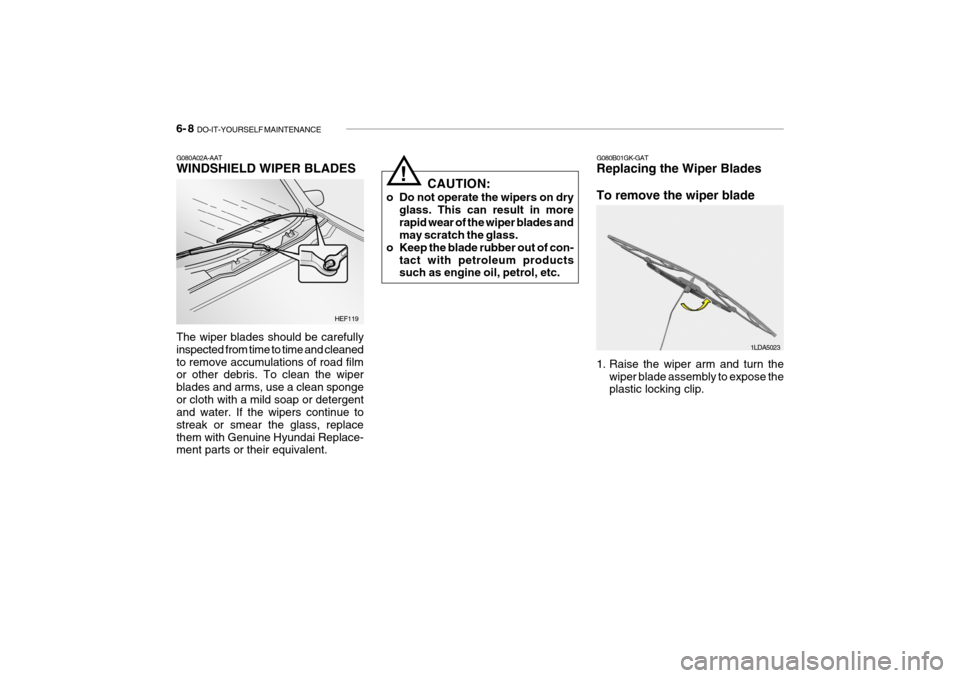
G080A02A-AAT WINDSHIELD WIPER BLADES The wiper blades should be carefully inspected from time to time and cleanedto remove accumulations of road film or other debris. To clean the wiper blades and arms, use a clean spongeor cloth with a mild soap or detergent and water. If the wipers continue to streak or smear the glass, replacethem with Genuine Hyundai Replace- ment parts or their equivalent. HEF119
!
CAUTION:
o Do not operate the wipers on dry glass. This can result in more rapid wear of the wiper blades and may scratch the glass.
o Keep the blade rubber out of con- tact with petroleum productssuch as engine oil, petrol, etc. G080B01GK-GAT Replacing the Wiper Blades To remove the wiper blade
1. Raise the wiper arm and turn the
wiper blade assembly to expose the plastic locking clip.
1LDA5023