height Hyundai Getz 2009 Owner's Manual - RHD (UK, Australia)
[x] Cancel search | Manufacturer: HYUNDAI, Model Year: 2009, Model line: Getz, Model: Hyundai Getz 2009Pages: 191, PDF Size: 6.3 MB
Page 24 of 191
FEATURES OF YOUR HYUNDAI 1- 13
HFC2028
Lock knob
!WARNING:
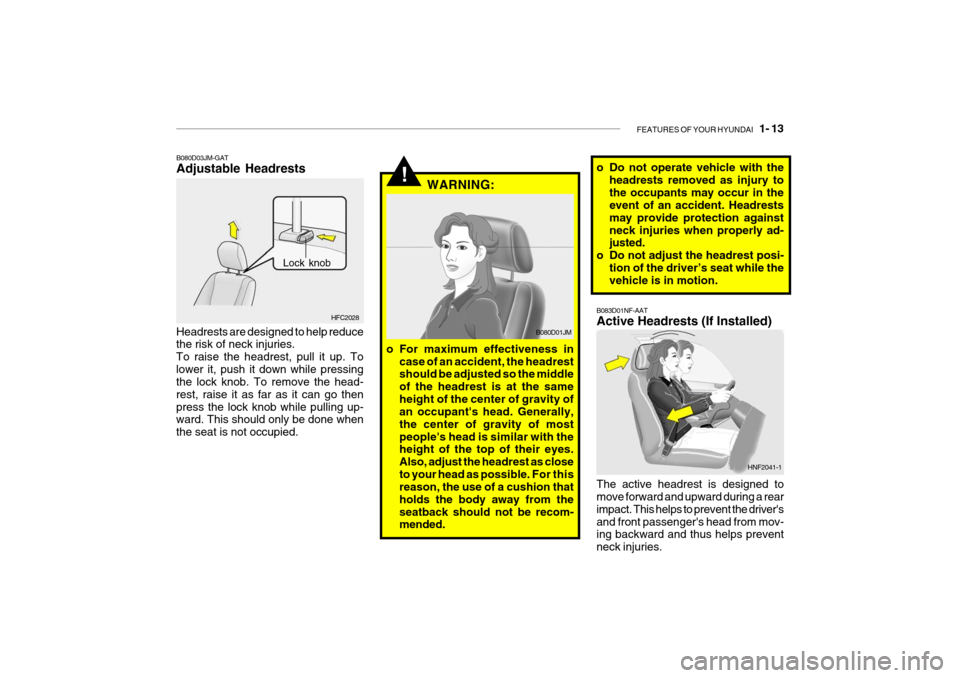
B080D03JM-GAT Adjustable Headrests
Headrests are designed to help reduce the risk of neck injuries. To raise the headrest, pull it up. Tolower it, push it down while pressing the lock knob. To remove the head- rest, raise it as far as it can go thenpress the lock knob while pulling up- ward. This should only be done when the seat is not occupied. B080D01JM
o For maximum effectiveness in case of an accident, the headrest should be adjusted so the middle of the headrest is at the sameheight of the center of gravity of an occupant's head. Generally, the center of gravity of mostpeople's head is similar with the height of the top of their eyes. Also, adjust the headrest as closeto your head as possible. For this
reason, the use of a cushion thatholds the body away from theseatback should not be recom- mended. o Do not operate vehicle with the
headrests removed as injury to the occupants may occur in the event of an accident. Headrests may provide protection againstneck injuries when properly ad- justed.
o Do not adjust the headrest posi- tion of the driver’s seat while thevehicle is in motion.
B083D01NF-AAT Active Headrests (If Installed) The active headrest is designed to move forward and upward during a rear impact. This helps to prevent the driver'sand front passenger's head from mov- ing backward and thus helps prevent neck injuries. HNF2041-1
Page 25 of 191
1- 14 FEATURES OF YOUR HYUNDAI
HTB025-D
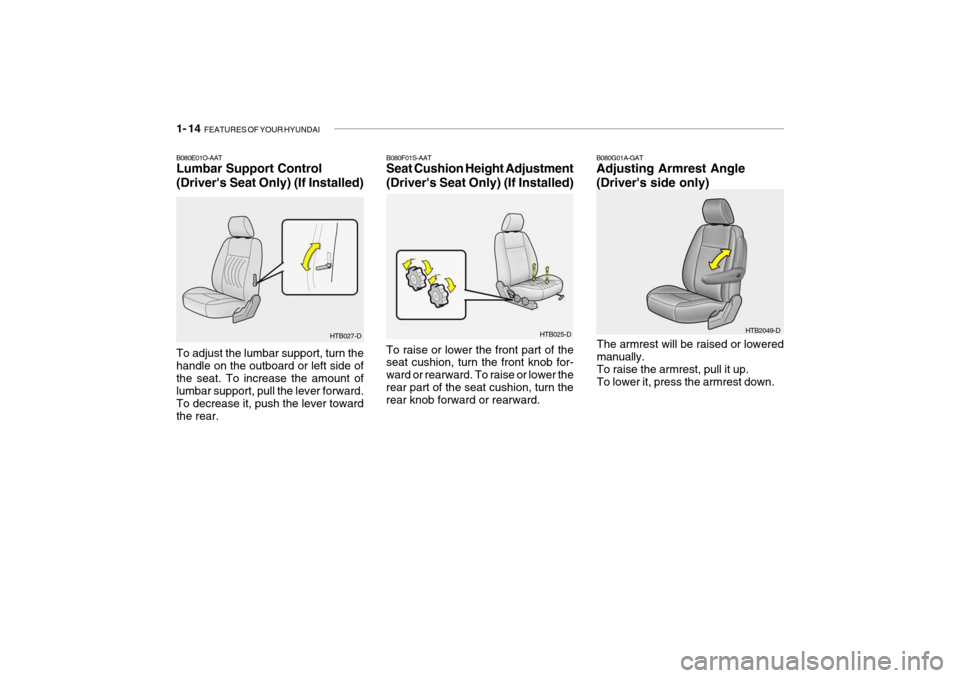
B080F01S-AAT Seat Cushion Height Adjustment (Driver's Seat Only) (If Installed) To raise or lower the front part of the seat cushion, turn the front knob for- ward or rearward. To raise or lower therear part of the seat cushion, turn the rear knob forward or rearward.
B080G01A-GAT Adjusting Armrest Angle (Driver's side only)
The armrest will be raised or lowered manually. To raise the armrest, pull it up.To lower it, press the armrest down. HTB2049-D
HTB027-D
B080E01O-AAT Lumbar Support Control
(Driver's Seat Only) (If Installed) To adjust the lumbar support, turn the handle on the outboard or left side ofthe seat. To increase the amount of lumbar support, pull the lever forward. To decrease it, push the lever towardthe rear.
Page 30 of 191
FEATURES OF YOUR HYUNDAI 1- 19
B150B01A-DAT
Maintenance of Seat Belts When cleaning the seat belts, as recommended, avoid getting solutions into the buckle where they may attack the lubricant or cause corrosion. Donot attempt to bleach or re-dye belts, as this may affect the webbing strength. NOTE: Do not attempt any form of modifi- cations or repairs to seat belt com- ponents. If the retractor or othercomponents do not operate cor- rectly, call an authorised Hyundai Dealer, who will take the necessarycorrective action. Your authorised dealer will inspect all seat belt com- ponents at regular intervals andadvise if replacement is required. Between these inspections you should make regular checks to en-sure that foreign objects are not preventing complete buckle en- gagement. B160B01A-AAT Periodic Inspection It is recommended that all seat belts be inspected periodically for wear ordamage of any kind. Parts of the sys- tem that are damaged should be re- placed as soon as possible. B160C01A-AAT Keep Belts Clean and Dry Seat belts should be kept clean and dry. If belts become dirty, they can be cleaned by using a mild soap solutionand warm water. Bleach, dye, strong detergents or abrasives should not be used because they may damage andweaken the fabric. B160D01A-DAT When to Replace Seat Belts Complete seat belt assembly or as- semblies should be replaced if the vehicle has been involved in an acci-dent. This should be done even if no damage is visible. Additional ques- tions concerning seat belt operationshould be directed to your Hyundai Dealer.B170A04A-AAT HEIGHT ADJUSTABLE FRONT SEAT SHOULDER BELT(If Installed)
B170A01L
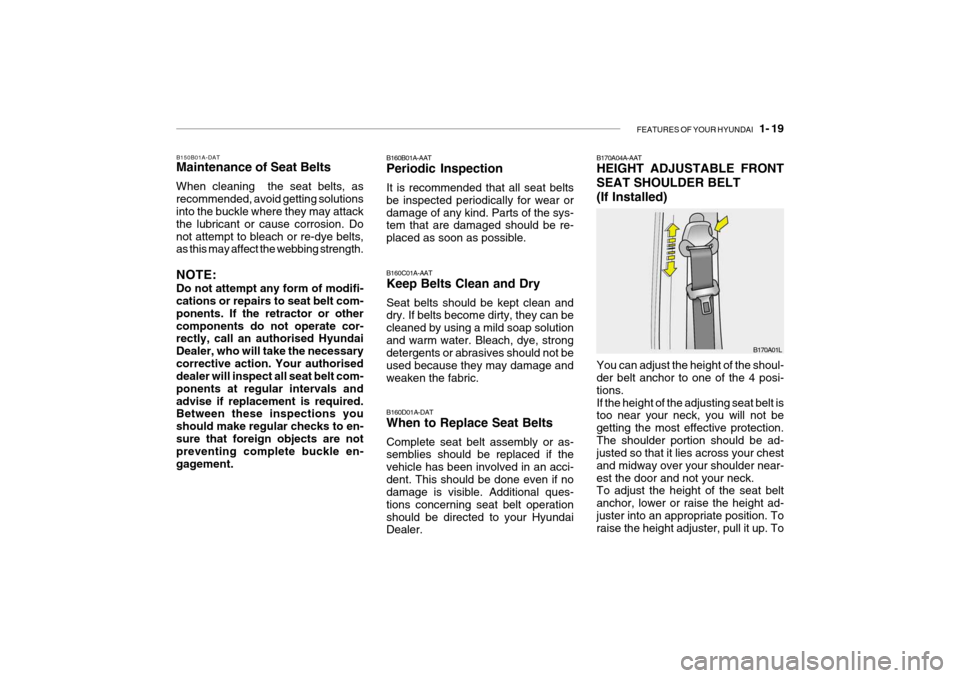
You can adjust the height of the shoul- der belt anchor to one of the 4 posi- tions.If the height of the adjusting seat belt is too near your neck, you will not be getting the most effective protection.The shoulder portion should be ad- justed so that it lies across your chest and midway over your shoulder near-est the door and not your neck. To adjust the height of the seat belt anchor, lower or raise the height ad-juster into an appropriate position. To raise the height adjuster, pull it up. To
Page 31 of 191
1- 20 FEATURES OF YOUR HYUNDAI
will also lock if you try to lean forward too quickly. Check to make sure that the belt is properly locked and that thebelt is not twisted. NOTE: If you are not able to pull out the seat belt from the retractor, firmly pull the belt out and release it. Then you will be able to pull the belt out smoothly.
B180A03A-GAT SEAT BELTS 3-Point System with Emergency Locking Retrac-
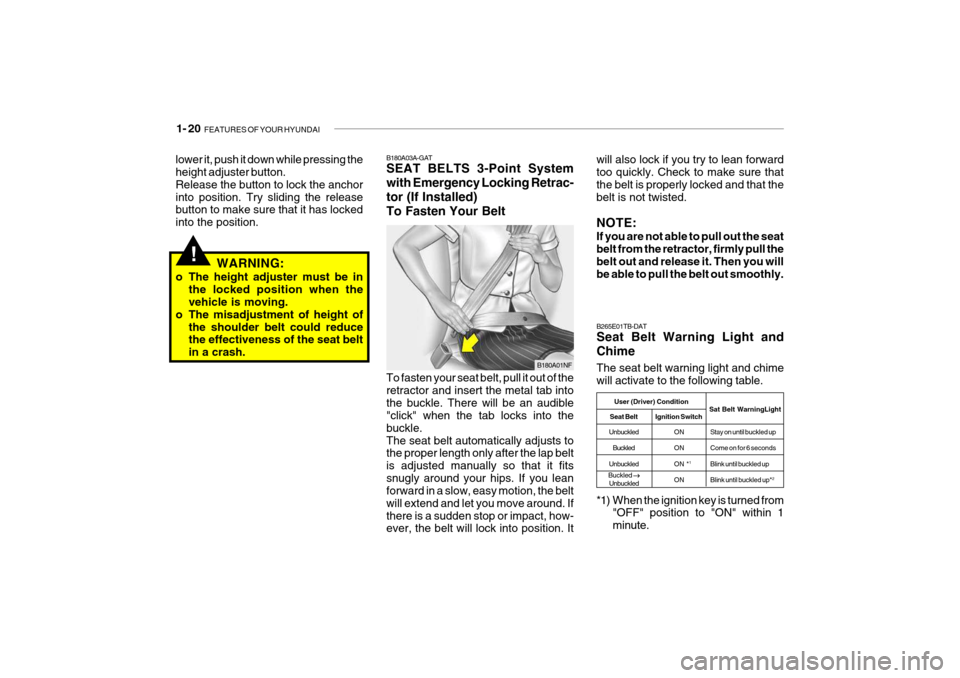
tor (If Installed)To Fasten Your Belt To fasten your seat belt, pull it out of the retractor and insert the metal tab intothe buckle. There will be an audible "click" when the tab locks into the buckle.The seat belt automatically adjusts to the proper length only after the lap belt is adjusted manually so that it fitssnugly around your hips. If you lean forward in a slow, easy motion, the belt will extend and let you move around. Ifthere is a sudden stop or impact, how- ever, the belt will lock into position. It
!
lower it, push it down while pressing the height adjuster button. Release the button to lock the anchorinto position. Try sliding the release button to make sure that it has locked into the position.
WARNING:
o The height adjuster must be in the locked position when the vehicle is moving.
o The misadjustment of height of the shoulder belt could reducethe effectiveness of the seat belt in a crash.
*1) When the ignition key is turned from"OFF" position to "ON" within 1minute.
The seat belt warning light and chimewill activate to the following table.
B265E01TB-DAT Seat Belt Warning Light and Chime
B180A01NF
Sat Belt WarningLight
Seat Belt Ignition Switch
Unbuckled ON Stay on until buckled up
Buckled O N Come on for 6 seconds
Unbuckled ON * 1
Blink until buckled up
ON Blink until buckled up* 2
Buckled
��
��
�
Unbuckled User (Driver) Condition
Page 95 of 191
1- 84 FEATURES OF YOUR HYUNDAI
CAUTION:
o Be sure to remove the antenna before washing the car in an au- tomatic car wash or it may bedamaged.
o Before entering a place with a
low height clearance, be sure toadjust the roof antenna low.
o When reinstalling your antenna,
it is important that it is fully tight-ened to ensure proper reception.!
HTB2043
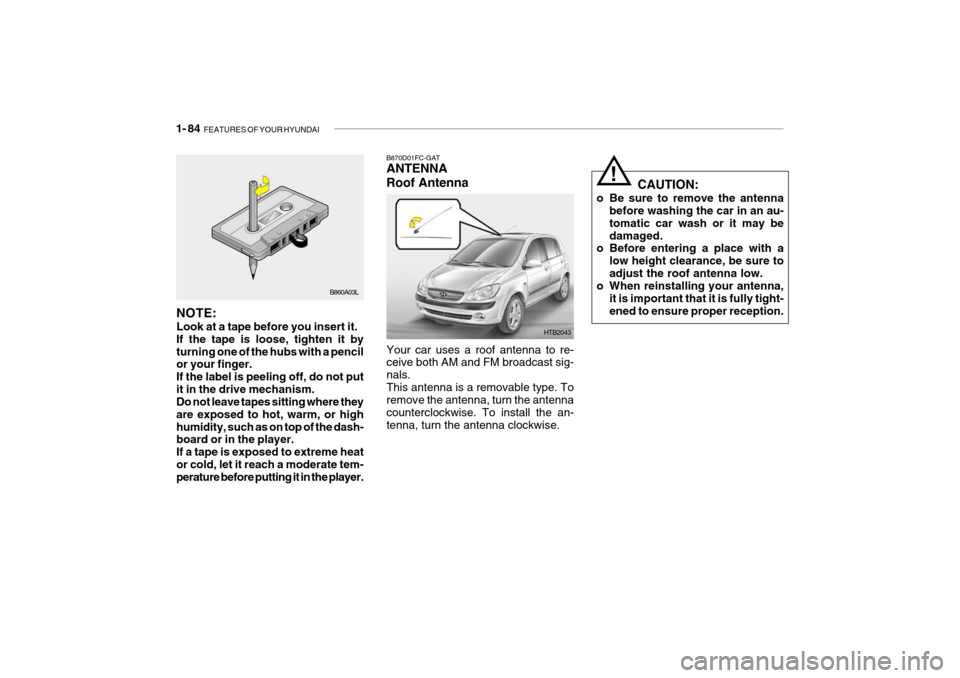
B870D01FC-GAT ANTENNA Roof Antenna
Your car uses a roof antenna to re- ceive both AM and FM broadcast sig- nals.This antenna is a removable type. To remove the antenna, turn the antenna counterclockwise. To install the an-tenna, turn the antenna clockwise.
B860A03L
NOTE: Look at a tape before you insert it. If the tape is loose, tighten it byturning one of the hubs with a pencil or your finger. If the label is peeling off, do not putit in the drive mechanism. Do not leave tapes sitting where they are exposed to hot, warm, or highhumidity, such as on top of the dash- board or in the player. If a tape is exposed to extreme heator cold, let it reach a moderate tem- perature before putting it in the player.
Page 107 of 191
2- 12 DRIVING YOUR HYUNDAI
!WARNING:
Your ABS (ESP) will not prevent accidents due to improper or dan- gerous driving maneuvers. Eventhough vehicle control is improvedduring emergency braking, alwaysmaintain a safe distance betweenyou and objects ahead. Vehicle speeds should always be reduced during extreme road conditions.The braking distance for carsequipped with an anti-lock brakingsystem may be longer than for thosewithout it in the following road con- ditions.
o Driving on rough, gravel or snow- covered roads.
o Driving with tyre chains installed.
o Driving on roads where the road surface is pitted or has different surface height.
These roads should be driven at reduced speeds. The safety features of an ABS (ESP) equipped vehicleshould not be tested by high speeddriving or cornering. This could en-danger the safety of yourself or oth-ers.
C120A03A-DAT ANTI-LOCK BRAKE SYSTEM (If installed) The Anti-Lock Brake System (ABS) is designed to prevent wheel lock-up during sudden braking or on hazard-ous road surfaces. The ABS control module monitors the wheel speed and controls the pressure applied to eachbrake. Thus, in emergency situations or on slick roads, your ABS will in- crease vehicle control during braking. NOTE:
o A click sound may be heard in the
engine compartment when the ve- hicle begins to move after the en-gine is started. These conditionsare normal and indicate that the anti-lock brake system (Electronic Stability Program) is functioningproperly.
o During ABS (ESP) operation, a slight pulsation may be felt in thebrake pedal when the brakes are applied. Also, a noise may be heard in the engine compartment whiledriving. These conditions are nor-mal and indicate that the anti-lockbrake system (ESP) is functioning properly.
o Use caution when parking on a hill.
Engage the hand brake and place the gear selector lever in "P" (automatic transaxle) or in first or reverse gear (manual transaxle). If your car is facing downhill, turn the front wheels into the curb to help keep the car from rolling. If your car is facing uphill, turn the front wheels away from the curb to help keep the car from rolling. If there is no curb or if it is required by other conditions to keep the car from rolling, block the wheels.
o Under some conditions your hand brake can freeze in the engaged position. This is most likely to hap- pen when there is an accumulation of snow or ice around or near the rear brakes or if the brakes are wet. If there is a risk that the hand brake may freeze, apply it only temporarily while you put the gear selector lever in "P" (automatic) or in first or re- verse gear (manual transaxle) and block the rear wheels so the car cannot roll. Then release the hand brake.
o Do not hold the vehicle on the up- grade with the accelerator pedal. This can cause the transmission to over- heat. Always use the brake pedal or hand brake.
Page 184 of 191

9- 2 VEHICLE SPECIFICATIONS
Type Wheel free play Rack stroke Oil pump type 3,825 (150.6)
1,665(65.6) 1,495(58.9) 2,455(96.7)1,450(57.1) 1,440(56.7)
Overall length Overall width Overall height (unladen) Wheel baseWheel tread J030A01TB-DAT TYREDual hydraulic with brake booster Ventilated disc Drum Cable
J010A02TB-DAT MEASUREMENT
J060A01TB-DATFUEL SYSTEMRack and pinion 0 ~ 30 mm (0 ~ 1.18 in.) 132 mm (5.20 in.) 140 mm (5.5 in.)Vane type
175/65R14, 185/55R15
Type
Front Rear
mm (in.)
J020A01TB-GAT POWER STEERING
Fuel tank Capacity Litre 45 J050A01FC-GAT BRAKE
Type Front brake type Rear brake type Parking brake
J035A01TB-DAT SPARE TYRE
Full size
Standard
Manual Power
Page 189 of 191

INDEX 10- 3
Drink Holder ................................................................ 1-54
Drive Belts .................................................................. 6-18
Driving Economical driving .................................................. 2-14
Smooth corneri ng ..................................................... 2-15
Winter driving ........................................................... 2-15
E Emission Contro l System ............................................ 7-2
Engine Before starting the engine ........................................ 2-3Compartment ............................................................ 6-2
Coolant ..................................................................... 6-6
Coolant temperature Indicator ..................................1-41
If the engine overheats ............................................. 3-4
Number ..................................................................... 8-2
Oil ............................................................................. 6-4Starting ..................................................................... 2-4
Engine Exhaust Can Be Dangerous ............................ 2-2
F
Fan Speed Control ...................................................... 1-72
Fog Light
Front ........................................................................ 1-51
Front Seats Adjustable front seats .............................................. 1-12Adjustable headrests
............................................... 1-13
Adjusting seat forward and rearward ........................1-12
Adjusting seatback angle .. ......................................1-12
Lumbar support control ............................................ 1-14
Seat cushion height adjustment .............................. 1-14
Fuel
Capacity ................................................................... 9-2
Gauge ...................................................................... 1-41
recommendations ...................................................... 1-2
Fuel Filler Lid Remote release ....................................................... 1-63
Fuses ......................................................................... 6-18
Fuse panel Description ............................................... 6-30
GGeneral Checks ........................................................... 6-4
Glove Box .................................................................. 1-58
H Hand Brake ................................................................. 1-61
Hazard Warning System ............................................. 1-50
Headlight Aiming Adjustment...................................... 6-23
Heating and Cooling Control .......................................1-71
Air flow control ......................................................... 1-73
Air intake control ..................................................... 1-73
Bi-level heati ng ........................................................ 1-76
Fan speed control .................................................... 1-72
Temperature control ................................................. 1-75
Page 191 of 191

INDEX 10- 5
S Seat
Front ........................................................................ 1-12
Seatback Holder ......................................................... 1-65
Seat Belts
3-Point system ........................................................ 1-20
Adjustabl e height ..................................................... 1-19
Adjusting your seat belt ........................................... 1-21
Maintenance of seat belts ....................................... 1-19
Seat pocket ................................................................ 1-66
Spectacle Ca se .......................................................... 1-58
Speedometer .............................................................. 1-42
Starting ........................................................................ 2-4
Steering Wheel Freeplay ............................................. 6-16
Steering Wheel Tilt Lever ........................................... 1-69
Stereo Sound System ................................................ 1-80
Sun Visor .................................................................... 1-68
Sunroof ....................................................................... 1-54
TTachometer ................................................................. 1-42
Tail gate ..................................................................... 1-65
Theft-Alarm system ..................................................... 1-7
Towing A trailer (or vehicle) ................................................. 2-18
Emergency .............................................................. 3-10
If your car must be towed ........................................ 3-8 Transaxle
Automatic ................................................................. 2-7
Automatic transaxle fluid checking .......................... 6-11
Manual ...................................................................... 2-5
Manual transaxle Oil checking ................................ 6-10
Trip Computer ............................................................. 1-43
Trip Odometer ............................................................. 1-42
Tyres Balancing .................................................................. 8-5
Chains ...................................................................... 8-4
Information ............................................................... 8-3
Pressure ................................................................... 8-3
Rotation .................................................................... 8-4
Snow tyres ............................................................... 8-4
Spare tyre ................................................................. 3-5 Traction ..................................................................... 8-5
Wheel and tyre changing .......................................... 3-5
V Vehicle Identification Number ..................................... 8-2
WWarning Lights ............................................................ 1-37
Windshield Wiper and Washer ....................................1-48
Windshield Wiper Blades ............................................. 6-8