checking oil Hyundai Grandeur 2002 Owner's Manual
[x] Cancel search | Manufacturer: HYUNDAI, Model Year: 2002, Model line: Grandeur, Model: Hyundai Grandeur 2002Pages: 230, PDF Size: 3.82 MB
Page 178 of 230

6. Do-It-Yourself Maintenance
Engine Compartment ..................................................................... 6-2
General Checks .............................................................................. 6-5
Checking the Engine Oil ................................................................ 6-6
Changing the Oil and Filter ........................................................... 6-7
Checking and Changing the Engine Coolant ............................... 6-8
Spark Plugs ..................................................................................6-10
Changing the Air Cleaner Filter ................................................... 6-11
Checking the Transaxle Oil (Manual) .......................................... 6-13
Checking the Transaxle Fluid (Automatic) .................................. 6-14
Checking the Brakes .................................................................... 6-15
Checking the Clutch Fluid ............................................................ 6-16
Air Conditioning Care ................................................................... 6-17
Changing the Air Filter (For Evaporator and Blower Unit) ......... 6-18
Checking Drive Belts .................................................................... 6-21
Checking and Replacing Fuses ................................................... 6-21
Power Steering Fluid Level .......................................................... 6-24
Headlight Aiming Adjustment ....................................................... 6-25
Replacement of Light Bulbs ......................................................... 6-26
Bulb Wattage ................................................................................ 6-33
Junction Box Description ............................................................. 6-34
6
Page 183 of 230
6- 6 DO-IT-YOURSELF MAINTENANCE
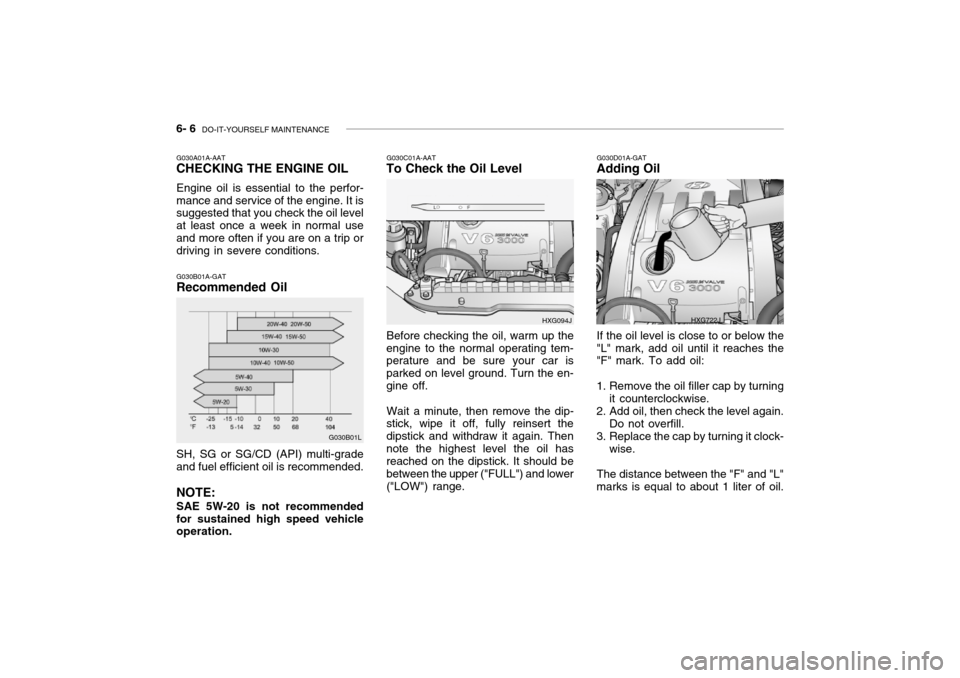
G030A01A-AAT CHECKING THE ENGINE OIL Engine oil is essential to the perfor- mance and service of the engine. It is suggested that you check the oil level at least once a week in normal useand more often if you are on a trip or driving in severe conditions. G030B01A-GAT Recommended Oil
G030B01L
SH, SG or SG/CD (API) multi-grade and fuel efficient oil is recommended. NOTE: SAE 5W-20 is not recommended for sustained high speed vehicle operation.G030C01A-AAT
To Check the Oil Level
Before checking the oil, warm up the
engine to the normal operating tem- perature and be sure your car is parked on level ground. Turn the en-gine off.
Wait a minute, then remove the dip-
stick, wipe it off, fully reinsert thedipstick and withdraw it again. Thennote the highest level the oil has reached on the dipstick. It should be between the upper ("FULL") and lower("LOW") range. HXG094J
G030D01A-GAT
Adding Oil
If the oil level is close to or below the
"L" mark, add oil until it reaches the "F" mark. To add oil:
1. Remove the oil filler cap by turning it counterclockwise.
2. Add oil, then check the level again. Do not overfill.
3. Replace the cap by turning it clock- wise.
The distance between the "F" and "L"
marks is equal to about 1 liter of oil.
HXG722J
Page 185 of 230

6- 8 DO-IT-YOURSELF MAINTENANCE
4. When the oil has stopped draining,
replace the drain plug using a new washer and retighten by turning itclockwise. Oil pan drain plug tightening torque : 3.5 ~4.0 kgf.m
5. Remove the oil filter by turning it counterclockwise with a oil filter wrench of the proper size. A cer- tain amount of oil will come out when you remove the filter. So besure to have your drain pan in place underneath it.
6. Install a new oil filter in accordance with the instructions on the carton or on the filter itself. Do not over-tighten. Oil filter tightening torque : 1.2 ~ 1.6 kgf.m Be sure that the mounting surface on the engine is clean and that theold gasket is removed completely. Lubricate the new gasket on the filter with clean engine oil beforeinstallation. 7. Refill the crankcase with the rec-
ommended engine oil. Refer to thespecification in chapter 9 for en-gine oil capacity.
8. Start the engine and check to be sure no oil is leaking from the drain plug or oil filter.
9. Shut off the engine and recheck the oil level.
NOTE: Always dispose of used engine oil
in an environmentally acceptable manner. It is suggested that it beplaced in a sealed container and taken to a service station for recla- mation. Do not pour the oil on theground or put it in with the house- hold trash.
WARNING:
Used motor oil may cause irrita-
tion or cancer of the skin if left in contact with the skin for prolongedperiods of time. Wash your hands thoroughly with soap and warm water as soon as possible afterhandling used oil. G050A01A-AAT
CHECKING AND CHANGING THE ENGINE COOLANT
WARNING:
Do not remove the radiator cap
when the engine is hot. When the engine is hot, the engine coolantis under pressure and may erupt through the opening if the cap is removed. You could be seriouslyburned if you do not observe this precaution. Do not remove the ra- diator cap until the radiator is coolto the touch.
!
!
Page 190 of 230
DO-IT-YOURSELF MAINTENANCE 6- 13
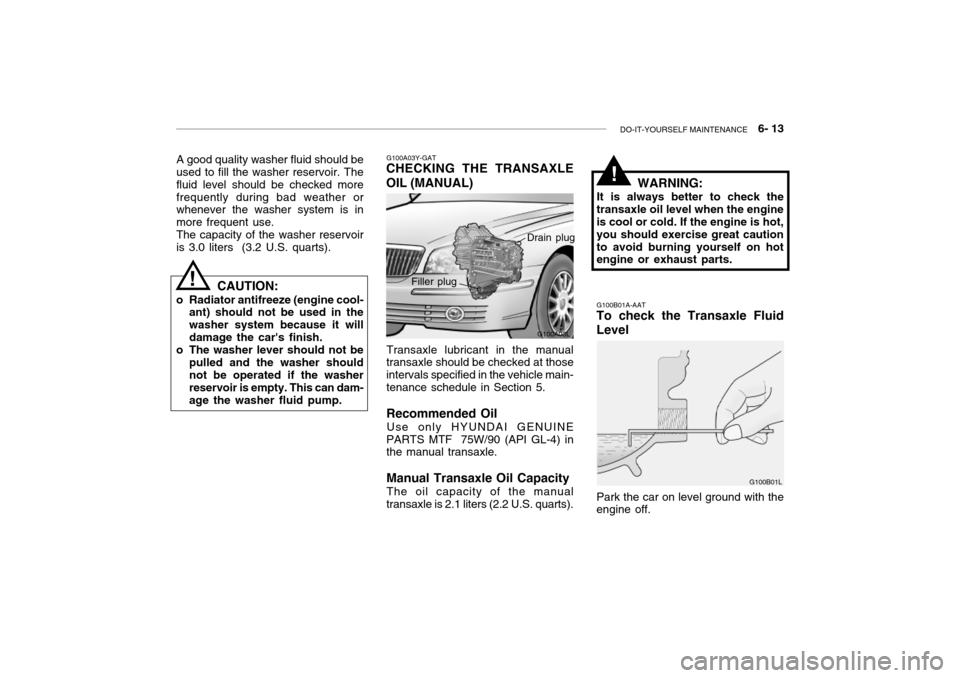
G100A03L
G100A03Y-GAT
CHECKING THE TRANSAXLE OIL (MANUAL)
Transaxle lubricant in the manual
transaxle should be checked at those intervals specified in the vehicle main-
tenance schedule in Section 5. Recommended Oil
Use only HYUNDAI GENUINE
PARTS MTF 75W/90 (API GL-4) in the manual transaxle. Manual Transaxle Oil Capacity
The oil capacity of the manual
transaxle is 2.1 liters (2.2 U.S. quarts). Drain plug
Filler plug WARNING:
It is always better to check the
transaxle oil level when the engine is cool or cold. If the engine is hot, you should exercise great cautionto avoid burning yourself on hot engine or exhaust parts. G100B01A-AAT
To check the Transaxle Fluid Level
G100B01L
Park the car on level ground with the engine off.
A good quality washer fluid should be used to fill the washer reservoir. The fluid level should be checked morefrequently during bad weather or whenever the washer system is in more frequent use.The capacity of the washer reservoiris 3.0 liters (3.2 U.S. quarts).
CAUTION:
o Radiator antifreeze (engine cool- ant) should not be used in thewasher system because it willdamage the car's finish.
o The washer lever should not be
pulled and the washer should not be operated if the washer reservoir is empty. This can dam-age the washer fluid pump.
!
!
Page 191 of 230
6- 14 DO-IT-YOURSELF MAINTENANCE
G110B03A-AAT
Recommended Fluid
Your Hyundai automatic transaxle is specially designed to operate with DIAMOND ATF SP-III or SK ATF SP- III. Damage caused by a nonspecifiedfluid is not covered by your new ve- hicle limited warranty. G110C02L-GAT
Transaxle Fluid Capacity
The fluid capacity of the automatic transaxle is 7.8 liters (2.5 V6)/8.5 liters (3.0/3.5 V6).
WARNING:
The transaxle fluid level should bechecked when the engine is atnormal operating temperature. This means that the engine, radiator, exhaust system etc., are very hot.Exercise great care not to burn yourself during this procedure.
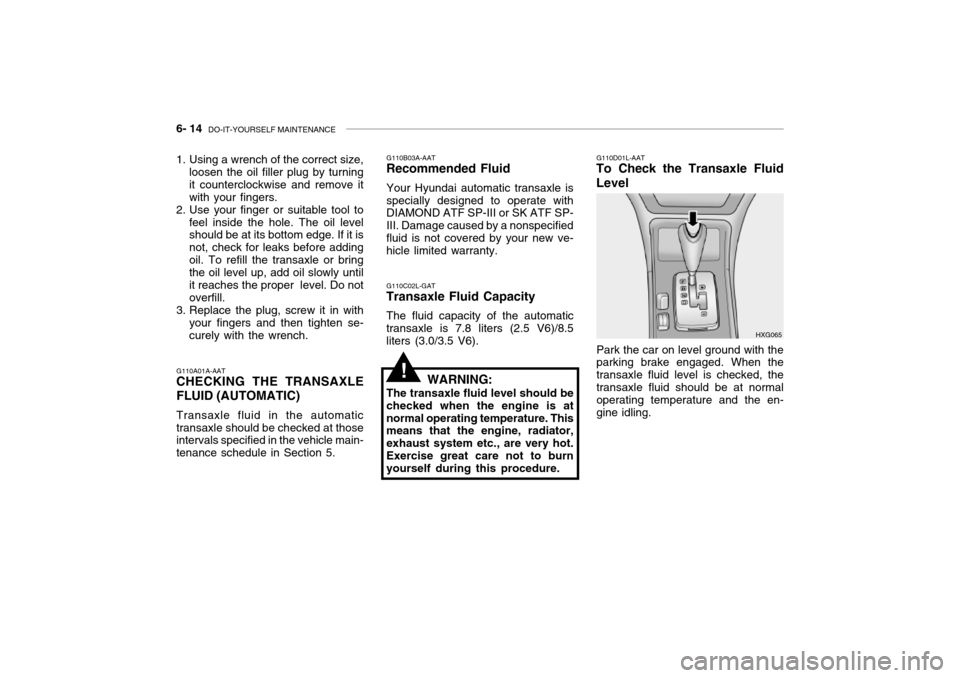
HXG065
G110D01L-AAT
To Check the Transaxle Fluid Level
Park the car on level ground with the parking brake engaged. When the transaxle fluid level is checked, thetransaxle fluid should be at normal operating temperature and the en- gine idling.
!G110A01A-AAT CHECKING THE TRANSAXLE FLUID (AUTOMATIC) Transaxle fluid in the automatic transaxle should be checked at those intervals specified in the vehicle main- tenance schedule in Section 5.
1. Using a wrench of the correct size,
loosen the oil filler plug by turningit counterclockwise and remove itwith your fingers.
2. Use your finger or suitable tool to
feel inside the hole. The oil level should be at its bottom edge. If it is not, check for leaks before addingoil. To refill the transaxle or bring the oil level up, add oil slowly until it reaches the proper level. Do notoverfill.
3. Replace the plug, screw it in with
your fingers and then tighten se-curely with the wrench.
Page 200 of 230
DO-IT-YOURSELF MAINTENANCE 6- 23
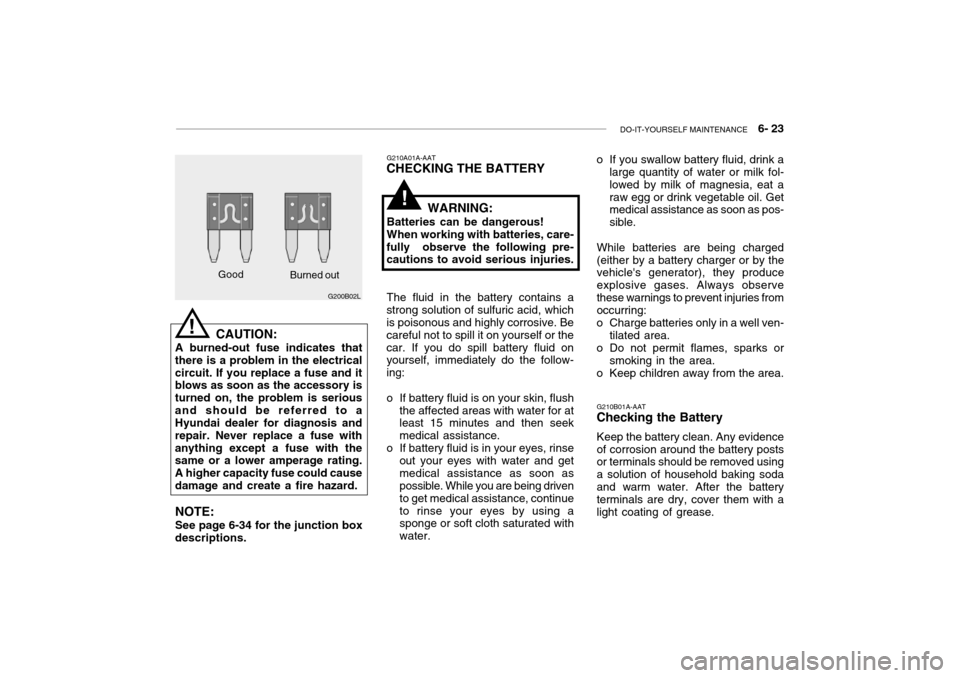
Good
G200B02L
Burned out G210A01A-AAT
CHECKING THE BATTERY
WARNING:
Batteries can be dangerous! When working with batteries, care-
fully observe the following pre- cautions to avoid serious injuries.
The fluid in the battery contains a
strong solution of sulfuric acid, whichis poisonous and highly corrosive. Be careful not to spill it on yourself or thecar. If you do spill battery fluid on yourself, immediately do the follow- ing:
o If battery fluid is on your skin, flush the affected areas with water for at least 15 minutes and then seek medical assistance.
o If battery fluid is in your eyes, rinse
out your eyes with water and getmedical assistance as soon as possible. While you are being driven to get medical assistance, continueto rinse your eyes by using a sponge or soft cloth saturated with water.
CAUTION:
A burned-out fuse indicates that
there is a problem in the electricalcircuit. If you replace a fuse and it blows as soon as the accessory is turned on, the problem is seriousand should be referred to a Hyundai dealer for diagnosis and repair. Never replace a fuse withanything except a fuse with the same or a lower amperage rating. A higher capacity fuse could causedamage and create a fire hazard.
NOTE: See page 6-34 for the junction box
descriptions. o If you swallow battery fluid, drink a
large quantity of water or milk fol- lowed by milk of magnesia, eat araw egg or drink vegetable oil. Get medical assistance as soon as pos- sible.
While batteries are being charged(either by a battery charger or by the vehicle's generator), they produce explosive gases. Always observethese warnings to prevent injuries from occurring:
o Charge batteries only in a well ven- tilated area.
o Do not permit flames, sparks or smoking in the area.
o Keep children away from the area.
G210B01A-AAT
Checking the Battery
Keep the battery clean. Any evidence of corrosion around the battery posts or terminals should be removed using a solution of household baking sodaand warm water. After the battery terminals are dry, cover them with a light coating of grease.
!
!
Page 201 of 230
6- 24 DO-IT-YOURSELF MAINTENANCE
G240A01A-AAT
POWER STEERING HOSES
It is suggested that you check the
power steering hose connections for fluid leakage at regular intervals.
The power steering hoses should be
replaced if there is severe surface cracking, scuffing or worn spots. De- terioration of the hose could causepremature failure.
G230A03A-GAT
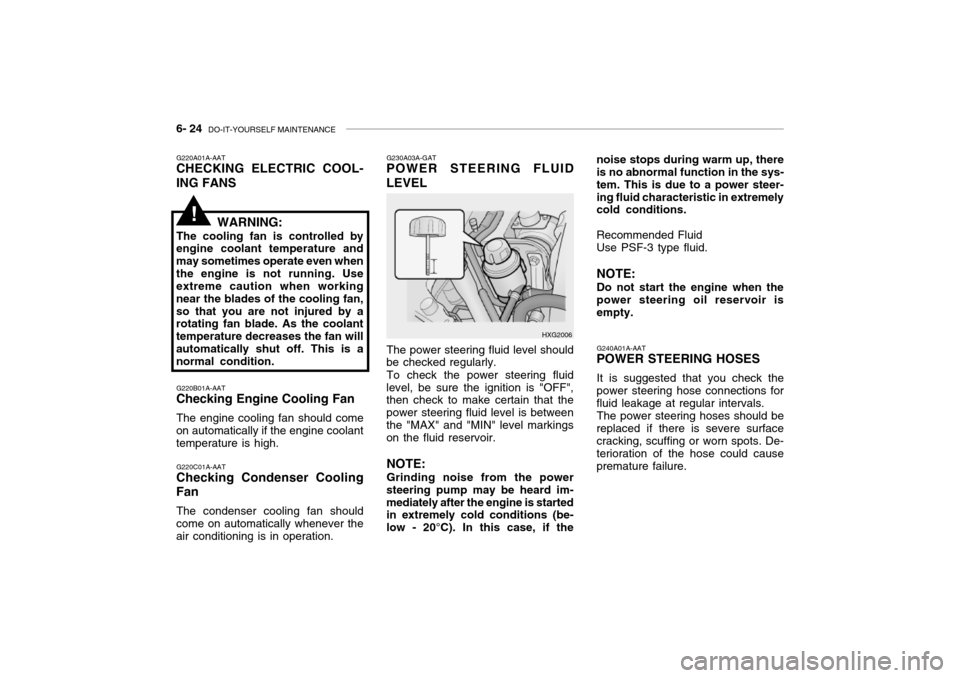
POWER STEERING FLUID LEVEL
HXG2006
The power steering fluid level should
be checked regularly.
To check the power steering fluid
level, be sure the ignition is "OFF", then check to make certain that the power steering fluid level is betweenthe "MAX" and "MIN" level markings on the fluid reservoir.
NOTE: Grinding noise from the power
steering pump may be heard im- mediately after the engine is started in extremely cold conditions (be- low - 20°C). In this case, if the noise stops during warm up, there is no abnormal function in the sys- tem. This is due to a power steer-ing fluid characteristic in extremely cold conditions. Recommended Fluid Use PSF-3 type fluid. NOTE: Do not start the engine when the power steering oil reservoir is empty.
G220A01A-AAT
CHECKING ELECTRIC COOL- ING FANS
WARNING:
The cooling fan is controlled by
engine coolant temperature and may sometimes operate even whenthe engine is not running. Use extreme caution when working near the blades of the cooling fan,so that you are not injured by a rotating fan blade. As the coolant temperature decreases the fan willautomatically shut off. This is a normal condition.
G220B01A-AAT
Checking Engine Cooling Fan
The engine cooling fan should come
on automatically if the engine coolanttemperature is high.
G220C01A-AAT
Checking Condenser Cooling Fan
The condenser cooling fan should
come on automatically whenever the air conditioning is in operation.
!
Page 229 of 230
INDEX 10- 5
Adjusting seat forward and rear ward..................... 1-14
Adjusting seatbag angle ......................................... 1-15 Seat cushion height adjustment............................ 1-14
Power Steering Fluid Level ....................................... 6-24 R
Rear Seat Fold Down ................................... 1-17 ~ 1-18Rear Window Defroster Switch .................... 1-52 ~ 1-53
Replacement of light bulbs ....................................... 6-26 S Seat Front ........................................................... 1-11 ~ 1-15
Seat Warmer ............................................................. 1-17
Seat Belts
3-Point system ........................................... 1-21 ~ 1-23
Adjustable height ........................................ 1-20 ~ 1-21
Adjusting your seat belt ......................................... 1-21Care of seat belts .................................................. 1-20
Precautions ............................................................ 1-18
Spark Plugs ................................................... 6-10 ~ 6-11
Spectacle Case ......................................................... 1-61
Speedometer ............................................................. 1-45
Starting Procedure ...................................................... 2-4
Steering Wheel Freeplay .......................................... 6-20
Steering Wheel Electric T ilt and Telescopic ............. 1-71
Steering Wheel Tilt Lever ......................................... 1-71 Stereo Radio Operation (H940B, H940A)
......................................... 1-93 ~ 1-95, 1-101 ~ 1-103
Stereo Sound System ................................... 1-91 ~ 1-92 Sun Visor
.................................................................. 1-70
Sunroof .......................................................... 1-57 ~ 1-59 T
Tachometer ............................................................... 1-46 Theft-Alarm system ........................................... 1-8 ~ 1-9
Tires Balancing .................................................................. 8-4
Chains ...................................................................... 8-4
If you have a flat tire ................................... 3-5 ~ 3-10
Information ............................................................... 8-2
Pressure ......................................................... 8-2 ~ 8-3Replacement ............................................................ 8-5
Rotation .................................................................... 8-4
Snow tires ................................................................ 8-3
Spare tire ................................................................. 3-5
Traction .................................................................... 8-4
Towing A trailer (or vehicle) ................................... 2-18 ~ 2-21
Emergency ............................................................. 3-12
If your car must be towed ......................... 3-10 ~ 3-12
Traction Control System ............................... 2-12 ~ 2-13
Transaxle
Automatic ..................................................... 2-7 ~ 2-11Automatic transaxle fluid checking ............ 6-14 ~ 6-15
Manual ..................................................................... 2-5
Manual transaxle Oil checkin g ................... 6-13 ~ 6-14
Trip Computer ............................................... 1-53 ~ 1-55
Trip Odometer ............................................... 1-46 ~ 1-47
Trunk Lid ....................................................... 1-64 ~ 1-66