fuse Hyundai Grandeur 2004 Owner's Manual
[x] Cancel search | Manufacturer: HYUNDAI, Model Year: 2004, Model line: Grandeur, Model: Hyundai Grandeur 2004Pages: 235, PDF Size: 6.64 MB
Page 48 of 235
FEATURES OF YOUR HYUNDAI 1- 35
o The SRS can function only when
the ignition key is in the "ON" position. If the SRS SRI does not come on, or continuously re- mains on after flashing for about6 seconds when the ignition key is turned to the "ON" position, or after the engine is started, comeson while driving, the SRS is not working properly. If this occurs, have your vehicle immediatelyinspected by your Hyundai dealer.
o Before you replace a fuse or dis- connect a battery terminal, turnthe ignition key to the "LOCK" position or remove the ignitionkey. Never remove or replace the air bag related fuse(s) when the ignition key is in the "ON" posi-tion. Failure to heed this warning will cause the SRS SRI to illumi- nate.
WARNING:
o When the SRS is activated, there may be a loud noise and fine dustwill be released throughout thevehicle. These conditions are normal and are not hazardous. However, the fine dust generatedduring airbag deployment may cause skin irritation. Wash your hands and face thoroughly withlukewarm water and a mild soap after an accident in which the airbags were deployed.
!
Passenger's Airbag
CAUTION:
When installing a container of liq- uid air freshener inside a vehicle, do not place it near the instrumentcluster nor on the instrument panel pad surface. If there is any leakage from the air freshener onto theseareas (Instrument cluster, instru- ment panel pad or air ventilator), it may damage these parts. If the liq-uid from air freshener does leak onto these areas, wash them with water immediately.
B240B05L
B240B04L
Passenger's Airbag
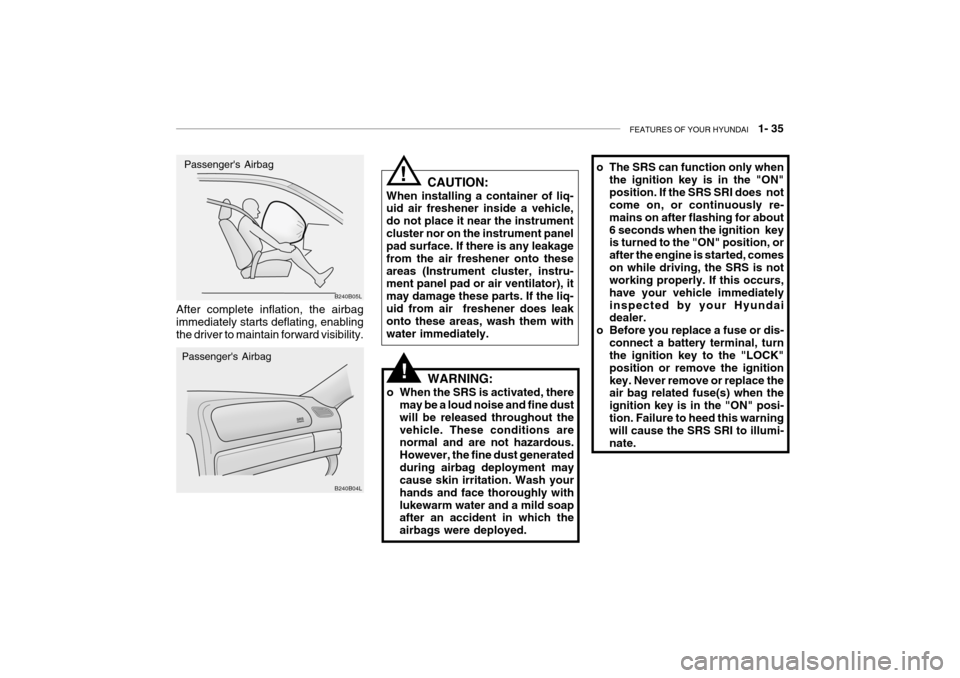
After complete inflation, the airbagimmediately starts deflating, enabling the driver to maintain forward visibility.
!
Page 63 of 235
1- 50 FEATURES OF YOUR HYUNDAI
To turn on the rear fog lights, push the switch. They will come on when the headlight switch is in the second posi-tion and the key is in the "ON" position.
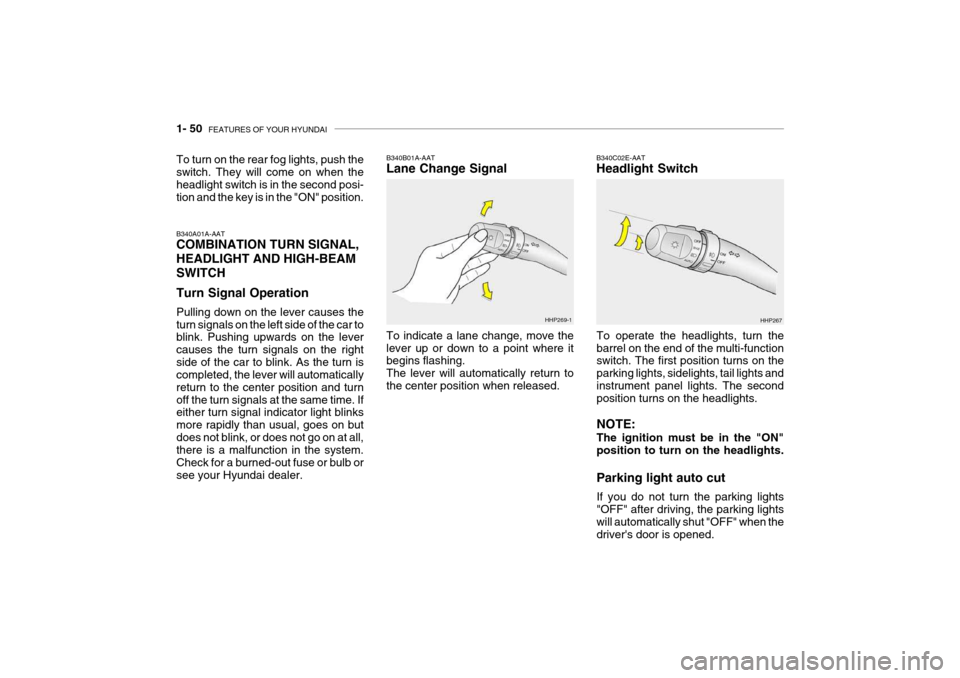
B340A01A-AAT COMBINATION TURN SIGNAL, HEADLIGHT AND HIGH-BEAM SWITCH Turn Signal Operation Pulling down on the lever causes the turn signals on the left side of the car to blink. Pushing upwards on the lever causes the turn signals on the rightside of the car to blink. As the turn is completed, the lever will automatically return to the center position and turnoff the turn signals at the same time. If either turn signal indicator light blinks more rapidly than usual, goes on butdoes not blink, or does not go on at all, there is a malfunction in the system. Check for a burned-out fuse or bulb orsee your Hyundai dealer. B340B01A-AAT Lane Change Signal To indicate a lane change, move the lever up or down to a point where it begins flashing. The lever will automatically return tothe center position when released.
HHP269-1
B340C02E-AAT Headlight Switch
To operate the headlights, turn the barrel on the end of the multi-function switch. The first position turns on the parking lights, sidelights, tail lights andinstrument panel lights. The second position turns on the headlights. NOTE: The ignition must be in the "ON" position to turn on the headlights. Parking light auto cut If you do not turn the parking lights "OFF" after driving, the parking lightswill automatically shut "OFF" when the driver's door is opened. HHP267
Page 117 of 235
1- 104 FEATURES OF YOUR HYUNDAI
NOTE:
o When replacing the fuse, replace
it with a fuse having the correct capacity.
o This equipment is designed to be used only in a 12 volt DCbattery system with negativeground.
o This unit is made of precision
parts. Do not attempt to disas-semble or adjust any parts.
o When driving your vehicle, be
sure to keep the volume of theunit set low enough to allow you to hear sounds coming from the outside.
! CAUTION:
o Do not isert warped or poor qual- ity discs into the CD changer as damage to the unit may occur.
o Do not insert anything like coins
into the changer slot as damage tothe unit may occur.
o Do not place beverages close to
the audio system. The playbackmechanism may be damaged if you spill them.
o Do not impact on the audio sys-
tem, or the playback mechanismcould be damaged.
o Driving on the off-roads or other vibrations may skip your compact disc.Do not use the audio system on off-roads as the discs could be scratched and damaged.
o Do not grip or pull out the disc with your hand while the disc isbeing pulled into the unit by theself loading mechanism. These can cause poor disc scratching to occur or trouble in the compactdisc player. o Avoid using CD-Recordable or CD-
Rewritable as the changer could not be operated in recording way of the CD maker. When using thecompact disc player, genuine CDs are recommended.
Page 124 of 235

FEATURES OF YOUR HYUNDAI 1- 111
B940L02L-GAT
1. Playing CD
o Insert the CD with the label facing
upward.
o Insert the CD to start CD playback, during radio operation or cassette tape playing.
o When a disc is in the CD deck, if you press the play button the CD playerwill begin playing even if the radio orcassette player is being used.
o The CD player can be used when
the ignition switch is in either the"ON" or "ACC" position.
2. FF/REW While the disc is playing, if you hold down the FF button continuously, the selected track is advanced. Holding down the REW button continuouslymoves the selected track back.
3. TRACK UP/DOWN
o The desired track on the disc cur- rently being played can be selected using the track number.
o Press once to skip forward to the beginning of the next track.
o Press once to skip back to the
beginning of the track. 4. SCAN (If installed)
o Press the SCAN button to playback
the first 10 seconds of each track.
o Press the SCAN button again within
10 sec. when you have reached the desired track.
5. REPEAT
o To repeat the track you are currently listening to, press the RPT button. To cancel , press again.
o If you do not release RPT operation
after all the tracks are played back,the unit will play back again from the first track.
6. EQ Button Press the EQ button to select the CLASSIC, JAZZ, ROCK and DEFEAT MODE for the desired tone quality. Each press of the button changes thedisplay as follows; NOTE:
o To assure proper operation of the
unit, keep the vehicle interior tem- perature within a normal range by using the vehicle's air condition-ing or heating system.
o When replacing the fuse, replace
it with a fuse having the correctcapacity.
o The preset station frequencies
are all erased when the car bat-tery is disconnected. Therefore, all data will have to be set again if this should occur.
o Do not add any oil to the rotating
parts. Keep magnets, screwdriv-ers and other metallic objects away from the tape mechanism and head.
o This equipment is designed to be used only in a 12 volt DCbattery system with negativeground.
o This unit is made of precision
parts. Do not attempt to disas-semble or adjust any parts.
CLASSIC � JAZZ � ROCK � DEFEAT
Page 128 of 235
FEATURES OF YOUR HYUNDAI 1- 115
NOTE:
o When replacing the fuse, replace
it with a fuse having the correct capacity.
o This equipment is designed to be used only in a 12 volt DCbattery system with negativeground.
o This unit is made of precision
parts. Do not attempt to disas-semble or adjust any parts.
o When driving your vehicle, be
sure to keep the volume of theunit set low enough to allow you to hear sounds coming from the outside. CAUTION:
o Do not isert warped or poor qual- ity discs into the CD changer asdamage to the unit may occur.
o Do not insert anything like coins into the changer slot as damage tothe unit may occur.
o Do not place beverages close to the audio system. The playbackmechanism may be damaged ifyou spill them.
o Do not impact on the audio sys-
tem, or the playback mechanismcould be damaged.
o Driving on the off-roads or other
vibrations may skip your compactdisc. Do not use the audio system on off-roads as the discs could bescratched and damaged.
o Do not grip or pull out the disc
with your hand while the disc isbeing pulled into the unit by the self loading mechanism. These can cause poor disc scratching tooccur or trouble in the compact disc player.
! o Avoid using CD-Recordable or CD-
Rewritable as the changer could not be operated in recording way of the CD maker. When using thecompact disc player, genuine CDs are recommended.
Page 183 of 235

6. Do-It-Yourself Maintenance
Engine Compartment ..................................................................... 6-2
General Checks .............................................................................. 6-5
Checking the Engine Oil ................................................................ 6-6
Changing the Oil and Filter ........................................................... 6-7
Checking and Changing the Engine Coolant ............................... 6-8
Spark Plugs ..................................................................................6-10
Changing the Air Cleaner Filter ................................................... 6-11
Checking the Transaxle Oil (Manual) .......................................... 6-13
Checking the Transaxle Fluid (Automatic) .................................. 6-14
Checking the Brakes .................................................................... 6-15
Checking the Clutch Fluid ............................................................ 6-16
Air Conditioning Care ................................................................... 6-17
Changing the Air Filter (For Evaporator and Blower Unit) ......... 6-18
Checking Drive Belts .................................................................... 6-21
Checking and Replacing Fuses ................................................... 6-21
Power Steering Fluid Level .......................................................... 6-24
Headlight Aiming Adjustment ....................................................... 6-24
Replacement of Light Bulbs ......................................................... 6-26
Bulb Wattage ................................................................................ 6-33
Junction Box Description ............................................................. 6-34
6
Page 203 of 235
DO-IT-YOURSELF MAINTENANCE 6- 21
G190A01A-GAT
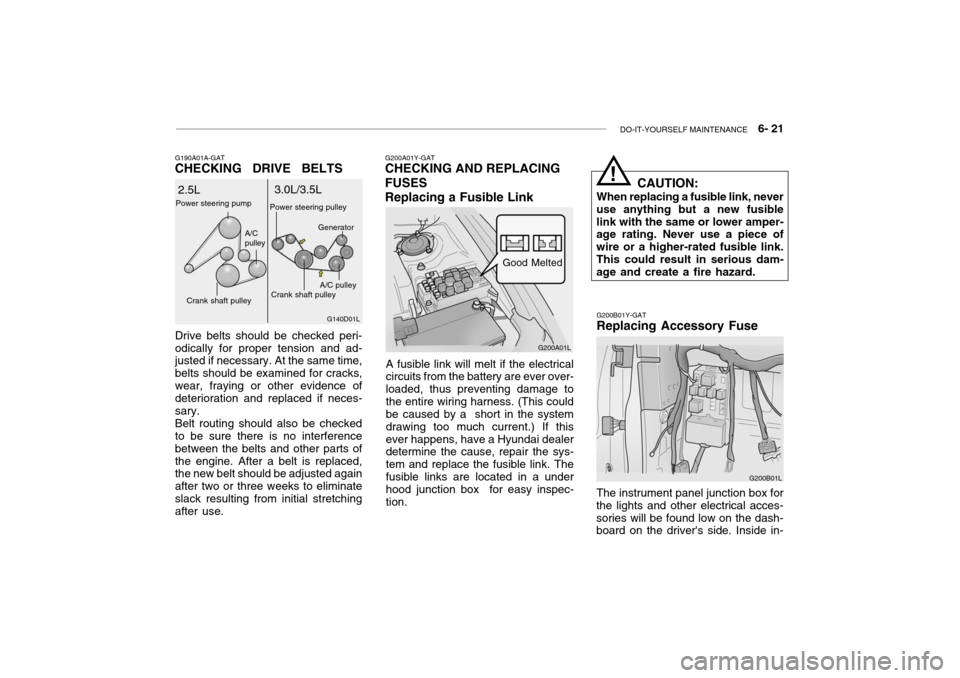
CHECKING DRIVE BELTS
Drive belts should be checked peri- odically for proper tension and ad- justed if necessary. At the same time, belts should be examined for cracks,wear, fraying or other evidence of deterioration and replaced if neces- sary. Belt routing should also be checked to be sure there is no interference between the belts and other parts ofthe engine. After a belt is replaced, the new belt should be adjusted again after two or three weeks to eliminateslack resulting from initial stretching after use. G140D01L
2.5L
3.0L/3.5L
Power steering pump
Crank shaft pulley A/C pulley
Crank shaft pulley
A/C pulley
Power steering pulley
Generator
G200A01Y-GAT
CHECKING AND REPLACING FUSES Replacing a Fusible Link
A fusible link will melt if the electrical circuits from the battery are ever over- loaded, thus preventing damage tothe entire wiring harness. (This could be caused by a short in the system drawing too much current.) If thisever happens, have a Hyundai dealer determine the cause, repair the sys- tem and replace the fusible link. Thefusible links are located in a under hood junction box for easy inspec- tion. G200A01L
Melted
Good
G200B01Y-GAT Replacing Accessory Fuse
G200B01L
The instrument panel junction box for
the lights and other electrical acces- sories will be found low on the dash- board on the driver's side. Inside in- CAUTION:
When replacing a fusible link, never use anything but a new fusiblelink with the same or lower amper- age rating. Never use a piece of wire or a higher-rated fusible link.This could result in serious dam- age and create a fire hazard.
!
Page 204 of 235
6- 22 DO-IT-YOURSELF MAINTENANCE
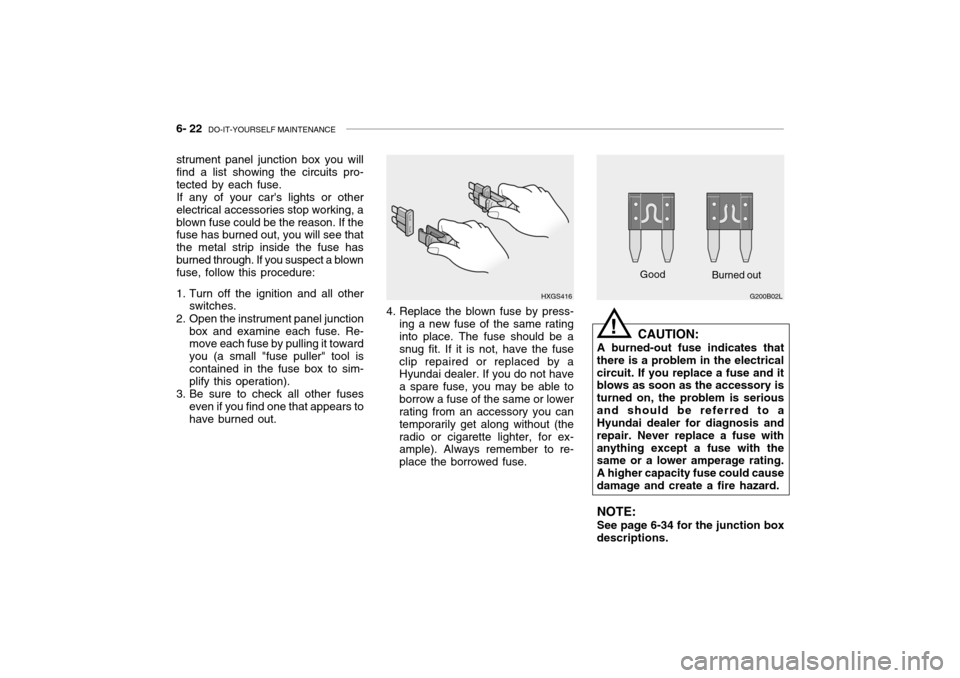
Good
G200B02L
Burned out
CAUTION:
A burned-out fuse indicates that
there is a problem in the electrical circuit. If you replace a fuse and it blows as soon as the accessory is turned on, the problem is seriousand should be referred to a Hyundai dealer for diagnosis and repair. Never replace a fuse withanything except a fuse with the same or a lower amperage rating. A higher capacity fuse could causedamage and create a fire hazard.
NOTE: See page 6-34 for the junction box
descriptions.
!
strument panel junction box you will find a list showing the circuits pro- tected by each fuse.
If any of your car's lights or other
electrical accessories stop working, ablown fuse could be the reason. If the fuse has burned out, you will see that the metal strip inside the fuse hasburned through. If you suspect a blown fuse, follow this procedure:
1. Turn off the ignition and all other switches.
2. Open the instrument panel junction box and examine each fuse. Re- move each fuse by pulling it toward you (a small "fuse puller" tool iscontained in the fuse box to sim- plify this operation).
3. Be sure to check all other fuses even if you find one that appears to have burned out.
HXGS416
4. Replace the blown fuse by press- ing a new fuse of the same rating into place. The fuse should be a snug fit. If it is not, have the fuseclip repaired or replaced by a Hyundai dealer. If you do not have a spare fuse, you may be able toborrow a fuse of the same or lower rating from an accessory you can temporarily get along without (theradio or cigarette lighter, for ex- ample). Always remember to re- place the borrowed fuse.
Page 216 of 235

6- 34 DO-IT-YOURSELF MAINTENANCE
G200C01L-GAT JUNCTION BOX DESCRIPTION Under Hood Junction Box
G200C01L
NOTE: Not all junction box description in this manual
may be applicable to your vehicle. It is accurate at the time of printing. When you inspect the junction box on your vehicle, refer to the junction box label. DESCRIPTION
FUEL PUMP
HEAD LIGHT(Lo-LH) ABS
INJECTOR
A/C COMPRESSOR A/T
MAIN
IGNITION COIL
OXYGEN SENSOR EGR
HORN
HEAD LIGHT(HI)
HEAD LIGHT(Lo-RH) DRL
FOG LIGHT DIODE 1
SPARE
SPARE
SPARE
SPARE
DIODE 2
BLOWER
POWER FUSE 2 POWER AMPSUNROOF
TAIL LIGHT
POWER FUSE 1 ECU
REAR DEFOGGER CONDENSER
POWER WINDOW IGNITION1/2ABS 1/2
RADIATOR FUSE
RATING
20A15A10A10A10A20A30A 20A 15A 15A15A15A15A15A15A 30A 20A15A10A 30A 30A20A15A20A30A10A30A20A40A
30A/30A30A/30A 30A PROTECTED COMPONENTS
Fuel pump relay
Head light relay (Low-LH)
ABS controls, Cruise control module, ETS control module
Limp home valve, ETS controls, Injector
A/C relay
A/T control relay, TCM, Engine control relayMFI controls
Ignition coil, A/T pulse generator, ECM, Ignition failure
sensor, E/TCM
ETS relay, MFI controls
A/C relay, MFI controls, EGR solenoid
Horn relay
Head light relay (High)
HID head light relay
DRL control module, Siren
Fog light relay - -----
Blower relayFuse 4, 20, 24, 25
Audio amp module
Data link connector, Sunroof relay, Home link connector
Tail light relayFuse 1, 7, 17, 18, 19
ETS control module, ECM, E/TCM, Generator
Rear window defogger relay
A/C fan relay #1
Power window relay, IMS controls
Ignition switchABS controlsRadiator fan relay
Page 217 of 235

DO-IT-YOURSELF MAINTENANCE 6- 35
FUSE RATING
25A 20A10A15A10A10A10A15A10A10A20A 10A 10A 10A20A10A 15A 10A20A10A10A15A10A20A 10A 10A 10A 10A10A10A 10A 10A PROTECTED COMPONENTS
Power seat
Seat warmerEPS controls
ETS relay
(HID) Head lights, DRL controls, AQS sensor
Blower & A/C controls
Turn & Hazard controlsNot used
Cruise switch, Instrument cluster
Head light leveling switch, Rain sensor, IMS controls
Rain sensor relay, Wiper & Washer controls
Home link connector, Left (Right) vanity lights, Sunroof, Blower & A/C controls,Electronic chrome mirrorNot used
Audio
Front (Rear) cigarette lighter, Accessory socket
IMS controls, Driver door module, RheostatNot used
Rear for light relay
Stop lights, Left (Right) personal lights, Left (Right) rear door lights
Door warning & Ignition key illumination, Courtesy lightsInstrument clusterSRS controls
Automatic transaxle controls, Back-up light switch, Vehicle speed sensor
Fuel filler door & Trunk lid opener, Driver (Assister) door module
Multipurpose check connector, Audio, lmmobiilizer controls, Trip computers, Digital
clock, Blower & A/C controls, Instrument cluster
Left (Right) inside lights, (HID) Head lights, Fog light relay, Right HID turn signal light,Right rear combination light
Stop light failure relay
Immobilizer controls, TCS switch, Trip computers, Instrument cluster
ETACM, Hazard switch, Auto light sensor
Antenna, Blower & A/C controls, Left (Right) outside mirror motor & Folding motor
(HID) Head lights, Front (Rear) cigarette lighters, Left (Right) license lights, Left HID
Turn signal light, Left rear combination lightBurglar alarm relay, Transaxle range switch, Start relay, ETS controlsDESCRIPTION P/SEAT
S/HTR EPSETS
H/LP
A/CON SW HAZARDSPARE
CRUISE IMS
WIPER
ETACS
SPARE AUDIO
C/LIGHTER MIRRORSPARE
RR FOG
STOP LP
ROOM LP
A/BAG IND A/BAGB/UP
T/LID
D/CLOCK
RH TAILSPARE
CLUSTER T/SIG
RR HTD IND
LH TAIL
START
G200D01L-GAT
Instrument Panel Junction Box
G200D01L