door lock HYUNDAI GX350 L 2005 User Guide
[x] Cancel search | Manufacturer: HYUNDAI, Model Year: 2005, Model line: GX350 L, Model: HYUNDAI GX350 L 2005Pages: 247, PDF Size: 7.48 MB
Page 33 of 247
1
FEATURES OF YOUR HYUNDAI
21
the seat belt operates in the same way as the
driver's seat belt (Emergency Locking Retrac-
tor Type). It automatically adjusts to the proper
length only after the lap belt portion of the seat
belt is adjusted manually so that it fits snugly
around your hips. When the seat belt is fully
extended from the retractor to allow the instal-
lation of a child restraint system, the seat belt
operation changes to allow the belt to retract, but
not to extend. (Automatic Locking Retractor
Type). See page 1-27.NOTE:Although the combination retractor pro-
vides the same level of protection for seated
passengers in either emergency or auto-
matic locking modes, it is recommended
that seated passengers use the emergency
locking feature for improved convenience.
The automatic locking function is intended
to facilitate child restraint installation. To
convert from the automatic locking feature
to the emergency locking operation mode,
allow the unbuckled seat belt to fully re-
tract.
WARNING:
o For maximum restraint system protec-
tion, the seat belts must always be used
whenever the car is moving.
o Seat belts are most effective when
seatbacks are in the upright position.
o Children must always be seatbelted in
the rear seats. Never allow children to
ride in the front passenger seat.
o The shoulder belt should be positioned
midway over the shoulder nearest the
door for the most effective protection.
Never wear the seat belt under the arm
nearest the door. Wearing the belt under
the arm nearest the door could cause
serious or fatal injuries in an accident.
o Avoid wearing twisted seat belts. A
twisted belt can't do its job as well. In a
collision, it could even cut into you. Be
sure the belt webbing is straight and not
twisted.
o Be careful not to damage the belt web-
bing or hardware. If the belt webbing or
hardware is damaged, replace it.
!
Check to make sure that the belt is properly
locked and that the belt is not twisted.NOTE:Seat belt reminder light comes and stays on
until the seat belt is fastened when the
ignition key is turned "ON" or "START".
And, the warning chime will also sound for
about 6 seconds.B190A01Y-AATSEAT BELTS-Front Passenger and Rear
Seat 3-Point System with Combination
Locking Retractor:
To Fasten Your BeltCombination retractor type seat belts are in-
stalled in the rear seat positions to help accom-
modate the installation of child restraint sys-
tems. Hyundai strongly recommends that chil-
dren always be seated in the rear seat. NEVER
place any infant restraint system in the front
seat of the vehicle.
This type of seat belt combines the features of
both an emergency locking retractor seat belt
and an automatic locking retractor seat belt. To
fasten your seat belt, pull it out of the retractor
and insert the metal tab into the buckle. There
will be an audible "click" when the tab locks into
the buckle. When not securing a child restraint,
xgflhma-1.p656/16/04, 3:02 PM 21
ProCarManuals.com
Page 34 of 247
1FEATURES OF YOUR HYUNDAI22
!
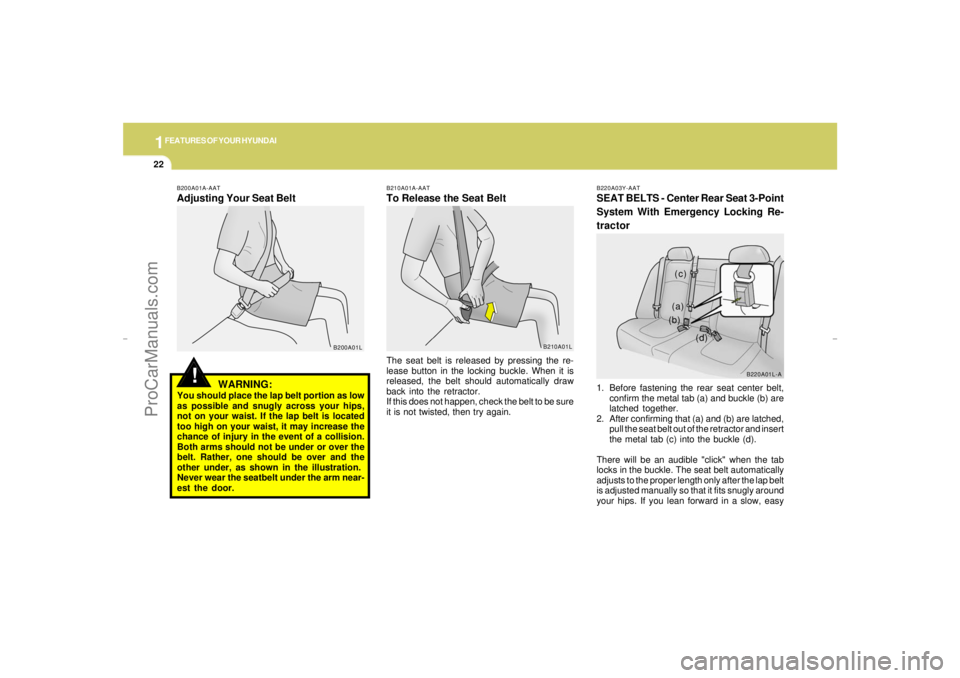
B200A01A-AATAdjusting Your Seat Belt
WARNING:You should place the lap belt portion as low
as possible and snugly across your hips,
not on your waist. If the lap belt is located
too high on your waist, it may increase the
chance of injury in the event of a collision.
Both arms should not be under or over the
belt. Rather, one should be over and the
other under, as shown in the illustration.
Never wear the seatbelt under the arm near-
est the door.
B200A01L
The seat belt is released by pressing the re-
lease button in the locking buckle. When it is
released, the belt should automatically draw
back into the retractor.
If this does not happen, check the belt to be sure
it is not twisted, then try again.B210A01A-AATTo Release the Seat Belt
B210A01LB220A03Y-AAT
SEAT BELTS - Center Rear Seat 3-Point
System With Emergency Locking Re-
tractor1. Before fastening the rear seat center belt,
confirm the metal tab (a) and buckle (b) are
latched together.
2. After confirming that (a) and (b) are latched,
pull the seat belt out of the retractor and insert
the metal tab (c) into the buckle (d).
There will be an audible "click" when the tab
locks in the buckle. The seat belt automatically
adjusts to the proper length only after the lap belt
is adjusted manually so that it fits snugly around
your hips. If you lean forward in a slow, easy
B220A01L-A
(a)
(b)
(d) (c)
xgflhma-1.p656/16/04, 3:02 PM 22
ProCarManuals.com
Page 48 of 247
1FEATURES OF YOUR HYUNDAI36
!
WARNING:
o For best protection from the side impact
airbag system and to avoid being injured
by the deploying side impact airbag,
both front seat occupants should sit in
an upright position with the seat belt
properly fastened. The driver's hands
should be placed on the steering wheel
at the 9:00 and 3:00 o'clock positions.
The passenger's arms and hands should
be placed on their laps.
o Do not use any accessory seat covers.
o Use of seat covers could reduce or pre-
vent the effectiveness of the system.
o Do not install any accessories on the
side or near the side impact airbag.
o Do not use excessive force on the side of
the seat.
o Do not place any objects over the airbag
or between the airbag and yourself.
o Do not place any objects (an umbrella,
bag, etc.) between the front door and the
front seat. Such objects may become
dangerous projectiles and cause injury
if the supplemental side impact air bag
inflates.
!
!
WARNING:
o The side impact airbag is supplemental
to the driver's and the passenger's seat
belt systems and is not a substitute for
them. Therefore your seat belts must be
worn at all times while the vehicle is in
motion. The airbags deploy only in cer-
tain side impact conditions severe
enough to cause significant injury to the
vehicle occupants.
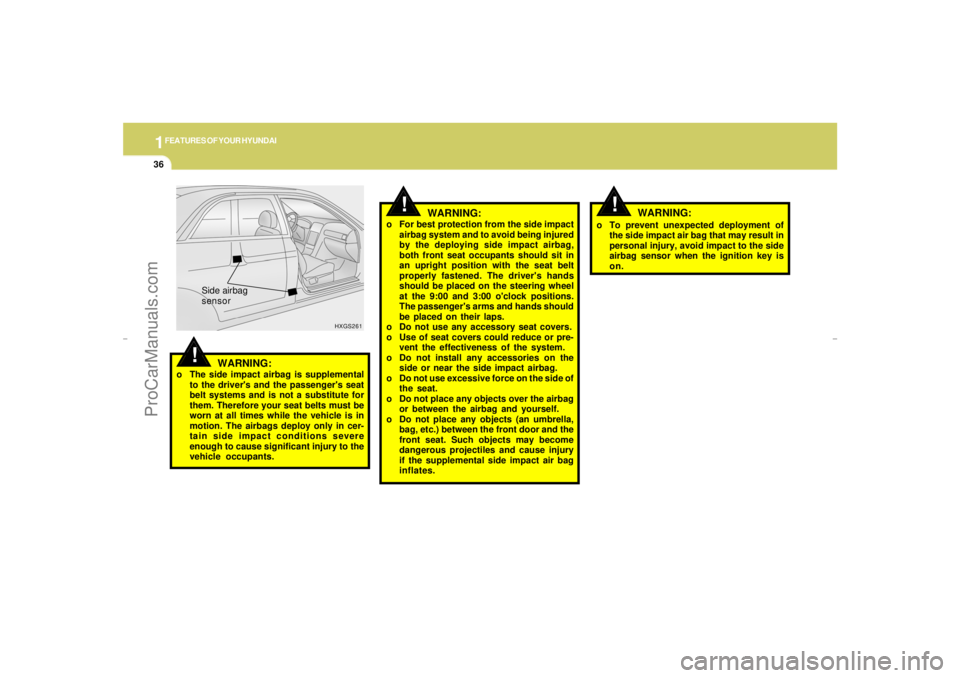
HXGS261
Side airbag
sensoro To prevent unexpected deployment of
the side impact air bag that may result in
personal injury, avoid impact to the side
airbag sensor when the ignition key is
on.
WARNING:
xgflhma-1.p656/16/04, 3:02 PM 36
ProCarManuals.com
Page 53 of 247
1
FEATURES OF YOUR HYUNDAI
41
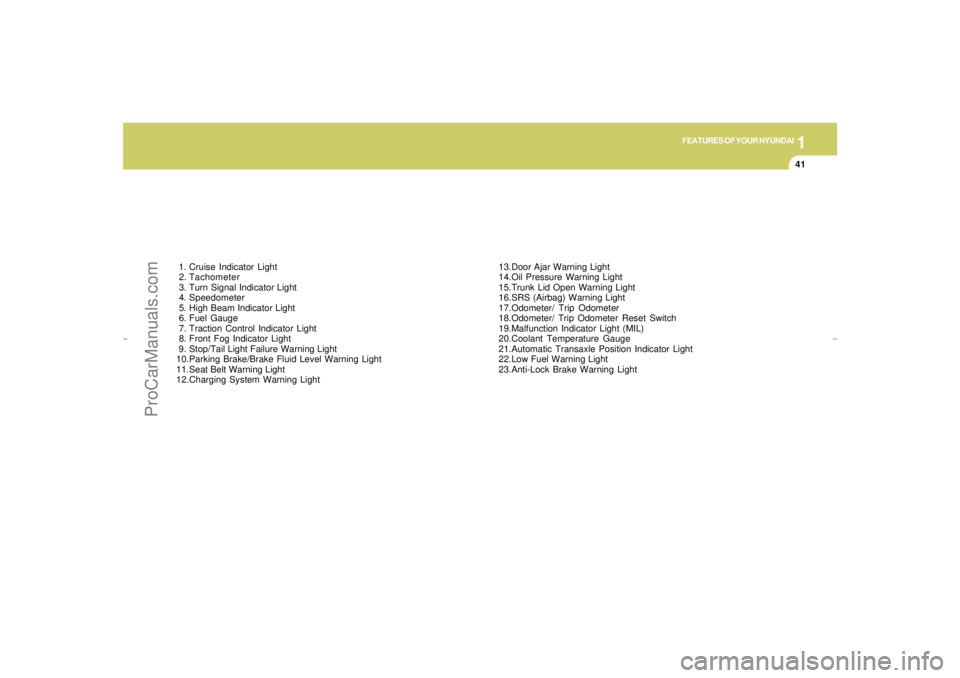
1. Cruise Indicator Light
2. Tachometer
3. Turn Signal Indicator Light
4. Speedometer
5. High Beam Indicator Light
6. Fuel Gauge
7. Traction Control Indicator Light
8. Front Fog Indicator Light
9. Stop/Tail Light Failure Warning Light
10.Parking Brake/Brake Fluid Level Warning Light
11.Seat Belt Warning Light
12.Charging System Warning Light13.Door Ajar Warning Light
14.Oil Pressure Warning Light
15.Trunk Lid Open Warning Light
16.SRS (Airbag) Warning Light
17.Odometer/ Trip Odometer
18.Odometer/ Trip Odometer Reset Switch
19.Malfunction Indicator Light (MIL)
20.Coolant Temperature Gauge
21.Automatic Transaxle Position Indicator Light
22.Low Fuel Warning Light
23.Anti-Lock Brake Warning Light
xgflhma-1.p656/16/04, 3:03 PM 41
ProCarManuals.com
Page 55 of 247
1
FEATURES OF YOUR HYUNDAI
43
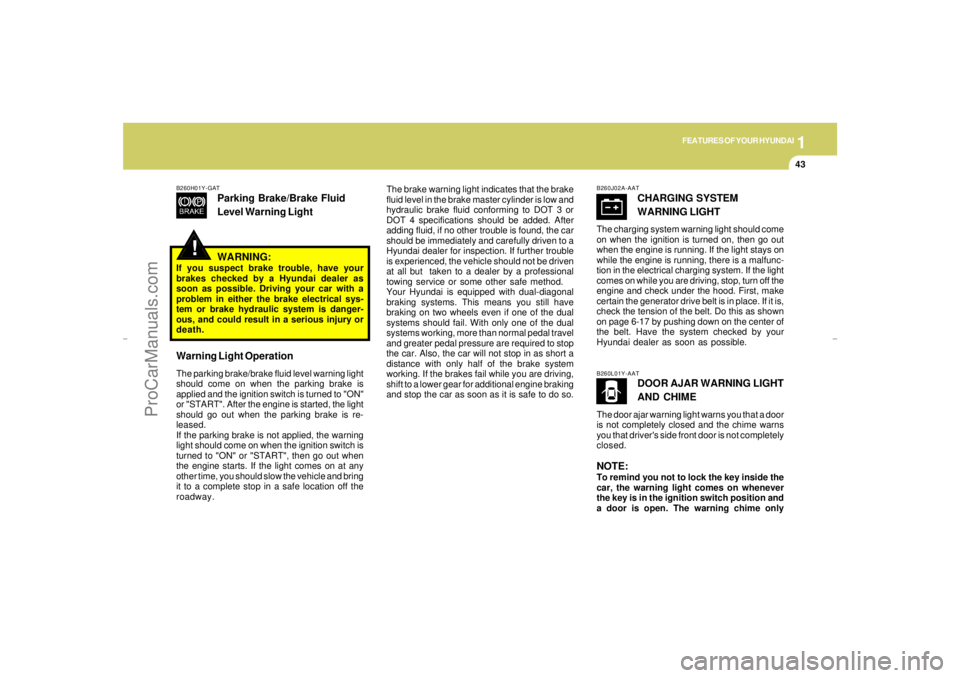
B260H01Y-GAT
Parking Brake/Brake Fluid
Level Warning Light
The brake warning light indicates that the brake
fluid level in the brake master cylinder is low and
hydraulic brake fluid conforming to DOT 3 or
DOT 4 specifications should be added. After
adding fluid, if no other trouble is found, the car
should be immediately and carefully driven to a
Hyundai dealer for inspection. If further trouble
is experienced, the vehicle should not be driven
at all but taken to a dealer by a professional
towing service or some other safe method.
Your Hyundai is equipped with dual-diagonal
braking systems. This means you still have
braking on two wheels even if one of the dual
systems should fail. With only one of the dual
systems working, more than normal pedal travel
and greater pedal pressure are required to stop
the car. Also, the car will not stop in as short a
distance with only half of the brake system
working. If the brakes fail while you are driving,
shift to a lower gear for additional engine braking
and stop the car as soon as it is safe to do so.
WARNING:
If you suspect brake trouble, have your
brakes checked by a Hyundai dealer as
soon as possible. Driving your car with a
problem in either the brake electrical sys-
tem or brake hydraulic system is danger-
ous, and could result in a serious injury or
death.Warning Light OperationThe parking brake/brake fluid level warning light
should come on when the parking brake is
applied and the ignition switch is turned to "ON"
or "START". After the engine is started, the light
should go out when the parking brake is re-
leased.
If the parking brake is not applied, the warning
light should come on when the ignition switch is
turned to "ON" or "START", then go out when
the engine starts. If the light comes on at any
other time, you should slow the vehicle and bring
it to a complete stop in a safe location off the
roadway.
B260J02A-AAT
CHARGING SYSTEM
WARNING LIGHT
The charging system warning light should come
on when the ignition is turned on, then go out
when the engine is running. If the light stays on
while the engine is running, there is a malfunc-
tion in the electrical charging system. If the light
comes on while you are driving, stop, turn off the
engine and check under the hood. First, make
certain the generator drive belt is in place. If it is,
check the tension of the belt. Do this as shown
on page 6-17 by pushing down on the center of
the belt. Have the system checked by your
Hyundai dealer as soon as possible.B260L01Y-AAT
DOOR AJAR WARNING LIGHT
AND CHIME
The door ajar warning light warns you that a door
is not completely closed and the chime warns
you that driver's side front door is not completely
closed.NOTE:To remind you not to lock the key inside the
car, the warning light comes on whenever
the key is in the ignition switch position and
a door is open. The warning chime only
!
xgflhma-1.p656/16/04, 3:03 PM 43
ProCarManuals.com
Page 56 of 247
1FEATURES OF YOUR HYUNDAI44
!
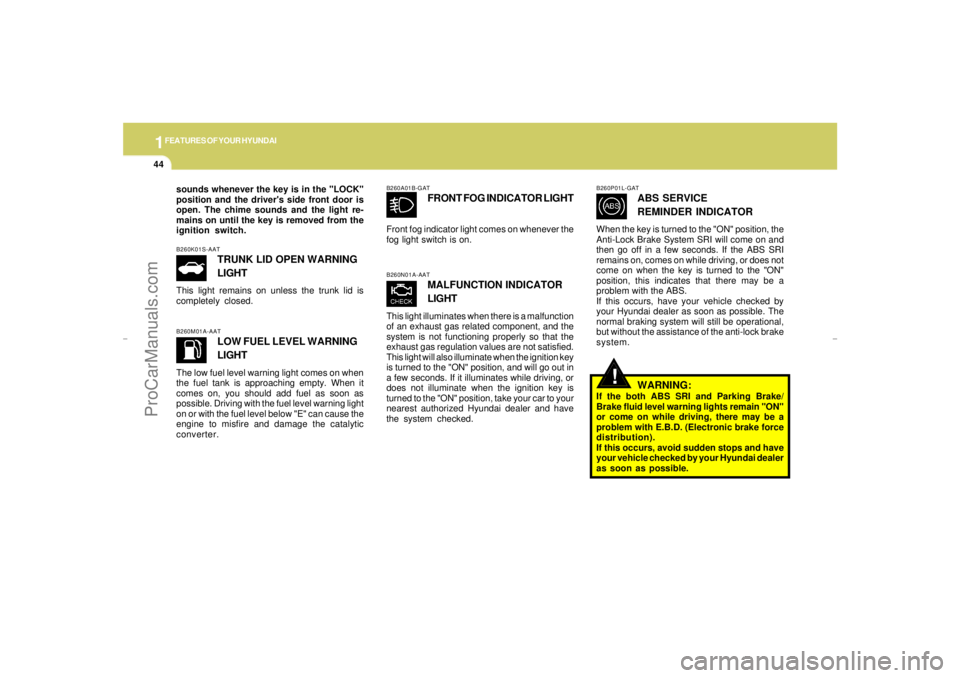
B260M01A-AAT
LOW FUEL LEVEL WARNING
LIGHT
The low fuel level warning light comes on when
the fuel tank is approaching empty. When it
comes on, you should add fuel as soon as
possible. Driving with the fuel level warning light
on or with the fuel level below "E" can cause the
engine to misfire and damage the catalytic
converter.
B260N01A-AAT
MALFUNCTION INDICATOR
LIGHT
This light illuminates when there is a malfunction
of an exhaust gas related component, and the
system is not functioning properly so that the
exhaust gas regulation values are not satisfied.
This light will also illuminate when the ignition key
is turned to the "ON" position, and will go out in
a few seconds. If it illuminates while driving, or
does not illuminate when the ignition key is
turned to the "ON" position, take your car to your
nearest authorized Hyundai dealer and have
the system checked.
B260P01L-GAT
ABS SERVICE
REMINDER INDICATOR
When the key is turned to the "ON" position, the
Anti-Lock Brake System SRI will come on and
then go off in a few seconds. If the ABS SRI
remains on, comes on while driving, or does not
come on when the key is turned to the "ON"
position, this indicates that there may be a
problem with the ABS.
If this occurs, have your vehicle checked by
your Hyundai dealer as soon as possible. The
normal braking system will still be operational,
but without the assistance of the anti-lock brake
system.
WARNING:
If the both ABS SRI and Parking Brake/
Brake fluid level warning lights remain "ON"
or come on while driving, there may be a
problem with E.B.D. (Electronic brake force
distribution).
If this occurs, avoid sudden stops and have
your vehicle checked by your Hyundai dealer
as soon as possible.
B260A01B-GAT
FRONT FOG INDICATOR LIGHT
Front fog indicator light comes on whenever the
fog light switch is on.
B260K01S-AAT
TRUNK LID OPEN WARNING
LIGHT
This light remains on unless the trunk lid is
completely closed. sounds whenever the key is in the "LOCK"
position and the driver's side front door is
open. The chime sounds and the light re-
mains on until the key is removed from the
ignition switch.
xgflhma-1.p656/16/04, 3:03 PM 44
ProCarManuals.com
Page 73 of 247
1
FEATURES OF YOUR HYUNDAI
61
SPECTACLE CASE
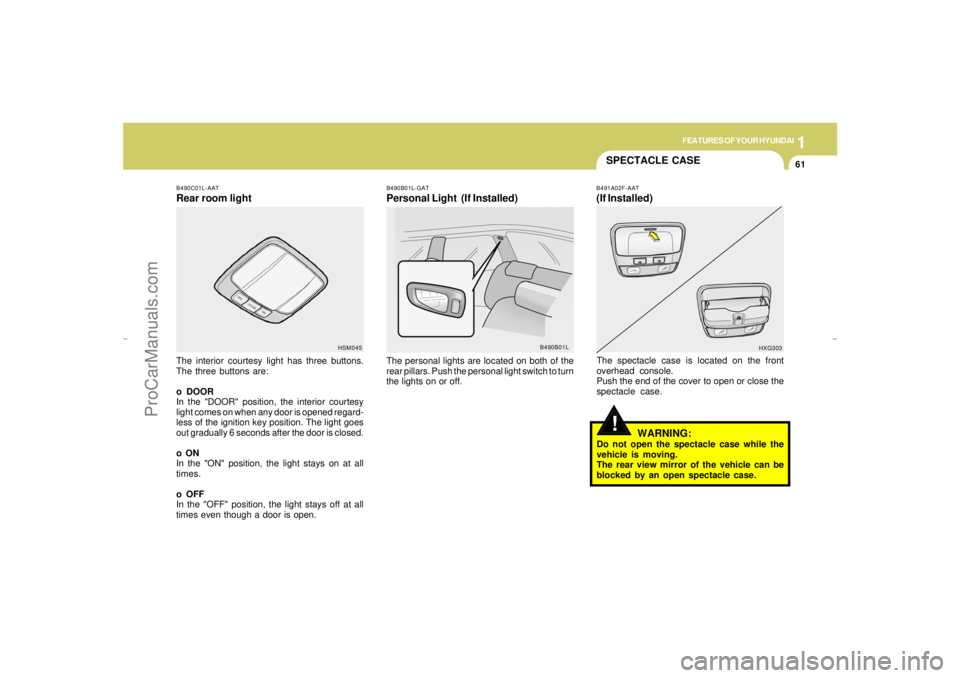
B490C01L-AATRear room lightThe interior courtesy light has three buttons.
The three buttons are:
o DOOR
In the "DOOR" position, the interior courtesy
light comes on when any door is opened regard-
less of the ignition key position. The light goes
out gradually 6 seconds after the door is closed.
o ON
In the "ON" position, the light stays on at all
times.
o OFF
In the "OFF" position, the light stays off at all
times even though a door is open.
B490B01L-GATPersonal Light (If Installed)The personal lights are located on both of the
rear pillars. Push the personal light switch to turn
the lights on or off.
HSM045
B490B01L
!
B491A02F-AAT(If Installed)The spectacle case is located on the front
overhead console.
Push the end of the cover to open or close the
spectacle case.
WARNING:
Do not open the spectacle case while the
vehicle is moving.
The rear view mirror of the vehicle can be
blocked by an open spectacle case.
HXG303
xgflhma-1.p656/16/04, 3:03 PM 61
ProCarManuals.com
Page 74 of 247
1FEATURES OF YOUR HYUNDAI62
MIRROR
!
CAUTION:
o Do not operate the switch continuously
for an unnecessary length of time.
o Scraping ice from the mirror face could
cause permanent damage. To remove
any ice, use a sponge, soft cloth or
approved de-icer.
!
WARNING:
Be careful when judging the size or dis-
tance of any object seen in the passenger
side rear view mirror. It is a convex mirror
with a curved surface. Any objects seen in
this mirror are closer than they appear.
HXGS252
GLOVE BOX!
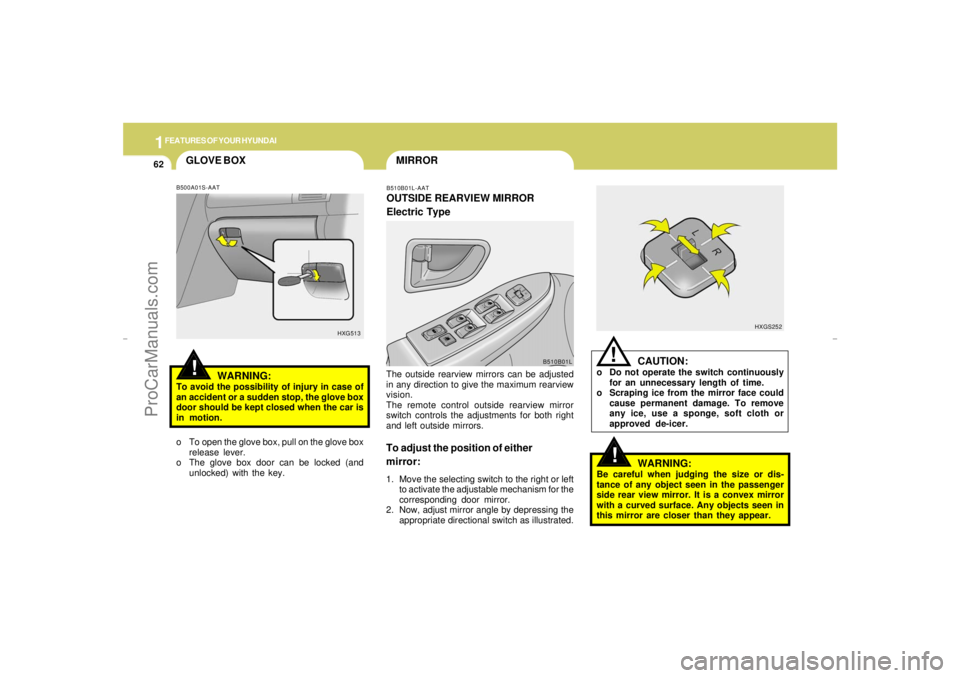
B510B01L-AATOUTSIDE REARVIEW MIRROR
Electric TypeThe outside rearview mirrors can be adjusted
in any direction to give the maximum rearview
vision.
The remote control outside rearview mirror
switch controls the adjustments for both right
and left outside mirrors.To adjust the position of either
mirror:1. Move the selecting switch to the right or left
to activate the adjustable mechanism for the
corresponding door mirror.
2. Now, adjust mirror angle by depressing the
appropriate directional switch as illustrated.
B500A01S-AAT
WARNING:
To avoid the possibility of injury in case of
an accident or a sudden stop, the glove box
door should be kept closed when the car is
in motion.
o To open the glove box, pull on the glove box
release lever.
o The glove box door can be locked (and
unlocked) with the key.
HXG513
B510B01L
xgflhma-1.p656/16/04, 3:03 PM 62
ProCarManuals.com
Page 78 of 247
1FEATURES OF YOUR HYUNDAI66
Operating HomeLinkSimply press the appropriate HomeLink button
to activate the trained product (garage door,
security system, entry door lock, estate gate,
lighting, etc.). The original handheld transmit-
ters may also be used at any time.
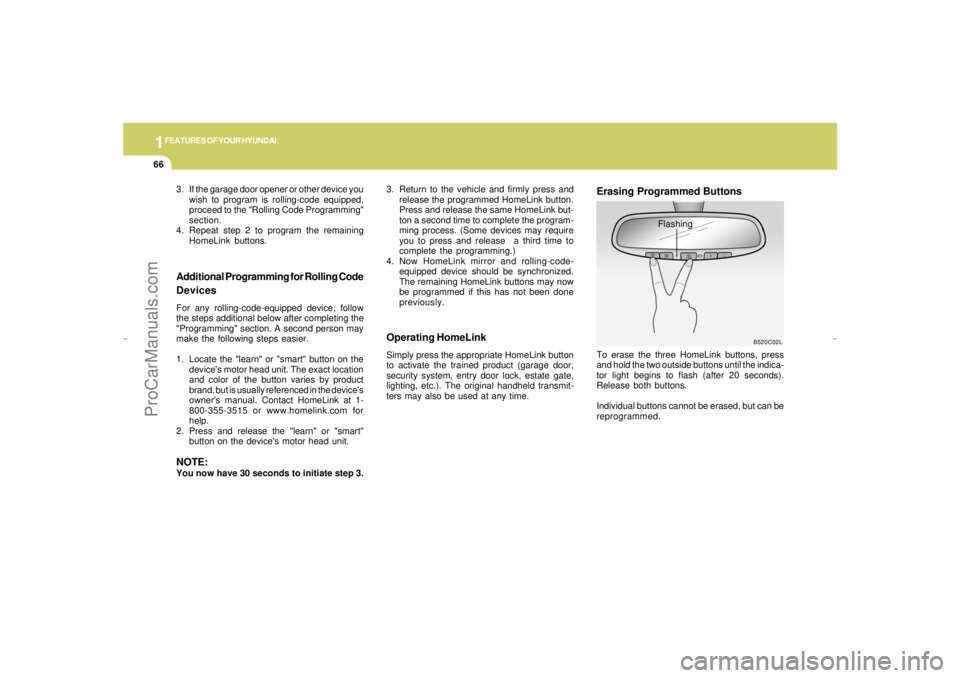
Erasing Programmed ButtonsTo erase the three HomeLink buttons, press
and hold the two outside buttons until the indica-
tor light begins to flash (after 20 seconds).
Release both buttons.
Individual buttons cannot be erased, but can be
reprogrammed.
Additional Programming for Rolling Code
DevicesFor any rolling-code-equipped device; follow
the steps additional below after completing the
"Programming" section. A second person may
make the following steps easier.
1. Locate the "learn" or "smart" button on the
device's motor head unit. The exact location
and color of the button varies by product
brand, but is usually referenced in the device's
owner's manual. Contact HomeLink at 1-
800-355-3515 or www.homelink.com for
help.
2. Press and release the "learn" or "smart"
button on the device's motor head unit.NOTE:You now have 30 seconds to initiate step 3.
B520C02L
Flashing 3. If the garage door opener or other device you
wish to program is rolling-code equipped,
proceed to the "Rolling Code Programming"
section.
4. Repeat step 2 to program the remaining
HomeLink buttons.3. Return to the vehicle and firmly press and
release the programmed HomeLink button.
Press and release the same HomeLink but-
ton a second time to complete the program-
ming process. (Some devices may require
you to press and release a third time to
complete the programming.)
4. Now HomeLink mirror and rolling-code-
equipped device should be synchronized.
The remaining HomeLink buttons may now
be programmed if this has not been done
previously.
xgflhma-1.p656/16/04, 3:03 PM 66
ProCarManuals.com
Page 80 of 247
1FEATURES OF YOUR HYUNDAI68
TRUNK LID
!
!
B540B02L-AATTrunk Lid Knob Lock (If Installed)WARNING:The trunk lid should always be kept com-
pletely closed while the vehicle is in motion.
If it is left open or ajar, exhaust gases may
enter the car and serious illness or death
may result. See additional warnings con-
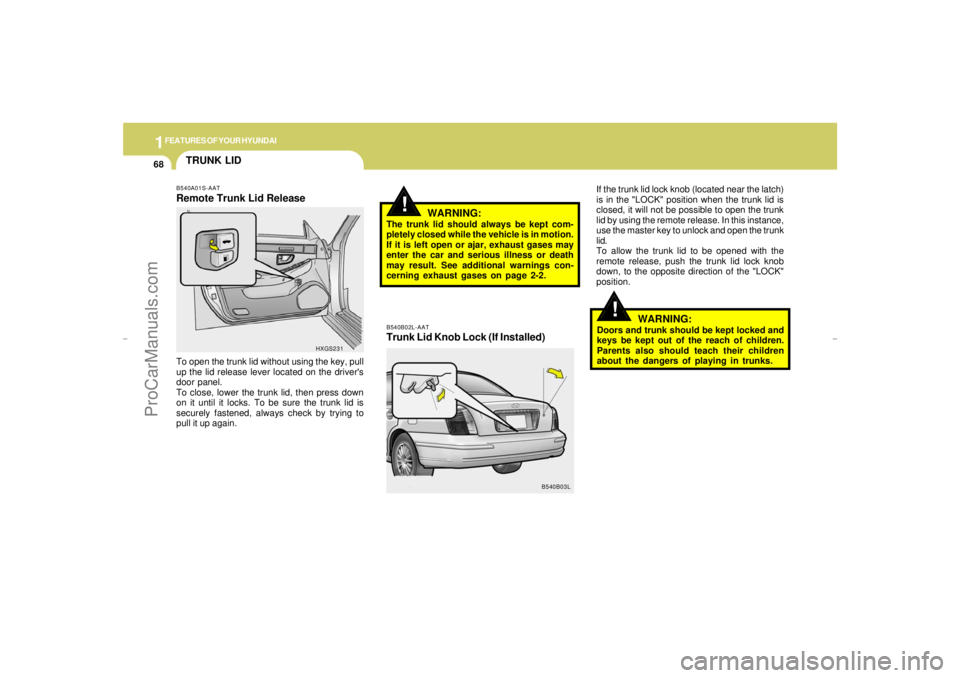
cerning exhaust gases on page 2-2.If the trunk lid lock knob (located near the latch)
is in the "LOCK" position when the trunk lid is
closed, it will not be possible to open the trunk
lid by using the remote release. In this instance,
use the master key to unlock and open the trunk
lid.
To allow the trunk lid to be opened with the
remote release, push the trunk lid lock knob
down, to the opposite direction of the "LOCK"
position.
B540A01S-AATRemote Trunk Lid ReleaseTo open the trunk lid without using the key, pull
up the lid release lever located on the driver's
door panel.
To close, lower the trunk lid, then press down
on it until it locks. To be sure the trunk lid is
securely fastened, always check by trying to
pull it up again.
HXGS231
B540B03L
WARNING:
Doors and trunk should be kept locked and
keys be kept out of the reach of children.
Parents also should teach their children
about the dangers of playing in trunks.
xgflhma-1.p656/16/04, 3:03 PM 68
ProCarManuals.com