window Hyundai H-1 (Grand Starex) 2006 Owner's Manual
[x] Cancel search | Manufacturer: HYUNDAI, Model Year: 2006, Model line: H-1 (Grand Starex), Model: Hyundai H-1 (Grand Starex) 2006Pages: 284, PDF Size: 12.21 MB
Page 11 of 284
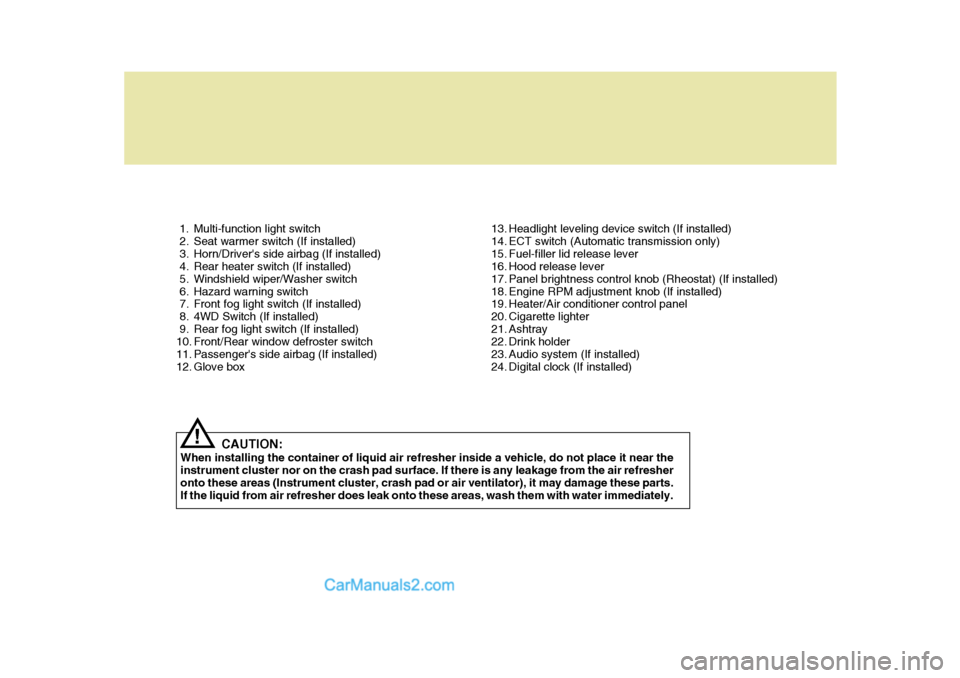
1. Multi-function light switch
2. Seat warmer switch (If installed)
3. Horn/Driver's side airbag (If installed)
4. Rear heater switch (If installed)
5. Windshield wiper/Washer switch
6. Hazard warning switch
7. Front fog light switch (If installed)
8. 4WD Switch (If installed)
9. Rear fog light switch (If installed)
10. Front/Rear window defroster switch
11. Passenger's side airbag (If installed)
12. Glove box13. Headlight leveling device switch (If installed)
14. ECT switch (Automatic transmission only)
15. Fuel-filler lid release lever
16. Hood release lever
17. Panel brightness control knob (Rheostat) (If installed)
18. Engine RPM adjustment knob (If installed)
19. Heater/Air conditioner control panel
20. Cigarette lighter
21. Ashtray
22. Drink holder
23. Audio system (If installed)
24. Digital clock (If installed)
CAUTION:
When installing the container of liquid air refresher inside a vehicle, do not place it near theinstrument cluster nor on the crash pad surface. If there is any leakage from the air refresher onto these areas (Instrument cluster, crash pad or air ventilator), it may damage these parts. If the liquid from air refresher does leak onto these areas, wash them with water immediately.
!
Page 15 of 284
Fuel Recommendations ................................................ 1-2
Before Driving Your Vehicle Safety Checks ................. 1-3
Running-in Recommendations ..................................... 1-3
Vehicle Identification Number (VIN) .............................. 1-5
Keys ............................................................................. 1-7
Immobilizer System ...................................................... 1-7
Illuminated Ignition Switc h ............................................ 1-12
Door ............................................................................. 1-13
Hold Open Lock System ............................................. 1-14
Central Door Locks ..................................................... 1-15
Theft-alarm System ..................................................... 1-16
Tail Gate/Rear Gate/Side Gate ................................... 1-21
Hood R elease .............................................................. 1-25
Remote Fuel-filler Lid Release ..................................... 1-26
Window ........................................................................ 1-28
Seats ........................................................................... 1-30
Seat Belts .................................................................... 1-42
Child Restraint System ................................................ 1-46
Steering Wheel Tilt Lever ............................................. 1-50
Supplemental Restraint (Airbag) System.................... 1-51
BEFORE DRIVING YOUR VEHICLE
1
1
Page 17 of 284
1
BEFORE DRIVING YOUR VEHICLE
3RUNNING-IN RECOMMEN- DATIONSBEFORE DRIVING YOUR VEHICLE SAFETY CHECKS
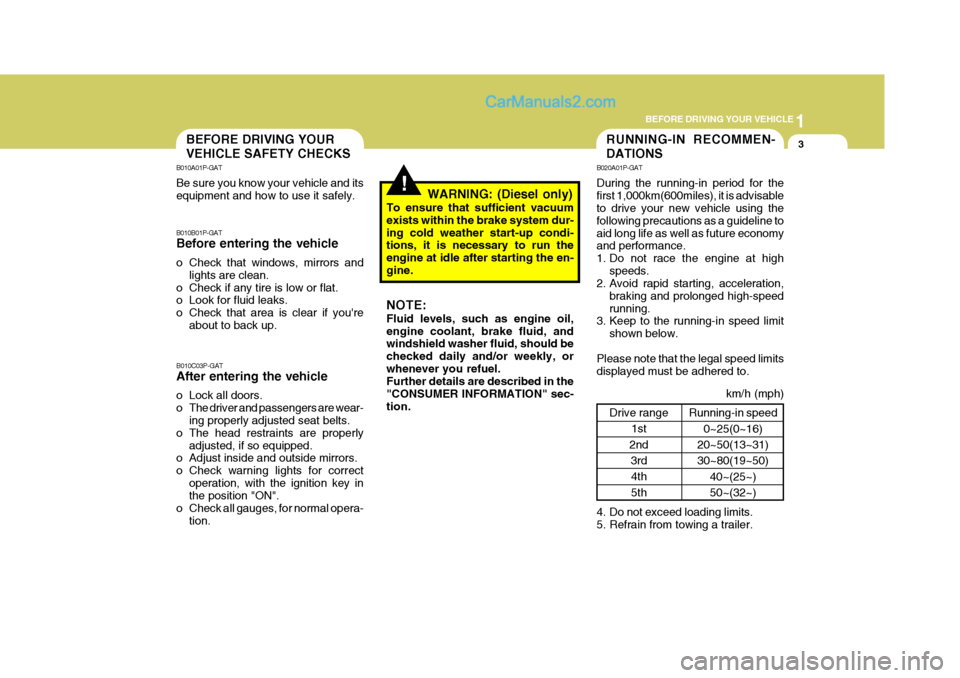
Drive range1st
2nd 3rd
4th 5th
!
B010A01P-GAT Be sure you know your vehicle and its equipment and how to use it safely. B010B01P-GAT Before entering the vehicle
o Check that windows, mirrors and lights are clean.
o Check if any tire is low or flat.
o Look for fluid leaks.
o Check that area is clear if you're about to back up.
B010C03P-GAT After entering the vehicle
o Lock all doors.
o The driver and passengers are wear- ing properly adjusted seat belts.
o The head restraints are properly adjusted, if so equipped.
o Adjust inside and outside mirrors.
o Check warning lights for correct
operation, with the ignition key in the position "ON".
o Check all gauges, for normal opera- tion. WARNING: (Diesel only)
To ensure that sufficient vacuum exists within the brake system dur-ing cold weather start-up condi- tions, it is necessary to run the engine at idle after starting the en-gine. NOTE: Fluid levels, such as engine oil, engine coolant, brake fluid, and windshield washer fluid, should be checked daily and/or weekly, orwhenever you refuel. Further details are described in the "CONSUMER INFORMATION" sec-tion. B020A01P-GAT During the running-in period for the first 1,000km(600miles), it is advisable to drive your new vehicle using the following precautions as a guideline toaid long life as well as future economy and performance.
1. Do not race the engine at high
speeds.
2. Avoid rapid starting, acceleration,
braking and prolonged high-speedrunning.
3. Keep to the running-in speed limit
shown below.
Please note that the legal speed limitsdisplayed must be adhered to.
4. Do not exceed loading limits.
5. Refrain from towing a trailer.
km/h (mph)
Running-in speed 0~25(0~16)
20~50(13~31) 30~80(19~50)
40~(25~) 50~(32~)
Page 42 of 284
1BEFORE DRIVING YOUR VEHICLE
28
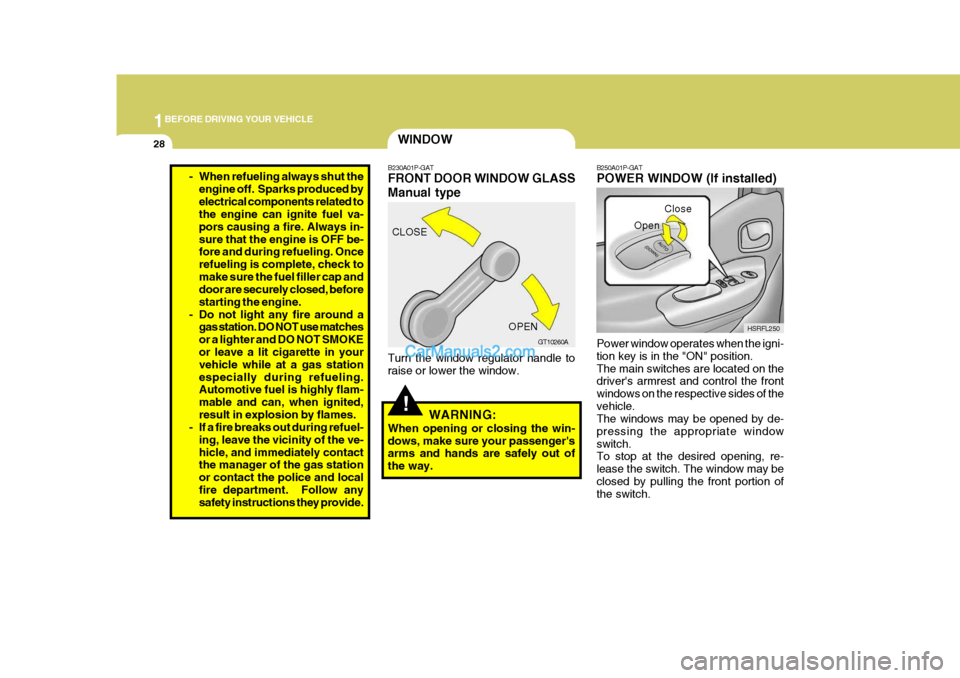
B250A01P-GAT POWER WINDOW (If installed) Power window operates when the igni- tion key is in the "ON" position.The main switches are located on the driver's armrest and control the front windows on the respective sides of thevehicle. The windows may be opened by de- pressing the appropriate windowswitch. To stop at the desired opening, re- lease the switch. The window may beclosed by pulling the front portion of the switch. Close
HSRFL250
Open
WINDOW
!
B230A01P-GAT FRONT DOOR WINDOW GLASS Manual type
Turn the window regulator handle to raise or lower the window. WARNING:
When opening or closing the win- dows, make sure your passenger's arms and hands are safely out of the way. CLOSE
GT10260A
OPEN
- When refueling always shut the
engine off. Sparks produced byelectrical components related to the engine can ignite fuel va- pors causing a fire. Always in-sure that the engine is OFF be- fore and during refueling. Once refueling is complete, check tomake sure the fuel filler cap and door are securely closed, before starting the engine.
- Do not light any fire around a gas station. DO NOT use matchesor a lighter and DO NOT SMOKE or leave a lit cigarette in your vehicle while at a gas stationespecially during refueling. Automotive fuel is highly flam- mable and can, when ignited,result in explosion by flames.
- If a fire breaks out during refuel-
ing, leave the vicinity of the ve-hicle, and immediately contact the manager of the gas station or contact the police and localfire department. Follow any safety instructions they provide.
Page 43 of 284
1
BEFORE DRIVING YOUR VEHICLE
29
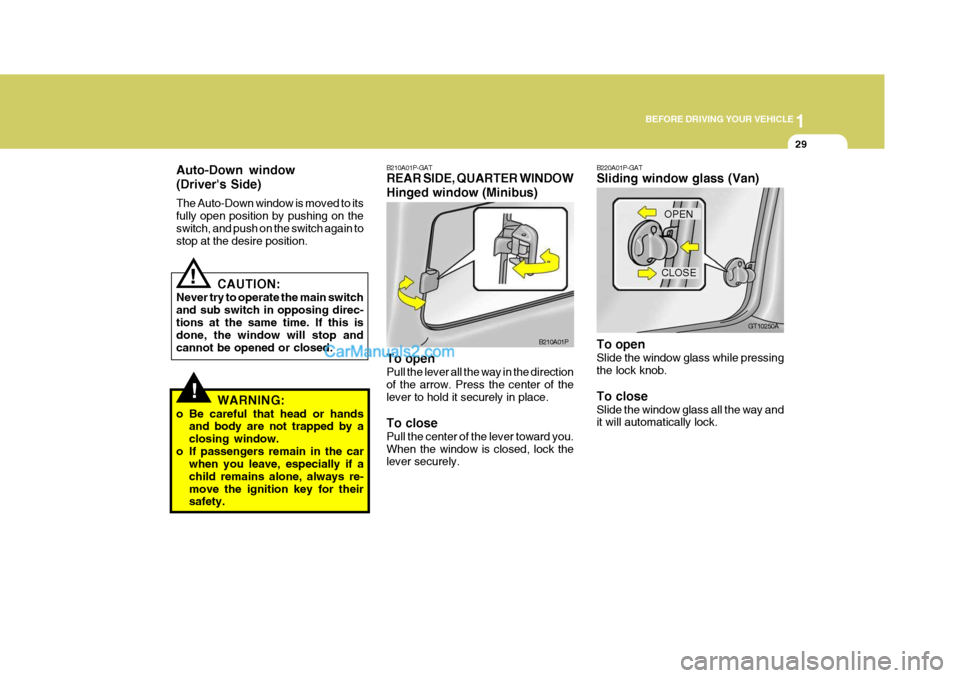
B210A01P-GAT REAR SIDE, QUARTER WINDOW Hinged window (Minibus) To open Pull the lever all the way in the direction of the arrow. Press the center of the lever to hold it securely in place. To close Pull the center of the lever toward you. When the window is closed, lock the lever securely. B210A01P
!
Auto-Down window (Driver's Side) The Auto-Down window is moved to its fully open position by pushing on theswitch, and push on the switch again to stop at the desire position.
CAUTION:
Never try to operate the main switch and sub switch in opposing direc-tions at the same time. If this is done, the window will stop and cannot be opened or closed.
WARNING:
o Be careful that head or hands and body are not trapped by aclosing window.
o If passengers remain in the car when you leave, especially if achild remains alone, always re-move the ignition key for their safety.
!
B220A01P-GAT Sliding window glass (Van) To open Slide the window glass while pressing the lock knob. To close Slide the window glass all the way and it will automatically lock. CLOSE
GT10250A
OPEN
Page 70 of 284
2
Instrument Cluster And Indicator Lights ....................... 2-2
Warning And Indicator Lights ........................................ 2-8
Instrument Cluster....................................................... 2-12
Odometer/Trip odmeter ................................................ 2-14
Multimeter .................................................................... 2-16
Muti-funition Light Switch ............................................. 2-19
Windshield Wiper And Washer Switch ........................2-21
Headlamp Leveling Device System .............................2-23
Instrument Panel Light Control (Rheostat) ..................2-24
Engine Rpm Adjustment Knob ..................................... 2-24
Fog Lamp Switch ......................................................... 2-25
Front/Rear Window Defroster Switch ..........................2-26
Interior Light ....................... .......................................... 2-28
Sunroof ........................................................................ 2-30
Mirror ........................................................................... 2-34
Drink H older ................................................................ 2-35
Ashtray ........................................................................ 2-36
Digital Clock ................................................................ 2-37
Horn ............................................................................. 2-37
Heating And Cooling Control .......................................2-38
Rear Heater And Air Conditioner ................................. 2-45
Overhead Air C onditioning ........................................... 2-47
Climate Control Air Filter .............................................. 2-47
Stereo Sound System ................................................. 2-49
Audio System .............................................................. 2-51
Antenna ....................................................................... 2-73
INSTRUMENTS AND CONTROLS
2
Page 91 of 284
2 INSTRUMENTS AND CONTROLS
22
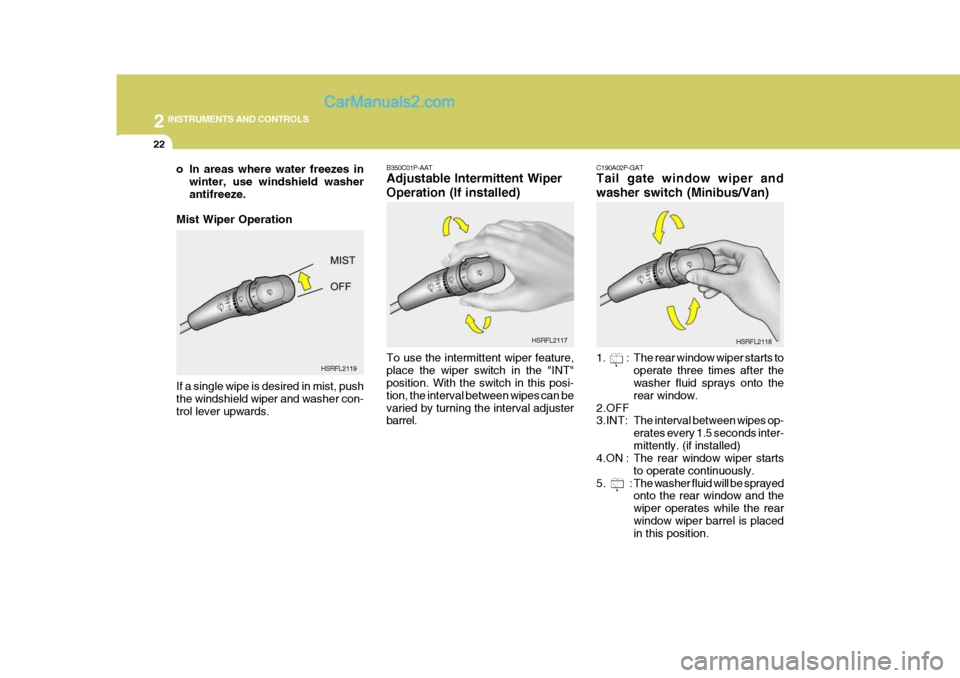
B350C01P-AAT Adjustable Intermittent Wiper Operation (If installed) To use the intermittent wiper feature, place the wiper switch in the "INT" position. With the switch in this posi- tion, the interval between wipes can bevaried by turning the interval adjuster barrel. HSRFL2117
o In areas where water freezes in
winter, use windshield washer antifreeze.
Mist Wiper Operation If a single wipe is desired in mist, push the windshield wiper and washer con- trol lever upwards. HSRFL2119 C190A02P-GAT Tail gate window wiper and washer switch (Minibus/Van)
1. : The rear window wiper starts to
operate three times after the washer fluid sprays onto the rear window.
2.OFF
3.INT: The interval between wipes op-
erates every 1.5 seconds inter- mittently. (if installed)
4.ON : The rear window wiper starts
to operate continuously.
5. : The washer fluid will be sprayed onto the rear window and thewiper operates while the rearwindow wiper barrel is placed in this position. HSRFL2118
Page 92 of 284
2
INSTRUMENTS AND CONTROLS
23HEADLIGHT LEVELING DEVICE SYSTEM
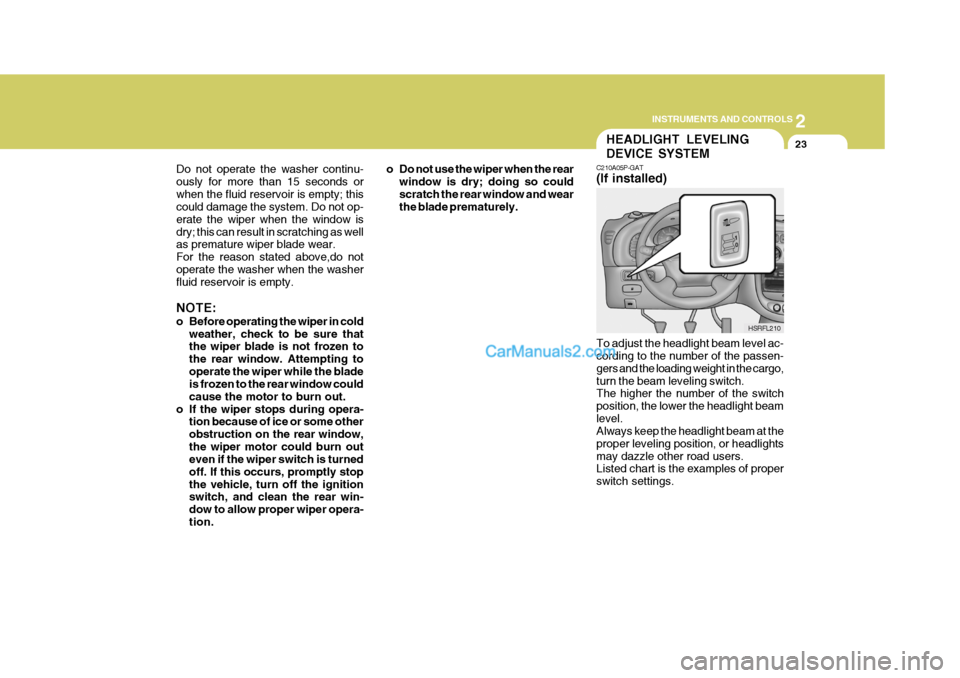
C210A05P-GAT (If installed) To adjust the headlight beam level ac- cording to the number of the passen- gers and the loading weight in the cargo,turn the beam leveling switch. The higher the number of the switch position, the lower the headlight beamlevel. Always keep the headlight beam at the proper leveling position, or headlightsmay dazzle other road users. Listed chart is the examples of proper switch settings. HSRFL210
Do not operate the washer continu-ously for more than 15 seconds orwhen the fluid reservoir is empty; this could damage the system. Do not op- erate the wiper when the window isdry; this can result in scratching as well as premature wiper blade wear. For the reason stated above,do notoperate the washer when the washer fluid reservoir is empty. NOTE:
o Before operating the wiper in cold
weather, check to be sure that the wiper blade is not frozen to the rear window. Attempting tooperate the wiper while the blade is frozen to the rear window could cause the motor to burn out.
o If the wiper stops during opera- tion because of ice or some otherobstruction on the rear window,the wiper motor could burn out even if the wiper switch is turned off. If this occurs, promptly stopthe vehicle, turn off the ignition switch, and clean the rear win- dow to allow proper wiper opera-tion. o Do not use the wiper when the rear
window is dry; doing so couldscratch the rear window and wear the blade prematurely.
Page 94 of 284
2
INSTRUMENTS AND CONTROLS
25FRONT FOG LIGHT SWITCH
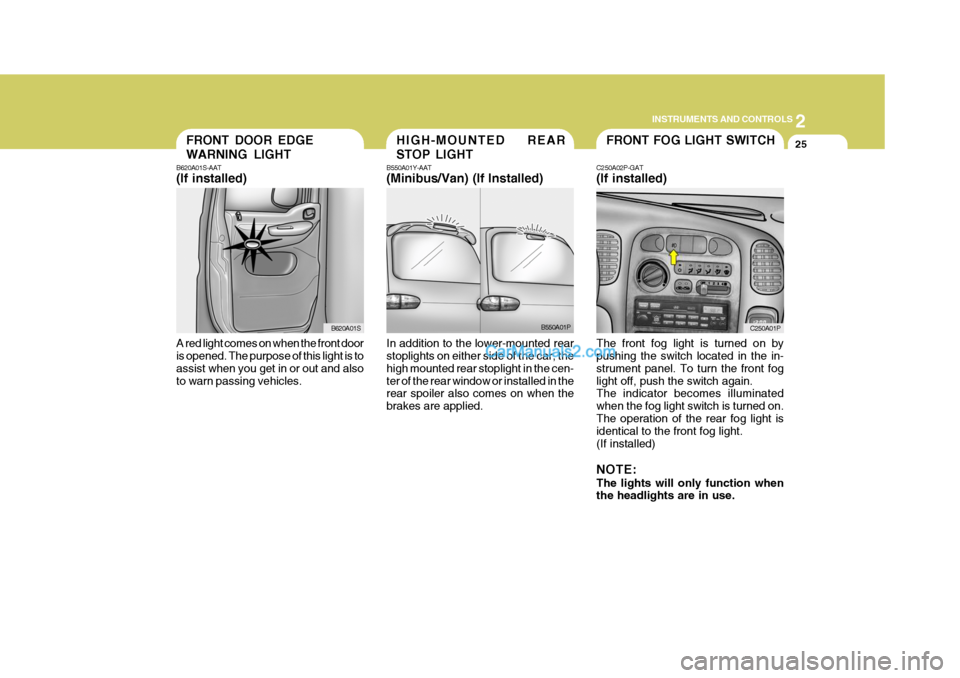
C250A02P-GAT (If installed) The front fog light is turned on by pushing the switch located in the in- strument panel. To turn the front foglight off, push the switch again. The indicator becomes illuminated when the fog light switch is turned on.The operation of the rear fog light is identical to the front fog light. (If installed) NOTE: The lights will only function when the headlights are in use. C250A01PFRONT DOOR EDGE WARNING LIGHT
B620A01S-AAT (If installed) A red light comes on when the front door is opened. The purpose of this light is to assist when you get in or out and alsoto warn passing vehicles. B620A01SHIGH-MOUNTED REAR STOP LIGHT
B550A01Y-AAT (Minibus/Van) (If Installed) In addition to the lower-mounted rear stoplights on either side of the car, the high mounted rear stoplight in the cen-ter of the rear window or installed in the rear spoiler also comes on when the brakes are applied. B550A01P
Page 95 of 284
2 INSTRUMENTS AND CONTROLS
26FRONT/REAR WINDOW DEFROSTER SWITCHHAZARD WARNING SYS- TEM
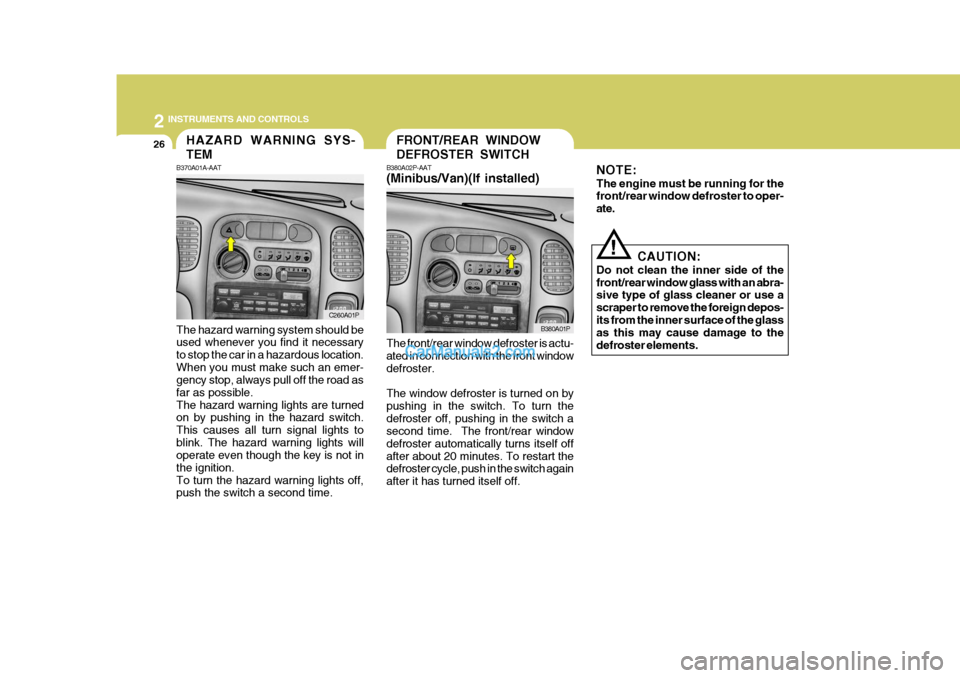
B370A01A-AAT The hazard warning system should be used whenever you find it necessary to stop the car in a hazardous location.When you must make such an emer- gency stop, always pull off the road as far as possible.The hazard warning lights are turned on by pushing in the hazard switch. This causes all turn signal lights toblink. The hazard warning lights will operate even though the key is not in the ignition.To turn the hazard warning lights off, push the switch a second time. B380A02P-AAT (Minibus/Van)(If installed)
C260A01P B380A01P
The front/rear window defroster is actu- ated in connection with the front window defroster. The window defroster is turned on by pushing in the switch. To turn thedefroster off, pushing in the switch a second time. The front/rear window defroster automatically turns itself offafter about 20 minutes. To restart the defroster cycle, push in the switch again after it has turned itself off. CAUTION:
Do not clean the inner side of thefront/rear window glass with an abra- sive type of glass cleaner or use a scraper to remove the foreign depos-its from the inner surface of the glass as this may cause damage to the defroster elements.
!
NOTE: The engine must be running for the front/rear window defroster to oper- ate.