reset Hyundai H-1 (Grand Starex) 2009 Owner's Manual - RHD (UK, Australia)
[x] Cancel search | Manufacturer: HYUNDAI, Model Year: 2009, Model line: H-1 (Grand Starex), Model: Hyundai H-1 (Grand Starex) 2009Pages: 303, PDF Size: 31.48 MB
Page 14 of 303
Safety features of your vehicle
4
3
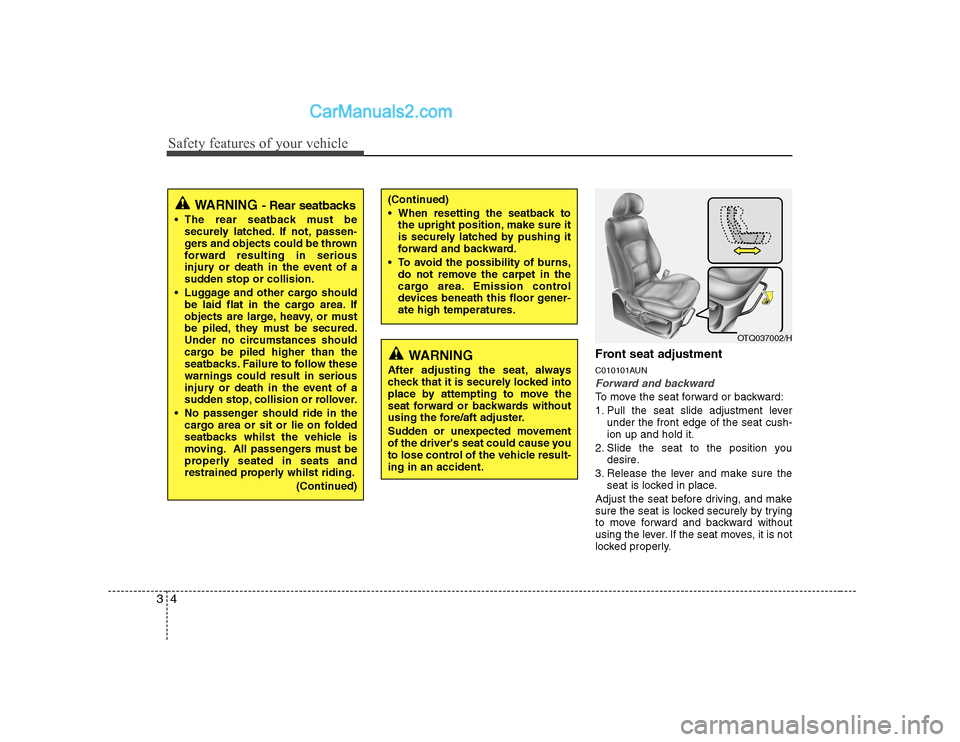
Front seat adjustment
C010101AUN
Forward and backward
To move the seat forward or backward:
1. Pull the seat slide adjustment lever
under the front edge of the seat cush- ion up and hold it.
2. Slide the seat to the position you desire.
3. Release the lever and make sure the seat is locked in place.
Adjust the seat before driving, and make
sure the seat is locked securely by trying
to move forward and backward without
using the lever. If the seat moves, it is not
locked properly.
OTQ037002/H
(Continued)
When resetting the seatback to the upright position, make sure it
is securely latched by pushing it
forward and backward.
To avoid the possibility of burns, do not remove the carpet in the
cargo area. Emission control
devices beneath this floor gener-ate high temperatures.WARNING- Rear seatbacks
The rear seatback must besecurely latched. If not, passen-
gers and objects could be thrown
forward resulting in serious
injury or death in the event of a
sudden stop or collision.
Luggage and other cargo should be laid flat in the cargo area. If
objects are large, heavy, or must
be piled, they must be secured.
Under no circumstances should
cargo be piled higher than the
seatbacks. Failure to follow thesewarnings could result in serious
injury or death in the event of a
sudden stop, collision or rollover.
No passenger should ride in the cargo area or sit or lie on folded
seatbacks whilst the vehicle is
moving. All passengers must be
properly seated in seats and
restrained properly whilst riding.
(Continued)
WARNING
After adjusting the seat, always
check that it is securely locked into
place by attempting to move the
seat forward or backwards without
using the fore/aft adjuster.
Sudden or unexpected movement
of the driver's seat could cause you
to lose control of the vehicle result-ing in an accident.
Page 80 of 303
419
Features of your vehicle
If the power window is not operated cor-
rectly, the automatic power window sys-
tem must be reset as follows:
1. Turn the ignition switch to the ON posi-tion.
2. Close driver’s window and continue pulling up on driver’s power window
switch for at least 1 second after the
window is completely closed.
Automatic reversal
If the upward movement of the window is
blocked by an object or part of the body,
the window will detect the resistance and
will stop upward movement. The window
will then lower approximately 11.8 in. (30
cm) to allow the object to be cleared.
If the window detects the resistance
whilst the power window switch is pulled
up continuously, the window will stop
upward movement then lower approxi-
mately 1 in. (2.5 cm). And if the power
window switch is pulled up continuously
again within 5 seconds after the window
is lowered by the automatic window
reversal feature, the automatic window
reversal will not operate.✽✽ NOTICE
The automatic reverse feature for the
driver’s window is only active when the
“auto up” feature is used by fully
pulling up the switch. The automatic
reverse feature will not operate if thewindow is raised using the halfway posi-
tion on the power window switch.
D080200AFD
Manual windows (if equipped)
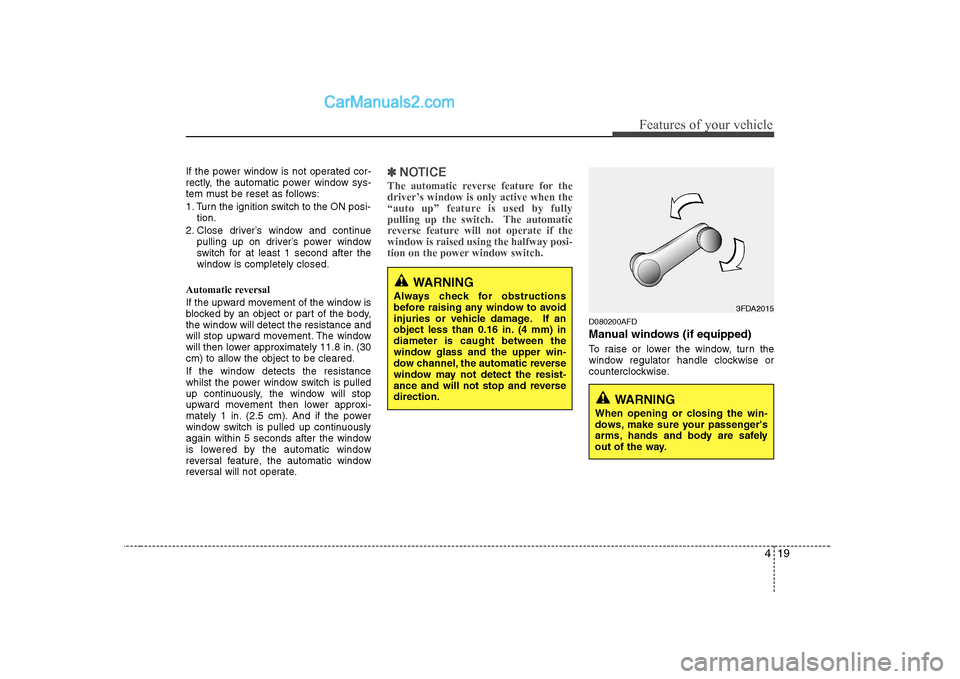
To raise or lower the window, turn the
window regulator handle clockwise or
counterclockwise.
WARNING
When opening or closing the win-
dows, make sure your passenger's
arms, hands and body are safely
out of the way.
3FDA2015
WARNING
Always check for obstructions
before raising any window to avoid
injuries or vehicle damage. If an
object less than 0.16 in. (4 mm) indiameter is caught between the
window glass and the upper win-
dow channel, the automatic reverse
window may not detect the resist-
ance and will not stop and reversedirection.
Page 96 of 303
435
Features of your vehicle
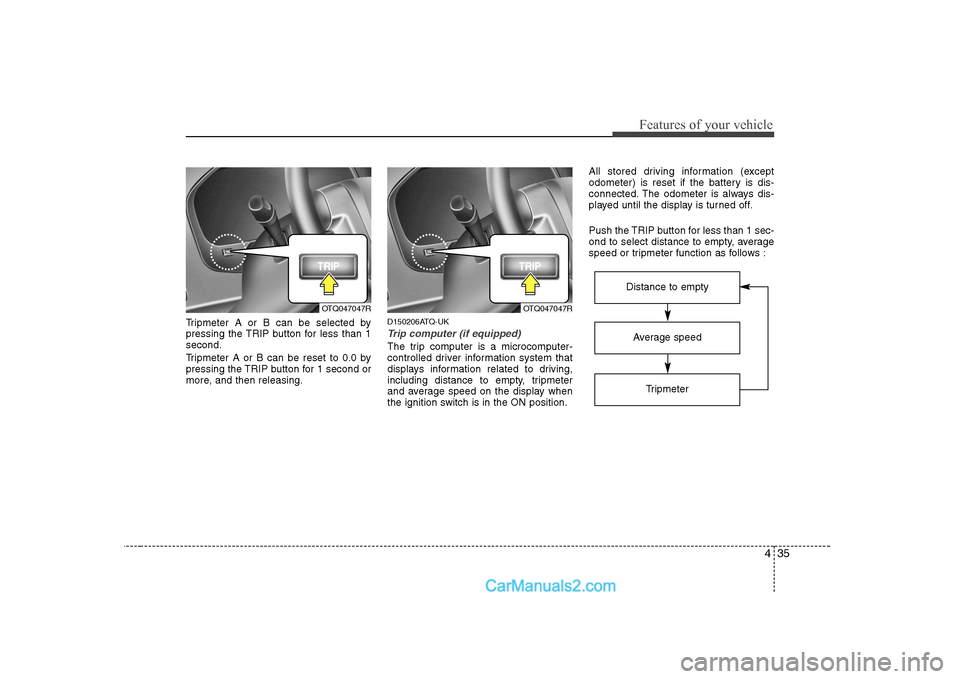
Tripmeter A or B can be selected by
pressing the TRIP button for less than 1second.
Tripmeter A or B can be reset to 0.0 by
pressing the TRIP button for 1 second or
more, and then releasing.D150206ATQ-UKTrip computer (if equipped)
The trip computer is a microcomputer-
controlled driver information system that
displays information related to driving,
including distance to empty, tripmeter
and average speed on the display when
the ignition switch is in the ON position.All stored driving information (except
odometer) is reset if the battery is dis-
connected. The odometer is always dis-
played until the display is turned off.
Push the TRIP button for less than 1 sec-
ond to select distance to empty, average
speed or tripmeter function as follows :
Average speed
Tripmeter
Distance to empty
OTQ047047ROTQ047047R
Page 98 of 303
437
Features of your vehicle
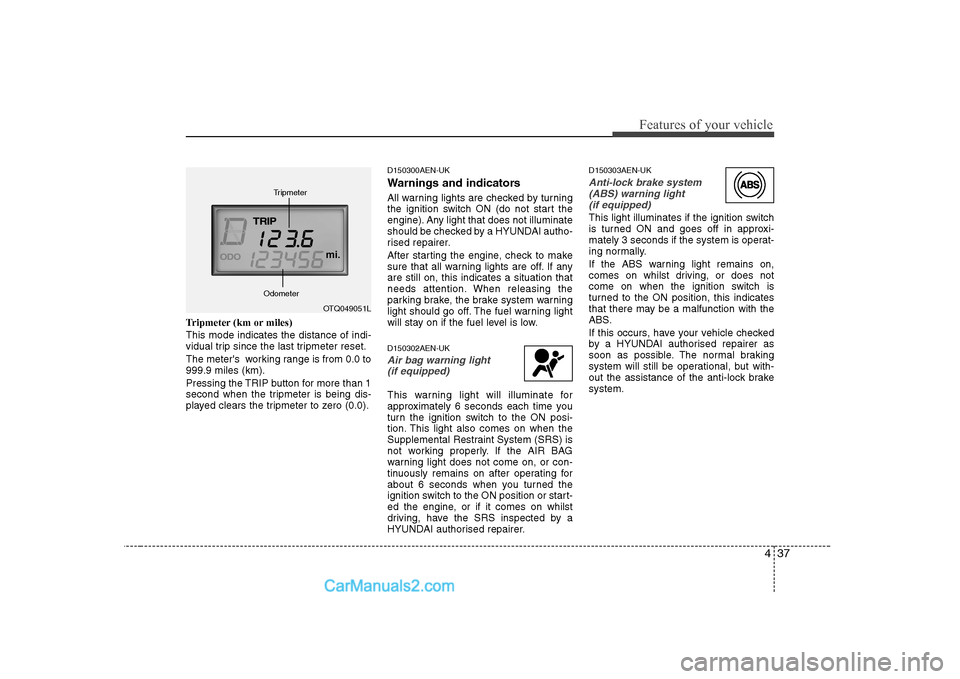
Tripmeter (km or miles) This mode indicates the distance of indi-
vidual trip since the last tripmeter reset.
The meter's working range is from 0.0 to 999.9 miles (km).
Pressing the TRIP button for more than 1
second when the tripmeter is being dis-
played clears the tripmeter to zero (0.0).D150300AEN-UK
Warnings and indicators
All warning lights are checked by turning
the ignition switch ON (do not start the
engine). Any light that does not illuminate
should be checked by a HYUNDAI autho-
rised repairer.
After starting the engine, check to make
sure that all warning lights are off. If anyare still on, this indicates a situation that
needs attention. When releasing the
parking brake, the brake system warning
light should go off. The fuel warning light
will stay on if the fuel level is low. D150302AEN-UK
Air bag warning light
(if equipped)
This warning light will illuminate for
approximately 6 seconds each time you
turn the ignition switch to the ON posi-
tion. This light also comes on when the
Supplemental Restraint System (SRS) is
not working properly. If the AIR BAG
warning light does not come on, or con-
tinuously remains on after operating for
about 6 seconds when you turned the
ignition switch to the ON position or start-
ed the engine, or if it comes on whilst
driving, have the SRS inspected by a
HYUNDAI authorised repairer. D150303AEN-UK
Anti-lock brake system
(ABS) warning light (if equipped)
This light illuminates if the ignition switch
is turned ON and goes off in approxi-
mately 3 seconds if the system is operat-
ing normally.
If the ABS warning light remains on,
comes on whilst driving, or does not
come on when the ignition switch is
turned to the ON position, this indicates
that there may be a malfunction with the
ABS.
If this occurs, have your vehicle checked
by a HYUNDAI authorised repairer as
soon as possible. The normal braking
system will still be operational, but with-
out the assistance of the anti-lock brakesystem.
OTQ049051L
Tripmeter
Odometer
Page 132 of 303
471
Features of your vehicle
D250102AFD-UK
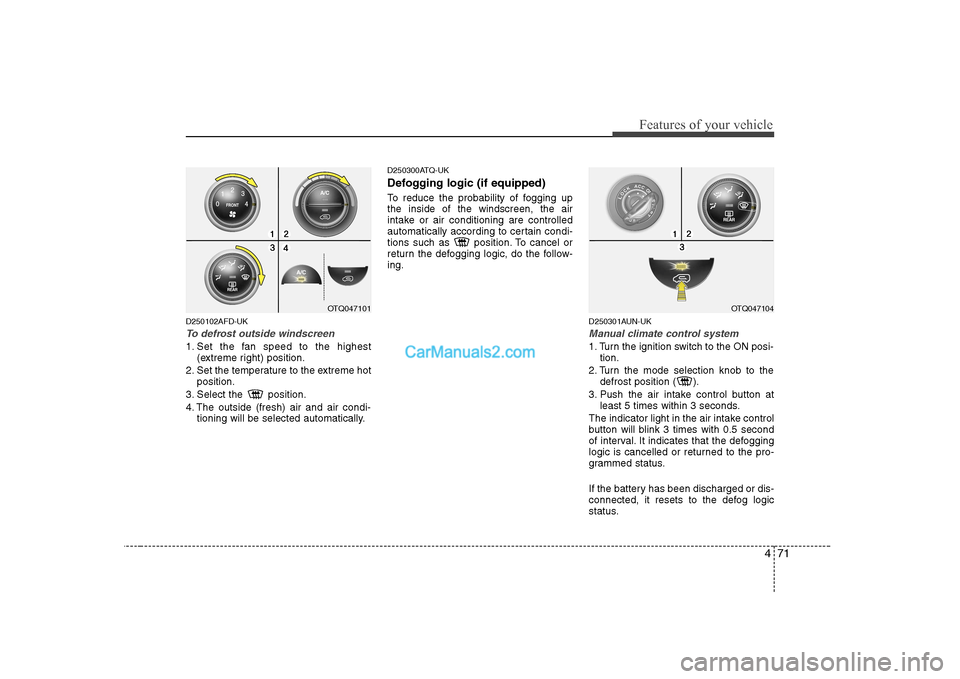
To defrost outside windscreen
1. Set the fan speed to the highest(extreme right) position.
2. Set the temperature to the extreme hot position.
3. Select the position.
4. The outside (fresh) air and air condi- tioning will be selected automatically. D250300ATQ-UK
Defogging logic (if equipped)
To reduce the probability of fogging up the inside of the windscreen, the air
intake or air conditioning are controlled
automatically according to certain condi-
tions such as position. To cancel or
return the defogging logic, do the follow-ing.
D250301AUN-UK
Manual climate control system
1. Turn the ignition switch to the ON posi-tion.
2. Turn the mode selection knob to the defrost position ( ).
3. Push the air intake control button at least 5 times within 3 seconds.
The indicator light in the air intake control
button will blink 3 times with 0.5 second
of interval. It indicates that the defogging
logic is cancelled or returned to the pro-
grammed status.
If the battery has been discharged or dis-
connected, it resets to the defog logic
status.
OTQ047101OTQ047104
Page 138 of 303
477
Features of your vehicle
D280600AEN-UK
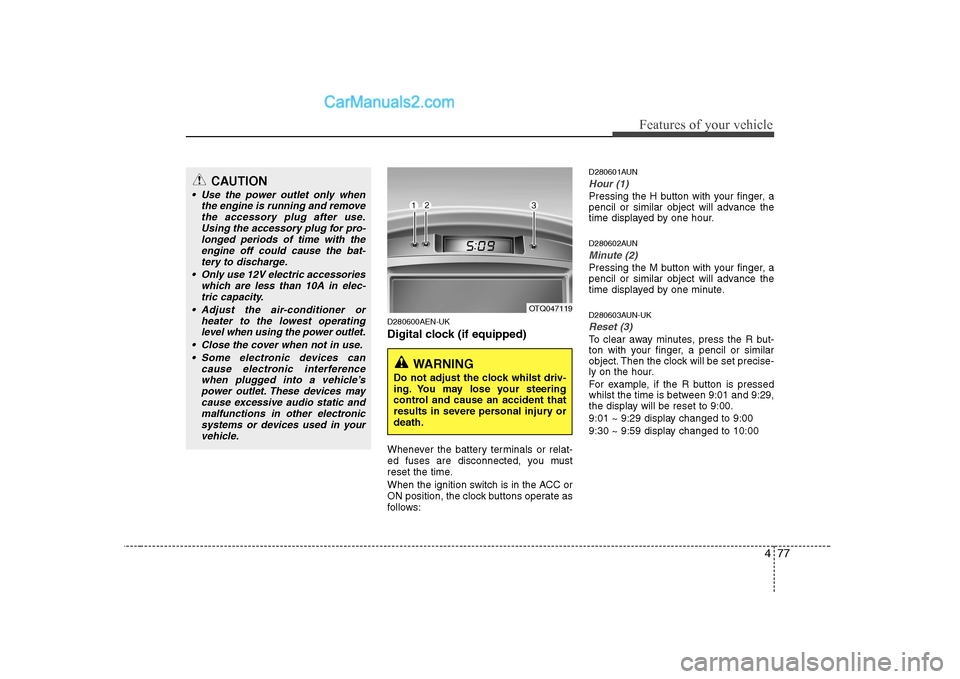
Digital clock (if equipped)
Whenever the battery terminals or relat-
ed fuses are disconnected, you must
reset the time.
When the ignition switch is in the ACC or
ON position, the clock buttons operate as
follows:D280601AUN
Hour (1)
Pressing the H button with your finger, a
pencil or similar object will advance the
time displayed by one hour.
D280602AUN
Minute (2)
Pressing the M button with your finger, a
pencil or similar object will advance the
time displayed by one minute.
D280603AUN-UK
Reset (3)
To clear away minutes, press the R but-
ton with your finger, a pencil or similar
object. Then the clock will be set precise-
ly on the hour.
For example, if the R button is pressed
whilst the time is between 9:01 and 9:29,
the display will be reset to 9:00.
9:01 ~ 9:29 display changed to 9:00
9:30 ~ 9:59 display changed to 10:00
OTQ047119
WARNING
Do not adjust the clock whilst driv-
ing. You may lose your steering
control and cause an accident that
results in severe personal injury ordeath.
CAUTION
Use the power outlet only when the engine is running and removethe accessory plug after use.Using the accessory plug for pro-
longed periods of time with theengine off could cause the bat- tery to discharge.
Only use 12V electric accessories which are less than 10A in elec-
tric capacity.
Adjust the air-conditioner or heater to the lowest operatinglevel when using the power outlet.
Close the cover when not in use. Some electronic devices can cause electronic interferencewhen plugged into a vehicle’s power outlet. These devices maycause excessive audio static and
malfunctions in other electronicsystems or devices used in your vehicle.
Page 143 of 303
Features of your vehicle
82
4
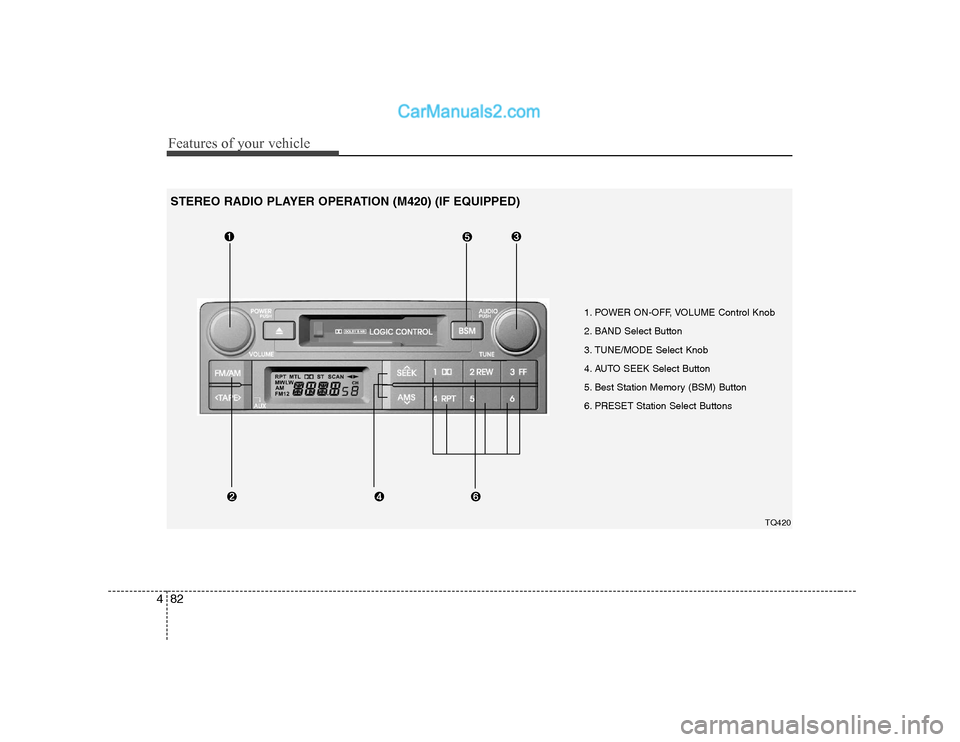
1. POWER ON-OFF, VOLUME Control Knob
2. BAND Select Button
3. TUNE/MODE Select Knob
4. AUTO SEEK Select Button
5. Best Station Memory (BSM) Button
6. PRESET Station Select Buttons
TQ420
STEREO RADIO PLAYER OPERATION (M420) (IF EQUIPPED)
Page 145 of 303
Features of your vehicle
84
4
4. AUTO SEEK Select Button
(Automatic Channel Selection)
Press the AUTO SEEK select button.
When the side is pressed, the unit
will automatically tune to the next higher
frequency and when the side ispressed, it will automatically tune to the
next lower frequency.
5. Best Station Memory (BSM) Button
When the BSM button is pressed, the six channels from the highest field intensity
are selected next and stored in memory.The stations selected are stored in thesequence of frequency from the first pre-
set key.
6. PRESET STATION Select Buttons
Six stations for AM(MW, LW), FM1 and
FM2 respectively can be preset in the
electronic memory circuit. HOW TO PRESET STATIONS
Six AM(MW, LW) and twelve FM stations
may be programmed into the memory of
the radio. Then, by simply pressing the
AM(MW, LW) / FM select button and/or
one of the six station select buttons, you
may recall any of these stations instantly.
To program the stations, follow thesesteps:
Press AM(MW, LW)/FM selector to set
the band for AM(MW, LW), FM1 and FM2.
Select the desired station to be stored by seek or manual tuning.
Determine the preset station select button you wish to use to access thatstation.
Press the station select button for more than two seconds. A select button indi-
cator will show in the display indicating
which select button you have
depressed. The frequency display willflash after it has been stored into the
memory. You should then release the
button, and proceed to program the
next desired station. A total of 24 sta-
tions can be programmed by selecting
one AM(MW, LW) and two FM station
per button. When completed, any preset station
may be recalled by selecting AM(MW,
LW), FM1 or FM2 band and the appro-
priate station button.
CAUTION
Do not place beverages close to
the audio system. The audio sys-tem mechanism may be damaged if you spill them.
Do not strike or allow anything to impact the audio system, damageto the system mechanisms could occur.
Page 148 of 303
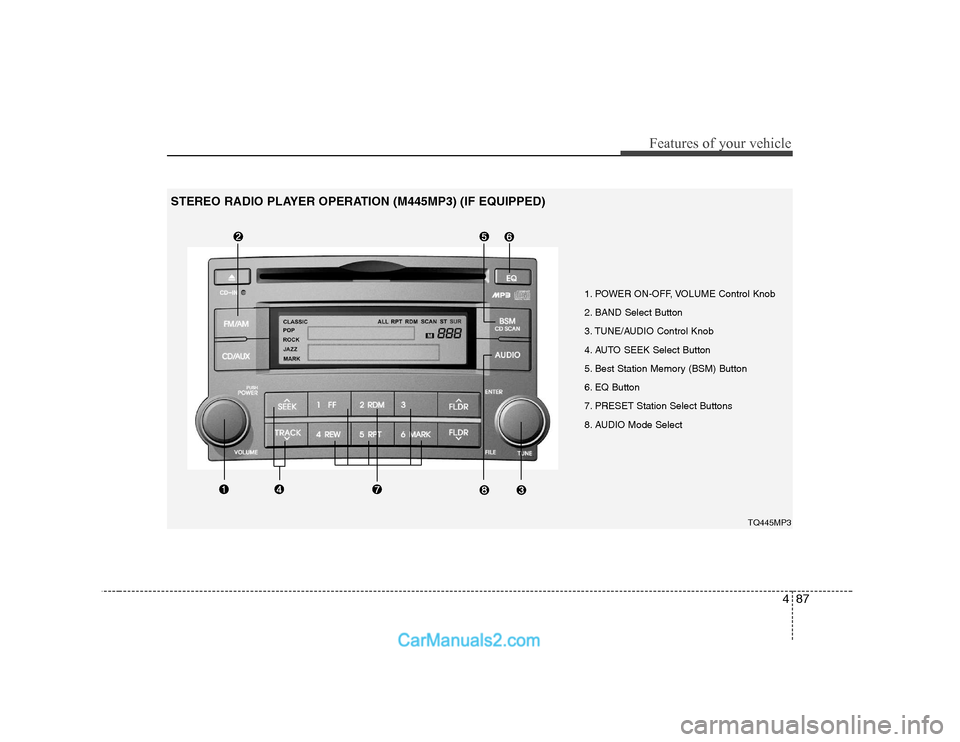
487
Features of your vehicle
1. POWER ON-OFF, VOLUME Control Knob
2. BAND Select Button
3. TUNE/AUDIO Control Knob
4. AUTO SEEK Select Button
5. Best Station Memory (BSM) Button
6. EQ Button
7. PRESET Station Select Buttons
8. AUDIO Mode SelectTQ445MP3
STEREO RADIO PLAYER OPERATION (M445MP3) (IF EQUIPPED)
Page 150 of 303
489
Features of your vehicle
5. Best Station Memory (BSM)Button
When the BSM button is pressed, the six channels from the highest field intensity
are selected next and stored in memory.The stations selected are stored in thesequence frequency from the first preset
key.
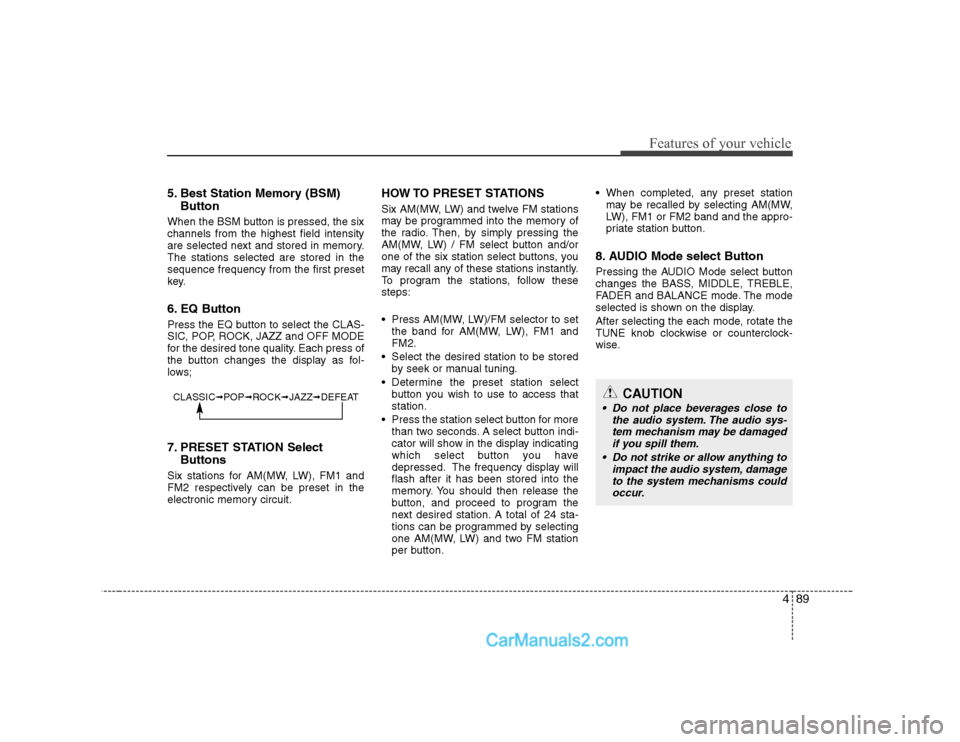
6. EQ Button
Press the EQ button to select the CLAS-
SIC, POP, ROCK, JAZZ and OFF MODE
for the desired tone quality. Each press of
the button changes the display as fol-
lows;
7. PRESET STATION Select Buttons
Six stations for AM(MW, LW), FM1 and
FM2 respectively can be preset in the
electronic memory circuit. HOW TO PRESET STATIONS
Six AM(MW, LW) and twelve FM stations
may be programmed into the memory of
the radio. Then, by simply pressing the
AM(MW, LW) / FM select button and/or
one of the six station select buttons, you
may recall any of these stations instantly.
To program the stations, follow thesesteps:
Press AM(MW, LW)/FM selector to set
the band for AM(MW, LW), FM1 and FM2.
Select the desired station to be stored by seek or manual tuning.
Determine the preset station select button you wish to use to access thatstation.
Press the station select button for more than two seconds. A select button indi-
cator will show in the display indicating
which select button you have
depressed. The frequency display willflash after it has been stored into the
memory. You should then release the
button, and proceed to program the
next desired station. A total of 24 sta-
tions can be programmed by selecting
one AM(MW, LW) and two FM station
per button. When completed, any preset station
may be recalled by selecting AM(MW,
LW), FM1 or FM2 band and the appro-
priate station button.
8. AUDIO Mode select Button
Pressing the AUDIO Mode select button
changes the BASS, MIDDLE, TREBLE,
FADER and BALANCE mode. The mode
selected is shown on the display.
After selecting the each mode, rotate the
TUNE knob clockwise or counterclock-
wise.
CLASSIC ➟POP ➟ROCK ➟JAZZ ➟DEFEATCAUTION
Do not place beverages close to
the audio system. The audio sys-tem mechanism may be damaged if you spill them.
Do not strike or allow anything to impact the audio system, damageto the system mechanisms couldoccur.