AUX Hyundai H-1 (Grand Starex) 2011 Owner's Manual - RHD (UK, Australia)
[x] Cancel search | Manufacturer: HYUNDAI, Model Year: 2011, Model line: H-1 (Grand Starex), Model: Hyundai H-1 (Grand Starex) 2011Pages: 346, PDF Size: 39.27 MB
Page 17 of 346
Your vehicle at a glance
4
2
INSTRUMENT PANEL OVERVIEW
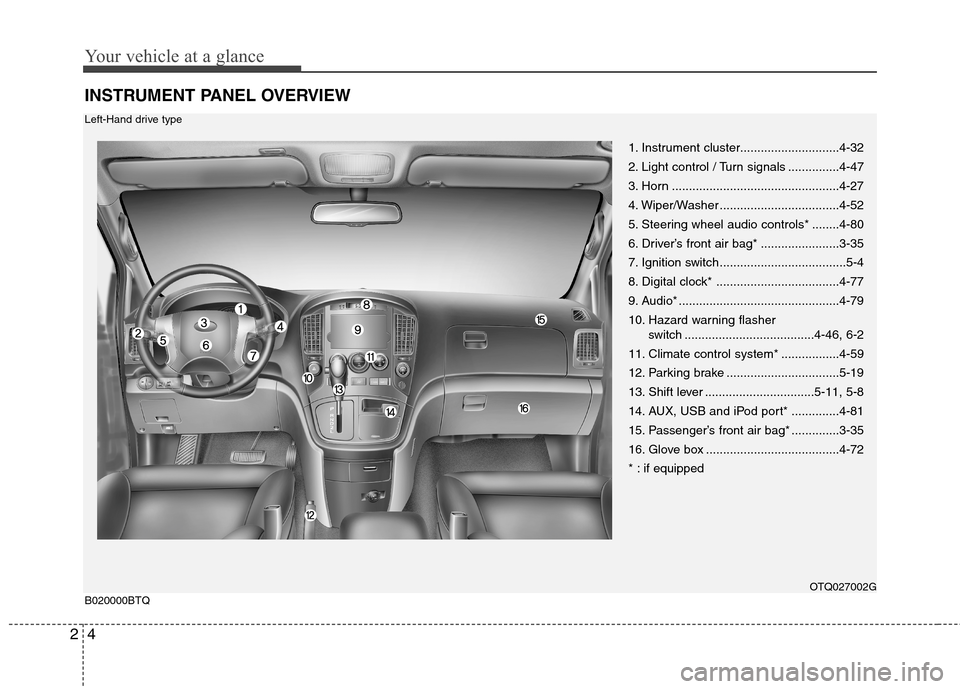
1. Instrument cluster.............................4-32
2. Light control / Turn signals ...............4-47
3. Horn .................................................4-27
4. Wiper/Washer ...................................4-52
5. Steering wheel audio controls* ........4-80
6. Driver’s front air bag* .......................3-35
7. Ignition switch .....................................5-4
8. Digital clock* ....................................4-77
9. Audio* ...............................................4-79
10. Hazard warning flasher
switch ......................................4-46, 6-2
11. Climate control system* .................4-59
12. Parking brake .................................5-19
13. Shift lever ................................5-11, 5-8
14. AUX, USB and iPod port* ..............4-81
15. Passenger’s front air bag* ..............3-35
16. Glove box .......................................4-72
* : if equipped
OTQ027002G
B020000BTQ
Left-Hand drive type
Page 18 of 346
25
Your vehicle at a glance
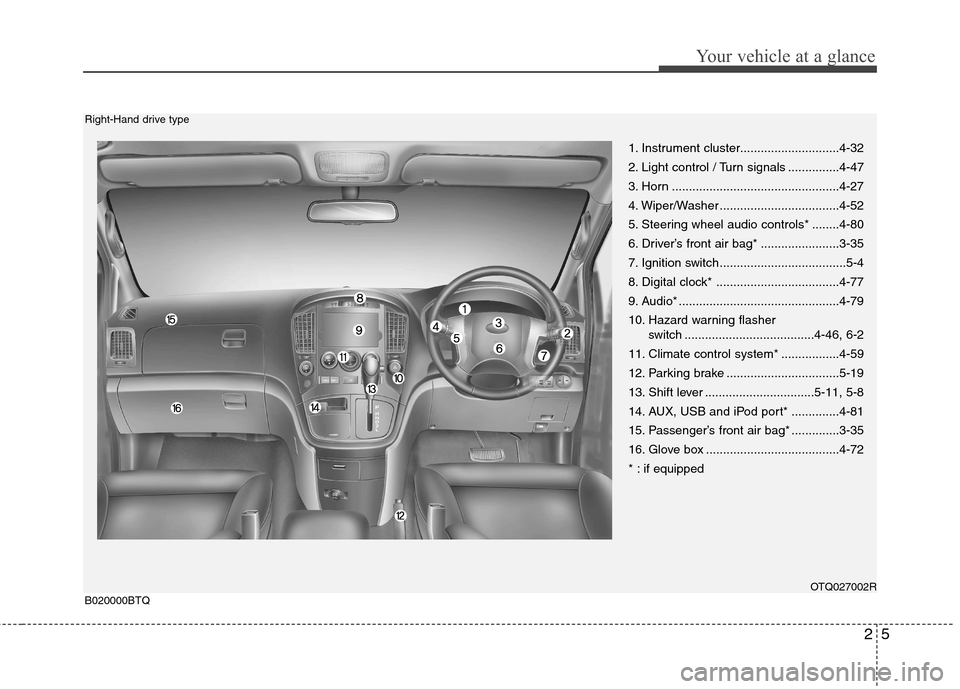
1. Instrument cluster.............................4-32
2. Light control / Turn signals ...............4-47
3. Horn .................................................4-27
4. Wiper/Washer ...................................4-52
5. Steering wheel audio controls* ........4-80
6. Driver’s front air bag* .......................3-35
7. Ignition switch .....................................5-4
8. Digital clock* ....................................4-77
9. Audio* ...............................................4-79
10. Hazard warning flasher switch ......................................4-46, 6-2
11. Climate control system* .................4-59
12. Parking brake .................................5-19
13. Shift lever ................................5-11, 5-8
14. AUX, USB and iPod port* ..............4-81
15. Passenger’s front air bag* ..............3-35
16. Glove box .......................................4-72
* : if equipped
OTQ027002R
B020000BTQ
Right-Hand drive type
Page 150 of 346
Features of your vehicle
80
4
D300200ATQ
Steering wheel audio control (if equipped)
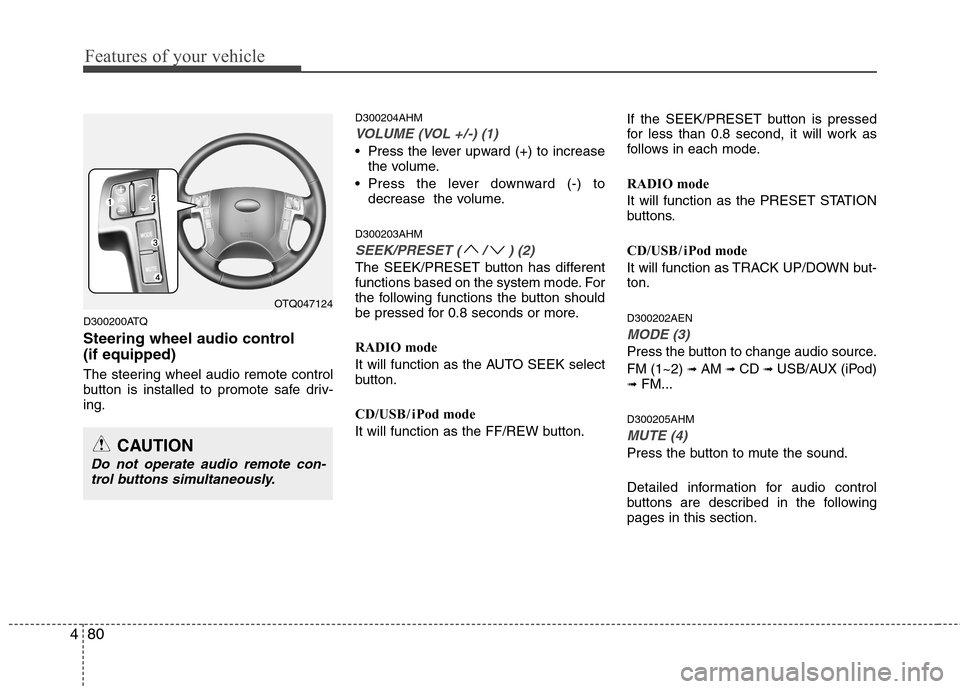
The steering wheel audio remote control
button is installed to promote safe driv-ing. D300204AHM
VOLUME (VOL +/-) (1)
• Press the lever upward (+) to increase
the volume.
Press the lever downward (-) to decrease the volume.
D300203AHM
SEEK/PRESET ( / ) (2)
The SEEK/PRESET button has different
functions based on the system mode. For
the following functions the button should
be pressed for 0.8 seconds or more.
RADIO mode
It will function as the AUTO SEEK select
button.
CD/USB / i Pod mode
It will function as the FF/REW button. If the SEEK/PRESET button is pressed
for less than 0.8 second, it will work as
follows in each mode.
RADIO mode
It will function as the PRESET STATION
buttons.
CD/USB / i Pod mode
It will function as TRACK UP/DOWN but- ton. D300202AEN
MODE (3)
Press the button to change audio source. FM (1~2)
➟ AM ➟ CD ➟ USB/AUX (iPod)
➟ FM...
D300205AHM
MUTE (4)
Press the button to mute the sound.
Detailed information for audio control
buttons are described in the followingpages in this section.
OTQ047124
CAUTION
Do not operate audio remote con- trol buttons simultaneously.
Page 151 of 346
481
Features of your vehicle
D300600AHM-EE
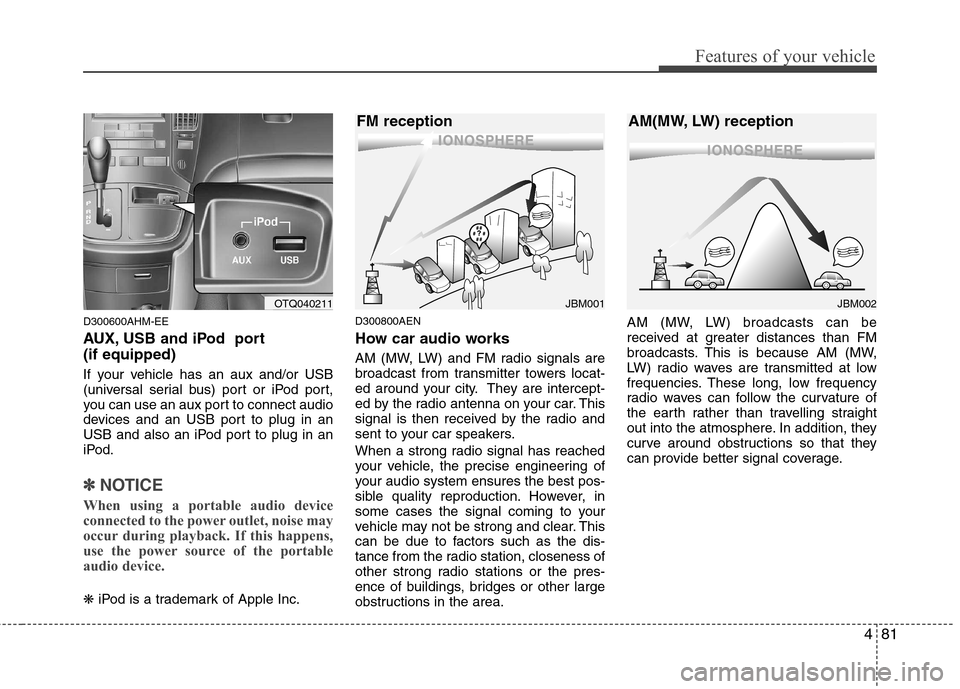
AUX, USB and iPod port (if equipped)
If your vehicle has an aux and/or USB
(universal serial bus) port or iPod port,
you can use an aux port to connect audio
devices and an USB port to plug in an
USB and also an iPod port to plug in an
iPod.
✽✽NOTICE
When using a portable audio device
connected to the power outlet, noise may
occur during playback. If this happens,
use the power source of the portable
audio device.
❋ iPod is a trademark of Apple Inc. D300800AEN
How car audio works
AM (MW, LW) and FM radio signals are
broadcast from transmitter towers locat-
ed around your city. They are intercept-
ed by the radio antenna on your car. This
signal is then received by the radio and
sent to your car speakers.
When a strong radio signal has reached
your vehicle, the precise engineering of
your audio system ensures the best pos-
sible quality reproduction. However, in
some cases the signal coming to your
vehicle may not be strong and clear. This
can be due to factors such as the dis-
tance from the radio station, closeness of
other strong radio stations or the pres-
ence of buildings, bridges or other large
obstructions in the area. AM (MW, LW) broadcasts can be
received at greater distances than FM
broadcasts. This is because AM (MW,
LW) radio waves are transmitted at low
frequencies. These long, low frequency
radio waves can follow the curvature of
the earth rather than travelling straight
out into the atmosphere. In addition, they
curve around obstructions so that they
can provide better signal coverage.
¢¢¢¢¢¢
JBM002
AM(MW, LW) reception
¢¢¢
JBM001
FM receptionOTQ040211
Page 157 of 346
487
Features of your vehicle
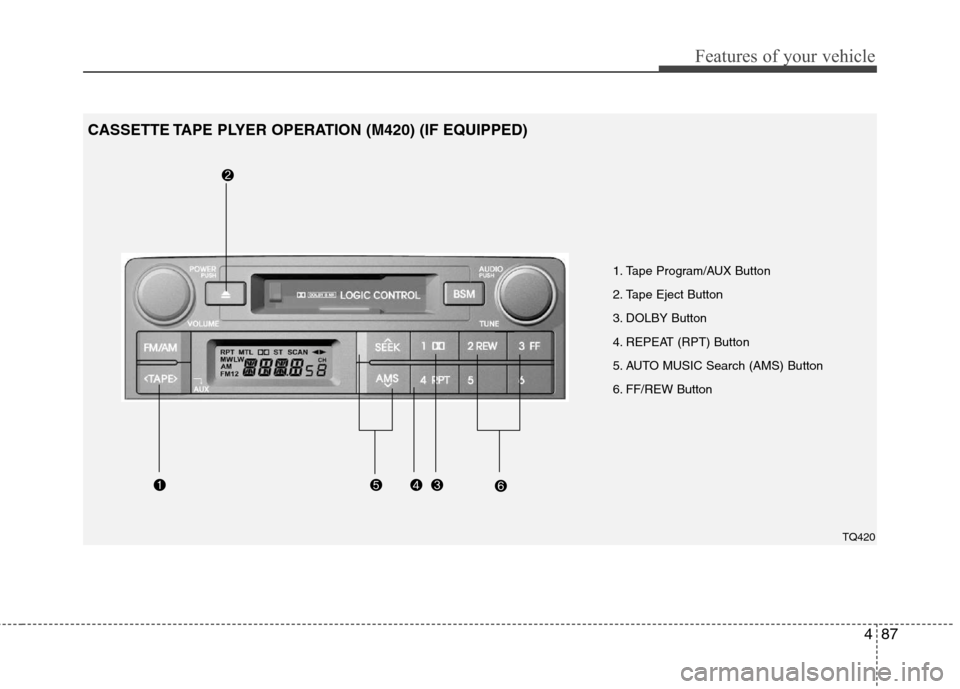
1. Tape Program/AUX Button
2. Tape Eject Button
3. DOLBY Button
4. REPEAT (RPT) Button
5. AUTO MUSIC Search (AMS) Button
6. FF/REW Button
CASSETTE TAPE PLYER OPERATION (M420) (IF EQUIPPED)TQ420
Page 158 of 346
Features of your vehicle
88
4
1. TAPE PROGRAM/AUX Button
This allows you to play the reverse side
of the tape by merely pressing the pro-
gram button. The PLAY and an arrow will
appear in the display to show the tapedirection.
If you press this button more than 0.8
second. you can change to AUX mode.
AUX mode is available only when AUX jack is plugged in and will change back
to the last mode if you pull it out.
2. TAPE EJECT Button
When the button is pressed with a cassette loaded, the cassette will eject.
When the button is pressed during FF/REW mode, the cassette will eject.
3. DOLBY Button
If you get background noise during tape
PLAY, you can reduce this considerably
by merely pressing the DOLBY button. If
you want to cancel the DOLBY feature,
press the button again.
4. REPEAT (RPT) Button
To repeat the track you are currently listening to, press the RPT button. To cancel , press again. If you do not release RPT operation
when the track ends, it will automati-
cally be replayed.
This process will continue until you
push the button again.
5. AUTO MUSIC Search (AMS) Button
Press the button to find the starting point
of each song in a prerecorded music
tape. The quiet space between songs
(must have at least a 4 sec. gap) can be
identified by the AUTO MUSIC Search
button.
Pressing the will play the begin- ning of the next music segment.
Pressing the will start replay at the beginning of the music just listened to.
To stop FF or REW action, press the button again.
6. FF/REW Button
Fast forward tape winding starts when the FF button is pressed during PLAY
or REW mode.
PLAY starts when the FF button is pressed again during FF mode.
Tape rewinding starts when the REW button is pressed during PLAY or
FF mode. PLAY starts when the REW button
pressed again during REW mode.
✽✽ NOTICE
When using a portable audio device
connected to the power outlet, noise may
occur during playback. If this happens,
use the orignal power source of the
portable audio device(e.g., batteries).
CAUTION
Do not insert anything like coins into the player slot as damage tothe unit may occur.
Do not place beverages close to the audio system. The playbackmechanism may be damaged ifyou spill them.
Do not strike or allow anything to impact the audio system, damageto the system mechanisms couldoccur.
When no device is connected to the AUX cable, please pull out the
cable from the JACK on the car.(AUX MODE is operational andnoise may heard in the AUX MODE.)
Page 162 of 346
Features of your vehicle
92
4
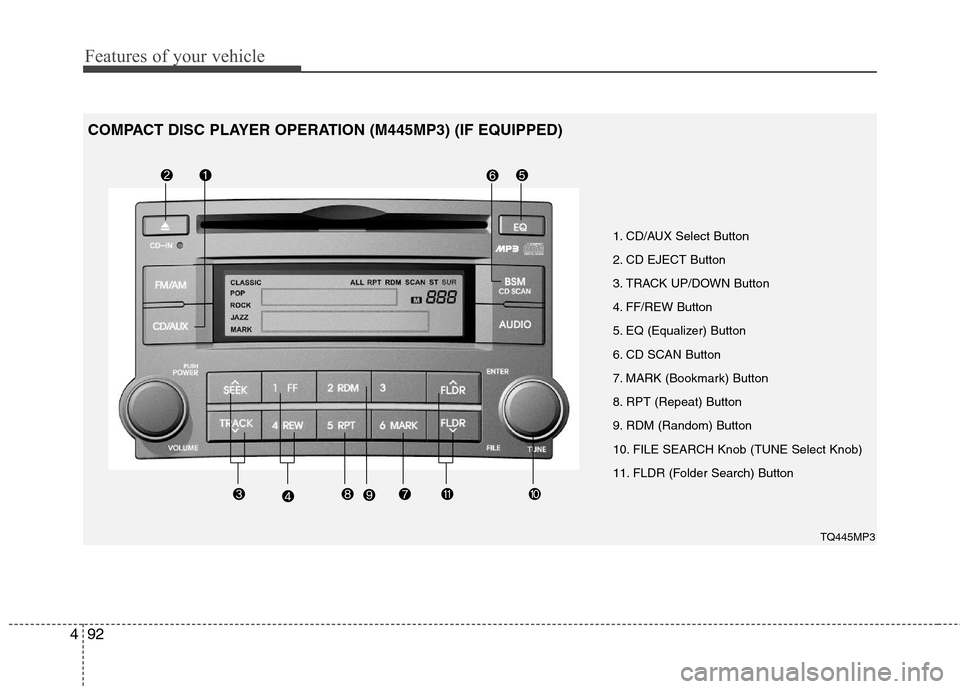
1. CD/AUX Select Button
2. CD EJECT Button
3. TRACK UP/DOWN Button
4. FF/REW Button
5. EQ (Equalizer) Button
6. CD SCAN Button
7. MARK (Bookmark) Button
8. RPT (Repeat) Button
9. RDM (Random) Button
10. FILE SEARCH Knob (TUNE Select Knob)
11. FLDR (Folder Search) Button
TQ445MP3
COMPACT DISC PLAYER OPERATION (M445MP3) (IF EQUIPPED)
Page 163 of 346
493
Features of your vehicle
1. CD/AUX Select Button
Insert the CD with the label facingupward.
Insert the CD to start CD playback, during radio operation.
When a disc is in the CD deck, if you press the CD button the CD player will
begin playing even if the radio player isbeing used.
The CD player can be used when the ignition switch is in either the “ON” or
“ACC” position.
Push the CD button to start CD play- back without pushing Power ON-OFF
control knob. (Only when a CD is in the
deck.)
If you press this button you can change to AUX mode.
AUX mode is available only when AUX jack is plugged in and change back to
last mode if you pull it out.
2. CD EJECT Button
When the EJECT button is pressed with a CD loaded, the CD will eject.
To eject all of the discs, press this but- ton for one second or more.✽✽ NOTICE
Do not stick paper or tape etc., on the label side or the recording side of any
discs, as it may cause a malfunction.
The unit cannot play a CD- R(Recordable CD) and CD-
RW(Rewritable CD) that is not final-
ized. Please refer to the manual of CD-
R/CD-RW recoder or CD-R/CD-RW
software for more information on
finalization process.
Depending on the recording status,
some CD-Rs/CD-RWs may not be
played on this unit.
3. TRACK UP/DOWN Button
The desired track on the disc currentlybeing played can be selected using the
track number.
Press button once to skip forward to the beginning of the next track.
Press within a second after play-
back begins to quickly move backward
through a CD.
If you press after more than a sec-
ond, it will take you to the beginning of
the track you are now listening to. 4. FF/REW Button
If you want to fast forward or reverse
through the compact disc track, push and
hold the FF or REW button.
When you release the button, the com-
pact disc player will resume playing.
5. EQ (Equalizer) Button
Press the EQ button to select the CLAS-
SIC, POP, JAZZ, ROCK and DEFEAT
MODE for the desired tone quality. Each
press of the button changes the display
as follows;
6. CD SCAN Button
Press the CD SCAN button to playback
the first 10 seconds of each track.
Press the CD SCAN button again with- in 10 sec. when you have reached the
desired track.
To playback the first 10 seconds of each track in the selected folder, Press
the CD SCAN button within a second.(MP3 CD only) CLASSIC ➟POP ➟ROCK ➟JAZZ ➟DEFEAT
Page 165 of 346
495
Features of your vehicle
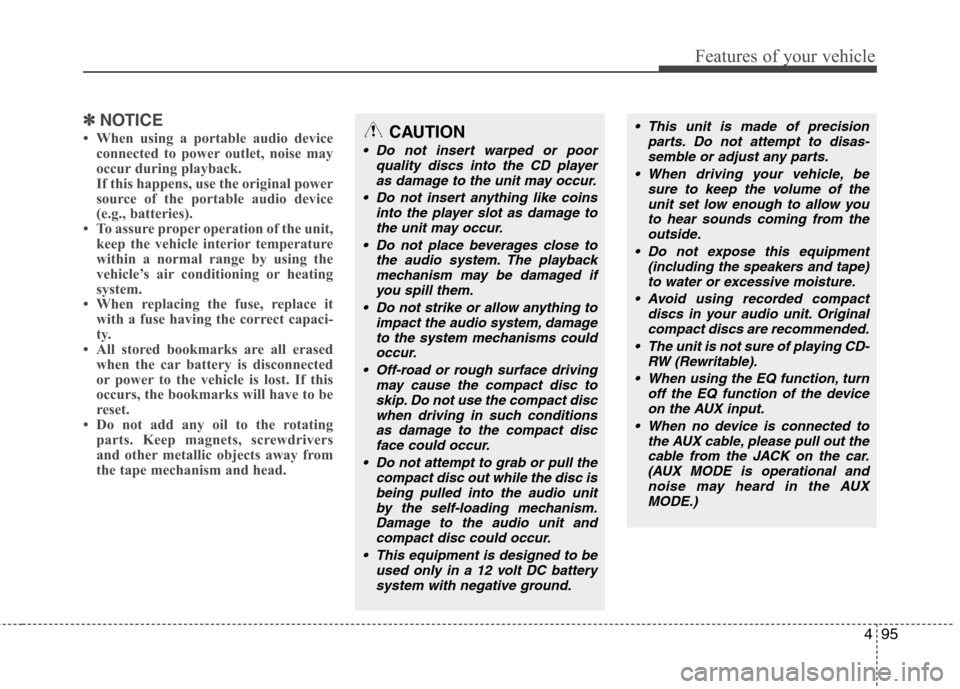
✽✽NOTICE
When using a portable audio device connected to power outlet, noise may
occur during playback.
If this happens, use the original power
source of the portable audio device
(e.g., batteries).
To assure proper operation of the unit,
keep the vehicle interior temperature
within a normal range by using the
vehicle’s air conditioning or heating
system.
When replacing the fuse, replace it with a fuse having the correct capaci-
ty.
All stored bookmarks are all erased
when the car battery is disconnected
or power to the vehicle is lost. If this
occurs, the bookmarks will have to be
reset.
Do not add any oil to the rotating parts. Keep magnets, screwdrivers
and other metallic objects away from
the tape mechanism and head.CAUTION
Do not insert warped or poor
quality discs into the CD player
as damage to the unit may occur.
Do not insert anything like coins into the player slot as damage tothe unit may occur.
Do not place beverages close to the audio system. The playbackmechanism may be damaged ifyou spill them.
Do not strike or allow anything to impact the audio system, damage
to the system mechanisms couldoccur.
Off-road or rough surface driving may cause the compact disc toskip. Do not use the compact disc
when driving in such conditionsas damage to the compact discface could occur.
Do not attempt to grab or pull the compact disc out while the disc isbeing pulled into the audio unitby the self-loading mechanism.Damage to the audio unit and
compact disc could occur.
This equipment is designed to be used only in a 12 volt DC batterysystem with negative ground.
This unit is made of precision parts. Do not attempt to disas-semble or adjust any parts.
When driving your vehicle, be sure to keep the volume of the
unit set low enough to allow youto hear sounds coming from the outside.
Do not expose this equipment (including the speakers and tape)to water or excessive moisture.
Avoid using recorded compact discs in your audio unit. Originalcompact discs are recommended.
The unit is not sure of playing CD- RW (Rewritable).
When using the EQ function, turn off the EQ function of the deviceon the AUX input.
When no device is connected to the AUX cable, please pull out thecable from the JACK on the car.(AUX MODE is operational and noise may heard in the AUX
MODE.)
Page 168 of 346
Features of your vehicle
98
4
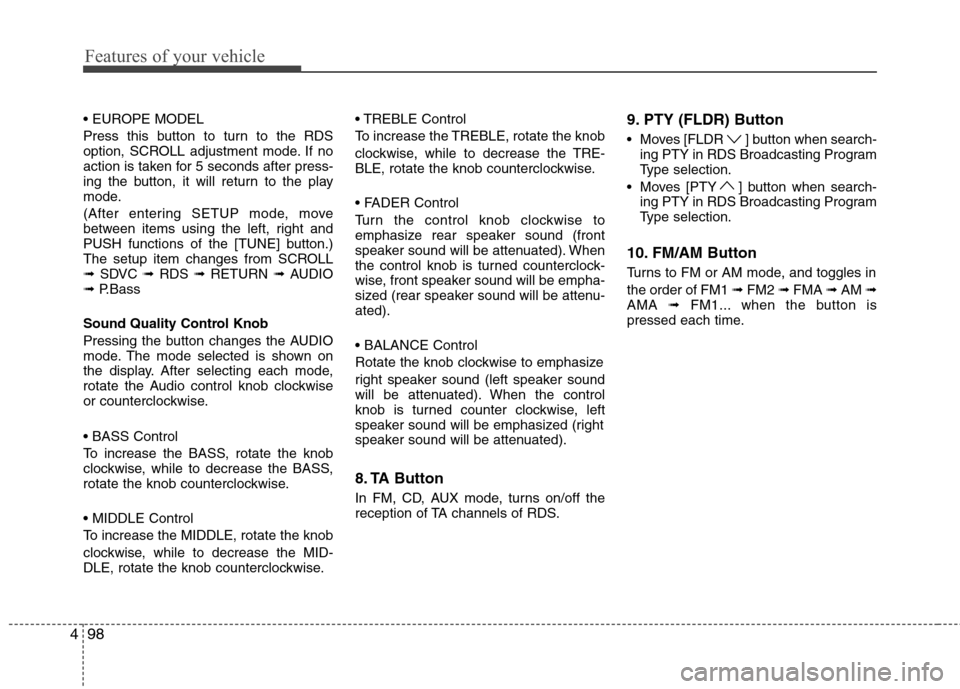
Press this button to turn to the RDS
option, SCROLL adjustment mode. If no
action is taken for 5 seconds after press-
ing the button, it will return to the play
mode.
(After entering SETUP mode, move
between items using the left, right and
PUSH functions of the [TUNE] button.)
The setup item changes from SCROLL➟ SDVC ➟RDS ➟RETURN ➟AUDIO
➟ P.Bass
Sound Quality Control Knob
Pressing the button changes the AUDIO
mode. The mode selected is shown on
the display. After selecting each mode,
rotate the Audio control knob clockwise
or counterclockwise.
To increase the BASS, rotate the knob
clockwise, while to decrease the BASS,
rotate the knob counterclockwise.
To increase the MIDDLE, rotate the knob
clockwise, while to decrease the MID-
DLE, rotate the knob counterclockwise.
To increase the TREBLE, rotate the knob
clockwise, while to decrease the TRE-
BLE, rotate the knob counterclockwise.
Turn the control knob clockwise to
emphasize rear speaker sound (front
speaker sound will be attenuated). When
the control knob is turned counterclock-
wise, front speaker sound will be empha-
sized (rear speaker sound will be attenu-ated).
Rotate the knob clockwise to emphasize
right speaker sound (left speaker sound
will be attenuated). When the control
knob is turned counter clockwise, left
speaker sound will be emphasized (right
speaker sound will be attenuated).
8. TA Button
In FM, CD, AUX mode, turns on/off the
reception of TA channels of RDS.
9. PTY (FLDR) Button
Moves [FLDR ] button when search-
ing PTY in RDS Broadcasting Program
Type selection.
Moves [PTY ] button when search- ing PTY in RDS Broadcasting Program
Type selection.
10. FM/AM Button
Turns to FM or AM mode, and toggles in the order of FM1 ➟FM2 ➟FMA ➟AM ➟
AMA ➟FM1... when the button is
pressed each time.