interior lights Hyundai H-1 (Grand Starex) 2011 Owner's Manual - RHD (UK, Australia)
[x] Cancel search | Manufacturer: HYUNDAI, Model Year: 2011, Model line: H-1 (Grand Starex), Model: Hyundai H-1 (Grand Starex) 2011Pages: 346, PDF Size: 39.27 MB
Page 126 of 346

Features of your vehicle
56
4
D210000AEN
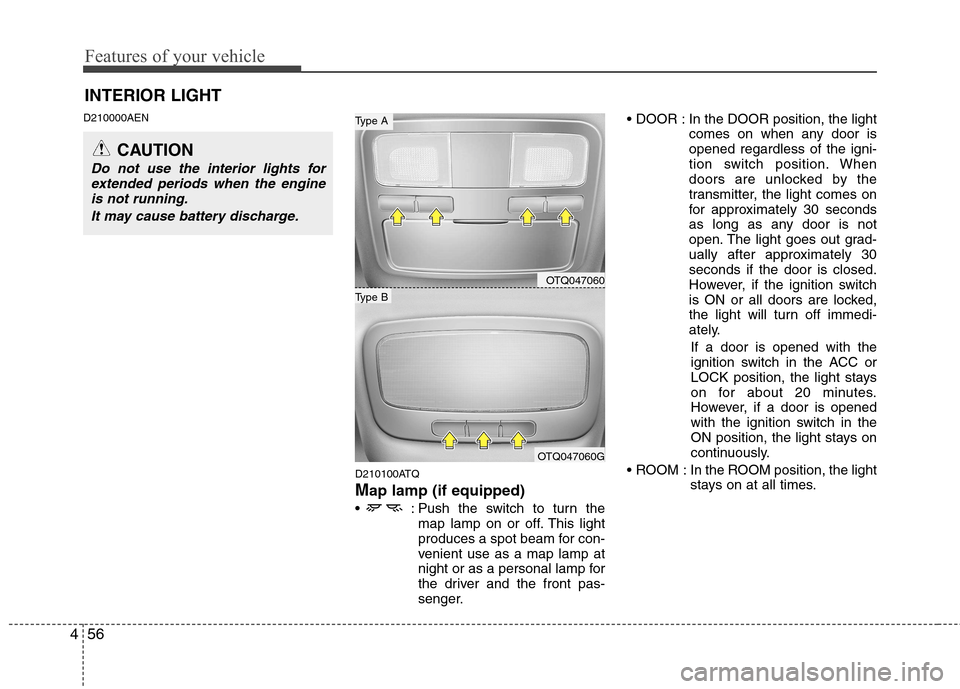
D210100ATQ Map lamp (if equipped)
: Push the switch to turn the map lamp on or off. This light
produces a spot beam for con-
venient use as a map lamp at
night or as a personal lamp for
the driver and the front pas-
senger. In the DOOR position, the light
comes on when any door isopened regardless of the igni-
tion switch position. When
doors are unlocked by the
transmitter, the light comes on
for approximately 30 seconds
as long as any door is not
open. The light goes out grad-
ually after approximately 30seconds if the door is closed.
However, if the ignition switch
is ON or all doors are locked,
the light will turn off immedi-
ately.
If a door is opened with the
ignition switch in the ACC or
LOCK position, the light stays
on for about 20 minutes.
However, if a door is opened
with the ignition switch in the
ON position, the light stays on
continuously.
ROOM : In the ROOM position, the light stays on at all times.
INTERIOR LIGHT
CAUTION
Do not use the interior lights for
extended periods when the engineis not running.
It may cause battery discharge.
OTQ047060
OTQ047060G
Type B
Type A
Page 292 of 346

Maintenance
38
7
G190200AUN
Battery recharging
Your vehicle has a maintenance-free,
calcium-based battery.
If the battery becomes discharged in a
short time (because, for example, the
headlights or interior lights were left on
while the vehicle was not in use),
recharge it by slow charging (trickle)
for 10 hours.
If the battery gradually discharges because of high electric load while the
vehicle is being used, recharge it at 20-
30A for two hours. G190300ATQ Reset items
Items should be reset after the battery
has been discharged or the battery hasbeen disconnected.
Climate control system
(See section 4)
Clock (See section 4)
Audio (See section 4)
WARNING
Before performing maintenance or recharging the battery, turn off all accessories and stop the
engine.
The negative battery cable must be removed first and installed
last when the battery is discon-nected.WARNING - Recharging
battery
When recharging the battery,
observe the following precautions:
The battery must be removed from the vehicle and placed in an area with good ventilation.
Do not allow cigarettes, sparks, or flame near the battery.
Watch the battery during charg- ing, and stop or reduce the charg-
ing rate if the battery cells begin
gassing (boiling) violently or if
the temperature of the electrolyte
of any cell exceeds 49°C (120°F).
Wear eye protection when check- ing the battery during charging.
Disconnect the battery charger in the following order.
1. Turn off the battery charger main switch.
2. Unhook the negative clamp from the negative battery terminal.
3. Unhook the positive clamp from the positive battery terminal.
Page 304 of 346

Maintenance
50
7
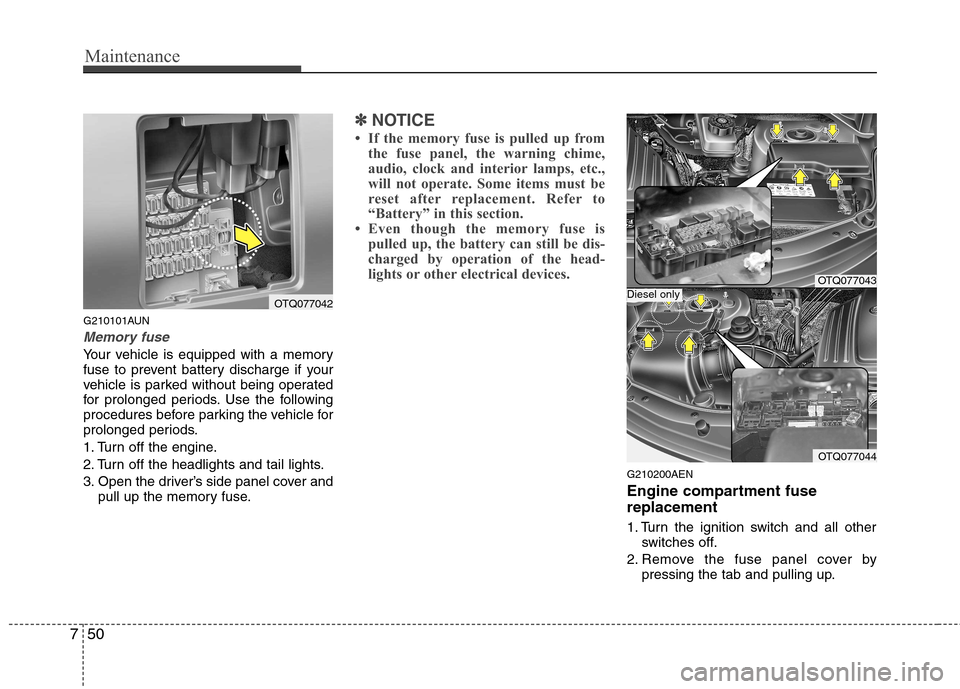
G210101AUN
Memory fuse
Your vehicle is equipped with a memory
fuse to prevent battery discharge if your
vehicle is parked without being operated
for prolonged periods. Use the following
procedures before parking the vehicle for
prolonged periods.
1. Turn off the engine.
2. Turn off the headlights and tail lights.
3. Open the driver’s side panel cover and
pull up the memory fuse.
✽✽ NOTICE
If the memory fuse is pulled up from the fuse panel, the warning chime,
audio, clock and interior lamps, etc.,
will not operate. Some items must be
reset after replacement. Refer to
“Battery” in this section.
Even though the memory fuse is
pulled up, the battery can still be dis-
charged by operation of the head-
lights or other electrical devices.
G210200AEN
Engine compartment fuse replacement
1. Turn the ignition switch and all other switches off.
2. Remove the fuse panel cover by pressing the tab and pulling up.
OTQ077042
OTQ077043
OTQ077044
Diesel only
Page 318 of 346

Maintenance
64
7
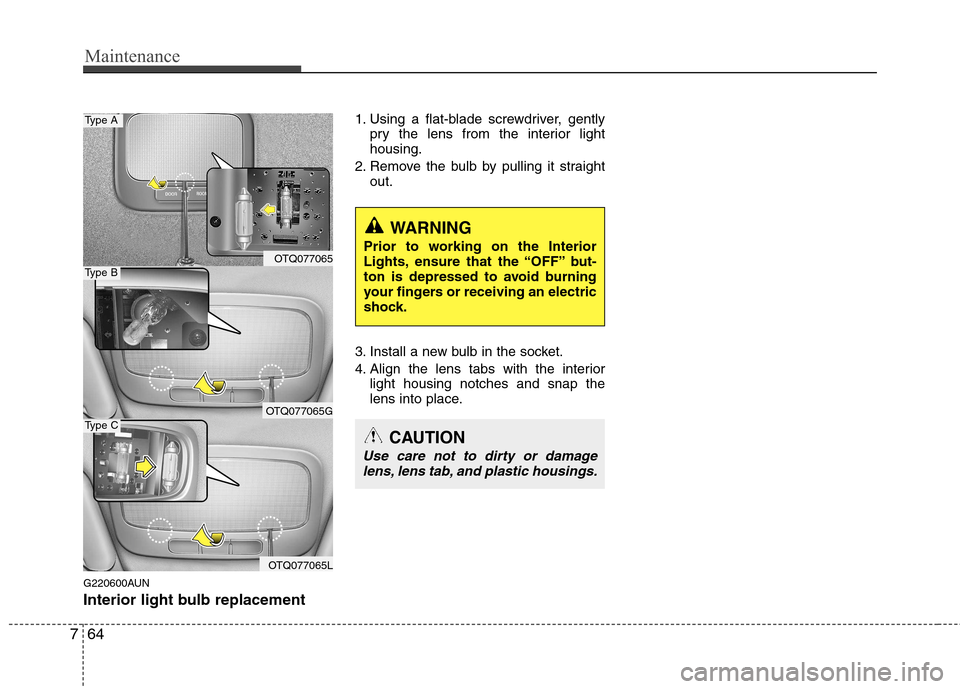
G220600AUN
Interior light bulb replacement 1. Using a flat-blade screwdriver, gently
pry the lens from the interior light housing.
2. Remove the bulb by pulling it straight out.
3. Install a new bulb in the socket.
4. Align the lens tabs with the interior light housing notches and snap the
lens into place.
WARNING
Prior to working on the Interior
Lights, ensure that the “OFF” but-
ton is depressed to avoid burning
your fingers or receiving an electric
shock.
CAUTION
Use care not to dirty or damage lens, lens tab, and plastic housings.
OTQ077065
OTQ077065G
OTQ077065L
Type A
Type B
Type C