engine Hyundai H-1 (Grand Starex) 2016 - RHD (UK, Australia) Owner's Guide
[x] Cancel search | Manufacturer: HYUNDAI, Model Year: 2016, Model line: H-1 (Grand Starex), Model: Hyundai H-1 (Grand Starex) 2016Pages: 332, PDF Size: 6.89 MB
Page 93 of 332
425
Features of your vehicle
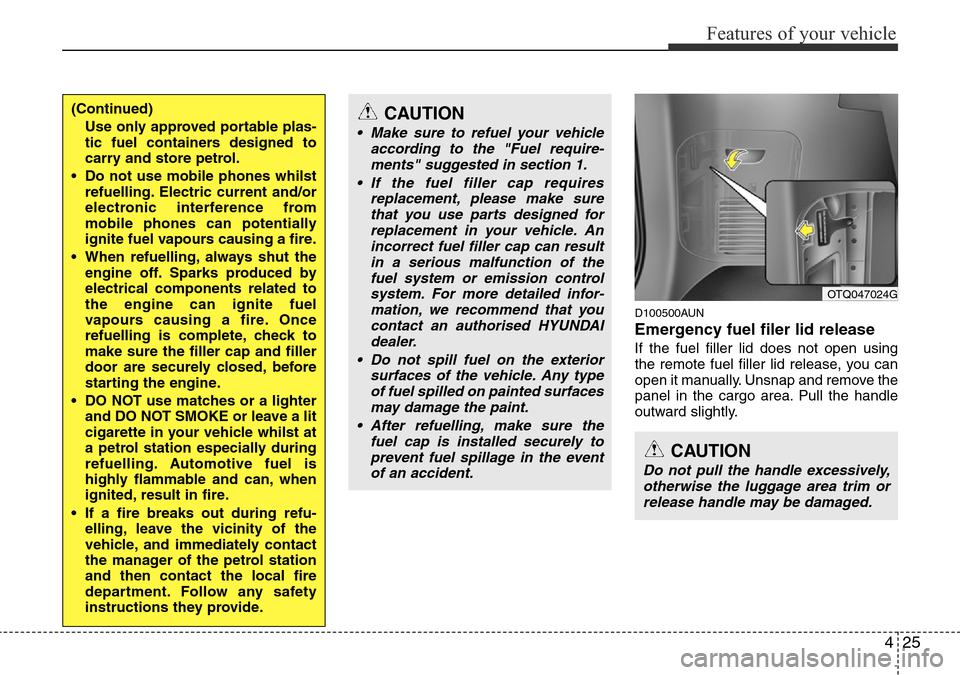
D100500AUN
Emergency fuel filer lid release
If the fuel filler lid does not open using
the remote fuel filler lid release, you can
open it manually. Unsnap and remove the
panel in the cargo area. Pull the handle
outward slightly.
CAUTION
• Make sure to refuel your vehicle
according to the "Fuel require-
ments" suggested in section 1.
• If the fuel filler cap requires
replacement, please make sure
that you use parts designed for
replacement in your vehicle. An
incorrect fuel filler cap can result
in a serious malfunction of the
fuel system or emission control
system. For more detailed infor-
mation, we recommend that you
contact an authorised HYUNDAI
dealer.
• Do not spill fuel on the exterior
surfaces of the vehicle. Any type
of fuel spilled on painted surfaces
may damage the paint.
• After refuelling, make sure the
fuel cap is installed securely to
prevent fuel spillage in the event
of an accident.
CAUTION
Do not pull the handle excessively,
otherwise the luggage area trim or
release handle may be damaged.
OTQ047024G
(Continued)
Use only approved portable plas-
tic fuel containers designed to
carry and store petrol.
• Do not use mobile phones whilst
refuelling. Electric current and/or
electronic interference from
mobile phones can potentially
ignite fuel vapours causing a fire.
• When refuelling, always shut the
engine off. Sparks produced by
electrical components related to
the engine can ignite fuel
vapours causing a fire. Once
refuelling is complete, check to
make sure the filler cap and filler
door are securely closed, before
starting the engine.
• DO NOT use matches or a lighter
and DO NOT SMOKE or leave a lit
cigarette in your vehicle whilst at
a petrol station especially during
refuelling. Automotive fuel is
highly flammable and can, when
ignited, result in fire.
• If a fire breaks out during refu-
elling, leave the vicinity of the
vehicle, and immediately contact
the manager of the petrol station
and then contact the local fire
department. Follow any safety
instructions they provide.
Page 94 of 332
Features of your vehicle
26 4
D130100AEN-EA
Power steering
Power steering uses energy from the
engine to assist you in steering the vehi-
cle. If the engine is off or if the power
steering system becomes inoperative,
the vehicle may still be steered, but it will
require increased steering effort.
Should you notice any change in the
effort required to steer during normal
vehicle operation, we recommend that
the system be checked by authorised
HYUNDAI dealer.
✽NOTICE
If the power steering drive belt breaks
or if the power steering pump malfunc-
tions, the steering effort will greatly
increase.
✽NOTICE
If the vehicle is parked for extended
periods outside in cold weather (below -
10°C/14°F), the power steering may
require increased effort when the engine
is first started. This is caused by
increased fluid viscosity due to the cold
weather and does not indicate a mal-
function.
When this happens, increase the engine
RPM by depressing accelerator until the
RPM reaches 1,500 rpm then release or
let the engine idle for two or three min-
utes to warm up the fluid.
D130300AUN
Tilt steering (if equipped)
Tilt steering allows you to adjust the
steering wheel before you drive. You can
also raise it to give your legs more room
when you exit and enter the vehicle.
The steering wheel should be positioned
so that it is comfortable for you to drive,
whilst permitting you to see the instru-
ment panel warning lights and gauges.
STEERING WHEEL
CAUTION
Never hold the steering wheel
against a stop (extreme right or left
turn) for more than 5 seconds with
the engine running. Holding the
steering wheel for more than 5 sec-
onds in either position may cause
damage to the power steering
pump.
WARNING
• Never adjust the angle of the
steering wheel whilst driving. You
may lose steering control and
cause severe personal injury,
death or accidents.
• After adjusting, push the steering
wheel both up and down to be
certain it is locked in position.
Page 96 of 332
Features of your vehicle
28 4
D140100BUN-EA
Inside rearview mirror
Adjust the rearview mirror to centre on
the view through the rear window. Make
this adjustment before you start driving.
D140101AUN
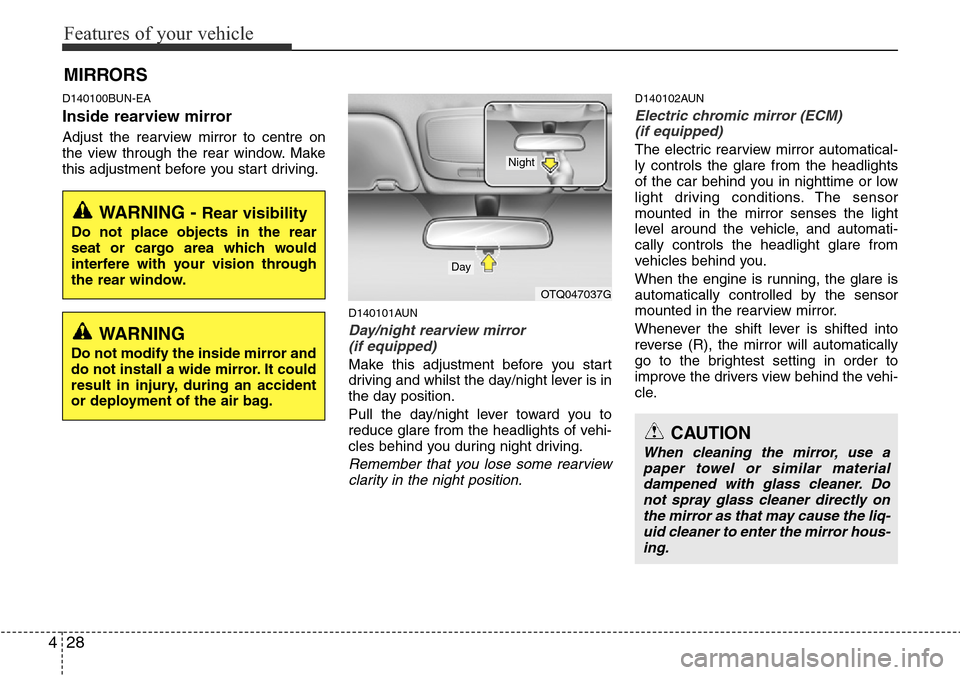
Day/night rearview mirror
(if equipped)
Make this adjustment before you start
driving and whilst the day/night lever is in
the day position.
Pull the day/night lever toward you to
reduce glare from the headlights of vehi-
cles behind you during night driving.
Remember that you lose some rearview
clarity in the night position.
D140102AUN
Electric chromic mirror (ECM)
(if equipped)
The electric rearview mirror automatical-
ly controls the glare from the headlights
of the car behind you in nighttime or low
light driving conditions. The sensor
mounted in the mirror senses the light
level around the vehicle, and automati-
cally controls the headlight glare from
vehicles behind you.
When the engine is running, the glare is
automatically controlled by the sensor
mounted in the rearview mirror.
Whenever the shift lever is shifted into
reverse (R), the mirror will automatically
go to the brightest setting in order to
improve the drivers view behind the vehi-
cle.
MIRRORS
WARNING - Rear visibility
Do not place objects in the rear
seat or cargo area which would
interfere with your vision through
the rear window.
OTQ047037G
CAUTION
When cleaning the mirror, use a
paper towel or similar material
dampened with glass cleaner. Do
not spray glass cleaner directly on
the mirror as that may cause the liq-
uid cleaner to enter the mirror hous-
ing.
Day
Night
WARNING
Do not modify the inside mirror and
do not install a wide mirror. It could
result in injury, during an accident
or deployment of the air bag.
Page 99 of 332
431
Features of your vehicle
D140202ATQ
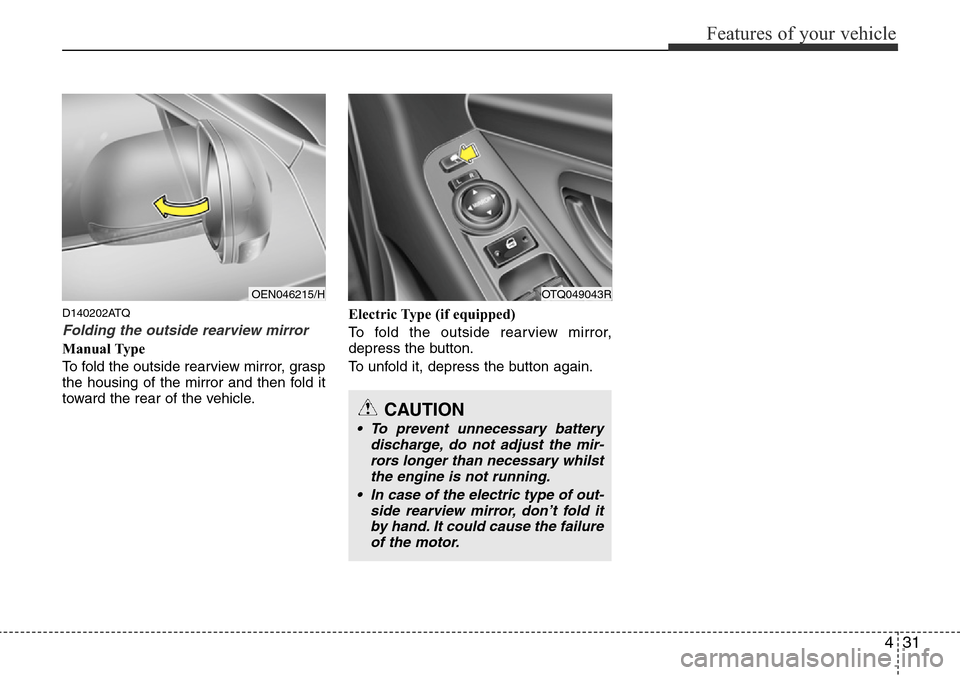
Folding the outside rearview mirror
Manual Type
To fold the outside rearview mirror, grasp
the housing of the mirror and then fold it
toward the rear of the vehicle.Electric Type (if equipped)
To fold the outside rearview mirror,
depress the button.
To unfold it, depress the button again.
OEN046215/HOTQ049043R
CAUTION
• To prevent unnecessary battery
discharge, do not adjust the mir-
rors longer than necessary whilst
the engine is not running.
• In case of the electric type of out-
side rearview mirror, don’t fold it
by hand. It could cause the failure
of the motor.
Page 100 of 332
Features of your vehicle
32 4
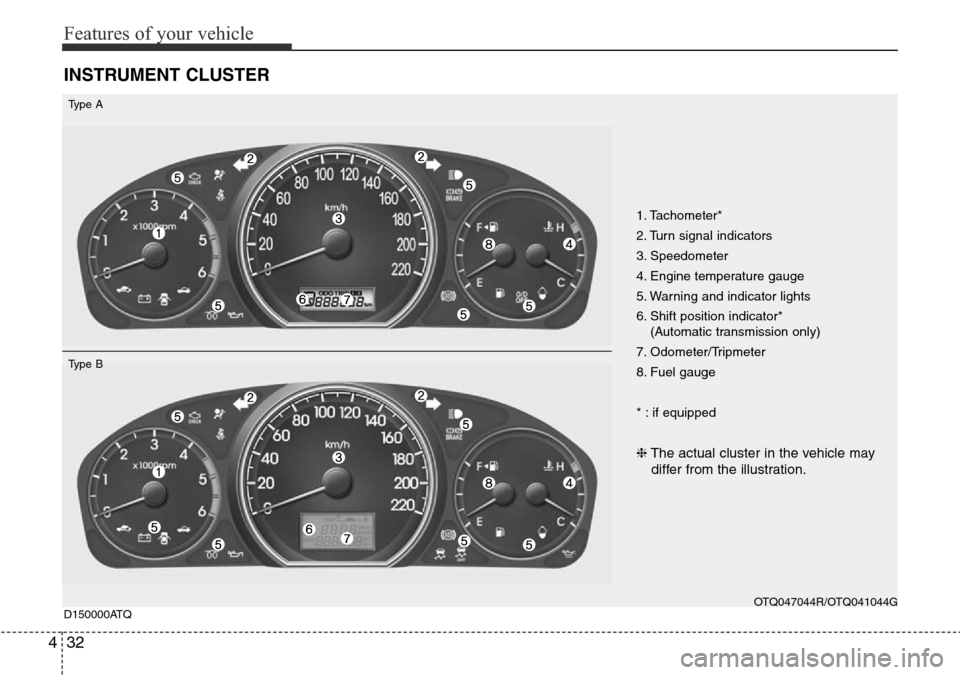
INSTRUMENT CLUSTER
1. Tachometer*
2. Turn signal indicators
3. Speedometer
4. Engine temperature gauge
5. Warning and indicator lights
6. Shift position indicator*
(Automatic transmission only)
7. Odometer/Tripmeter
8. Fuel gauge
* : if equipped
❈The actual cluster in the vehicle may
differ from the illustration.
OTQ047044R/OTQ041044G
D150000ATQ
Type A
Type B
Page 101 of 332
433
Features of your vehicle
Instrument cluster control
D150100AEN-EE
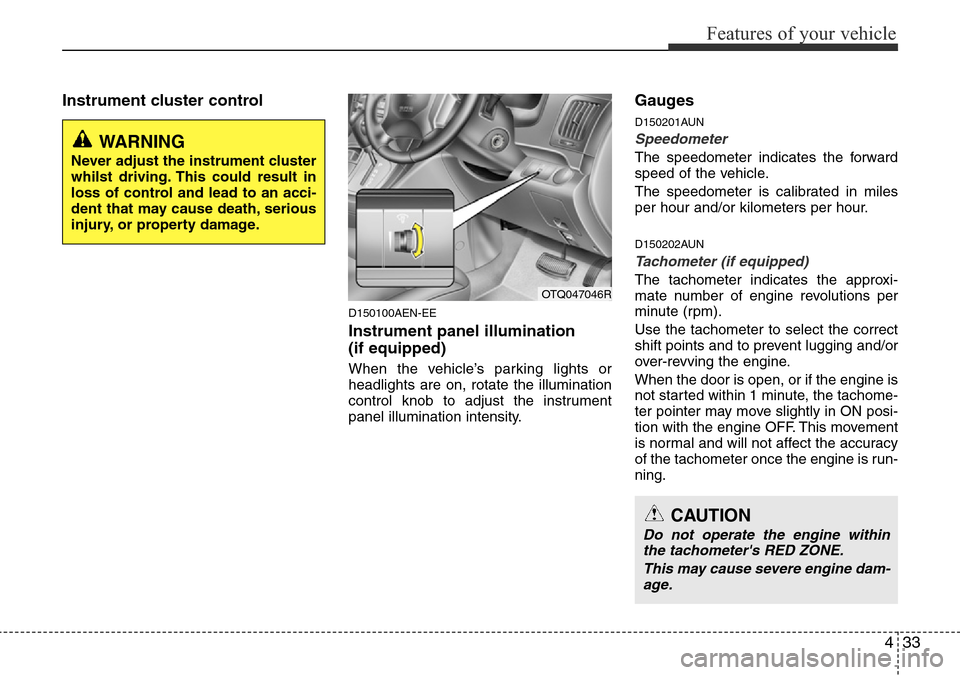
Instrument panel illumination
(if equipped)
When the vehicle’s parking lights or
headlights are on, rotate the illumination
control knob to adjust the instrument
panel illumination intensity.
Gauges
D150201AUN
Speedometer
The speedometer indicates the forward
speed of the vehicle.
The speedometer is calibrated in miles
per hour and/or kilometers per hour.
D150202AUN
Tachometer (if equipped)
The tachometer indicates the approxi-
mate number of engine revolutions per
minute (rpm).
Use the tachometer to select the correct
shift points and to prevent lugging and/or
over-revving the engine.
When the door is open, or if the engine is
not started within 1 minute, the tachome-
ter pointer may move slightly in ON posi-
tion with the engine OFF. This movement
is normal and will not affect the accuracy
of the tachometer once the engine is run-
ning.OTQ047046R
CAUTION
Do not operate the engine within
the tachometer's RED ZONE.
This may cause severe engine dam-
age.
WARNING
Never adjust the instrument cluster
whilst driving. This could result in
loss of control and lead to an acci-
dent that may cause death, serious
injury, or property damage.
Page 102 of 332
Features of your vehicle
34 4
D150203AUN
Engine temperature gauge
This gauge shows the temperature of the
engine coolant when the ignition switch
is ON.
Do not continue driving with an overheat-
ed engine. If your vehicle overheats, refer
to “If the engine overheats” in section 6.
D150204BUN
Fuel gauge
The fuel gauge indicates the approxi-
mate amount of fuel remaining in the fuel
tank.
The fuel tank capacity is given in sec-
tion 9.The fuel gauge is supplemented by
a low fuel warning light, which will illumi-
nate when the fuel tank is near empty.
On inclines or curves, the fuel gauge
pointer may fluctuate or the low fuel
warning light may come on earlier than
usual due to the movement of fuel in the
tank.
D150205AUN
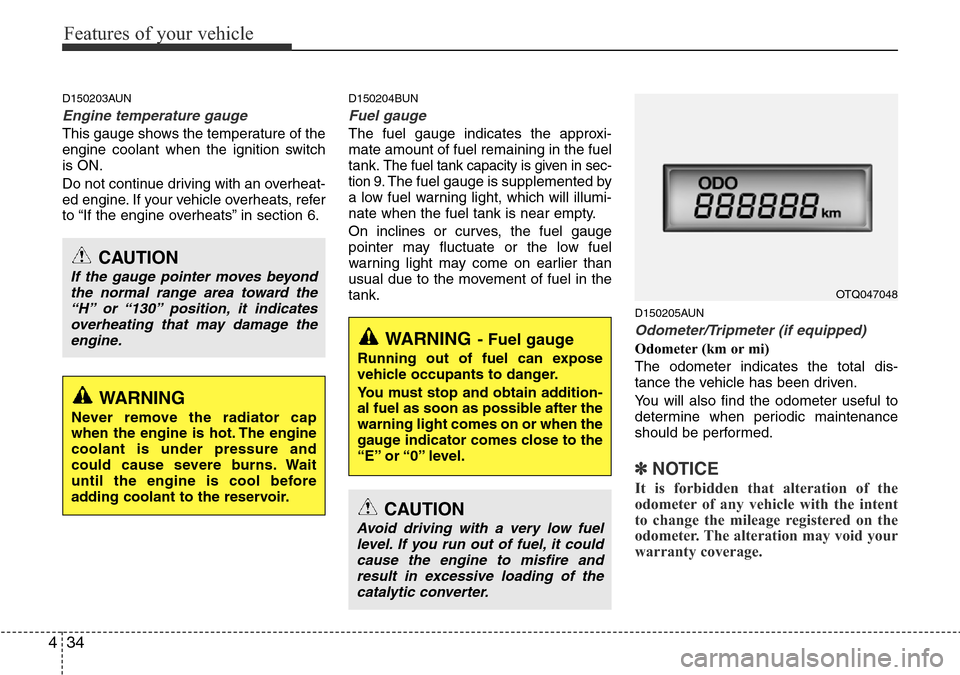
Odometer/Tripmeter (if equipped)
Odometer (km or mi)
The odometer indicates the total dis-
tance the vehicle has been driven.
You will also find the odometer useful to
determine when periodic maintenance
should be performed.
✽NOTICE
It is forbidden that alteration of the
odometer of any vehicle with the intent
to change the mileage registered on the
odometer. The alteration may void your
warranty coverage.
OTQ047048
WARNING- Fuel gauge
Running out of fuel can expose
vehicle occupants to danger.
You must stop and obtain addition-
al fuel as soon as possible after the
warning light comes on or when the
gauge indicator comes close to the
“E” or “0” level.
CAUTION
Avoid driving with a very low fuel
level. If you run out of fuel, it could
cause the engine to misfire and
result in excessive loading of the
catalytic converter.
CAUTION
If the gauge pointer moves beyond
the normal range area toward the
“H” or “130” position, it indicates
overheating that may damage the
engine.
WARNING
Never remove the radiator cap
when the engine is hot. The engine
coolant is under pressure and
could cause severe burns. Wait
until the engine is cool before
adding coolant to the reservoir.
Page 104 of 332
Features of your vehicle
36 4
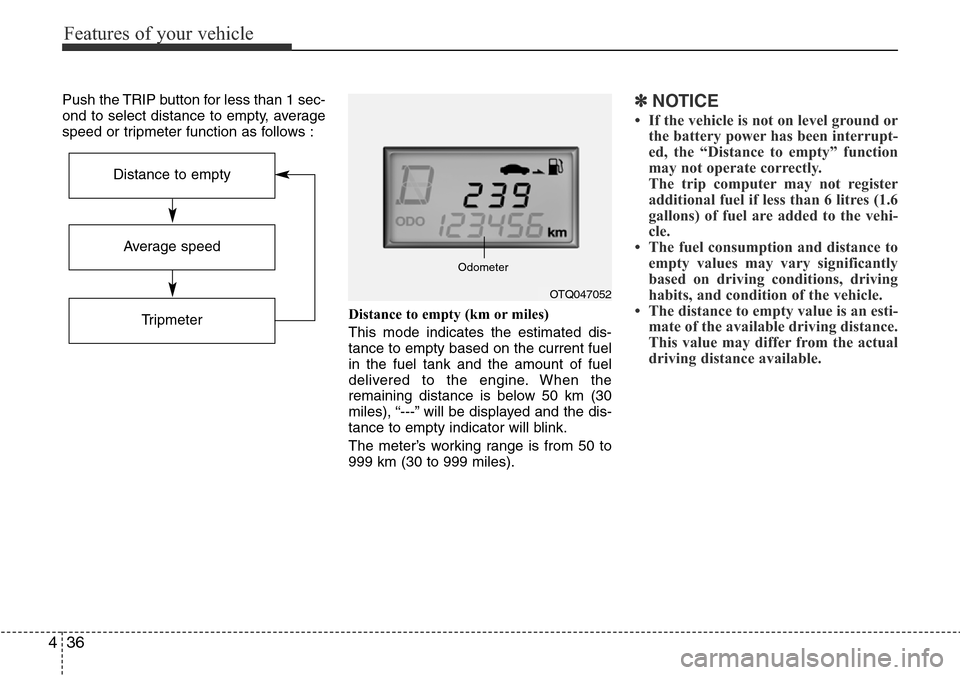
Push the TRIP button for less than 1 sec-
ond to select distance to empty, average
speed or tripmeter function as follows :
Distance to empty (km or miles)
This mode indicates the estimated dis-
tance to empty based on the current fuel
in the fuel tank and the amount of fuel
delivered to the engine. When the
remaining distance is below 50 km (30
miles), “---” will be displayed and the dis-
tance to empty indicator will blink.
The meter’s working range is from 50 to
999 km (30 to 999 miles).✽NOTICE
• If the vehicle is not on level ground or
the battery power has been interrupt-
ed, the “Distance to empty” function
may not operate correctly.
The trip computer may not register
additional fuel if less than 6 litres (1.6
gallons) of fuel are added to the vehi-
cle.
• The fuel consumption and distance to
empty values may vary significantly
based on driving conditions, driving
habits, and condition of the vehicle.
• The distance to empty value is an esti-
mate of the available driving distance.
This value may differ from the actual
driving distance available.
OTQ047052 Odometer
Average speed
Tripmeter
Distance to empty
Page 105 of 332
437
Features of your vehicle
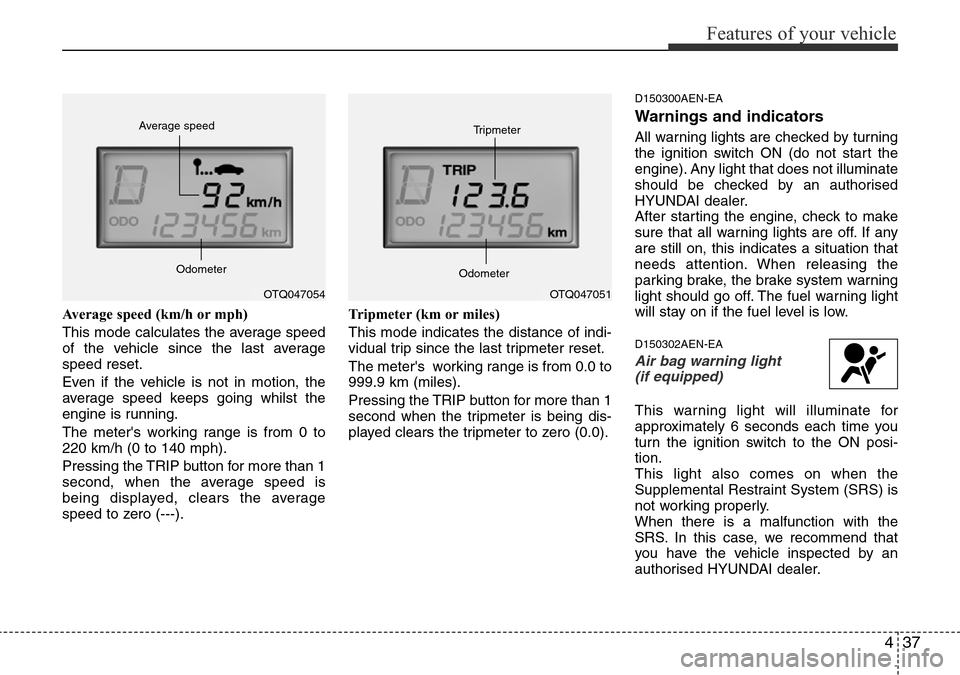
Average speed (km/h or mph)
This mode calculates the average speed
of the vehicle since the last average
speed reset.
Even if the vehicle is not in motion, the
average speed keeps going whilst the
engine is running.
The meter's working range is from 0 to
220 km/h (0 to 140 mph).
Pressing the TRIP button for more than 1
second, when the average speed is
being displayed, clears the average
speed to zero (---).Tripmeter (km or miles)
This mode indicates the distance of indi-
vidual trip since the last tripmeter reset.
The meter's working range is from 0.0 to
999.9 km (miles).
Pressing the TRIP button for more than 1
second when the tripmeter is being dis-
played clears the tripmeter to zero (0.0).
D150300AEN-EA
Warnings and indicators
All warning lights are checked by turning
the ignition switch ON (do not start the
engine). Any light that does not illuminate
should be checked by an authorised
HYUNDAI dealer.
After starting the engine, check to make
sure that all warning lights are off. If any
are still on, this indicates a situation that
needs attention. When releasing the
parking brake, the brake system warning
light should go off. The fuel warning light
will stay on if the fuel level is low.
D150302AEN-EA
Air bag warning light
(if equipped)
This warning light will illuminate for
approximately 6 seconds each time you
turn the ignition switch to the ON posi-
tion.
This light also comes on when the
Supplemental Restraint System (SRS) is
not working properly.
When there is a malfunction with the
SRS. In this case, we recommend that
you have the vehicle inspected by an
authorised HYUNDAI dealer.
OTQ047051 Tripmeter
OdometerOTQ047054 Average speed
Odometer
Page 107 of 332
439
Features of your vehicle
D150305AUN
Turn signal indicator
The blinking green arrows on the instru-
ment panel show the direction indicated
by the turn signals. If the arrow comes on
but does not blink, blinks more rapidly
than normal, or does not illuminate at all,
a malfunction in the turn signal system is
indicated. Your dealer should be consult-
ed for repairs.
D150306AUN
High beam indicator
This indicator illuminates when the head-
lights are on and in the high beam posi-
tion or when the turn signal lever is pulled
into the Flash-to-Pass position.
D150307AEN-EA
Engine oil pressure
warning light
This warning light indicates the engine oil
pressure is low.
If the warning light illuminates whilst driv-
ing:
1. Drive safely to the side of the road and
stop.
2. With the engine off, check the engine
oil level. If the level is low, add oil as
required.
If the warning light remains on after
adding oil or if oil is not available, we rec-
ommend that you have the vehicle
inspected by an authorised HYUNDAI
dealer as soon as possible.
CAUTION
If the engine is not stopped imme-
diately after the engine oil pressure
warning light is illuminated, severe
damage could result.
CAUTION
If the oil pressure warning light
stays on whilst the engine is run-
ning, serious engine damage may
result. The oil pressure warning
light comes on whenever there is
insufficient oil pressure. In normal
operation, it should come on when
the ignition switch is turned on,
then go out when the engine is
started. If the oil pressure warning
light stays on whilst the engine is
running, there is a serious malfunc-
tion.
If this happens, stop the car as
soon as it is safe to do so, turn off
the engine and check the oil level. If
the oil level is low, fill the engine oil
to the proper level and start the
engine again. If the light stays on
with the engine running, turn the
engine off immediately. In any
instance where the oil light stays on
when the engine is running, the
engine should be checked by an
authorised HYUNDAI dealer before
the car is driven again.