clock Hyundai H-1 (Grand Starex) 2016 Owner's Manual - RHD (UK, Australia)
[x] Cancel search | Manufacturer: HYUNDAI, Model Year: 2016, Model line: H-1 (Grand Starex), Model: Hyundai H-1 (Grand Starex) 2016Pages: 332, PDF Size: 6.89 MB
Page 17 of 332
23
Your vehicle at a glance
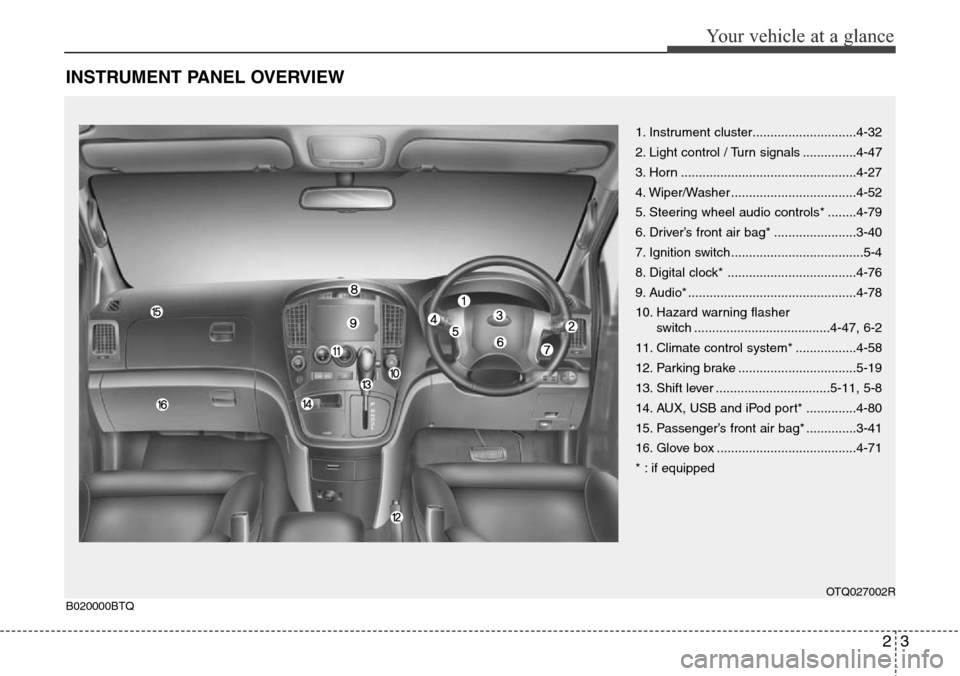
INSTRUMENT PANEL OVERVIEW
1. Instrument cluster.............................4-32
2. Light control / Turn signals ...............4-47
3. Horn .................................................4-27
4. Wiper/Washer ...................................4-52
5. Steering wheel audio controls* ........4-79
6. Driver’s front air bag* .......................3-40
7. Ignition switch .....................................5-4
8. Digital clock* ....................................4-76
9. Audio* ...............................................4-78
10. Hazard warning flasher
switch ......................................4-47, 6-2
11. Climate control system* .................4-58
12. Parking brake .................................5-19
13. Shift lever ................................5-11, 5-8
14. AUX, USB and iPod port* ..............4-80
15. Passenger’s front air bag* ..............3-41
16. Glove box .......................................4-71
* : if equipped
OTQ027002RB020000BTQ
Page 87 of 332
419
Features of your vehicle
If the power window is not operated cor-
rectly, the automatic power window sys-
tem must be reset as follows:
1. Turn the ignition switch to the ON posi-
tion.
2. Close driver’s window and continue
pulling up on driver’s power window
switch for at least 1 second after the
window is completely closed.
Automatic reversal
If the upward movement of the window is
blocked by an object or part of the body,
the window will detect the resistance and
will stop upward movement. The window
will then lower approximately 30 cm (11.8
in.) to allow the object to be cleared.
If the window detects the resistance
whilst the power window switch is pulled
up continuously, the window will stop
upward movement then lower approxi-
mately 2.5 cm (1 in.). And if the power
window switch is pulled up continuously
again within 5 seconds after the window
is lowered by the automatic window
reversal feature, the automatic window
reversal will not operate.✽NOTICE
The automatic reverse feature for the
driver’s window is only active when the
“auto up” feature is used by fully
pulling up the switch. The automatic
reverse feature will not operate if the
window is raised using the halfway posi-
tion on the power window switch.
D080200AFD
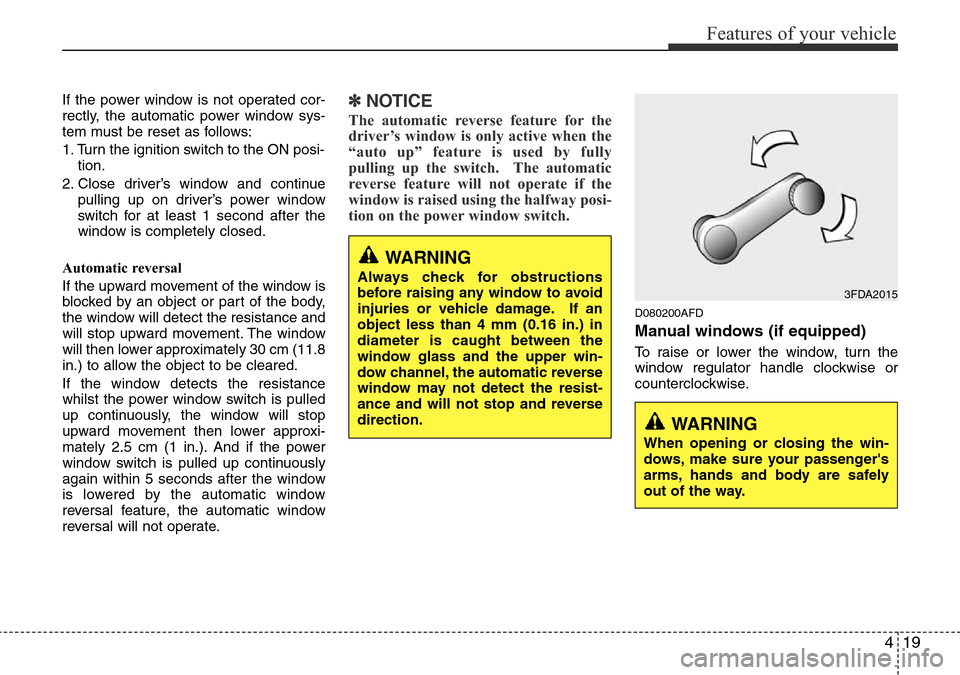
Manual windows (if equipped)
To raise or lower the window, turn the
window regulator handle clockwise or
counterclockwise.
WARNING
When opening or closing the win-
dows, make sure your passenger's
arms, hands and body are safely
out of the way.
3FDA2015
WARNING
Always check for obstructions
before raising any window to avoid
injuries or vehicle damage. If an
object less than 4 mm (0.16 in.) in
diameter is caught between the
window glass and the upper win-
dow channel, the automatic reverse
window may not detect the resist-
ance and will not stop and reverse
direction.
Page 91 of 332
423
Features of your vehicle
D100100AUN
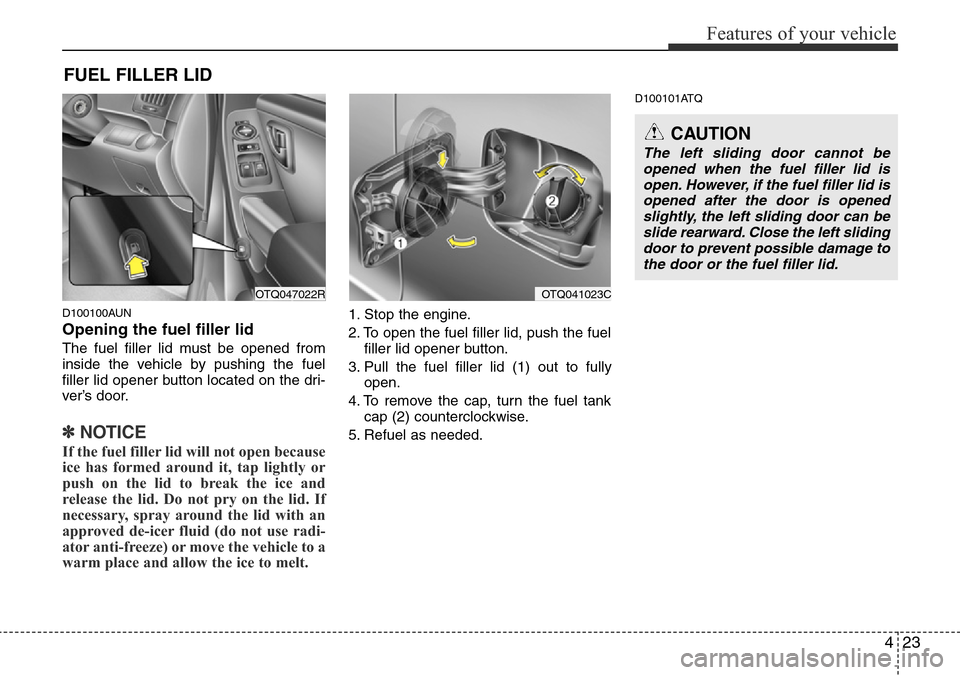
Opening the fuel filler lid
The fuel filler lid must be opened from
inside the vehicle by pushing the fuel
filler lid opener button located on the dri-
ver’s door.
✽NOTICE
If the fuel filler lid will not open because
ice has formed around it, tap lightly or
push on the lid to break the ice and
release the lid. Do not pry on the lid. If
necessary, spray around the lid with an
approved de-icer fluid (do not use radi-
ator anti-freeze) or move the vehicle to a
warm place and allow the ice to melt.
1. Stop the engine.
2. To open the fuel filler lid, push the fuel
filler lid opener button.
3. Pull the fuel filler lid (1) out to fully
open.
4. To remove the cap, turn the fuel tank
cap (2) counterclockwise.
5. Refuel as needed.
D100101ATQ
FUEL FILLER LID
OTQ047022ROTQ041023C
CAUTION
The left sliding door cannot be
opened when the fuel filler lid is
open. However, if the fuel filler lid is
opened after the door is opened
slightly, the left sliding door can be
slide rearward. Close the left sliding
door to prevent possible damage to
the door or the fuel filler lid.
Page 92 of 332
Features of your vehicle
24 4
D100200AEN
Closing the fuel filler lid
1. To install the cap, turn it clockwise until
it “clicks”. This indicates that the cap is
securely tightened.
2. Close the fuel filler lid and push it light-
ly and make sure that it is securely
closed.
D100300AEN-EA
(Continued)
• Do not get back into a vehicle
once you have begun refuelling
since you can generate static
electricity by touching, rubbing
or sliding against any item or fab-
ric (polyester, satin, nylon, etc.)
capable of producing static elec-
tricity. Static electricity discharge
can ignite fuel vapours resulting
in rapid burning. If you must re-
enter the vehicle, you should
once again eliminate potentially
dangerous static electricity dis-
charge by touching a metal part
of the vehicle, away from the fuel
filler neck, nozzle or other petrol
source.
• When using an approved
portable fuel container, be sure to
place the container on the
ground prior to refuelling. Static
electricity discharge from the
container can ignite fuel vapours
causing a fire. Once refuelling
has begun, contact with the vehi-
cle should be maintained until
the filling is complete.
(Continued)WARNING - Refuelling
dangers
Automotive fuels are flammable
materials. When refuelling, please
note the following guidelines care-
fully. Failure to follow these guide-
lines may result in severe personal
injury, severe burns or death by fire
or explosion.
• Read and follow all warning at the
petrol station facility.
• Before refuelling note the loca-
tion of the Emergency Fuel Shut-
Off, if available, at the petrol sta-
tion facility.
• Before touching the fuel nozzle,
you should eliminate potentially
dangerous static electricity dis-
charge by touching another metal
part of the vehicle, a safe dis-
tance away from the fuel filler
neck, nozzle, or other petrol
source.
(Continued)
WARNING - Refuelling
• If pressurized fuel sprays out, it
can cover your clothes or skin
and thus subject you to the risk
of fire and burns. Always remove
the fuel cap carefully and slowly.
If the cap is venting fuel or if you
hear a hissing sound, wait until
the condition stops before com-
pletely removing the cap.
• Do not "top off" after the nozzle
automatically shuts off when
refuelling.
• Always check that the fuel cap is
installed securely to prevent fuel
spillage in the event of an acci-
dent.
Page 144 of 332
Features of your vehicle
76 4
D280600AEN
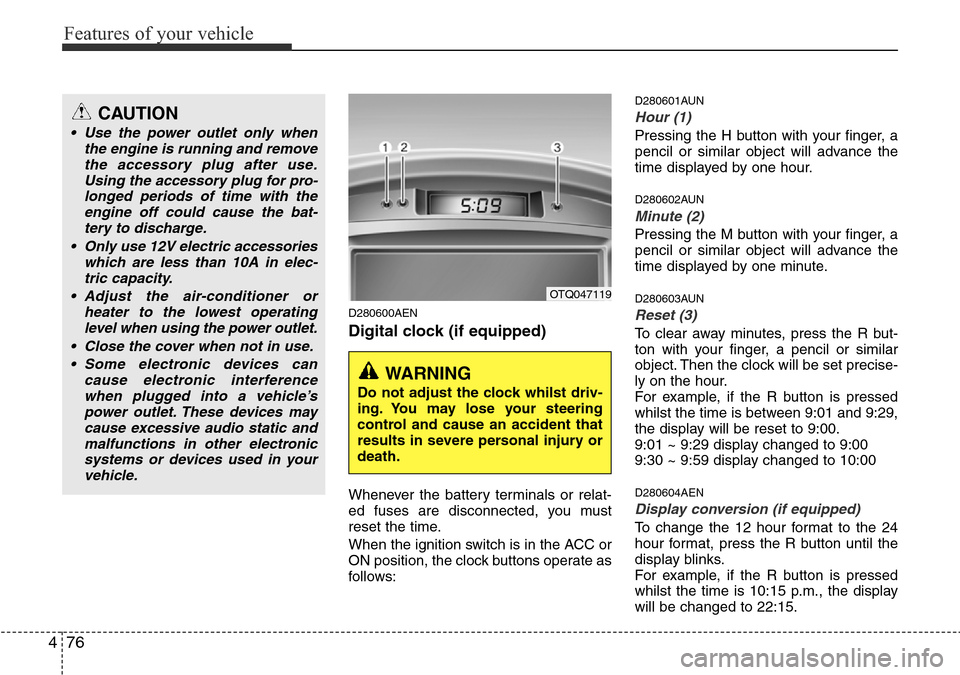
Digital clock (if equipped)
Whenever the battery terminals or relat-
ed fuses are disconnected, you must
reset the time.
When the ignition switch is in the ACC or
ON position, the clock buttons operate as
follows:
D280601AUN
Hour (1)
Pressing the H button with your finger, a
pencil or similar object will advance the
time displayed by one hour.
D280602AUN
Minute (2)
Pressing the M button with your finger, a
pencil or similar object will advance the
time displayed by one minute.
D280603AUN
Reset (3)
To clear away minutes, press the R but-
ton with your finger, a pencil or similar
object. Then the clock will be set precise-
ly on the hour.
For example, if the R button is pressed
whilst the time is between 9:01 and 9:29,
the display will be reset to 9:00.
9:01 ~ 9:29 display changed to 9:00
9:30 ~ 9:59 display changed to 10:00
D280604AEN
Display conversion (if equipped)
To change the 12 hour format to the 24
hour format, press the R button until the
display blinks.
For example, if the R button is pressed
whilst the time is 10:15 p.m., the display
will be changed to 22:15.
OTQ047119
WARNING
Do not adjust the clock whilst driv-
ing. You may lose your steering
control and cause an accident that
results in severe personal injury or
death.
CAUTION
• Use the power outlet only when
the engine is running and remove
the accessory plug after use.
Using the accessory plug for pro-
longed periods of time with the
engine off could cause the bat-
tery to discharge.
• Only use 12V electric accessories
which are less than 10A in elec-
tric capacity.
• Adjust the air-conditioner or
heater to the lowest operating
level when using the power outlet.
• Close the cover when not in use.
• Some electronic devices can
cause electronic interference
when plugged into a vehicle’s
power outlet. These devices may
cause excessive audio static and
malfunctions in other electronic
systems or devices used in your
vehicle.
Page 146 of 332
Features of your vehicle
78 4
✽NOTICE
• If you install an aftermarket HID
head lamp, your vehicle’s audio and
electronic device may malfunction.
• Prevent chemicals such as perfume,
cosmetic oil, sun cream, hand cleaner
and air freshener from contacting the
interior parts because they may cause
damage or discoloration.
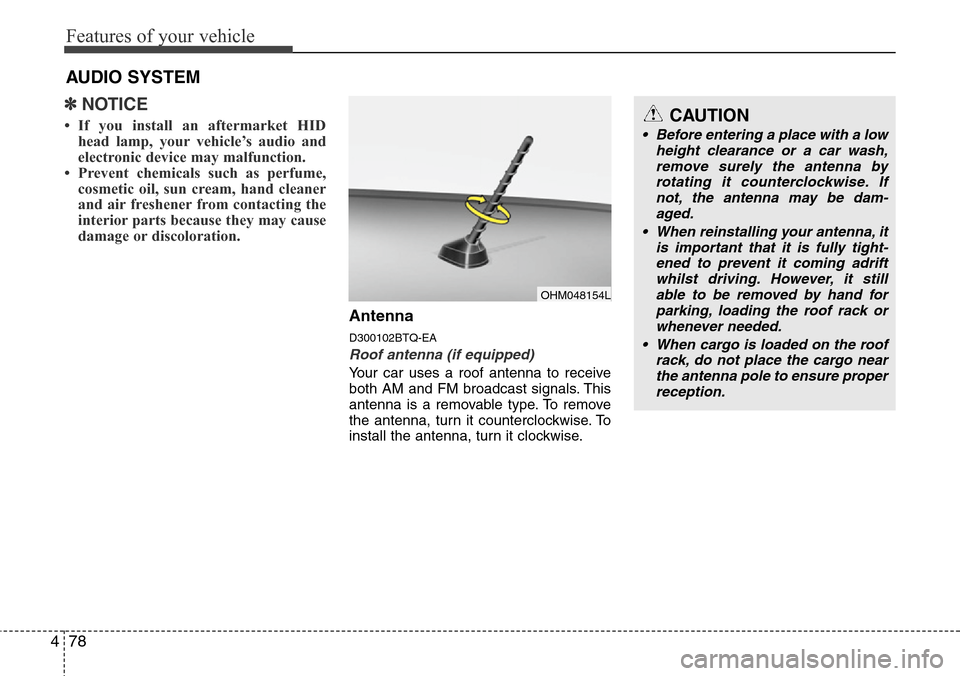
Antenna
D300102BTQ-EA
Roof antenna (if equipped)
Your car uses a roof antenna to receive
both AM and FM broadcast signals. This
antenna is a removable type. To remove
the antenna, turn it counterclockwise. To
install the antenna, turn it clockwise.
AUDIO SYSTEM
CAUTION
• Before entering a place with a low
height clearance or a car wash,
remove surely the antenna by
rotating it counterclockwise. If
not, the antenna may be dam-
aged.
• When reinstalling your antenna, it
is important that it is fully tight-
ened to prevent it coming adrift
whilst driving. However, it still
able to be removed by hand for
parking, loading the roof rack or
whenever needed.
• When cargo is loaded on the roof
rack, do not place the cargo near
the antenna pole to ensure proper
reception.
OHM048154L
Page 152 of 332
Features of your vehicle
84 4
1. POWER ON-OFF Control Knob
The radio unit may be operated when the
ignition key is in the “ACC” or “ON” posi-
tion. Press the knob to switch the power
on. The LCD shows the radio frequency
in the radio mode or the tape direction
indicator in the tape mode. To switch the
power off, press the knob again.
VOLUME Control
Rotate the knob clockwise to increase
the volume and counterclockwise to
reduce the volume.
AVC(Auto Volume Control) Feature
As the vehicle speed increases, outside
noise also increases.
To compensate for this, the audio unit
activates the AVC feature that increases
the audio units volume level automatical-
ly.
2. BAND Select Button
Pressing the button changes
the AM(MW, LW), FM1 and FM2 bands.
3. TUNE/MODE Select Knob
Rotate the knob clockwise to increase
the frequency and counterclockwise to
reduce the frequency.
Mode Select Knob
Pressing the MODE knob changes the
BASS, MIDDLE, TREBLE, FADER and
BALANCE mode.
The mode selected is shown on the dis-
play.
After selecting the each mode, rotate the
mode select knob clockwise or counter-
clockwise.
BASS Control
To increase the BASS, rotate the knob
clockwise, whilst to decrease the BASS,
rotate the knob counterclockwise.
MIDDLE Control
To increase the MIDDLE, rotate the knob
clockwise, whilst to decrease the MID-
DLE, rotate the knob counterclockwise.
TREBLE Control
To increase the TREBLE, rotate the knob
clockwise, whilst to decrease the TRE-
BLE, rotate the knob counterclockwise.
FADER Control
Rotate the control knob clockwise to
emphasize the rear speaker sound (front
speaker sound will be attenuated). When
the control knob is turned counterclock-
wise, the front speaker sound will be
emphasized (rear speaker sound will be
attenuated).
✽NOTICE
For the VAN type car, FADER control
feature is not supported(no rear speaker
equipped).
BALANCE Control
Rotate the knob clockwise to emphasize
the right speaker sound (left speaker
sound will be attenuated). When the con-
trol knob is turned counterclockwise, the
left speaker sound will be emphasized
(right speaker sound will be attenuated).
AM/FM
Page 157 of 332
489
Features of your vehicle
1. POWER ON-OFF Control Knob
The radio unit may be operated when the
ignition key is in the "ACC" or “ON” posi-
tion. Press the knob to switch the power
on. The LCD shows the radio frequency
in the radio mode, the tape direction indi-
cator in the tape mode or CD track in
either the CD mode or CD AUTO
CHANGER mode. To switch the power
off, press the knob again.
VOLUME Control
Rotate the knob clockwise to increase
the volume and counterclockwise to
reduce the volume.
AVC(Auto Volume Control) Feature
As the vehicle speed increases, outside
noise also increases.
To compensate for this, the audio unit
activates the AVC feature that increases
the audio units volume level automatical-
ly.
2. BAND Select Button
Pressing the FM/AM button changes the
AM(MW, LW), FM1 and FM2 bands. The
mode selected is shown on the display.
3. TUNE/AUDIO Control Knob
Rotate the knob clockwise to increase
the frequency and counterclockwise to
reduce the frequency.
AUDIO Control Knob
Pressing the AUDIO Mode select button
changes the BASS, MIDDLE, TREBLE,
FADER and BALANCE mode. The mode
selected is shown on the display.
BASS Control
To increase the BASS, rotate the knob
clockwise, whilst to decrease the BASS,
rotate the knob counterclockwise.
MIDDLE Control
To increase the MIDDLE, rotate the knob
clockwise, whilst to decrease the MID-
DLE, rotate the knob counterclockwise.
TREBLE Control
To increase the TREBLE, rotate the knob
clockwise, whilst to decrease the TRE-
BLE, rotate the knob counterclockwise.
FADER Control
Rotate the control knob clockwise to
emphasize the rear speaker sound (front
speaker sound will be attenuated). When
the control knob is turned counterclock-
wise, the front speaker sound will be
emphasized (rear speaker sound will be
attenuated).
✽NOTICE
For the VAN type car, FADER Control
feature is not supported(no rear speaker
equipped).
BALANCE Control
Rotate the knob clockwise to emphasize
the right speaker sound (left speaker
sound will be attenuated). When the con-
trol knob is turned counterclockwise, the
left speaker sound will be emphasized
(right speaker sound will be attenuated).
4. AUTO SEEK Select Button
(Automatic Channel Selection)
Press the AUTO SEEK select button.
When the side is pressed, the unit will
automatically tune to the next higher fre-
quency and when the side is pressed,
it will automatically tune to the next lower
frequency.
Page 158 of 332
Features of your vehicle
90 4
5. Best Station Memory (BSM)
Button
When the BSM button is pressed, the six
channels from the highest field intensity
are selected next and stored in memory.
The stations selected are stored in the
sequence frequency from the first preset
key.
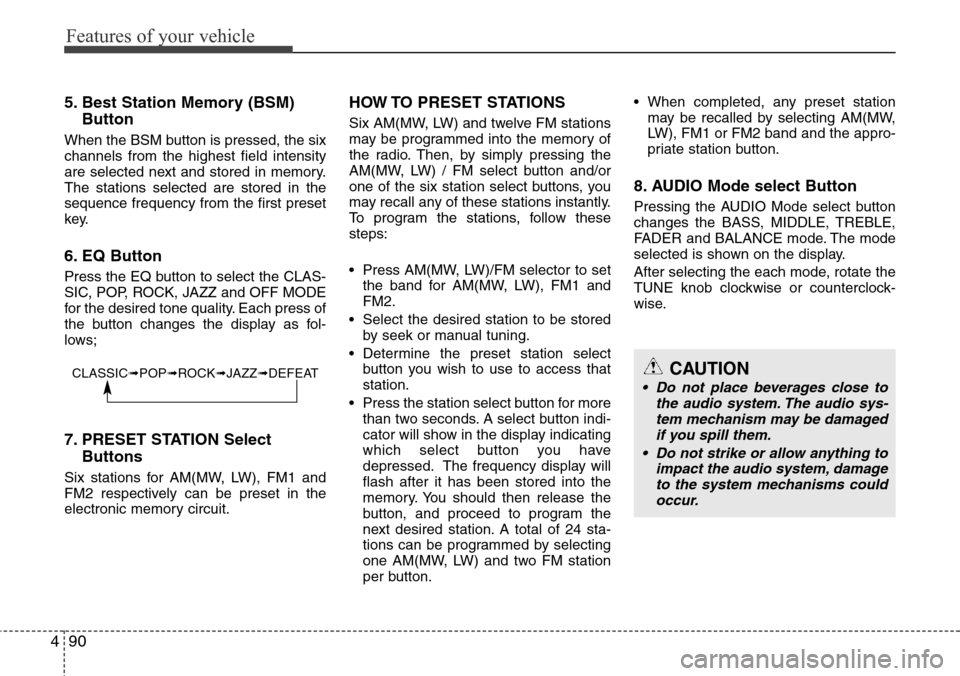
6. EQ Button
Press the EQ button to select the CLAS-
SIC, POP, ROCK, JAZZ and OFF MODE
for the desired tone quality. Each press of
the button changes the display as fol-
lows;
7. PRESET STATION Select
Buttons
Six stations for AM(MW, LW), FM1 and
FM2 respectively can be preset in the
electronic memory circuit.
HOW TO PRESET STATIONS
Six AM(MW, LW) and twelve FM stations
may be programmed into the memory of
the radio. Then, by simply pressing the
AM(MW, LW) / FM select button and/or
one of the six station select buttons, you
may recall any of these stations instantly.
To program the stations, follow these
steps:
• Press AM(MW, LW)/FM selector to set
the band for AM(MW, LW), FM1 and
FM2.
• Select the desired station to be stored
by seek or manual tuning.
• Determine the preset station select
button you wish to use to access that
station.
• Press the station select button for more
than two seconds. A select button indi-
cator will show in the display indicating
which select button you have
depressed. The frequency display will
flash after it has been stored into the
memory. You should then release the
button, and proceed to program the
next desired station. A total of 24 sta-
tions can be programmed by selecting
one AM(MW, LW) and two FM station
per button.• When completed, any preset station
may be recalled by selecting AM(MW,
LW), FM1 or FM2 band and the appro-
priate station button.
8. AUDIO Mode select Button
Pressing the AUDIO Mode select button
changes the BASS, MIDDLE, TREBLE,
FADER and BALANCE mode. The mode
selected is shown on the display.
After selecting the each mode, rotate the
TUNE knob clockwise or counterclock-
wise.
CLASSIC➟POP➟ROCK➟JAZZ➟DEFEATCAUTION
• Do not place beverages close to
the audio system. The audio sys-
tem mechanism may be damaged
if you spill them.
• Do not strike or allow anything to
impact the audio system, damage
to the system mechanisms could
occur.
Page 161 of 332
493
Features of your vehicle
7. MARK (Bookmark) Button
When the CD player unit is operating, the
desired track on the disc can be book-
marked by using the MARK button.
• Press the MARK button for more than
one second to bookmark the desired
track. "M" will be displayed on the LCD
and "MEMORY NO." will display for
approximately five seconds with a
beep sound. To play the bookmarked
tracks, press the MARK button within
one second and select the book-
marked track to play.
• To erase a bookmarked track, press
the MARK button for more than one
second. This will erase the bookmark
with a beep sound.
If you want to delete all tracks stored on
Mark Memory, press FILE SEARCH
knob in the Mark Play mode for more
than one second. You will hear a beep
sound and all tracks will be deleted from
Mark Memory with "MARK DELETE
ALL" displayed on the LCD.
✽NOTICE
Tracks stored on Mark Memory will be
automatically erased after you eject CDs
that contain those tracks.
8. RPT (Repeat) Button
• To repeat the track you are currently
listening to, press the RPT button. To
cancel, press it again. If it is pressed
for more than one second, it will repeat
all tracks within the currently played
CD.
• To repeat the music within currently
played folder, press the RPT button for
more than one second. Then it will
repeat in sequential order within the
currently played folder. To cancel,
press it again. (MP3 CD only)
• If you do not release RPT operation
when the track ends, it will automati-
cally be replayed. This process will
continue until you push the button
again.
9. RDM (Random) Button
• To listen to the music in random order,
press the RDM Button with a beep
sound for more than one second. To
cancel, press it again.
• To listen to the music within the cur-
rently played folder in random order,
press the RDM Button within one sec-
ond.To cancel, press it again within one
second. If it is pressed for more than
one second, it will be played in random
order within currently played CD (MP3
CD only).
10. FILE SEARCH Knob (TUNE
Select Knob)
• You can move through the track by
turning the FILE SEARCH knob clock-
wise or counterclockwise.
• After moving through the desired file,
press the FILE SEARCH knob to play-
back in the selected file.
• If you do not press the FILE SEARCH
knob within five seconds, the file
searching function will be released.
11. FLDR (FOLDER Search)
Button
• You can move through the folder by
pushing the FLDR button to up ( )
and down ( ).
• After moving the desired folder, press
the FILE SEARCH knob to play back in
the selected folder. If you do not press
the FILE SEARCH knob within 5 sec-
onds, the folder searching function will
be released. It is not operated in a sin-
gle folder.