low beam Hyundai H-100 Truck 2010 Owner's Manuals
[x] Cancel search | Manufacturer: HYUNDAI, Model Year: 2010, Model line: H-100 Truck, Model: Hyundai H-100 Truck 2010Pages: 207, PDF Size: 7.9 MB
Page 24 of 207

1
FEATURES OF YOUR HYUNDAI
23
1. Fuel Gauge
2. Coolant Temperature Gauge
3. Charging System Warning Light
4. Parking Brake/Low Brake Fluid Level Warning Light
5. Turn Signal Indicator Light
6. Seat Belt Warning Light
7. High Beam Indicator Light
8. Digital Clock
9. Malfunction Indicator Light (MIL) (If Installed) 10. Speedometer
11. Digital Clock Reset Switch
12. Door Ajar Warning Light
13. Low Oil Pressure Warning Light
14. Fuel Filter Warning Light
15. Odometer/Trip Odometer
16. Low Fuel Warning Light
17. Diesel Pre-heat Indicator Light
18. Trip Odometer Reset Switch
Page 26 of 207

1
FEATURES OF YOUR HYUNDAI
25
1. Tachometer
2. Charging System Warning Light
3. Parking Brake/Low Brake Fluid Level Warning Light
4. Turn Signal Indicator Light
5. Seat Belt Warning Light
6. High Beam Indicator Light
7. Digital Clock
8. Low Fuel Warning Light
9. Malfunction Indicator Light (MIL) (If Installed)
10. Speedometer 11. Digital Clock Reset Switch
12. Low Oil Pressure Warning Light
13. Door Ajar Warning Light
14. Fuel Filter Warning Light
15. Coolant Temperature Gauge
16. Odometer/Trip Odometer
17. Fuel Gauge
18. Diesel Pre-heat Indicator Light
19. Trip Odometer Reset Switch
Page 27 of 207
1FEATURES OF YOUR HYUNDAI
26WARNING AND INDICATOR LIGHTS
!
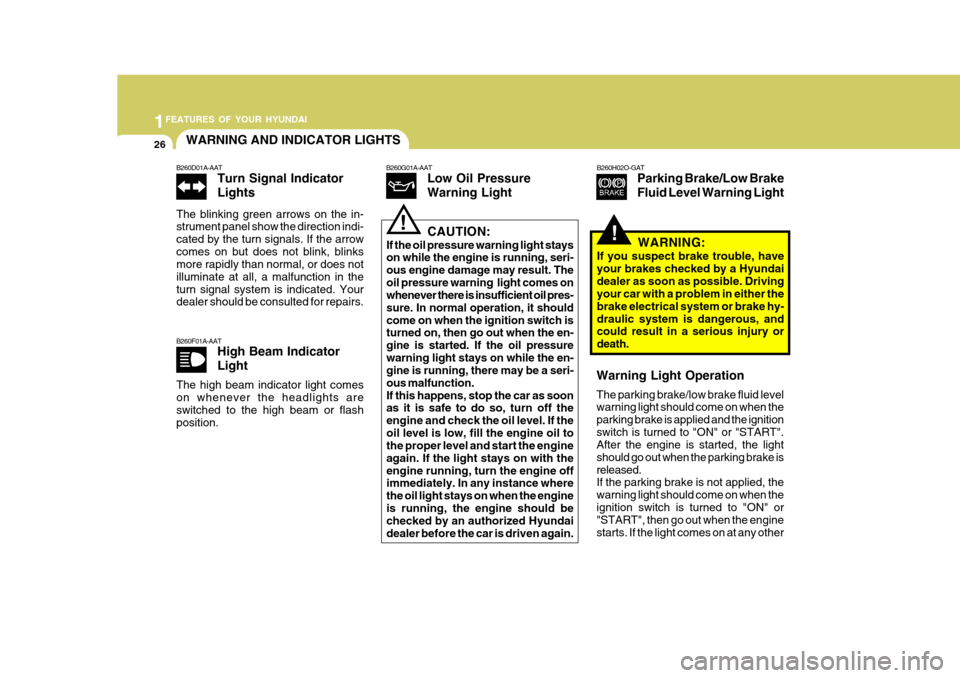
B260F01A-AAT
High Beam Indicator Light
The high beam indicator light comes on whenever the headlights are switched to the high beam or flash position. B260H02O-GAT
Parking Brake/Low Brake Fluid Level Warning Light
B260G01A-AAT
Low Oil PressureWarning Light
!CAUTION:
If the oil pressure warning light stays on while the engine is running, seri- ous engine damage may result. Theoil pressure warning light comes on whenever there is insufficient oil pres- sure. In normal operation, it shouldcome on when the ignition switch is turned on, then go out when the en- gine is started. If the oil pressurewarning light stays on while the en- gine is running, there may be a seri- ous malfunction.If this happens, stop the car as soon as it is safe to do so, turn off the
engine and check the oil level. If the oil level is low, fill the engine oil to the proper level and start the engine again. If the light stays on with theengine running, turn the engine off immediately. In any instance where the oil light stays on when the engineis running, the engine should be checked by an authorized Hyundai dealer before the car is driven again. WARNING:
If you suspect brake trouble, haveyour brakes checked by a Hyundaidealer as soon as possible. Driving your car with a problem in either the brake electrical system or brake hy-draulic system is dangerous, and could result in a serious injury or death.
B260D01A-AAT
Turn Signal Indicator Lights
The blinking green arrows on the in- strument panel show the direction indi- cated by the turn signals. If the arrowcomes on but does not blink, blinks more rapidly than normal, or does not illuminate at all, a malfunction in theturn signal system is indicated. Your dealer should be consulted for repairs.
Warning Light Operation The parking brake/low brake fluid level warning light should come on when the parking brake is applied and the ignitionswitch is turned to "ON" or "START". After the engine is started, the light should go out when the parking brake isreleased. If the parking brake is not applied, the warning light should come on when theignition switch is turned to "ON" or "START", then go out when the engine starts. If the light comes on at any other
Page 33 of 207
1FEATURES OF YOUR HYUNDAI
32
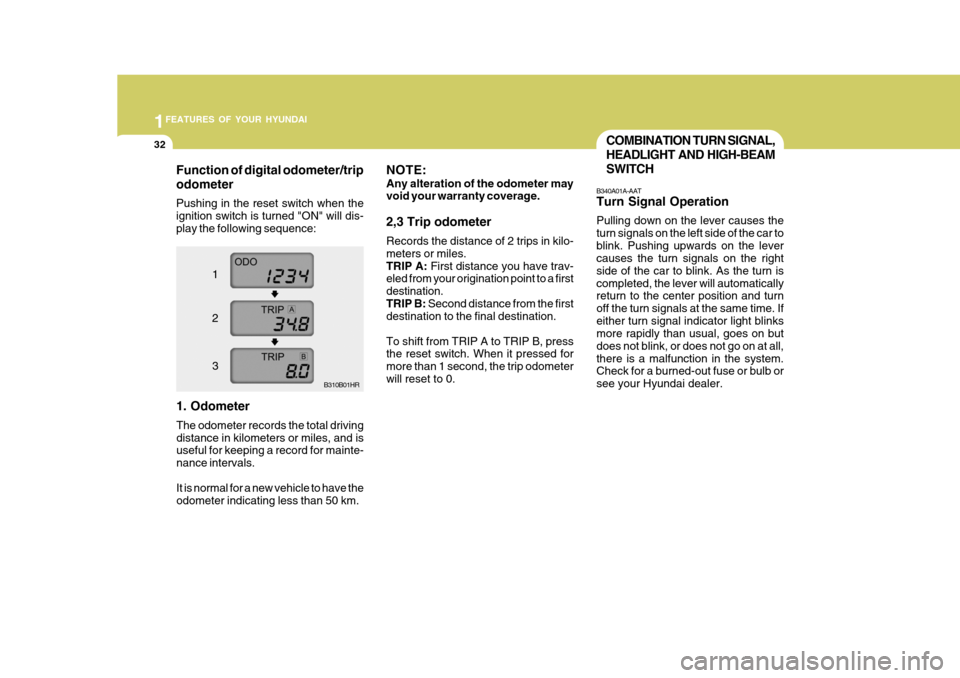
NOTE: Any alteration of the odometer may void your warranty coverage. 2,3 Trip odometer Records the distance of 2 trips in kilo- meters or miles.TRIP A: First distance you have trav-
eled from your origination point to a firstdestination.TRIP B: Second distance from the first
destination to the final destination. To shift from TRIP A to TRIP B, press the reset switch. When it pressed for more than 1 second, the trip odometerwill reset to 0.COMBINATION TURN SIGNAL, HEADLIGHT AND HIGH-BEAMSWITCH
B340A01A-AAT Turn Signal Operation Pulling down on the lever causes the turn signals on the left side of the car toblink. Pushing upwards on the lever causes the turn signals on the right side of the car to blink. As the turn iscompleted, the lever will automatically return to the center position and turn off the turn signals at the same time. Ifeither turn signal indicator light blinks more rapidly than usual, goes on but does not blink, or does not go on at all,there is a malfunction in the system. Check for a burned-out fuse or bulb or see your Hyundai dealer.
Function of digital odometer/trip odometer
Pushing in the reset switch when the ignition switch is turned "ON" will dis-play the following sequence:
1. Odometer The odometer records the total driving distance in kilometers or miles, and is useful for keeping a record for mainte- nance intervals. It is normal for a new vehicle to have the odometer indicating less than 50 km. B310B01HR
1 2 3
Page 35 of 207
1FEATURES OF YOUR HYUNDAI
34
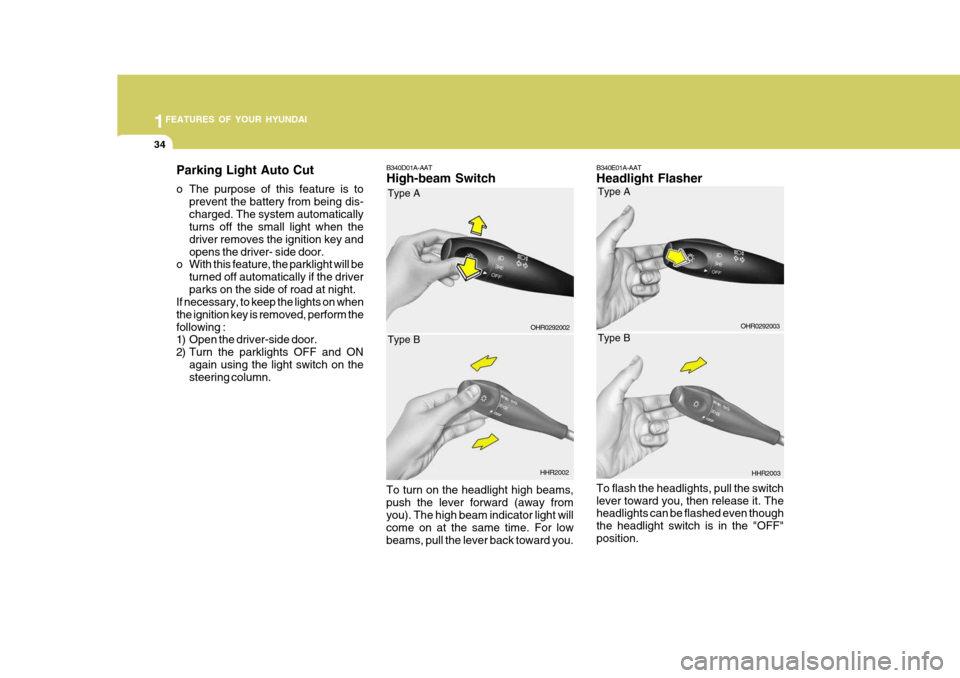
B340E01A-AAT Headlight Flasher To flash the headlights, pull the switch lever toward you, then release it. The headlights can be flashed even though the headlight switch is in the "OFF"position. HHR2003B340D01A-AAT High-beam Switch
To turn on the headlight high beams, push the lever forward (away fromyou). The high beam indicator light will come on at the same time. For low beams, pull the lever back toward you. HHR2002
OHR0292002
Type A Type BOHR0292003
Type A Type B
Parking Light Auto Cut
o The purpose of this feature is to
prevent the battery from being dis- charged. The system automatically turns off the small light when the driver removes the ignition key andopens the driver- side door.
o With this feature, the parklight will be
turned off automatically if the driverparks on the side of road at night.
If necessary, to keep the lights on whenthe ignition key is removed, perform thefollowing :
1) Open the driver-side door.
2) Turn the parklights OFF and ON
again using the light switch on the steering column.
Page 38 of 207
1
FEATURES OF YOUR HYUNDAI
37HEADLIGHT LEVELING DE- VICE SYSTEM
Switch position
0 1
Loading condition
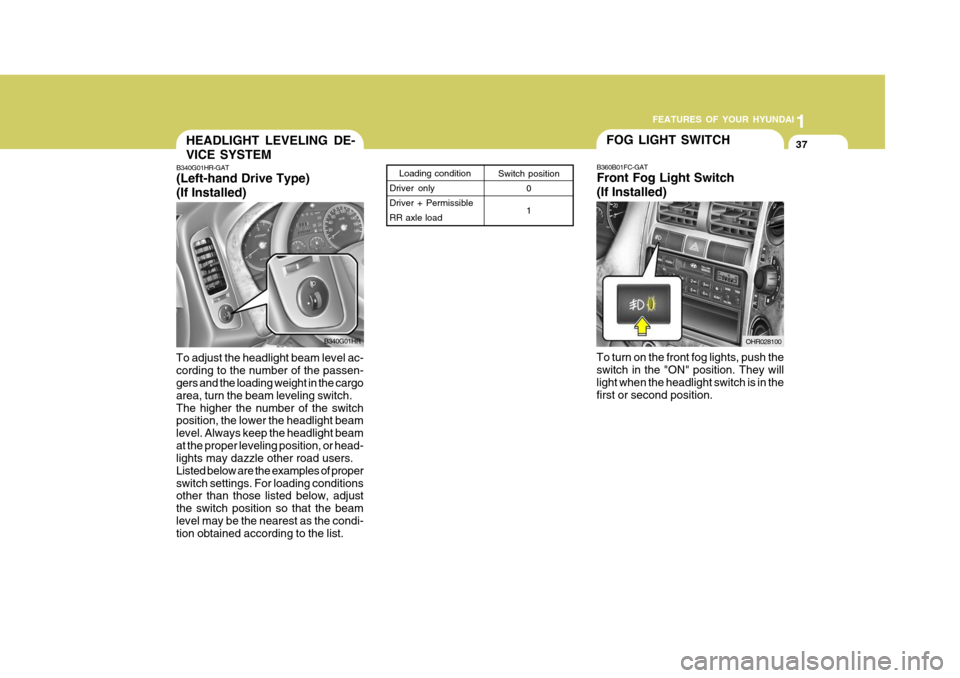
Driver only Driver + PermissibleRR axle loadB340G01HR-GAT (Left-hand Drive Type) (If Installed)
To adjust the headlight beam level ac- cording to the number of the passen- gers and the loading weight in the cargo area, turn the beam leveling switch.The higher the number of the switch position, the lower the headlight beam level. Always keep the headlight beamat the proper leveling position, or head- lights may dazzle other road users. Listed below are the examples of properswitch settings. For loading conditions other than those listed below, adjust the switch position so that the beamlevel may be the nearest as the condi- tion obtained according to the list. B340G01HR
FOG LIGHT SWITCH
OHR028100
B360B01FC-GAT Front Fog Light Switch (If Installed)
To turn on the front fog lights, push the switch in the "ON" position. They willlight when the headlight switch is in the first or second position.
Page 43 of 207
1FEATURES OF YOUR HYUNDAI
42
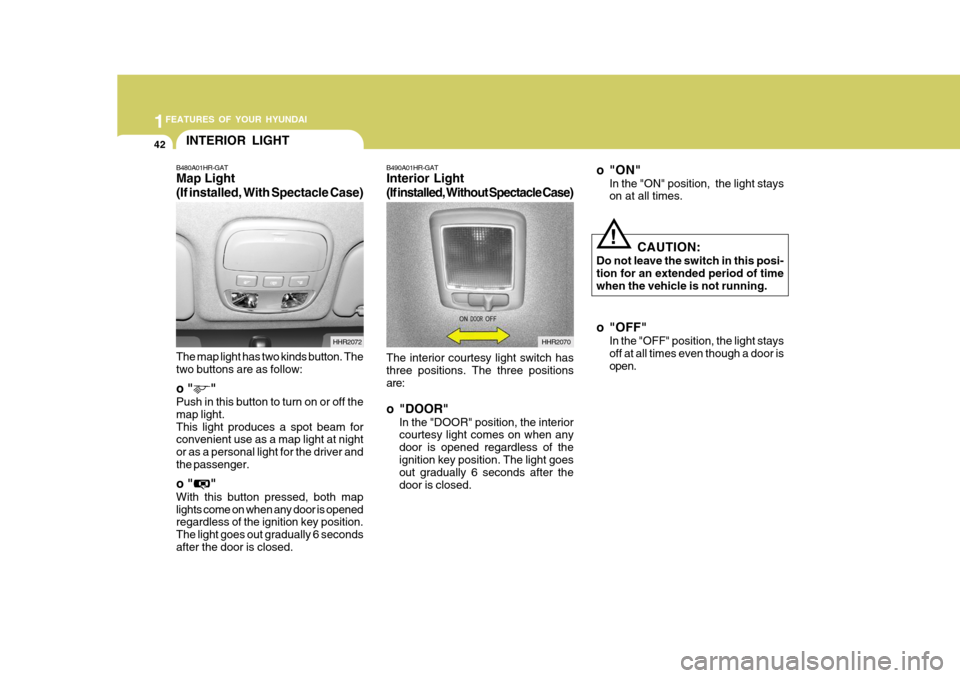
The interior courtesy light switch has three positions. The three positions are: o "DOOR"
In the "DOOR" position, the interior courtesy light comes on when any door is opened regardless of theignition key position. The light goes out gradually 6 seconds after the door is closed.
B490A01HR-GAT Interior Light
(If installed, Without Spectacle Case)
HHR2070
o"ON"
In the "ON" position, the light stays on at all times.
CAUTION:
Do not leave the switch in this posi- tion for an extended period of timewhen the vehicle is not running.
o "OFF" In the "OFF" position, the light stays off at all times even though a door isopen.
!
INTERIOR LIGHT
B480A01HR-GAT Map Light (If installed, With Spectacle Case) The map light has two kinds button. The two buttons are as follow: o " " Push in this button to turn on or off the map light.This light produces a spot beam for convenient use as a map light at night or as a personal light for the driver andthe passenger. o " " With this button pressed, both map lights come on when any door is opened regardless of the ignition key position. The light goes out gradually 6 secondsafter the door is closed. HHR2072
Page 118 of 207
2
DRIVING YOUR HYUNDAI
15USE OF LIGHTSHIGHER SPEED MOTORING
C180A01A-AAT Check your lights regularly for correct operation and always keep them clean. When driving during the day in condi- tions of poor visibility, it is helpful todrive with headlights on low beam. This enables you to be seen as well as to see.
C170A01A-AAT Pre-Trip Inspections 1. Tires: Adjust the tire inflation pressures to specification. Low tire inflation pres-sures will result in overheating and possible failure of the tires. Avoid using worn or damaged tireswhich may result in reduced traction or tire failure. NOTE: Never exceed the maximum tire in- flation pressure shown on the tires.
2. Fuel, engine coolant and
engine oil:
High speed travel consumes more fuel than urban motoring. Do not forget tocheck both engine coolant and engine oil. 3. Drive belt: A loose or damaged drive belt may result in overheating of the engine.TRAILER OR VEHICLE TOWING
C190A01HR-GAT If you are considering towing with your car, you should first check with your Province Department of Motor Vehicles to determine their legal requirements.Since laws vary from province to prov- ince, the requirements for towing trail- ers, cars, other types of vehicles, orapparatus may differ. Ask your Hyundai dealer for further details before towing.
! CAUTION
Do not do any towing with your car during its first 1,000 km (600 miles)in order to allow the engine to prop- erly break in. Failure to heed this caution may result in serious en-gine or transmission damage.
Page 187 of 207
6
DO-IT-YOURSELF MAINTENANCE
29
!WARNING:
o Do not smoke or have any other open flame near the vehicle while bleeding the fuel system.
o Be sure to carefully wipe away any
water drained out in this manner,because the fuel mixed in the wa- ter might be ignited and result in a fire.
HEADLIGHT AIMING ADJUSTMENT
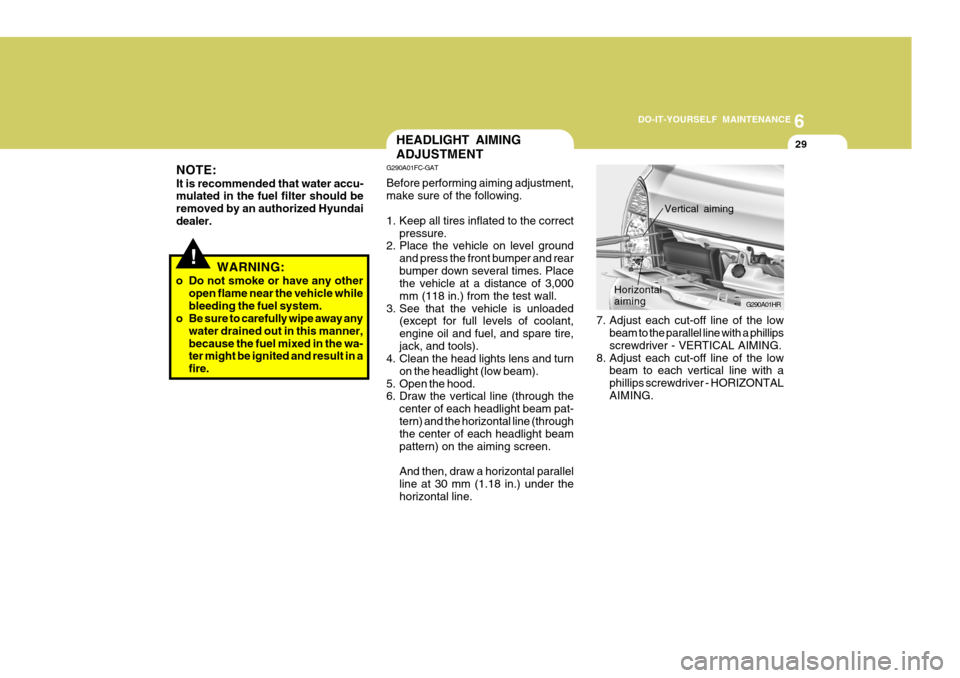
7. Adjust each cut-off line of the lowbeam to the parallel line with a phillips screwdriver - VERTICAL AIMING.
8. Adjust each cut-off line of the low beam to each vertical line with a phillips screwdriver - HORIZONTALAIMING. G290A01HR
Horizontal aiming
Vertical aiming
G290A01FC-GAT Before performing aiming adjustment, make sure of the following.
1. Keep all tires inflated to the correct
pressure.
2. Place the vehicle on level ground
and press the front bumper and rear bumper down several times. Place the vehicle at a distance of 3,000 mm (118 in.) from the test wall.
3. See that the vehicle is unloaded (except for full levels of coolant,engine oil and fuel, and spare tire,jack, and tools).
4. Clean the head lights lens and turn
on the headlight (low beam).
5. Open the hood.
6. Draw the vertical line (through the
center of each headlight beam pat- tern) and the horizontal line (through the center of each headlight beam pattern) on the aiming screen. And then, draw a horizontal parallel line at 30 mm (1.18 in.) under thehorizontal line.
NOTE: It is recommended that water accu- mulated in the fuel filter should be removed by an authorized Hyundaidealer.
Page 188 of 207
6 DO-IT-YOURSELF MAINTENANCE
30REPLACEMENT OF LIGHT BULBS
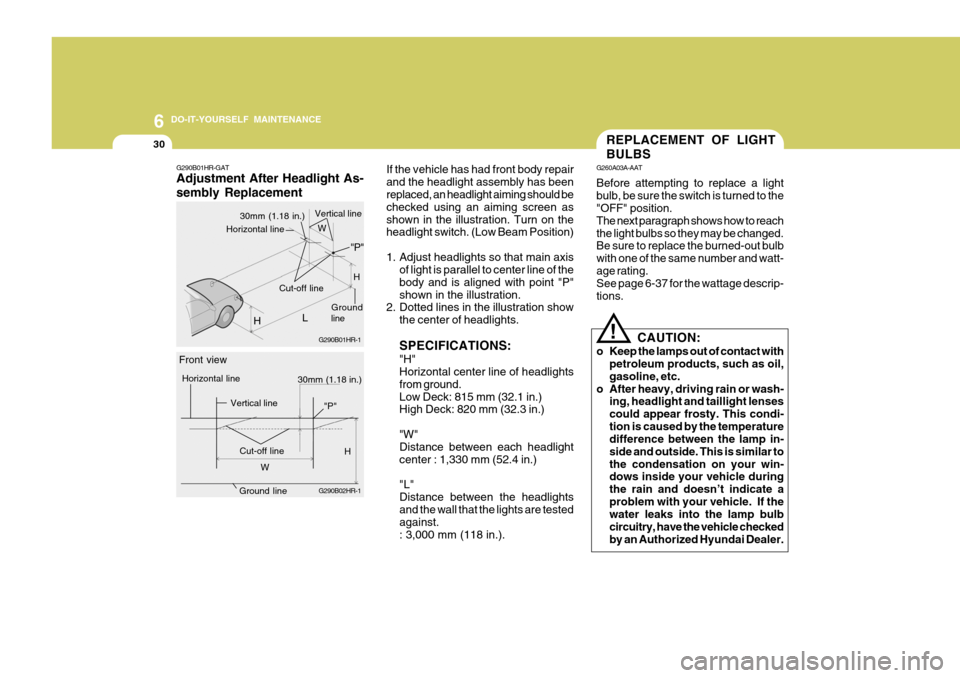
If the vehicle has had front body repair and the headlight assembly has been replaced, an headlight aiming should be checked using an aiming screen asshown in the illustration. Turn on the headlight switch. (Low Beam Position)
1. Adjust headlights so that main axis of light is parallel to center line of the body and is aligned with point "P"shown in the illustration.
2. Dotted lines in the illustration show
the center of headlights. SPECIFICATIONS: "H" Horizontal center line of headlights from ground.Low Deck: 815 mm (32.1 in.) High Deck: 820 mm (32.3 in.) "W" Distance between each headlight center : 1,330 mm (52.4 in.) "L" Distance between the headlightsand the wall that the lights are tested against. : 3,000 mm (118 in.). G260A03A-AAT Before attempting to replace a light bulb, be sure the switch is turned to the "OFF" position. The next paragraph shows how to reachthe light bulbs so they may be changed. Be sure to replace the burned-out bulb with one of the same number and watt-age rating. See page 6-37 for the wattage descrip- tions.
CAUTION:
o Keep the lamps out of contact with petroleum products, such as oil,gasoline, etc.
o After heavy, driving rain or wash- ing, headlight and taillight lensescould appear frosty. This condi-tion is caused by the temperature difference between the lamp in- side and outside. This is similar tothe condensation on your win- dows inside your vehicle during the rain and doesn’t indicate aproblem with your vehicle. If the water leaks into the lamp bulb circuitry, have the vehicle checkedby an Authorized Hyundai Dealer.
!
G290B01HR-GAT Adjustment After Headlight As- sembly Replacement
G290B01HR-1
H
Ground line
30mm (1.18 in.)
Vertical line
L
Cut-off line "P"
Horizontal line
G290B02HR-1
30mm (1.18 in.)
Front view
Horizontal line
Vertical line
Cut-off lineH
W H
W
Ground line
"P"