engine oil Hyundai H-100 Truck 2012 Owner's Guide
[x] Cancel search | Manufacturer: HYUNDAI, Model Year: 2012, Model line: H-100 Truck, Model: Hyundai H-100 Truck 2012Pages: 217, PDF Size: 9.37 MB
Page 160 of 217
6 DO-IT-YOURSELF MAINTENANCE
8
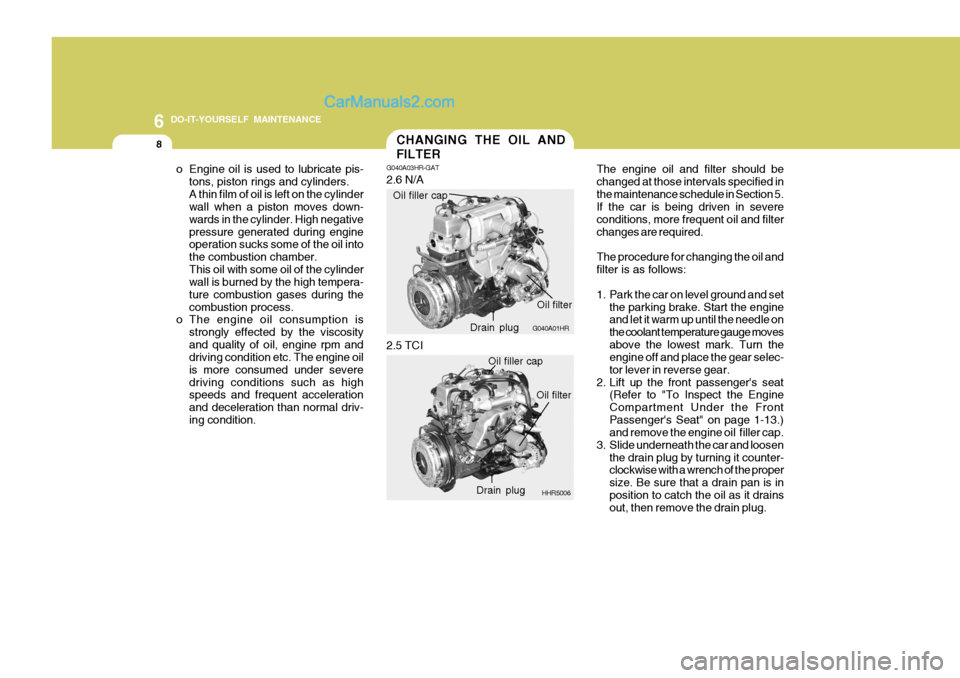
The engine oil and filter should be changed at those intervals specified inthe maintenance schedule in Section 5. If the car is being driven in severe conditions, more frequent oil and filterchanges are required. The procedure for changing the oil and filter is as follows:
1. Park the car on level ground and set
the parking brake. Start the engine and let it warm up until the needle on the coolant temperature gauge movesabove the lowest mark. Turn the engine off and place the gear selec- tor lever in reverse gear.
2. Lift up the front passenger's seat (Refer to "To Inspect the EngineCompartment Under the FrontPassenger's Seat" on page 1-13.) and remove the engine oil filler cap.
3. Slide underneath the car and loosen the drain plug by turning it counter-clockwise with a wrench of the proper size. Be sure that a drain pan is inposition to catch the oil as it drains out, then remove the drain plug.
CHANGING THE OIL AND FILTER
o Engine oil is used to lubricate pis- tons, piston rings and cylinders. A thin film of oil is left on the cylinder wall when a piston moves down- wards in the cylinder. High negativepressure generated during engine operation sucks some of the oil into the combustion chamber.This oil with some oil of the cylinder wall is burned by the high tempera-
ture combustion gases during thecombustion process.
o The engine oil consumption is
strongly effected by the viscosityand quality of oil, engine rpm and driving condition etc. The engine oil is more consumed under severedriving conditions such as high speeds and frequent acceleration and deceleration than normal driv-ing condition. G040A03HR-GAT 2.6 N/A
G040A01HR
Oil filler capDrain plugOil filter
2.5 TCI
HHR5006
Oil filler cap
Drain plug Oil filter
Page 161 of 217

6
DO-IT-YOURSELF MAINTENANCE
9
!WARNING:
Be very careful when draining the engine oil as it may be hot enough to burn you!
4. When the oil has stopped draining, replace the drain plug using a new gasket and retighten by turning it clockwise.
Tightening torque : 3.5 ~ 4.5 kgf.m
5. Remove the oil filter by turning it counterclockwise with a oil filter wrench of the proper size. A certainamount of oil will come out when you remove the filter. So be sure to have your drain pan in place underneathit.
6. Install a new oil filter in accordance
with the instructions on the carton oron the filter itself. Do not over-tighten.
Tightening torque: 2.3 ~ 2.5 kgf.m Be sure that the mounting surfaceon the engine is clean and that theold gasket is removed completely. Lubricate the new gasket on the filter with clean engine oil beforeinstallation.
!
7. Remove the engine oil level dipstick.
8. Refill the crankcase with the recom- mended engine oil slowly. Refer to the specification in chapter 9 for engine oil capacity.
CAUTION:
o Slowly pour the recommended oil by using a funnel. Do not overfill not to damage the engine.
o Do not spill engine oil, when add- ing or changing engine oil. If youdrop the engine oil on the engine room, wipe it off immediately. 9. Start the engine and check to be
sure no oil is leaking from the drainplug or oil filter.
10. Shut off the engine and recheck the
oil level.
NOTE: Always dispose of used engine oil in an environmentally acceptable man- ner. It is suggested that it be placedin a sealed container and taken to a service station for reclamation. Do not pour the oil on the ground or putit into the household trash.
WARNING:
Used motor oil may cause irritationor cancer of the skin if left in contact with the skin for prolonged periods of time. Wash your hands thoroughlywith soap and warm water as soon as possible after handling used oil.
!
Page 166 of 217

6 DO-IT-YOURSELF MAINTENANCE
14
To install the wiper blade
HHR5050
1. Put a new wiper blade onto the wiper arm and lower the wiper blade at the level of the wiper arm as shown in thedrawing.
2. Raise the wiper blade lightly and pull
up it. HHR5049
CAUTION:
o Do not operate the wipers on dry glass. This can result in more rapid wear of the wiper blades and may scratch the glass.
o Keep the blade rubber out of con- tact with petroleum products suchas engine oil, gasoline, etc.! G080B01HR-GAT Replacing the Wiper Blades To replace the wiper blades, raise the wiper to the vertical. To remove the wiper blade
1. Push down the wiper blade with the
locking clip (1) pressed to detach it from the wiper arm. HHR5048
(1)
Page 168 of 217
6 DO-IT-YOURSELF MAINTENANCE
16
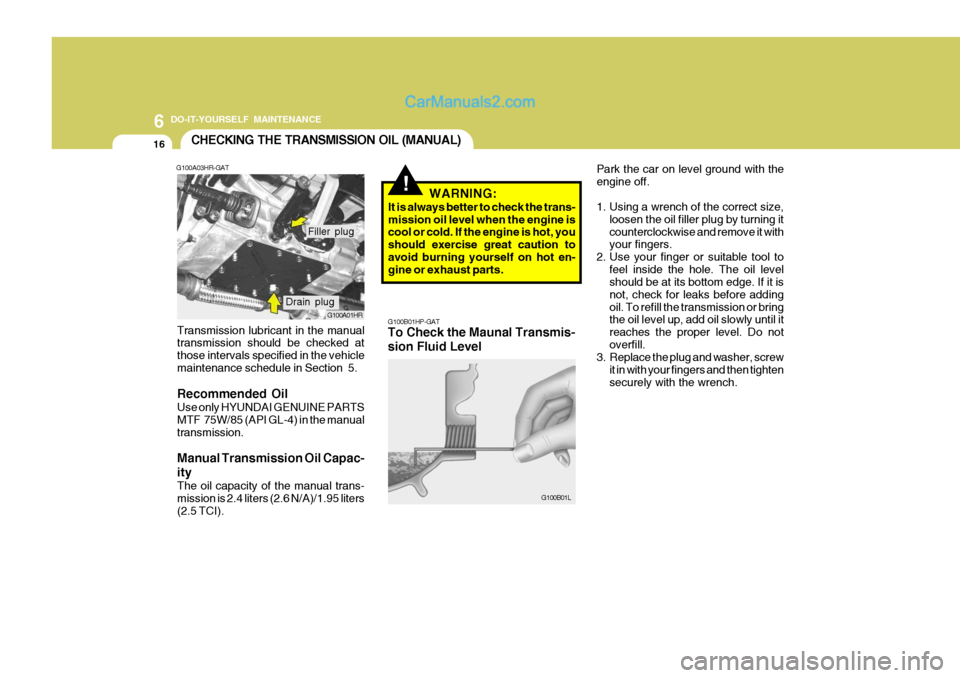
Park the car on level ground with the engine off.
1. Using a wrench of the correct size,loosen the oil filler plug by turning it counterclockwise and remove it with your fingers.
2. Use your finger or suitable tool to
feel inside the hole. The oil levelshould be at its bottom edge. If it is not, check for leaks before addingoil. To refill the transmission or bring the oil level up, add oil slowly until it reaches the proper level. Do notoverfill.
3. Replace the plug and washer, screw
it in with your fingers and then tightensecurely with the wrench.CHECKING THE TRANSMISSION OIL (MANUAL)
G100A03HR-GAT
G100A01HR
Transmission lubricant in the manual transmission should be checked at those intervals specified in the vehiclemaintenance schedule in Section 5. Recommended Oil Use only HYUNDAI GENUINE PARTS MTF 75W/85 (API GL-4) in the manualtransmission. Manual Transmission Oil Capac- ity The oil capacity of the manual trans- mission is 2.4 liters (2.6 N/A)/1.95 liters(2.5 TCI).
Drain plug Filler plug
!
G100B01HP-GAT To Check the Maunal Transmis- sion Fluid Level
G100B01L
WARNING:
It is always better to check the trans- mission oil level when the engine is cool or cold. If the engine is hot, you should exercise great caution toavoid burning yourself on hot en- gine or exhaust parts.
Page 169 of 217
6
DO-IT-YOURSELF MAINTENANCE
17CHECKING THE REAR AXLE OIL
!
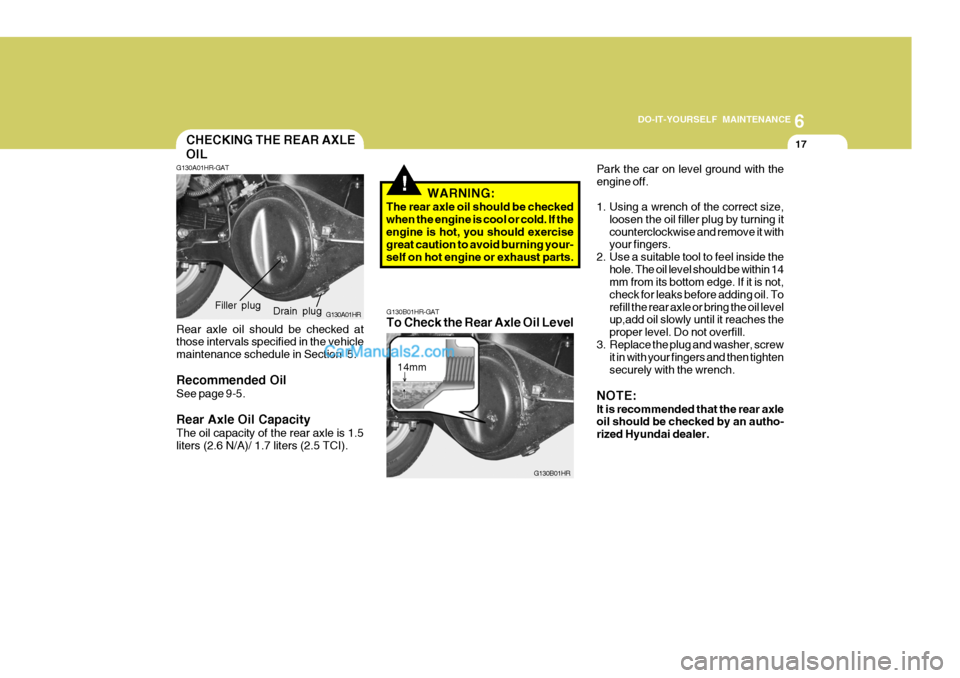
G130A01HR-GAT
G130A01HR
Rear axle oil should be checked at those intervals specified in the vehicle maintenance schedule in Section 5. Recommended Oil See page 9-5. Rear Axle Oil Capacity The oil capacity of the rear axle is 1.5 liters (2.6 N/A)/ 1.7 liters (2.5 TCI). WARNING:
The rear axle oil should be checkedwhen the engine is cool or cold. If the engine is hot, you should exercise great caution to avoid burning your-self on hot engine or exhaust parts.
Drain plug
Filler plug
G130B01HR-GAT To Check the Rear Axle Oil Level
G130B01HR
14mmPark the car on level ground with the engine off.
1. Using a wrench of the correct size,
loosen the oil filler plug by turning it counterclockwise and remove it with your fingers.
2. Use a suitable tool to feel inside the
hole. The oil level should be within 14mm from its bottom edge. If it is not, check for leaks before adding oil. Torefill the rear axle or bring the oil level up,add oil slowly until it reaches the proper level. Do not overfill.
3. Replace the plug and washer, screw it in with your fingers and then tightensecurely with the wrench.
NOTE: It is recommended that the rear axle oil should be checked by an autho- rized Hyundai dealer.
Page 175 of 217
6
DO-IT-YOURSELF MAINTENANCE
23
CAUTION:
When replacing a fusible link, never use anything but a new fusible link with the same or lower amperagerating. Never use a piece of wire or a higher-rated fusible link. This could result in serious damage andcreate a fire hazard.!
!WARNING:
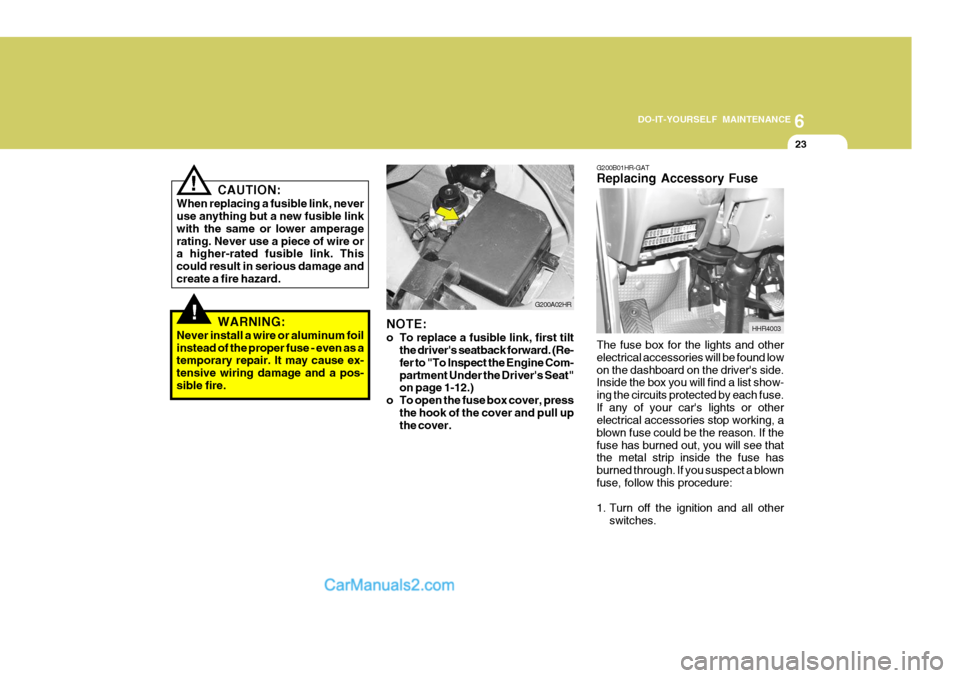
Never install a wire or aluminum foil instead of the proper fuse - even as a temporary repair. It may cause ex- tensive wiring damage and a pos-sible fire.NOTE:
o To replace a fusible link, first tilt the driver's seatback forward. (Re- fer to "To Inspect the Engine Com-partment Under the Driver's Seat" on page 1-12.)
o To open the fuse box cover, press the hook of the cover and pull upthe cover. G200A02HR
G200B01HR-GAT Replacing Accessory Fuse The fuse box for the lights and other electrical accessories will be found lowon the dashboard on the driver's side. Inside the box you will find a list show- ing the circuits protected by each fuse.If any of your car's lights or other electrical accessories stop working, a blown fuse could be the reason. If thefuse has burned out, you will see that the metal strip inside the fuse has burned through. If you suspect a blownfuse, follow this procedure:
1. Turn off the ignition and all other
switches. HHR4003
Page 180 of 217

6 DO-IT-YOURSELF MAINTENANCE
28
G350B01HR-GAT BLEEDING THE FUEL SYSTEM
The fuel system should be bled to remove air as described in the illustra-tion if the fuel supply is exhausted during travel, when the fuel filter is replaced, or if the vehicle is not used fora long time.
1. Loosen the air plug at the upper part of the fuel filter.
NOTE: The fuel filter is located under the driver's seat. To bleed the fuel sys- tem, first tilt the driver's seatback forward. (Refer to "To Inspect theEngine Compartment Under the Driver's Seat." on page 1-12.) HHR4046
2. Pump the hand pump until there are
no more bubbles in the fuel coming out of the air plug. When doing this,place a cloth around the air plug to prevent the escaping fuel from spew- ing about.
3. Tighten the air plug when there are no more bubbles in the fuel.
4. Continue pumping until the hand
pump becomes stiff.
5. Finally, check to be sure that there is
no leakage of fuel.If in doubt, consult your nearest au- thorized HYUNDAI dealer. HHR4047
FUEL FILTER
G240A01A-AAT POWER STEERING HOSES It is suggested that you check the power steering hose connections for fluid leakage at regular intervals. The power steering hoses should be re-placed if there is severe surface crack- ing, scuffing or worn spots. Deteriora- tion of the hose could cause prema-ture failure.
It is due to a power steering fluidcharacteristic in extremely cold con-ditions. Recommended Fluid Use PSF-3 type fluid NOTE: Do not start the engine when the power steering oil reservoir is empty.
Page 182 of 217

6 DO-IT-YOURSELF MAINTENANCE
30
!WARNING:
o Do not smoke or have any other open flame near the vehicle while bleeding the fuel system.
o Be sure to carefully wipe away any
water drained out in this manner,because the fuel mixed in the wa- ter might be ignited and result in a fire.
HEADLIGHT AIMING ADJUSTMENT
7. Adjust each cut-off line of the lowbeam to the parallel line with a phillips screwdriver - VERTICAL AIMING.
8. Adjust each cut-off line of the low beam to each vertical line with a phillips screwdriver - HORIZONTALAIMING. G290A01HR
Horizontal aiming
Vertical aiming
G290A01FC-GAT Before performing aiming adjustment, make sure of the following.
1. Keep all tires inflated to the correct
pressure.
2. Place the vehicle on level ground
and press the front bumper and rear bumper down several times. Place the vehicle at a distance of 3,000 mm (118 in.) from the test wall.
3. See that the vehicle is unloaded (except for full levels of coolant,engine oil and fuel, and spare tire,jack, and tools).
4. Clean the head lights lens and turn
on the headlight (low beam).
5. Open the hood.
6. Draw the vertical line (through the
center of each headlight beam pat- tern) and the horizontal line (through the center of each headlight beam pattern) on the aiming screen. And then, draw a horizontal parallel line at 30 mm (1.18 in.) under thehorizontal line.
NOTE: It is recommended that water accu- mulated in the fuel filter should be removed by an authorized Hyundaidealer.
Page 211 of 217

9
VEHICLE SPECIFICATIONS
5
Items
ENGINE OIL (DIESEL) Recommends ENGINE OIL CONSUMPTION MANUAL TRANSMISSION OIL POWER STEERING OIL COOLANT BRAKE FLUID FRONT, REAR WHEEL BEARING REAR AXLE OIL A2.5
LUBRICATION CHART
Recommended in field
API CF-4 or ABOVE, ACEA B2 or B3 API service CF-4 or above, ACEA B4 NORMAL DRIVING CONDITION SEVERE DRIVING CONDITION HYUNDAI GENUINE PARTS MTF 75W/85 (API GL-4)HYUNDAI GENUINE PARTS MTF 75W/85 (API GL-4) API service GL-4 SAE 75W/85 PSF-3HIGH QUALITY ETHYLENE GLYCOL BASE FOR ALUMINUM RADIATOR DOT 3, DOT 4 or equivalentSAE J310a, MULTI-PURPOSE GREASE NLGI-2 or equivalent SAE 90 (-30°C ~ 30°C) SAE 140 (ABOVE 30°C)
API GL-5 SAE 80 (BELOW -30°C)
J080A04HR-GAT
Quantity (liter)
Engine Oil : 5.7 at Oil Pan : 5.1 at Oil Filter : 0.6
7.4 Max. 1L/1,500 Km Max. 1L/1,000 Km 2.41.95 3.0 0.8 8 As required As required 2.6 N/A : 1.5 2.5 TCI/A2.5 : 1.7
API GL-4
2.6 N/A 2.5 TCI
2.6 N/A 2.5 TCI A2.5
Page 214 of 217
10
INDEX
3
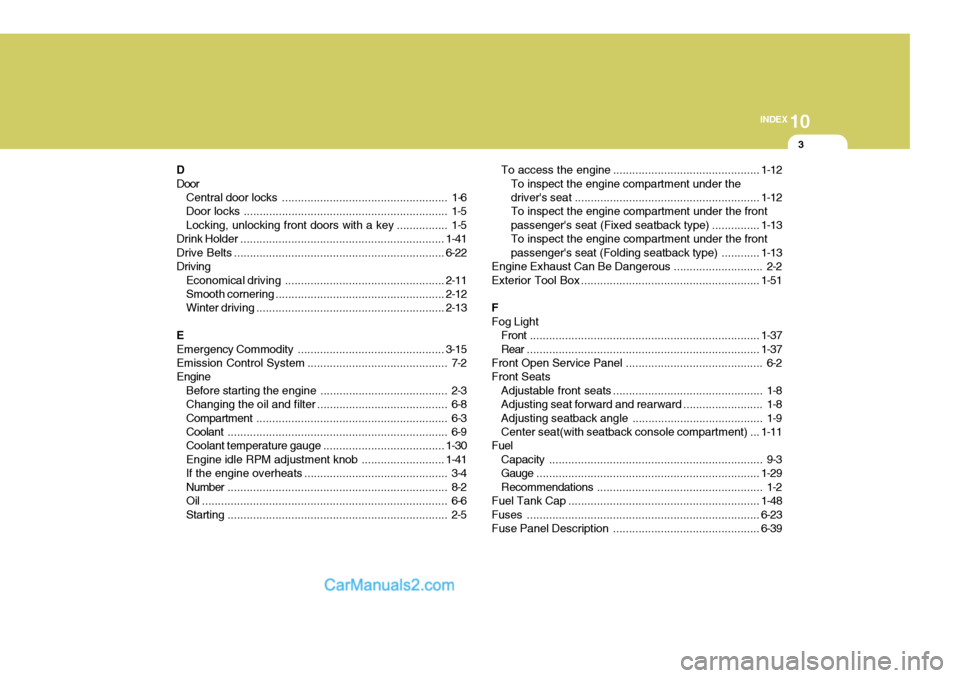
D Door Central door locks .................................................... 1-6
Door locks ................................................................ 1-5Locking, unlocking front doors with a key ................ 1-5
Drink Holder ................................................................ 1-41
Drive Belts .................................................................. 6-22
Driving Economical driving .................................................. 2-11
Smooth corneri ng ..................................................... 2-12
Winter driving ........................................................... 2-13
E
Emergency Commodity .............................................. 3-15
Emission Contro l System ............................................ 7-2
Engine
Before starting the engine ........................................ 2-3
Changing the oil and filter ......................................... 6-8Compartment ............................................................ 6-3
Coolant ..................................................................... 6-9
Coolant temperature gauge ......................................1-30
Engine idle RPM adjustment knob ..........................1-41
If the engine overheats ............................................. 3-4
Number ..................................................................... 8-2
Oil ............................................................................. 6-6Starting ..................................................................... 2-5 To access the
engine .............................................. 1-12
To inspect the engine compartment under the
driver's seat .......................................................... 1-12
To inspect the engine compartment under the frontpassenger's seat (Fixed seatback type) ............... 1-13
To inspect the engine compartment under the frontpassenger's seat (Fol ding seatback type) ............ 1-13
Engine Exhaust Can Be Dangerous ............................ 2-2
Exterior Tool Box ........................................................ 1-51
FFog Light Front ........................................................................ 1-37
Rear ......................................................................... 1-37
Front Open Service Panel ........................................... 6-2
Front Seats Adjustable front seats ............................................... 1-8
Adjusting seat forward and rearward ......................... 1-8
Adjusting seatback angle ......................................... 1-9
Center seat(with seatback console compartment) ... 1-11
Fuel
Capacity ................................................................... 9-3
Gauge ...................................................................... 1-29
Recommendations .................................................... 1-2
Fuel Tank Cap ............................................................ 1-48
Fuses ......................................................................... 6-23
Fuse Panel Description .............................................. 6-39