HYUNDAI I30 2023 Owners Manual
Manufacturer: HYUNDAI, Model Year: 2023, Model line: I30, Model: HYUNDAI I30 2023Pages: 533, PDF Size: 59.13 MB
Page 101 of 533
3-18
Convenient features of your vehicle
(Continued)
• When the vehicle is stationary, if
you turn the steering wheel all the
way to the left or right continuously,
the steering wheel effort increases.
This is not a system malfunction. As
time passes, the steering wheel
effort will return to its normal con-
dition.
Tilt steering / Telescopic steer-
ing
Information
After adjustment, sometimes the lock-
release lever may not lock the steering
wheel.
It is not a malfunction. This occurs
when two gears are not engaged cor-
rectly. In this case, adjust the steering
wheel again and then lock the steering
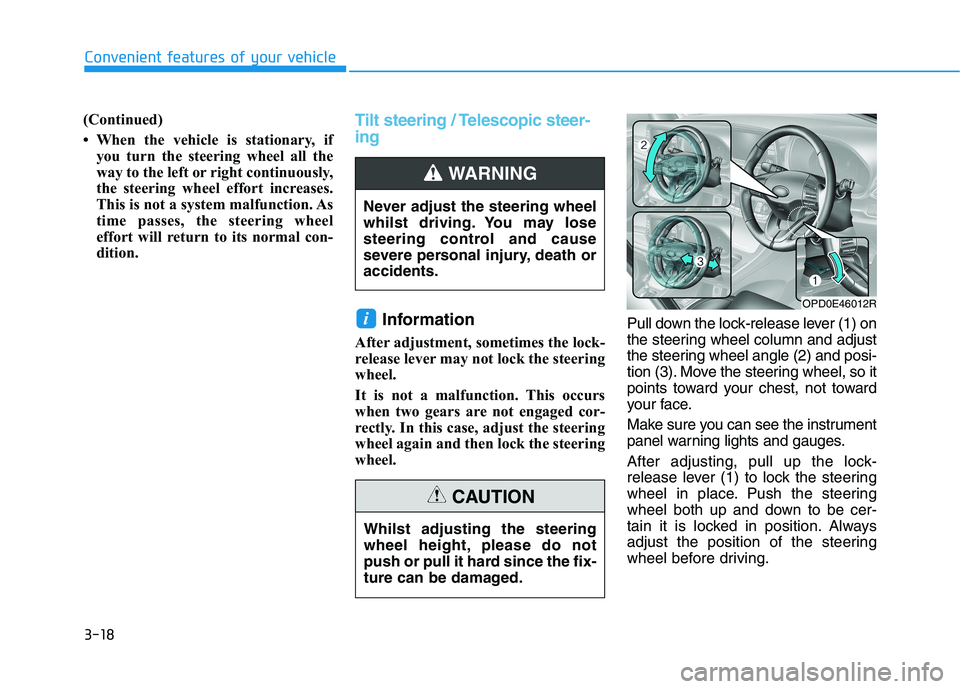
wheel.Pull down the lock-release lever (1) on
the steering wheel column and adjust
the steering wheel angle (2) and posi-
tion (3). Move the steering wheel, so it
points toward your chest, not toward
your face.
Make sure you can see the instrument
panel warning lights and gauges.
After adjusting, pull up the lock-
release lever (1) to lock the steering
wheel in place. Push the steering
wheel both up and down to be cer-
tain it is locked in position. Always
adjust the position of the steering
wheel before driving.
i
Never adjust the steering wheel
whilst driving. You may lose
steering control and cause
severe personal injury, death or
accidents.
WARNING
OPD0E46012R
Whilst adjusting the steering
wheel height, please do not
push or pull it hard since the fix-
ture can be damaged.
CAUTION
Page 102 of 533
3-19
Convenient features of your vehicle
3
Horn
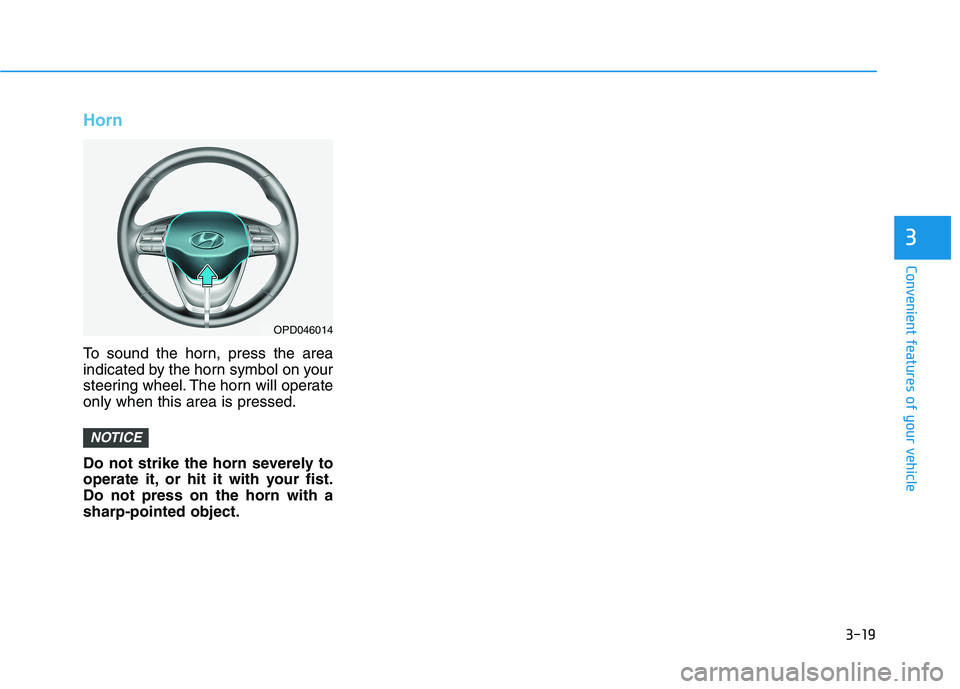
To sound the horn, press the area
indicated by the horn symbol on your
steering wheel. The horn will operate
only when this area is pressed.
Do not strike the horn severely to
operate it, or hit it with your fist.
Do not press on the horn with a
sharp-pointed object.
NOTICE
OPD046014
Page 103 of 533
3-20
Convenient features of your vehicle
Inside rearview mirror
Before you start driving, adjust the
rearview mirror to centre the view
through the rear window.
When cleaning the mirror, use a
paper towel or similar material
dampened with glass cleaner. Do
not spray glass cleaner directly on
the mirror as that may cause the
liquid cleaner to enter the mirror
housing.
Day/night rearview mirror
(if equipped)
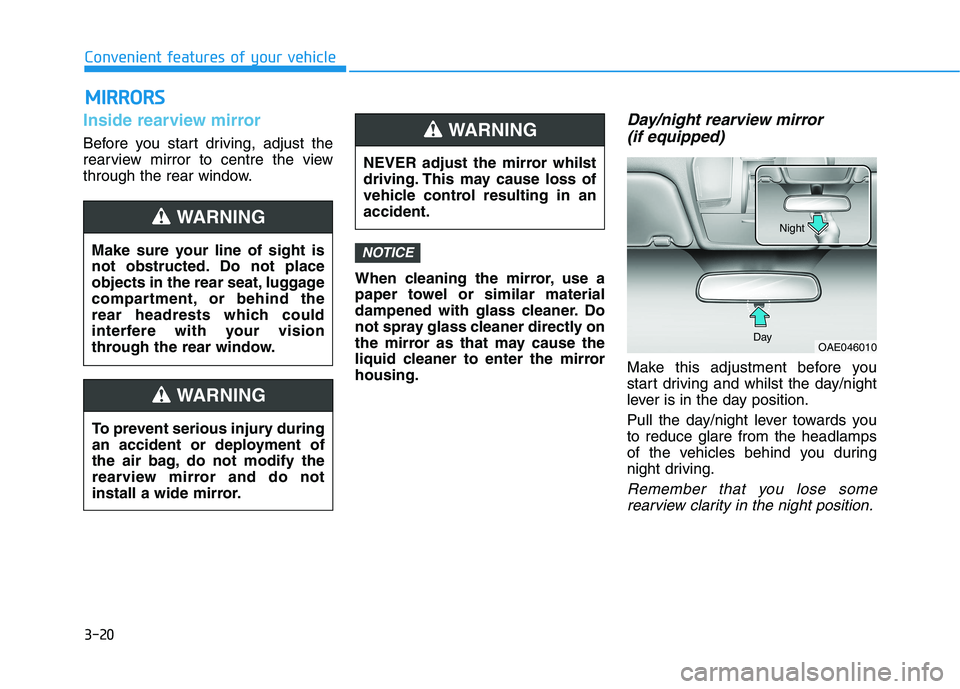
Make this adjustment before you
start driving and whilst the day/night
lever is in the day position.
Pull the day/night lever towards you
to reduce glare from the headlamps
of the vehicles behind you during
night driving.
Remember that you lose some
rearview clarity in the night position.
NOTICE
NEVER adjust the mirror whilst
driving. This may cause loss of
vehicle control resulting in an
accident.
WARNING
OAE046010 DayNight
M MI
IR
RR
RO
OR
RS
S
Make sure your line of sight is
not obstructed. Do not place
objects in the rear seat, luggage
compartment, or behind the
rear headrests which could
interfere with your vision
through the rear window.
WARNING
To prevent serious injury during
an accident or deployment of
the air bag, do not modify the
rearview mirror and do not
install a wide mirror.
WARNING
Page 104 of 533
3-21
Convenient features of your vehicle
3
Electric Chromic Mirror (ECM)
(if equipped)
The electric rearview mirror automati-
cally controls the glare from the head-
lamp of the vehicle behind you in
nighttime or low light driving condi-
tions.
When the engine is running, the
glare is automatically controlled by
the sensor mounted in the rearview
mirror. The sensor detects the light
level around the vehicle, and auto-
matically adjusts to control the head-
lamp glare from vehicles behind you.
Whenever the shift lever is placed in
R (Reverse), the mirror will automat-
ically go to the brightest setting in
order to improve the driver's view
behind the vehicle.
To operate the electric rearview
mirror:
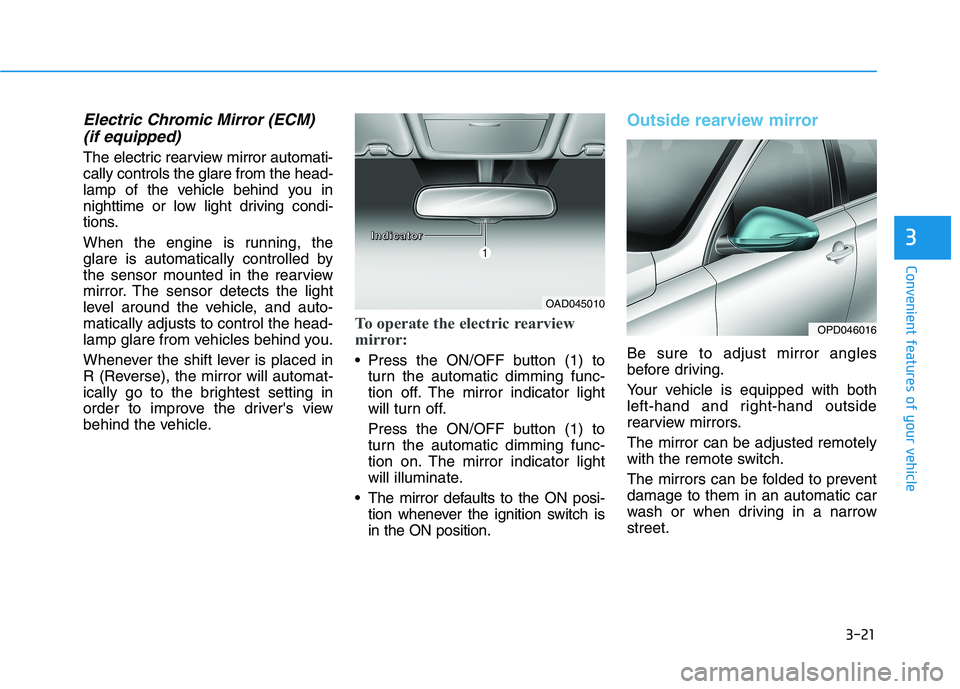
Press the ON/OFF button (1) to
turn the automatic dimming func-
tion off. The mirror indicator light
will turn off.
Press the ON/OFF button (1) to
turn the automatic dimming func-
tion on. The mirror indicator light
will illuminate.
The mirror defaults to the ON posi-
tion whenever the ignition switch is
in the ON position.
Outside rearview mirror
Be sure to adjust mirror angles
before driving.
Your vehicle is equipped with both
left-hand and right-hand outside
rearview mirrors.
The mirror can be adjusted remotely
with the remote switch.
The mirrors can be folded to prevent
damage to them in an automatic car
wash or when driving in a narrow
street.
OAD045010
OPD046016
I I I I
n n n n
d d d d
i i i i
c c c c
a a a a
t t t t
o o o o
r r r r
Page 105 of 533
3-22
Convenient features of your vehicle
Do not scrape ice off the mirror
face; this may damage the sur-
face of the glass.
If the mirror is jammed with ice,
do not adjust the mirror by
force. Use an approved spray
de-icer (not radiator antifreeze)
spray, or a sponge or soft cloth
with very warm water, or move
the vehicle to a warm place and
allow the ice to melt.
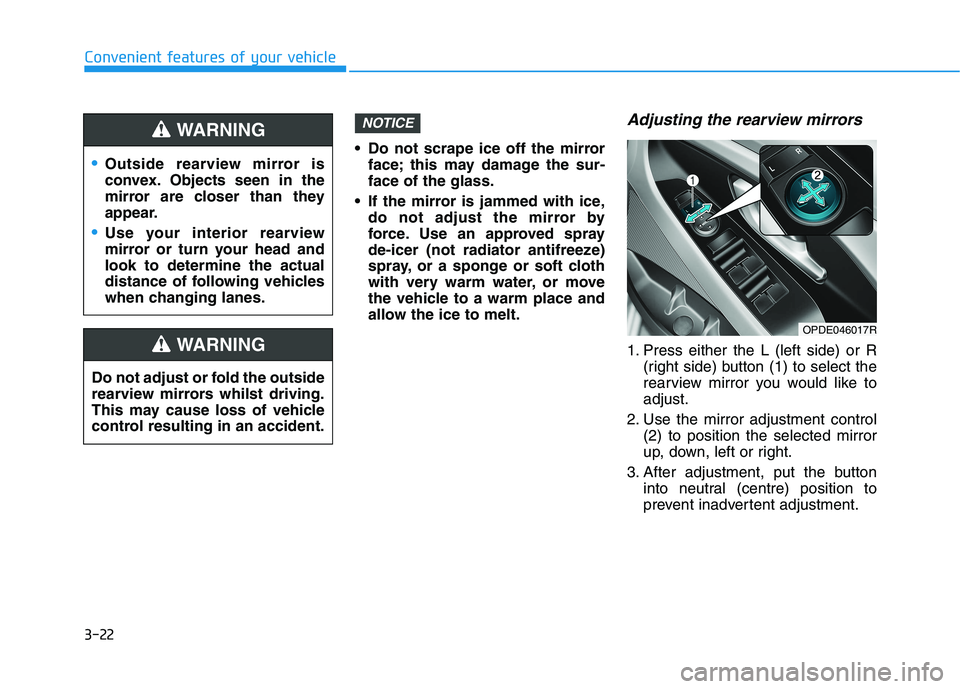
Adjusting the rearview mirrors
1. Press either the L (left side) or R
(right side) button (1) to select the
rearview mirror you would like to
adjust.
2. Use the mirror adjustment control
(2) to position the selected mirror
up, down, left or right.
3. After adjustment, put the button
into neutral (centre) position to
prevent inadvertent adjustment.
NOTICE
OPDE046017R
Outside rearview mirror is
convex. Objects seen in the
mirror are closer than they
appear.
Use your interior rearview
mirror or turn your head and
look to determine the actual
distance of following vehicles
when changing lanes.
WARNING
Do not adjust or fold the outside
rearview mirrors whilst driving.
This may cause loss of vehicle
control resulting in an accident.
WARNING
Page 106 of 533
3-23
Convenient features of your vehicle
3
The mirrors stop moving when
they reach the maximum adjust-
ing angles, but the motor contin-
ues to operate whilst the switch
is pressed. Do not press the
switch longer than necessary,
the motor may be damaged.
Do not attempt to adjust the out-
side rearview mirror by hand
otherwise the motor may be
damaged.
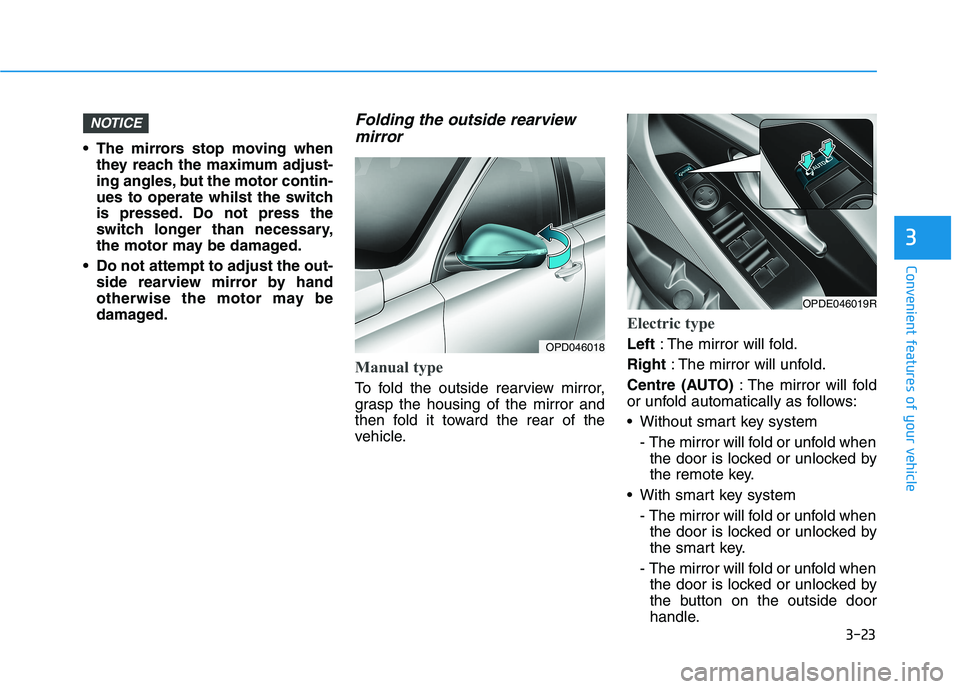
Folding the outside rearview
mirror
Manual type
To fold the outside rearview mirror,
grasp the housing of the mirror and
then fold it toward the rear of the
vehicle.
Electric type
Left: The mirror will fold.
Right: The mirror will unfold.
Centre (AUTO): The mirror will fold
or unfold automatically as follows:
Without smart key system
- The mirror will fold or unfold when
the door is locked or unlocked by
the remote key.
With smart key system
- The mirror will fold or unfold when
the door is locked or unlocked by
the smart key.
- The mirror will fold or unfold when
the door is locked or unlocked by
the button on the outside door
handle.
NOTICE
OPD046018
OPDE046019R
Page 107 of 533
3-24
The electric type outside rearview
mirror operates even though the
ignition switch is in the OFF posi-
tion. However, to prevent unnec-
essary battery discharge, do not
adjust the mirrors longer than
necessary whilst the engine is not
running.
Do not fold the electric type out-
side rearview mirror by hand. It
could cause motor failure.
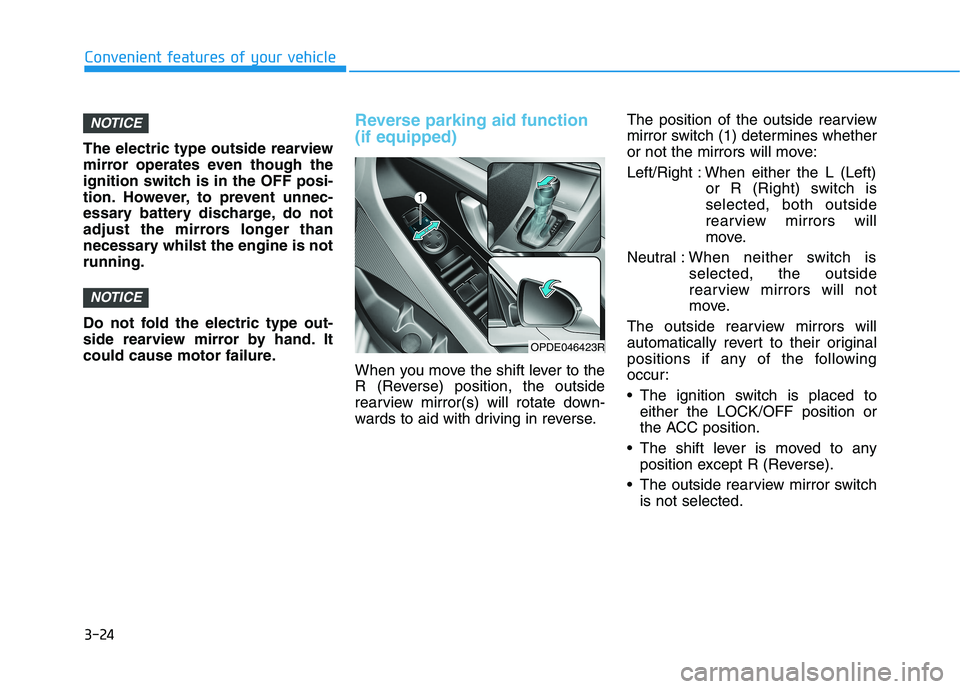
Reverse parking aid function
(if equipped)
When you move the shift lever to the
R (Reverse) position, the outside
rearview mirror(s) will rotate down-
wards to aid with driving in reverse.The position of the outside rearview
mirror switch (1) determines whether
or not the mirrors will move:
Left/Right : When either the L (Left)
or R (Right) switch is
selected, both outside
rearview mirrors will
move.
Neutral :When neither switch is
selected, the outside
rearview mirrors will not
move.
The outside rearview mirrors will
automatically revert to their original
positions if any of the following
occur:
The ignition switch is placed to
either the LOCK/OFF position or
the ACC position.
The shift lever is moved to any
position except R (Reverse).
The outside rearview mirror switch
is not selected.
NOTICE
NOTICE
Convenient features of your vehicle
OPDE046423R
Page 108 of 533
3-25
Convenient features of your vehicle
3
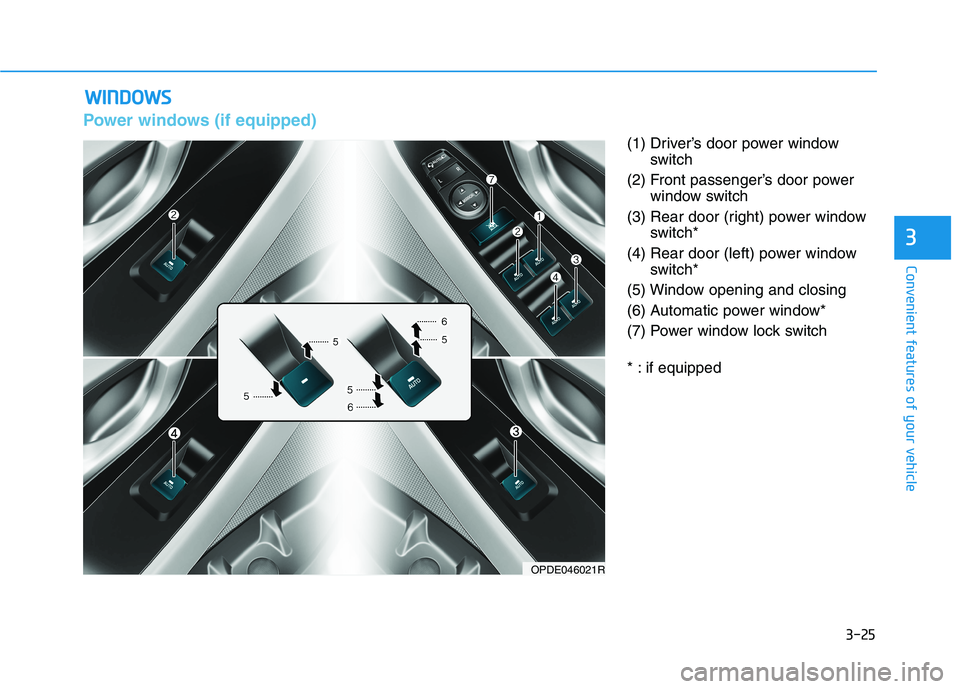
Power windows (if equipped)
(1) Driver’s door power window
switch
(2) Front passenger’s door power
window switch
(3) Rear door (right) power window
switch*
(4) Rear door (left) power window
switch*
(5) Window opening and closing
(6) Automatic power window*
(7) Power window lock switch
* : if equipped
W WI
IN
ND
DO
OW
WS
S
OPDE046021R
Page 109 of 533
3-26
Convenient features of your vehicle
The ignition switch must be in the ON
position to be able to raise or lower
the windows. Each door has a Power
Window switch to control that door's
window. The driver has a Power
Window Lock switch which can block
the operation of passenger windows.
The power windows will operate for
approximately 30 seconds after the
ignition switch is placed in the ACC
or OFF position. However, if the front
doors are opened, the Power
Windows cannot be operated even
within the 30 second period.
Information
• In cold and wet climates, power win-
dows may not work properly due to
freezing conditions.
• Whilst driving with the rear win-
dows down or with the sunroof (if
equipped) opened (or partially
opened), your vehicle may demon-
strate a wind buffeting or pulsation
noise. This noise is normal and can
be reduced or eliminated by taking
the following actions. If the noise
occurs with one or both of the rear
windows down, partially lower both
front windows approximately 2.5
cm. If you experience the noise with
the sunroof open, slightly close the
sunroof.
Window opening and closing
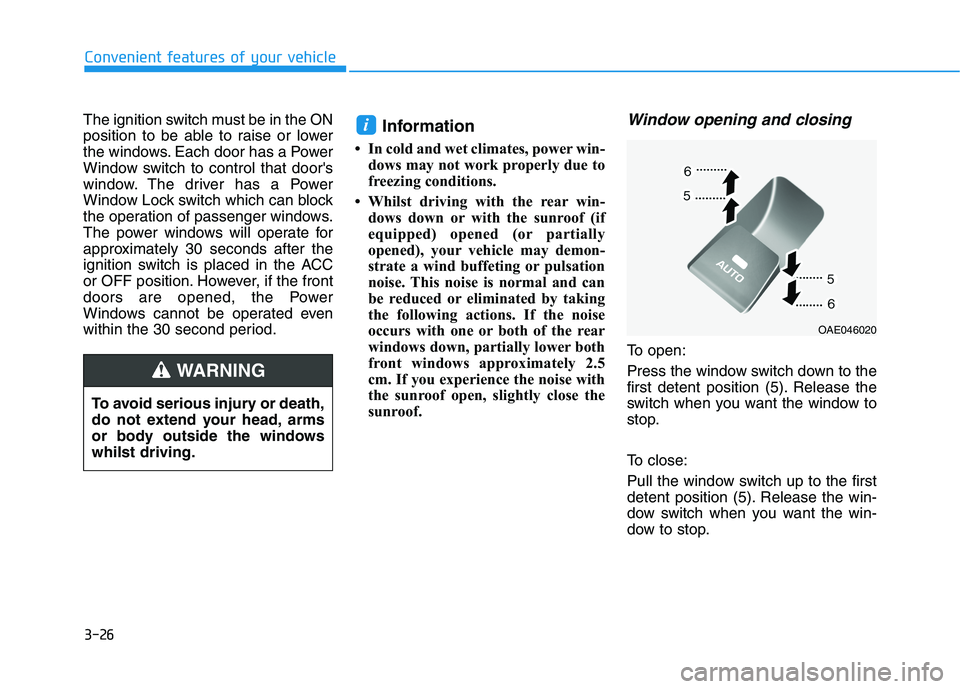
To open:
Press the window switch down to the
first detent position (5). Release the
switch when you want the window to
stop.
To close:
Pull the window switch up to the first
detent position (5). Release the win-
dow switch when you want the win-
dow to stop.
i
To avoid serious injury or death,
do not extend your head, arms
or body outside the windows
whilst driving.
WARNING
OAE046020
Page 110 of 533
3-27
Convenient features of your vehicle
3
Auto down window (if equipped)
Pressing the power window switch
momentarily to the second detent
position (6) completely lowers the
window even when the switch is
released. To stop the window at the
desired position whilst the window is
in operation, pull up or press down
and release the switch.
Auto up/down window
(if equipped)
Pressing or pulling up the power win-
dow switch momentarily to the sec-
ond detent position (6) completely
lowers or lifts the window even when
the switch is released. To stop the
window at the desired position whilst
the window is in operation, pull up or
press down and release the switch.
To reset the power windows
If the power windows do not operate
normally, the automatic power win-
dow system must be reset as follows:
1. Place the ignition switch to the ON
position.
2. Close the window and continue
pulling up on the power window
switch for at least one second.
If the power windows do not operate
properly after resetting, it is recom-
mended that the system be checked
by an authorised HYUNDAI dealer.
Automatic reverse (if equipped)
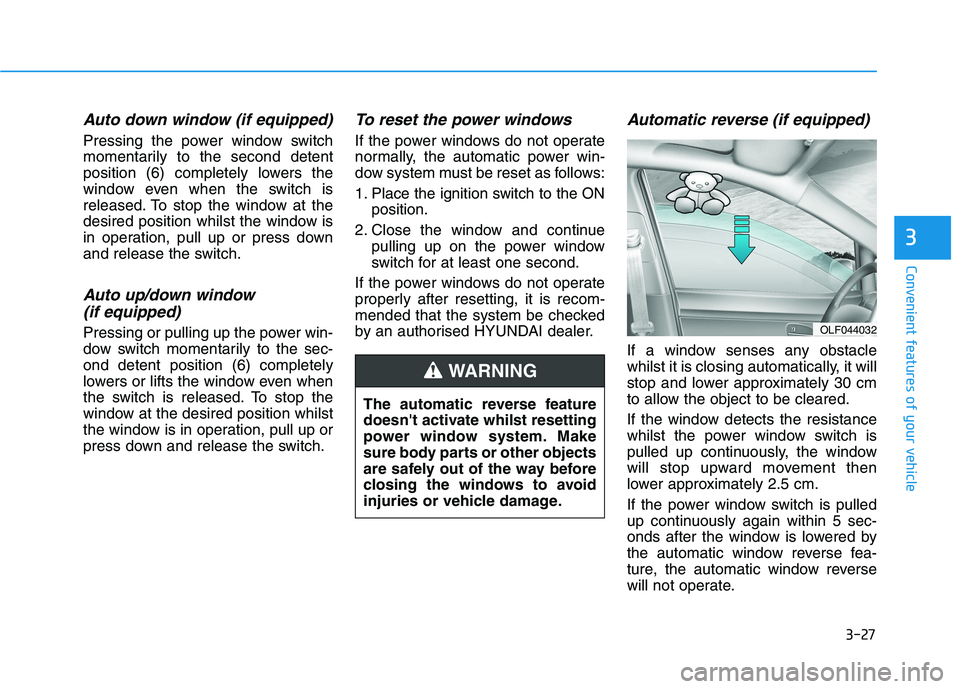
If a window senses any obstacle
whilst it is closing automatically, it will
stop and lower approximately 30 cm
to allow the object to be cleared.
If the window detects the resistance
whilst the power window switch is
pulled up continuously, the window
will stop upward movement then
lower approximately 2.5 cm.
If the power window switch is pulled
up continuously again within 5 sec-
onds after the window is lowered by
the automatic window reverse fea-
ture, the automatic window reverse
will not operate.
OLF044032
The automatic reverse feature
doesn't activate whilst resetting
power window system. Make
sure body parts or other objects
are safely out of the way before
closing the windows to avoid
injuries or vehicle damage.
WARNING