HYUNDAI I30 2023 Owners Manual
Manufacturer: HYUNDAI, Model Year: 2023, Model line: I30, Model: HYUNDAI I30 2023Pages: 533, PDF Size: 59.13 MB
Page 161 of 533
3-78
Convenient features of your vehicle
Fuel economy
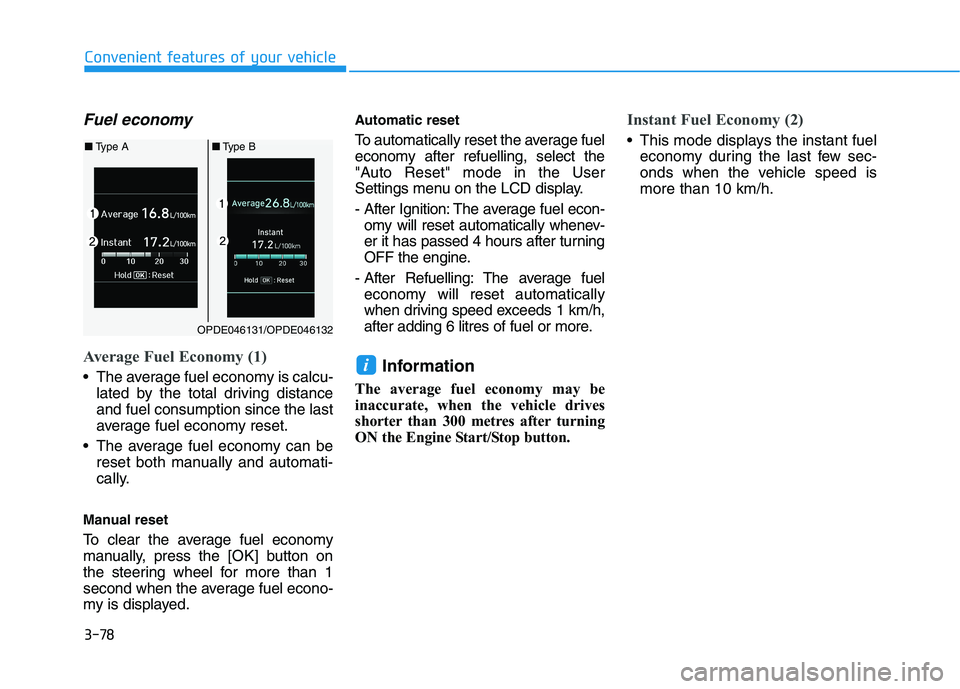
Average Fuel Economy (1)
The average fuel economy is calcu-
lated by the total driving distance
and fuel consumption since the last
average fuel economy reset.
The average fuel economy can be
reset both manually and automati-
cally.
Manual reset
To clear the average fuel economy
manually, press the [OK] button on
the steering wheel for more than 1
second when the average fuel econo-
my is displayed.
Automatic reset
To automatically reset the average fuel
economy after refuelling, select the
"Auto Reset" mode in the User
Settings menu on the LCD display.
- After Ignition: The average fuel econ-
omy will reset automatically whenev-
er it has passed 4 hours after turning
OFF the engine.
- After Refuelling: The average fuel
economy will reset automatically
when driving speed exceeds 1 km/h,
after adding 6 litres of fuel or more.
Information
The average fuel economy may be
inaccurate, when the vehicle drives
shorter than 300 metres after turning
ON the Engine Start/Stop button.
Instant Fuel Economy (2)
This mode displays the instant fuel
economy during the last few sec-
onds when the vehicle speed is
more than 10 km/h.
i
OPDE046131/OPDE046132
■Type A■Type B
Page 162 of 533
3-79
Convenient features of your vehicle
3
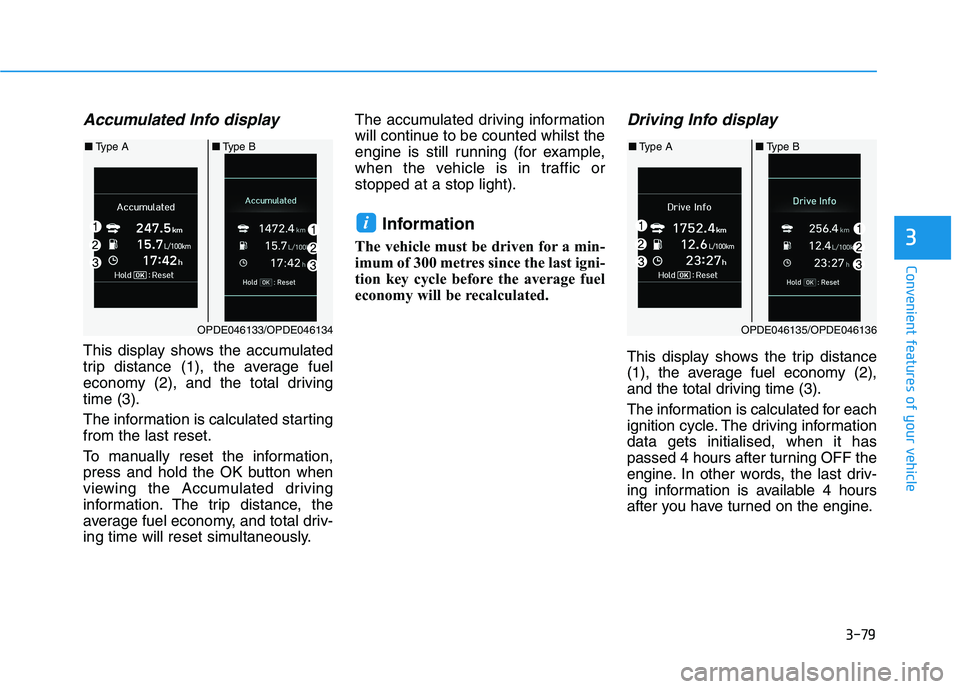
Accumulated Info display
This display shows the accumulated
trip distance (1), the average fuel
economy (2), and the total driving
time (3).
The information is calculated starting
from the last reset.
To manually reset the information,
press and hold the OK button when
viewing the Accumulated driving
information. The trip distance, the
average fuel economy, and total driv-
ing time will reset simultaneously.The accumulated driving information
will continue to be counted whilst the
engine is still running (for example,
when the vehicle is in traffic or
stopped at a stop light).
Information
The vehicle must be driven for a min-
imum of 300 metres since the last igni-
tion key cycle before the average fuel
economy will be recalculated.
Driving Info display
This display shows the trip distance
(1), the average fuel economy (2),
and the total driving time (3).
The information is calculated for each
ignition cycle. The driving information
data gets initialised, when it has
passed 4 hours after turning OFF the
engine. In other words, the last driv-
ing information is available 4 hours
after you have turned on the engine.
i
OPDE046133/OPDE046134
■Type A■Type B
OPDE046135/OPDE046136
■Type A■Type B
Page 163 of 533

3-80
Convenient features of your vehicle
To manually reset the information,
press and hold the OK button when
viewing the Driving information. The
trip distance, the average fuel econo-
my, and total driving time will reset
simultaneously.
The driving information will continue
to be counted whilst the engine is still
running (for example, when the vehi-
cle is in traffic or stopped at a stop
light.)
Information
The vehicle must be driven for a min-
imum of 300 metres since the last igni-
tion key cycle before the average fuel
economy will be recalculated.
Digital Speedometer
This message shows the speed of
the vehicle (km/h).
iOPDE046145/OPDE046146
■Type A■Type B
Page 164 of 533
3-81
Convenient features of your vehicle
3
Exterior lights
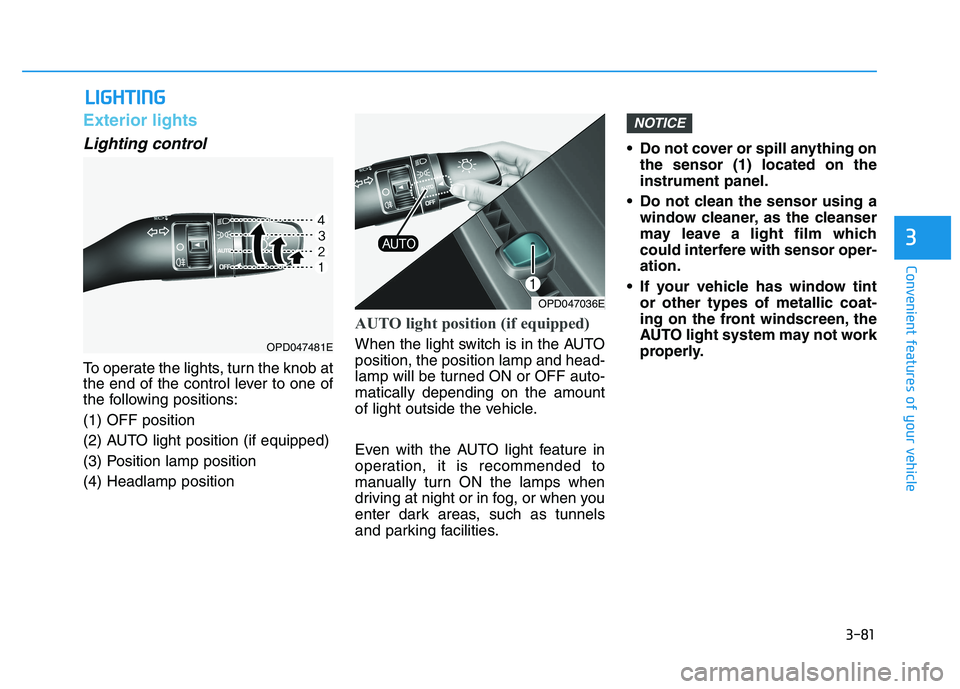
Lighting control
To operate the lights, turn the knob at
the end of the control lever to one of
the following positions:
(1) OFF position
(2) AUTO light position (if equipped)
(3) Position lamp position
(4) Headlamp position
AUTO light position (if equipped)
When the light switch is in the AUTO
position, the position lamp and head-
lamp will be turned ON or OFF auto-
matically depending on the amount
of light outside the vehicle.
Even with the AUTO light feature in
operation, it is recommended to
manually turn ON the lamps when
driving at night or in fog, or when you
enter dark areas, such as tunnels
and parking facilities.• Do not cover or spill anything on
the sensor (1) located on the
instrument panel.
Do not clean the sensor using a
window cleaner, as the cleanser
may leave a light film which
could interfere with sensor oper-
ation.
If your vehicle has window tint
or other types of metallic coat-
ing on the front windscreen, the
AUTO light system may not work
properly.
NOTICE
L LI
IG
GH
HT
TI
IN
NG
G
OPD047036E
OPD047481E
Page 165 of 533
3-82
Convenient features of your vehicle
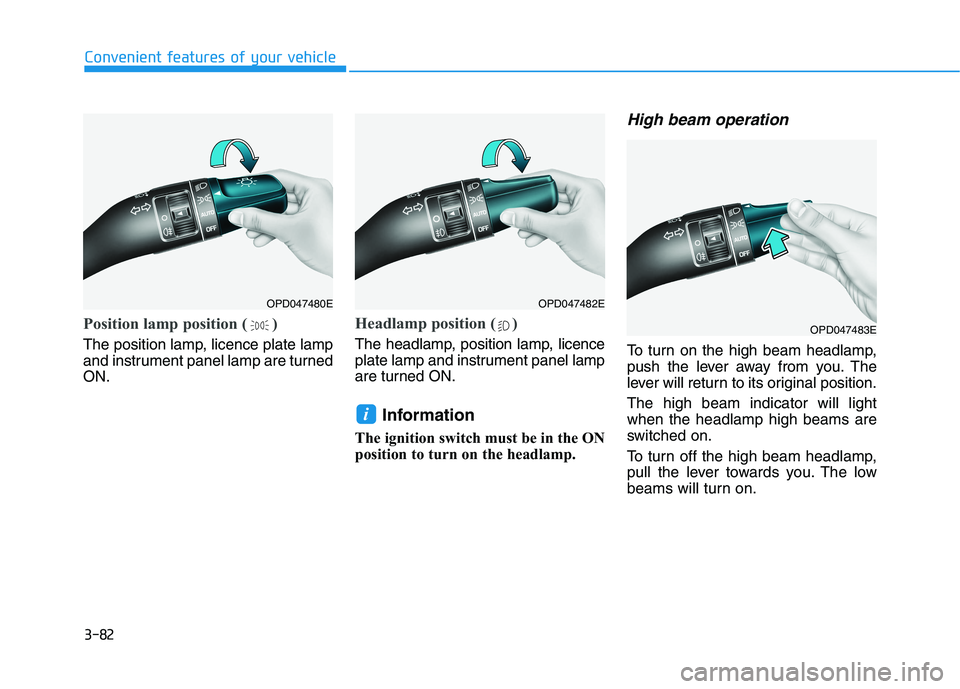
Position lamp position ( )
The position lamp, licence plate lamp
and instrument panel lamp are turned
ON.
Headlamp position ( )
The headlamp, position lamp, licence
plate lamp and instrument panel lamp
are turned ON.
Information
The ignition switch must be in the ON
position to turn on the headlamp.
High beam operation
To turn on the high beam headlamp,
push the lever away from you. The
lever will return to its original position.
The high beam indicator will light
when the headlamp high beams are
switched on.
To turn off the high beam headlamp,
pull the lever towards you. The low
beams will turn on.
i
OPD047480EOPD047482E
OPD047483E
Page 166 of 533
3-83
Convenient features of your vehicle
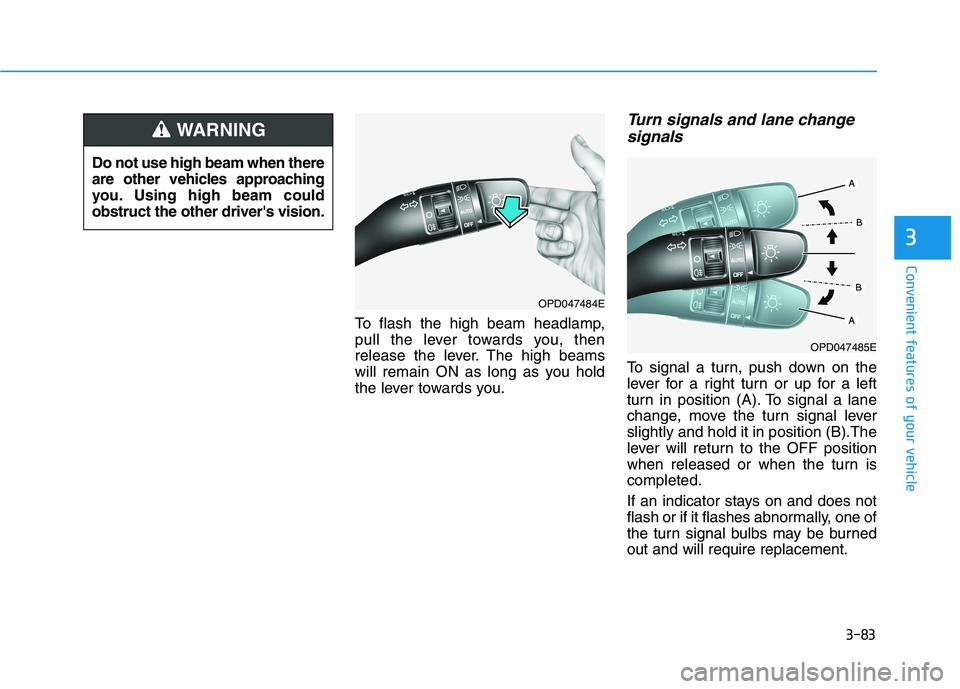
To flash the high beam headlamp,
pull the lever towards you, then
release the lever. The high beams
will remain ON as long as you hold
the lever towards you.
Turn signals and lane change
signals
To signal a turn, push down on the
lever for a right turn or up for a left
turn in position (A). To signal a lane
change, move the turn signal lever
slightly and hold it in position (B).The
lever will return to the OFF position
when released or when the turn is
completed.
If an indicator stays on and does not
flash or if it flashes abnormally, one of
the turn signal bulbs may be burned
out and will require replacement.
3
Do not use high beam when there
are other vehicles approaching
you. Using high beam could
obstruct the other driver's vision.
WARNING
OPD047484E
OPD047485E
Page 167 of 533
3-84
One-touch turn signal function
To activate a one-touch turn signal
function, move the turn signal lever
slightly and then release it. The lane
change signals will blink 3, 5 or 7
times.
You can activate/deactivate the One
Touch Turn Signal function or choose
the number of blinks (3, 5, or 7) from
the User Settings mode on the LCD
display.For more details, refer to
"LCD Display" in this chapter.
Rear fog lamp
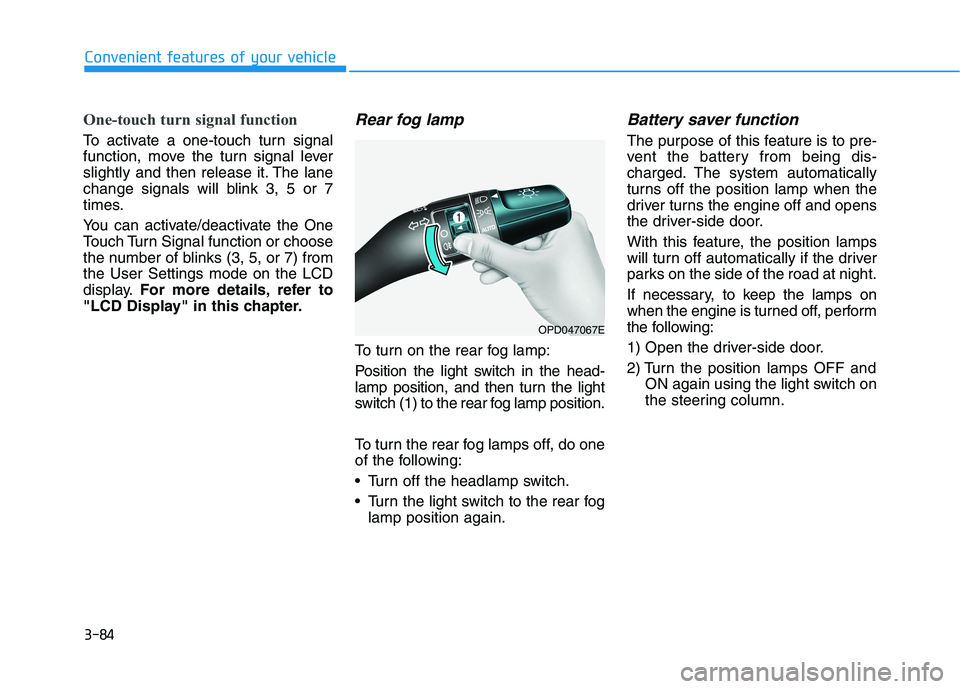
To turn on the rear fog lamp:
Position the light switch in the head-
lamp position, and then turn the light
switch (1) to the rear fog lamp position.
To turn the rear fog lamps off, do one
of the following:
• Turn off the headlamp switch.
Turn the light switch to the rear fog
lamp position again.
Battery saver function
The purpose of this feature is to pre-
vent the battery from being dis-
charged. The system automatically
turns off the position lamp when the
driver turns the engine off and opens
the driver-side door.
With this feature, the position lamps
will turn off automatically if the driver
parks on the side of the road at night.
If necessary, to keep the lamps on
when the engine is turned off, perform
the following:
1) Open the driver-side door.
2) Turn the position lamps OFF and
ON again using the light switch on
the steering column.
Convenient features of your vehicle
OPD047067E
Page 168 of 533
3-85
Convenient features of your vehicle
3
Headlamp delay function
(if equipped)
If you place the ignition switch to the
ACC or OFF position with the head-
lamps ON, the headlamps (and/or
position lamps) remain on for about 5
minutes. However, with the engine off
if the driver’s door is opened and
closed, the headlamps (and/or posi-
tion lamps) are turned off after 15
seconds.
The headlamps (and/or position
lamps) can be turned off by pressing
the lock button on the remote key or
smart key twice or turning the light
switch to the OFF or AUTO position.
However, if you turn the light switch
to the AUTO position when it is dark
outside, the headlamps will not be
turned off.
You can activate or deactivate the
Headlamp Delay function from the
User Settings mode on the LCD dis-
play.For more details, refer to
"LCD Display" in this chapter.If the driver gets out of the vehicle
through other doors (except dri-
ver's door), the battery saver func-
tion does not operate and the
headlamp delay function does not
turn off automatically. Therefore, It
causes the battery to be dis-
charged. In this case, make sure to
turn off the lamp before getting out
of the vehicle.
Daytime running light (DRL)
(if equipped)
The Daytime Running Lights (DRL)
can make it easier for others to see
the front of your vehicle during the
day, especially after dawn and before
sunset.
The DRL system will turn the dedi-
cated lamp OFF when:
1. The headlamps are in the ON
position.
2. The position lamp switch is in the
ON position.
3. The engine is turned off.
NOTICE
Page 169 of 533
3-86
Convenient features of your vehicle
Headlamp levelling device
(if equipped)
Manual type
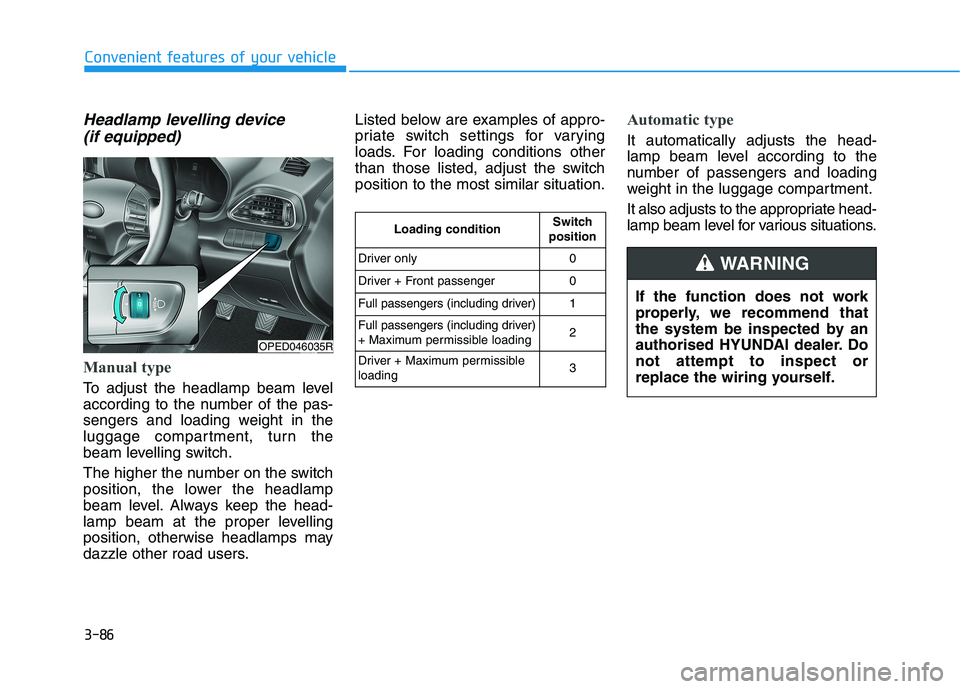
To adjust the headlamp beam level
according to the number of the pas-
sengers and loading weight in the
luggage compartment, turn the
beam levelling switch.
The higher the number on the switch
position, the lower the headlamp
beam level. Always keep the head-
lamp beam at the proper levelling
position, otherwise headlamps may
dazzle other road users.Listed below are examples of appro-
priate switch settings for varying
loads. For loading conditions other
than those listed, adjust the switch
position to the most similar situation.
Automatic type
It automatically adjusts the head-
lamp beam level according to the
number of passengers and loading
weight in the luggage compartment.
It also adjusts to the appropriate head-
lamp beam level for various situations.
OPED046035R
If the function does not work
properly, we recommend that
the system be inspected by an
authorised HYUNDAI dealer. Do
not attempt to inspect or
replace the wiring yourself.
WARNING
Loading conditionSwitch
position
Driver only0
Driver + Front passenger0
Full passengers (including driver)1
Full passengers (including driver)
+ Maximum permissible loading2
Driver + Maximum permissible
loading 3
Page 170 of 533
3-87
Convenient features of your vehicle
3
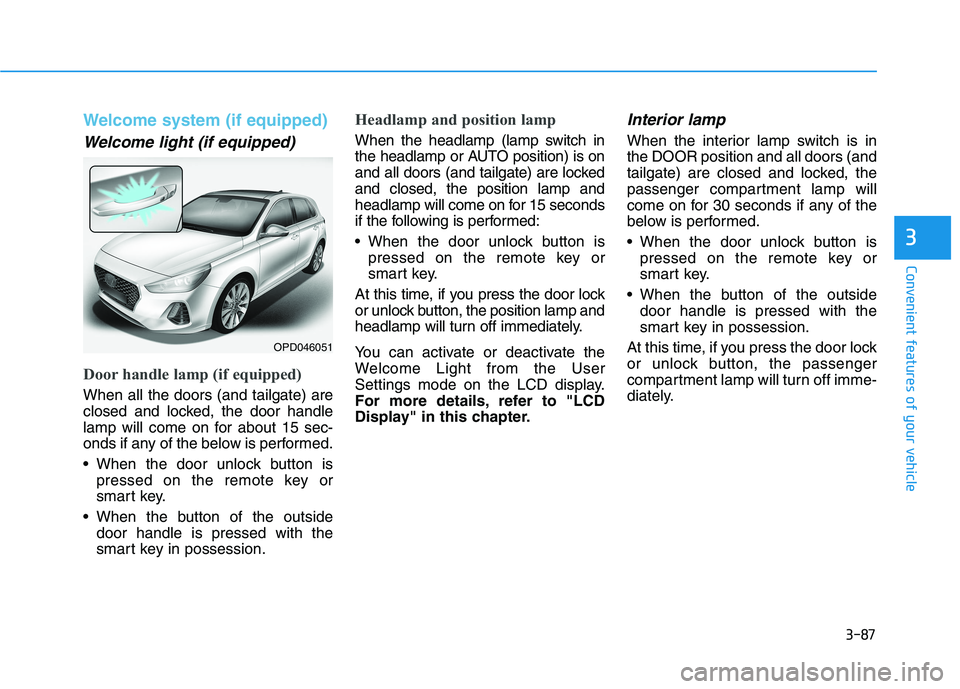
Welcome system (if equipped)
Welcome light (if equipped)
Door handle lamp (if equipped)
When all the doors (and tailgate) are
closed and locked, the door handle
lamp will come on for about 15 sec-
onds if any of the below is performed.
When the door unlock button is
pressed on the remote key or
smart key.
When the button of the outside
door handle is pressed with the
smart key in possession.
Headlamp and position lamp
When the headlamp (lamp switch in
the headlamp or AUTO position) is on
and all doors (and tailgate) are locked
and closed, the position lamp and
headlamp will come on for 15 seconds
if the following is performed:
When the door unlock button is
pressed on the remote key or
smart key.
At this time, if you press the door lock
or unlock button, the position lamp and
headlamp will turn off immediately.
You can activate or deactivate the
Welcome Light from the User
Settings mode on the LCD display.
For more details, refer to "LCD
Display" in this chapter.
Interior lamp
When the interior lamp switch is in
the DOOR position and all doors (and
tailgate) are closed and locked, the
passenger compartment lamp will
come on for 30 seconds if any of the
below is performed.
When the door unlock button is
pressed on the remote key or
smart key.
When the button of the outside
door handle is pressed with the
smart key in possession.
At this time, if you press the door lock
or unlock button, the passenger
compartment lamp will turn off imme-
diately.
OPD046051