sensor HYUNDAI I800 2016 User Guide
[x] Cancel search | Manufacturer: HYUNDAI, Model Year: 2016, Model line: I800, Model: HYUNDAI I800 2016Pages: 419, PDF Size: 9.23 MB
Page 87 of 419
413
Features of your vehicle
Impact sensing door unlock sys-
tem (if equipped)
All doors will be automatically unlocked
when the impact is delivered to impact
sensors whilst the ignition switch ON.
However, the doors may not be unlocked
if mechanical problems occur with the
door lock system or battery.
Speed sensing door lock system
(if equipped)
When the speed of the vehicle keeps
above 25 mph (40 km/h) for 1 second, it
will automatically lock all doors. For acti-
vation of this fearture, we recommend
that you contact a HYUNDAI authorised
repairer.
✽NOTICE
A HYUNDAI authorised repairer can
select some auto door lock/unlock fea-
tures as follows;
• Speed sensing auto door locking
• Auto door unlock when the ignition
key is removed from the ignition
switch
If you want to select a door lock/unlock
feature, we recommend that you consult
a HYUNDAI authorised repairer.
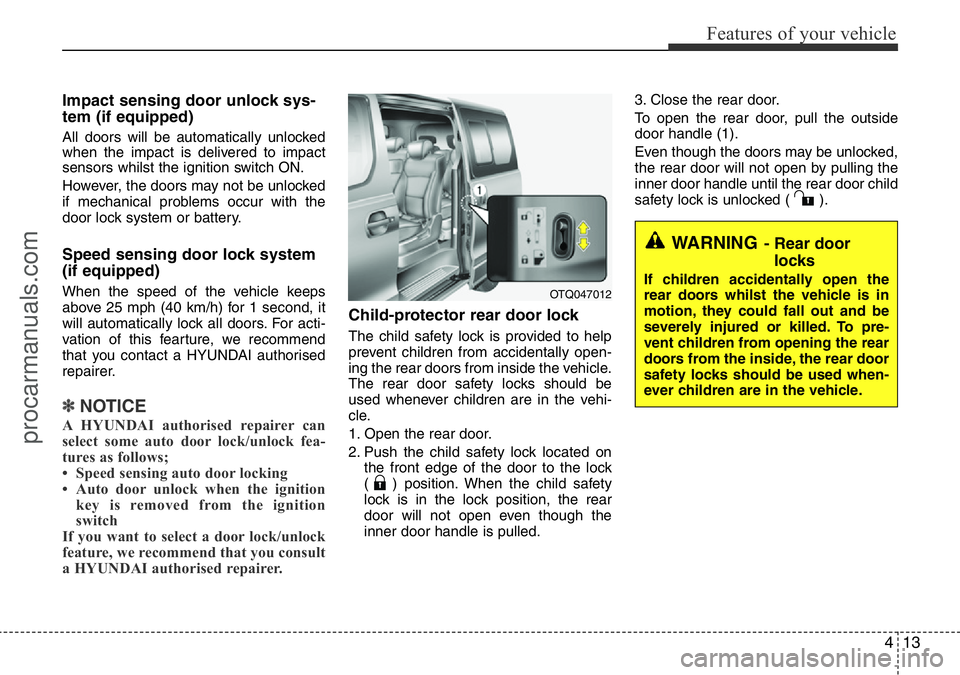
Child-protector rear door lock
The child safety lock is provided to help
prevent children from accidentally open-
ing the rear doors from inside the vehicle.
The rear door safety locks should be
used whenever children are in the vehi-
cle.
1. Open the rear door.
2. Push the child safety lock located on
the front edge of the door to the lock
( ) position. When the child safety
lock is in the lock position, the rear
door will not open even though the
inner door handle is pulled.3. Close the rear door.
To open the rear door, pull the outside
door handle (1).
Even though the doors may be unlocked,
the rear door will not open by pulling the
inner door handle until the rear door child
safety lock is unlocked ( ).
WARNING- Rear door
locks
If children accidentally open the
rear doors whilst the vehicle is in
motion, they could fall out and be
severely injured or killed. To pre-
vent children from opening the rear
doors from the inside, the rear door
safety locks should be used when-
ever children are in the vehicle.OTQ047012
procarmanuals.com
Page 109 of 419
435
Features of your vehicle
Inside rearview mirror
Adjust the rearview mirror to centre on
the view through the rear window. Make
this adjustment before you start driving.
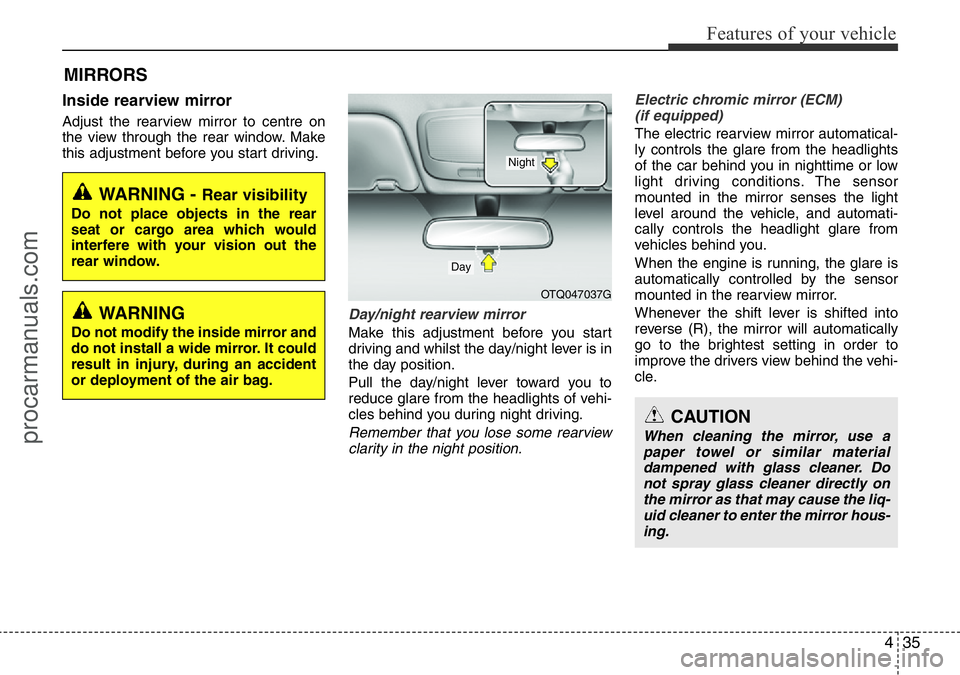
Day/night rearview mirror
Make this adjustment before you start
driving and whilst the day/night lever is in
the day position.
Pull the day/night lever toward you to
reduce glare from the headlights of vehi-
cles behind you during night driving.
Remember that you lose some rearview
clarity in the night position.Electric chromic mirror (ECM)
(if equipped)
The electric rearview mirror automatical-
ly controls the glare from the headlights
of the car behind you in nighttime or low
light driving conditions. The sensor
mounted in the mirror senses the light
level around the vehicle, and automati-
cally controls the headlight glare from
vehicles behind you.
When the engine is running, the glare is
automatically controlled by the sensor
mounted in the rearview mirror.
Whenever the shift lever is shifted into
reverse (R), the mirror will automatically
go to the brightest setting in order to
improve the drivers view behind the vehi-
cle.
MIRRORS
WARNING - Rear visibility
Do not place objects in the rear
seat or cargo area which would
interfere with your vision out the
rear window.
OTQ047037G
CAUTION
When cleaning the mirror, use a
paper towel or similar material
dampened with glass cleaner. Do
not spray glass cleaner directly on
the mirror as that may cause the liq-
uid cleaner to enter the mirror hous-
ing.
Day
Night
WARNING
Do not modify the inside mirror and
do not install a wide mirror. It could
result in injury, during an accident
or deployment of the air bag.
procarmanuals.com
Page 110 of 419
Features of your vehicle
36 4
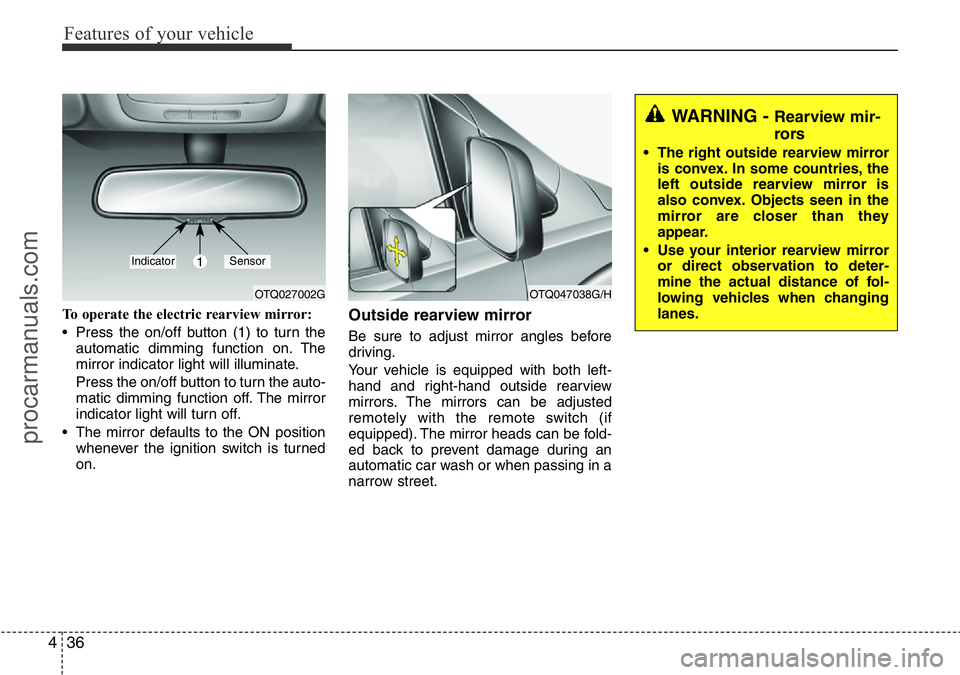
To operate the electric rearview mirror:
• Press the on/off button (1) to turn the
automatic dimming function on. The
mirror indicator light will illuminate.
Press the on/off button to turn the auto-
matic dimming function off. The mirror
indicator light will turn off.
• The mirror defaults to the ON position
whenever the ignition switch is turned
on.Outside rearview mirror
Be sure to adjust mirror angles before
driving.
Your vehicle is equipped with both left-
hand and right-hand outside rearview
mirrors. The mirrors can be adjusted
remotely with the remote switch (if
equipped). The mirror heads can be fold-
ed back to prevent damage during an
automatic car wash or when passing in a
narrow street.
OTQ027002GOTQ047038G/H
1IndicatorSensor
WARNING - Rearview mir-
rors
• The right outside rearview mirror
is convex. In some countries, the
left outside rearview mirror is
also convex. Objects seen in the
mirror are closer than they
appear.
• Use your interior rearview mirror
or direct observation to deter-
mine the actual distance of fol-
lowing vehicles when changing
lanes.
procarmanuals.com
Page 134 of 419
Features of your vehicle
60 4
REAR PARKING ASSIST SYSTEM (IF EQUIPPED)
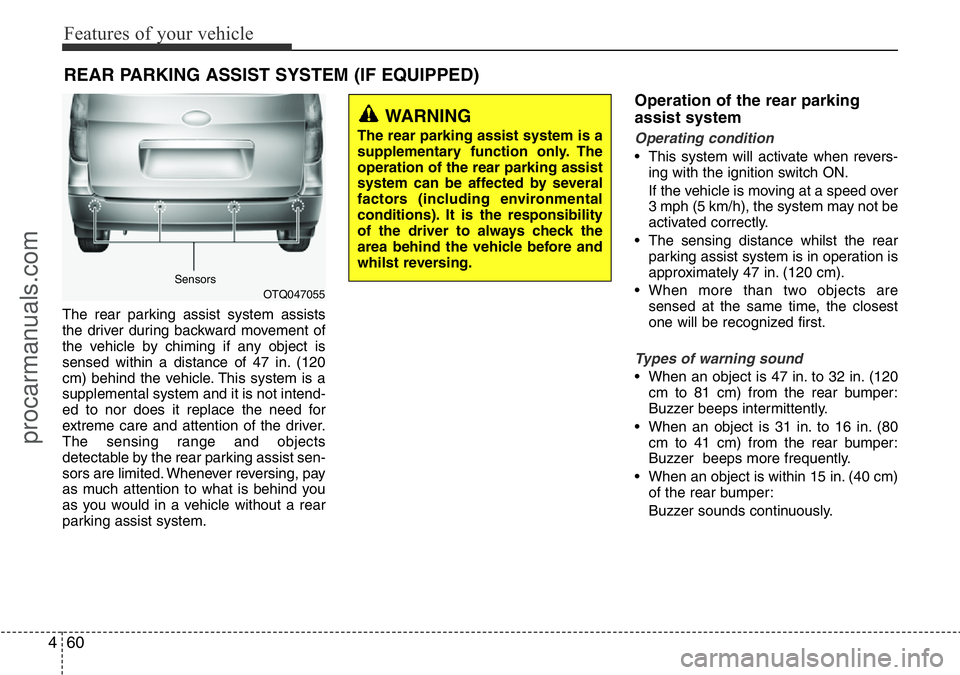
The rear parking assist system assists
the driver during backward movement of
the vehicle by chiming if any object is
sensed within a distance of 47 in. (120
cm) behind the vehicle. This system is a
supplemental system and it is not intend-
ed to nor does it replace the need for
extreme care and attention of the driver.
The sensing range and objects
detectable by the rear parking assist sen-
sors are limited. Whenever reversing, pay
as much attention to what is behind you
as you would in a vehicle without a rear
parking assist system.
Operation of the rear parking
assist system
Operating condition
• This system will activate when revers-
ing with the ignition switch ON.
If the vehicle is moving at a speed over
3 mph (5 km/h), the system may not be
activated correctly.
• The sensing distance whilst the rear
parking assist system is in operation is
approximately 47 in. (120 cm).
• When more than two objects are
sensed at the same time, the closest
one will be recognized first.
Types of warning sound
• When an object is 47 in. to 32 in. (120
cm to 81 cm) from the rear bumper:
Buzzer beeps intermittently.
• When an object is 31 in. to 16 in. (80
cm to 41 cm) from the rear bumper:
Buzzer beeps more frequently.
• When an object is within 15 in. (40 cm)
of the rear bumper:
Buzzer sounds continuously.
OTQ047055
WARNING
The rear parking assist system is a
supplementary function only. The
operation of the rear parking assist
system can be affected by several
factors (including environmental
conditions). It is the responsibility
of the driver to always check the
area behind the vehicle before and
whilst reversing.
Sensors
procarmanuals.com
Page 135 of 419
461
Features of your vehicle
Non-operational conditions of
rear parking assist system
The rear parking assist system may
not operate properly when:
1. Moisture is frozen to the sensor. (It will
operate normally when the moisture
has been cleared.)
2. The sensor is covered with foreign
matter, such as snow or water, or the
sensor cover is blocked. (It will operate
normally when the material is removed
or the sensor is no longer blocked.)
3. Driving on uneven road surfaces
(unpaved roads, gravel, bumps, gradi-
ent).
4. Objects generating excessive noise
(vehicle horns, loud motorcycle
engines, or truck air brakes) are within
range of the sensor.
5. Heavy rain or water spray exists.
6. Wireless transmitters or mobile
phones are within range of the sensor.
7. The sensor is covered with snow.
8. Trailer towingThe detecting range may decrease
when:
1. The sensor is stained with foreign mat-
ter such as snow or water. (The sens-
ing range will return to normal when
removed.)
2. Outside air temperature is extremely
hot or cold.
The following objects may not be rec-
ognized by the sensor:
1. Sharp or slim objects such as ropes,
chains or small poles.
2. Objects which tend to absorb the sen-
sor frequency such as clothes, spongy
material or snow.
3. Undetectable objects smaller than 40
in. (1 m) in height and narrower than 6
in. (14 cm) in diameter.
Rear parking assist system pre-
cautions
• The rear parking assist system may
not sound sequentially depending on
the speed and shapes of the objects
detected.
• The rear parking assist system may
malfunction if the vehicle bumper
height or sensor installation has been
modified or damaged. Any non-factory
installed equipment or accessories
may also interfere with the sensor per-
formance.
• The sensor may not recognize objects
less than 15 in. (40 cm) from the sen-
sor, or it may sense an incorrect dis-
tance. Use caution.
• When the sensor is frozen or stained
with snow, dirt, or water, the sensor
may be inoperative until the stains are
removed using a soft cloth.
• Do not push, scratch or strike the sen-
sor. Sensor damage could occur.
procarmanuals.com
Page 136 of 419
Features of your vehicle
62 4
✽NOTICE
This system can only sense objects with-
in the range and location of the sensors;
It can not detect objects in other areas
where sensors are not installed. Also,
small or slim objects, such as poles or
objects located between sensors may not
be detected by the sensors.
Always visually check behind the vehi-
cle when reversing.
Be sure to inform any drivers of the
vehicle that may be unfamiliar with the
system regarding the systems capabili-
ties and limitations.
Self-diagnosis
If you don’t hear an audible warning
sound or if the buzzer sounds intermit-
tently when shifting the gear to the R
(Reverse) position, this may indicate a
malfunction in the rear parking assist sys-
tem. If this occurs, we recommend that
the system be checked by a HYUNDAI
authorised repairer.
WARNING
Pay close attention when the vehi-
cle is driven close to objects on the
road, particularly pedestrians, and
especially children. Be aware that
some objects may not be detected
by the sensors, due to the object’s
distance, size or material, all of
which can limit the effectiveness of
the sensor. Always perform a visu-
al inspection to make sure the vehi-
cle is clear of all obstructions
before moving the vehicle in any
direction.
WARNING
Your new vehicle warranty does not
cover any accidents or damage to
the vehicle or injuries to its occu-
pants due to a rear parking assist
system malfunction. Always drive
safely and cautiously.
procarmanuals.com
Page 139 of 419
465
Features of your vehicle
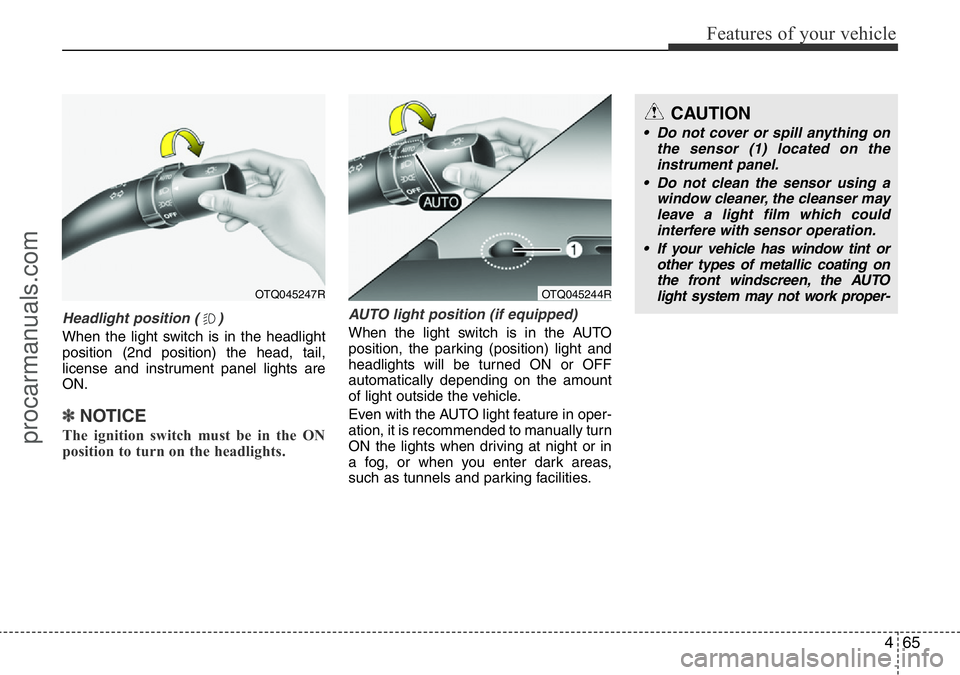
Headlight position ( )
When the light switch is in the headlight
position (2nd position) the head, tail,
license and instrument panel lights are
ON.
✽NOTICE
The ignition switch must be in the ON
position to turn on the headlights.
AUTO light position (if equipped)
When the light switch is in the AUTO
position, the parking (position) light and
headlights will be turned ON or OFF
automatically depending on the amount
of light outside the vehicle.
Even with the AUTO light feature in oper-
ation, it is recommended to manually turn
ON the lights when driving at night or in
a fog, or when you enter dark areas,
such as tunnels and parking facilities.
OTQ045247R
CAUTION
• Do not cover or spill anything on
the sensor (1) located on the
instrument panel.
• Do not clean the sensor using a
window cleaner, the cleanser may
leave a light film which could
interfere with sensor operation.
• If your vehicle has window tint or
other types of metallic coating on
the front windscreen, the AUTO
light system may not work proper-
OTQ045244R
procarmanuals.com
Page 164 of 419
Features of your vehicle
90 4
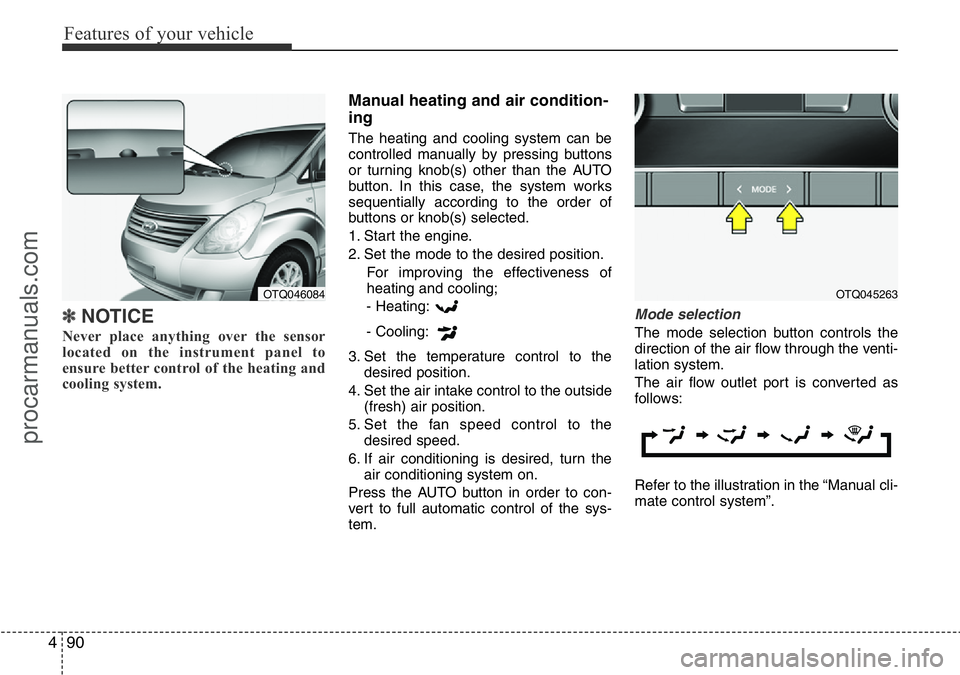
✽NOTICE
Never place anything over the sensor
located on the instrument panel to
ensure better control of the heating and
cooling system.
Manual heating and air condition-
ing
The heating and cooling system can be
controlled manually by pressing buttons
or turning knob(s) other than the AUTO
button. In this case, the system works
sequentially according to the order of
buttons or knob(s) selected.
1. Start the engine.
2. Set the mode to the desired position.
For improving the effectiveness of
heating and cooling;
- Heating:
- Cooling:
3. Set the temperature control to the
desired position.
4. Set the air intake control to the outside
(fresh) air position.
5. Set the fan speed control to the
desired speed.
6. If air conditioning is desired, turn the
air conditioning system on.
Press the AUTO button in order to con-
vert to full automatic control of the sys-
tem.
Mode selection
The mode selection button controls the
direction of the air flow through the venti-
lation system.
The air flow outlet port is converted as
follows:
Refer to the illustration in the “Manual cli-
mate control system”.
OTQ045263OTQ046084
procarmanuals.com
Page 314 of 419
What to do in an emergency
10 6
The Low Tyre Pressure Telltale will
remain on and the TPMS Malfunction
Indicator may blink for one minute
and then remain illuminated (when
the vehicle is driven approximately
10 minutes at speed above 25 km/h
(15.5 mph)) until you have the low
pressure tyre repaired and replaced
on the vehicle.
✽NOTICE
The spare tyre is not equipped with
a tyre pressure sensor.
TPMS Malfunction
Indicator
The TPMS Malfunction Indicator
comes on after it blinks for approxi-
mately one minute when there is a
problem with the Tyre Pressure
Monitoring System.
We recommend that the system be
checked by a HYUNDAI authorised
repairer.
✽NOTICE
The TPMS Malfunction Indicator
may illuminate after blinking for one
minute if the vehicle is near electric
power supply cables or radio trans-
mitters such as police stations, gov-
ernment and public offices, broad-
casting stations, military installations,
airports, transmitting towers, etc.
Additionally, the TPMS Malfunction
Indicator may illuminate if snow
chains are used or electronic devices
such as computers, chargers, remote
starters, navigation, etc. This may
interfere with normal operation of
the TPMS.
(Continued)
When you drive your vehicle
from a warm area to a cold area
or from a cold area to a warm
area, or the outside temperature
is greatly higher or lower, you
should check the tyre inflation
pressure and adjust the tyres to
the recommended tyre inflation
pressure.
CAUTION
In winter or cold weather, the
Low Tyre Pressure Telltale may
be illuminated if the tyre pres-
sure was adjusted to the recom-
mended tyre inflation pressure
in warm weather. It does not
mean your TPMS is malfunction-
ing because the decreased tem-
perature leads to a proportional
lowering of tyre pressure.
(Continued)
WARNING
• Significantly low tyre pres-
sure makes the vehicle unsta-
ble and can contribute to loss
of vehicle control and
increased braking distances.
• Continued driving on low
pressure tyres can cause the
tyres to overheat and fail.
procarmanuals.com
Page 315 of 419
611
What to do in an emergency
Changing a Tyre with TPMS
If you have a flat tyre, the Low Tyre
Pressure Telltale will illuminate. If you
believe you have a flat tyre or feel
any vehicle instability, take your foot
off the accelerator pedal and let the
vehicle slow down whilst driving
straight ahead. Do not apply the
brakes immediately or attempt to pull
off the road as this may cause a loss
of control resulting in an accident.
When the vehicle has slowed to such
a speed that it is safe to do so, brake
carefully and pull off the road. Drive
off the road as far as possible and
park on firm, level ground. If you are
on a divided highway, do not park in
the median area between the two
traffic lanes. Replace the flat tyre
with the compact spare tyre.The spare tyre is not equipped with a
tyre pressure monitoring sensor.
When the low pressure tyre or the flat
tyre is replaced with the spare tyre,
the Low Tyre Pressure Telltale will
remain on. Also, the TPMS
Malfunction Indicator will illuminate
after blinking for one minute if the
vehicle is driven at speed above 25
km/h (15.5 mph) for approximately 10
minutes.
Once the original tyre equipped with
a tyre pressure monitoring sensor is
reinflated to the recommended pres-
sure and reinstalled on the vehicle,
the Low Tyre Pressure Telltale and
TPMS Malfunction Indicator will go
off within a few minutes.
If the indicator is not extinguished
after a few minutes of driving, We rec-
ommend that the system be checked
by a HYUNDAI authorised repairer.
Each wheel is equipped with a tyre
pressure sensor mounted inside the
tyre behind the valve stem (except for
the spare tyre). You must use TPMS
specific wheels. It is recommended
that you always have your tyres serv-
iced by a HYUNDAI authorised
repairer as soon as possible.
CAUTION
To prevent damaging your tyre
pressure sensor, never use a
puncture-repairing agents or
tyre sealants to repair and/or
inflate a low pressure tyre. If
used, you will have to replace
the tyre pressure sensor.
WARNING - For EUROPE
• Do not modify the vehicle, it
may interfere with the TPMS
function.
• The wheels on the market do
not have a TPMS sensor.
For your safety, we recom-
mend that you use parts for
replacement from a HYUNDAI
authorised repairer.
• If you use the wheels on the
market, use a TPMS sensor
approved by a HYUNDAI dealer.
If your vehicle is not equipped
with a TPMS sensor or TPMS
does not work properly, you
may fail the periodic vehicle
inspection conducted in your
country.
❈All vehicles sold in the
EUROPE market during below
period must be equipped with
TPMS.
- New model vehicle :
Nov. 1, 2012 ~
- Current model vehicle :
Nov. 1, 2014~ (Based on vehi-
cle registrations)
procarmanuals.com