tire pressure HYUNDAI IONIQ 2020 Owner's Manual
[x] Cancel search | Manufacturer: HYUNDAI, Model Year: 2020, Model line: IONIQ, Model: HYUNDAI IONIQ 2020Pages: 561, PDF Size: 24.5 MB
Page 393 of 561
6-11
What to do in an emergency
6
TPMS Malfunction
Indicator
The TPMS Malfunction Indicator will
illuminate after it blinks for approxi-
mately one minute when there is a
problem with the Tire Pressure
Monitoring System.
Have the system checked by an
authorized HYUNDAI dealer as soon
as possible.
If there is a malfunction with the
TPMS, the individual tire pres-
sures in the cluster LCD display
will not be available. Have the sys-
tem checked by an authorized
HYUNDAI dealer as soon as possi-
ble.
NOTICE
In winter or cold weather, the
Low Tire Pressure Telltale may
be illuminated if the tire pres-
sure was adjusted to the recom-
mended tire inflation pressure
in warm weather. It does not
mean your TPMS is malfunc-
tioning because the decreased
temperature leads to a propor-
tional lowering of tire pressure.
When you drive your vehicle
from a warm area to a cold area
or from a cold area to a warm
area, or the outside temperature
is greatly higher or lower, you
should check the tire inflation
pressure and adjust the tires to
the recommended tire inflation
pressure.
CAUTION
Low pressure damage
Significantly low tire pressure
makes the vehicle unstable and
can contribute to loss of vehicle
control and increased braking
distances.
Continued driving on low pres-
sure tires can cause the tires to
overheat and fail.
WARNING
Page 394 of 561
6-12
What to do in an emergency
The TPMS Malfunction Indicator
may illuminate after blinking for
one minute if the vehicle is near
electric power supply cables or
radio transmitters such as police
stations, government and public
offices, broadcasting stations,
military installations, airports,
transmitting towers, etc.
Additionally, the TPMS Malfunction
Indicator may illuminate if snow
chains are used or electronic
devices such as computers, charg-
ers, remote starters, navigation,
etc. This may interfere with normal
operation of the TPMS.
Changing a Tire with TPMS
If you have a flat tire, the Low Tire
Pressure and LCD position indicator
will come on. Have the flat tire
repaired by an authorized HYUNDAI
dealer as soon as possible or
replace the flat tire with the spare
tire.Once the original tire equipped with
a tire pressure monitoring sensor is
reinflated to the recommended pres-
sure and reinstalled on the vehicle,
the Low Tire Pressure LCD position
indicator and TPMS Malfunction
Indicator will go off within a few min-
utes of driving.
If the indicators do not disappear
after a few minutes, please visit an
authorized HYUNDAI dealer.
Each wheel is equipped with a tire
pressure sensor mounted inside the
tire behind the valve stem. You must
use TPMS specific wheels. It is rec-
ommended that you always have
your tires serviced by an authorized
HYUNDAI dealer.
NOTICE
Never use a puncture-repairing
agent not approved by HYUNDAI
dealer to repair and/or inflate a
low pressure tire. Tire sealant
not approved by HYUNDAI deal-
er may damage the tire pressure
sensor.
CAUTION
Page 395 of 561
6-13
What to do in an emergency
6
A cold tire means the vehicle has
been sitting for 3 hours and driven for
less than 1 mile (1.6 km) in that 3
hour period.
Allow the tire to cool before measur-
ing the inflation pressure. Always be
sure the tire is cold before inflating to
the recommended pressure.Information
This device complies with Part 15 of
the FCC rules.
Operation is subject to the following
three conditions:
1. This device may not cause harmful
interference, and
2. This device must accept any inter-
ference received, including interfer-
ence that may cause undesired
operation.
3. Changes or modifications not
expressly approved by the party
responsible for compliance could
void the user's authority to operate
the equipment.
i
The TPMS cannot alert you to
severe and sudden tire dam-
age caused by external fac-
tors such as nails or road
debris.
If you feel any vehicle instabil-
ity, immediately take your foot
off the accelerator, apply the
brakes gradually with light
force, and slowly move to a
safe position off the road.
WARNING
Tampering with, modifying, or
disabling the Tire Pressure
Monitoring System (TPMS)
components may interfere with
the system's ability to warn the
driver of low tire pressure con-
ditions and/or TPMS malfunc-
tions. Tampering with, modify-
ing, or disabling the Tire
Pressure Monitoring System
(TPMS) components may void
the warranty for that portion of
the vehicle.
WARNING
Page 396 of 561
6-14
What to do in an emergency
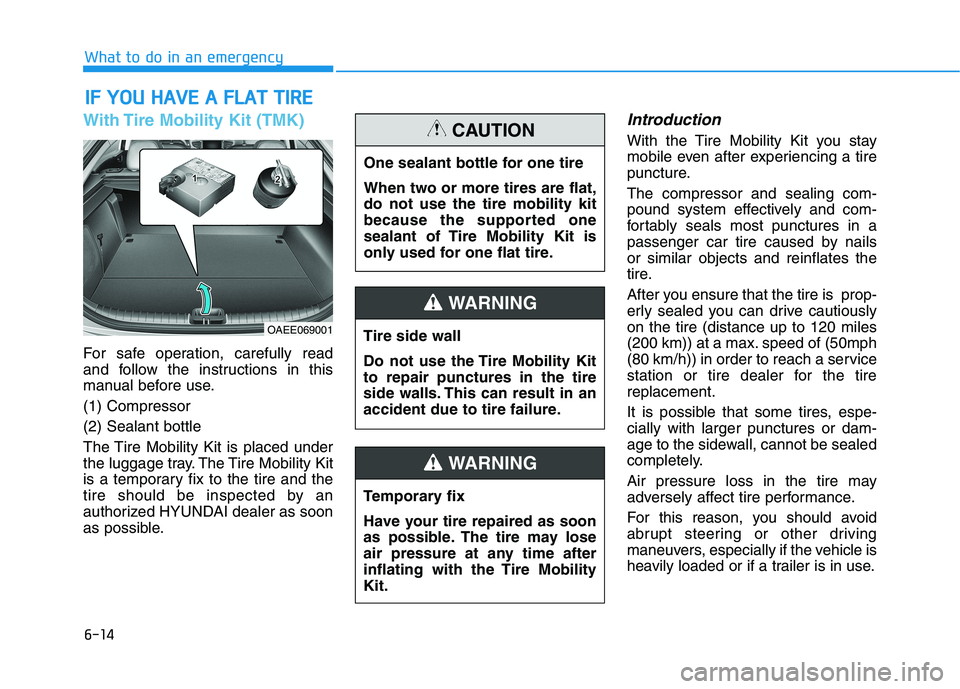
With Tire Mobility Kit (TMK)
For safe operation, carefully read
and follow the instructions in this
manual before use.
(1) Compressor
(2) Sealant bottle
The Tire Mobility Kit is placed under
the luggage tray. The Tire Mobility Kit
is a temporary fix to the tire and the
tire should be inspected by an
authorized HYUNDAI dealer as soon
as possible.
Introduction
With the Tire Mobility Kit you stay
mobile even after experiencing a tire
puncture.
The compressor and sealing com-
pound system effectively and com-
fortably seals most punctures in a
passenger car tire caused by nails
or similar objects and reinflates the
tire.
After you ensure that the tire is prop-
erly sealed you can drive cautiously
on the tire (distance up to 120 miles
(200 km)) at a max. speed of (50mph
(80 km/h)) in order to reach a service
station or tire dealer for the tire
replacement.
It is possible that some tires, espe-
cially with larger punctures or dam-
age to the sidewall, cannot be sealed
completely.
Air pressure loss in the tire may
adversely affect tire performance.
For this reason, you should avoid
abrupt steering or other driving
maneuvers, especially if the vehicle is
heavily loaded or if a trailer is in use.
I IF
F
Y
YO
OU
U
H
HA
AV
VE
E
A
A
F
FL
LA
AT
T
T
TI
IR
RE
E
OAEE069001
One sealant bottle for one tire
When two or more tires are flat,
do not use the tire mobility kit
because the supported one
sealant of Tire Mobility Kit is
only used for one flat tire.
CAUTION
Tire side wall
Do not use the Tire Mobility Kit
to repair punctures in the tire
side walls. This can result in an
accident due to tire failure.
WARNING
Temporary fix
Have your tire repaired as soon
as possible. The tire may lose
air pressure at any time after
inflating with the Tire Mobility
Kit.
WARNING
Page 398 of 561
6-16
What to do in an emergency
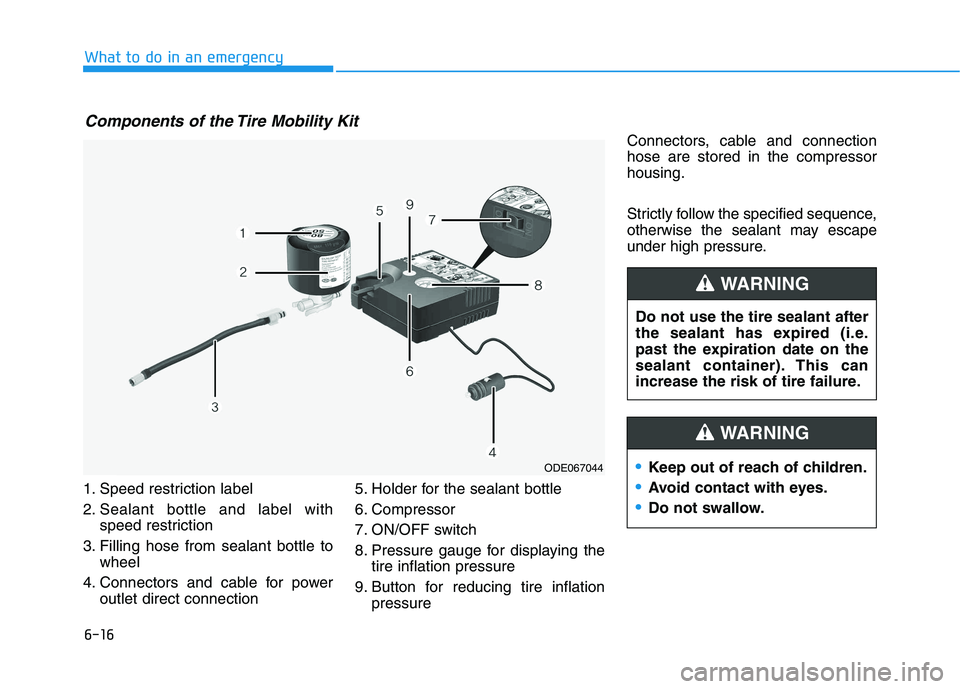
1. Speed restriction label
2. Sealant bottle and label with
speed restriction
3. Filling hose from sealant bottle to
wheel
4. Connectors and cable for power
outlet direct connection5. Holder for the sealant bottle
6. Compressor
7. ON/OFF switch
8. Pressure gauge for displaying the
tire inflation pressure
9. Button for reducing tire inflation
pressureConnectors, cable and connection
hose are stored in the compressor
housing.
Strictly follow the specified sequence,
otherwise the sealant may escape
under high pressure.
Components of the Tire Mobility Kit
ODE067044
Do not use the tire sealant after
the sealant has expired (i.e.
past the expiration date on the
sealant container). This can
increase the risk of tire failure.
WARNING
Keep out of reach of children.
Avoid contact with eyes.
Do not swallow.
WARNING
Page 400 of 561
6-18
What to do in an emergency
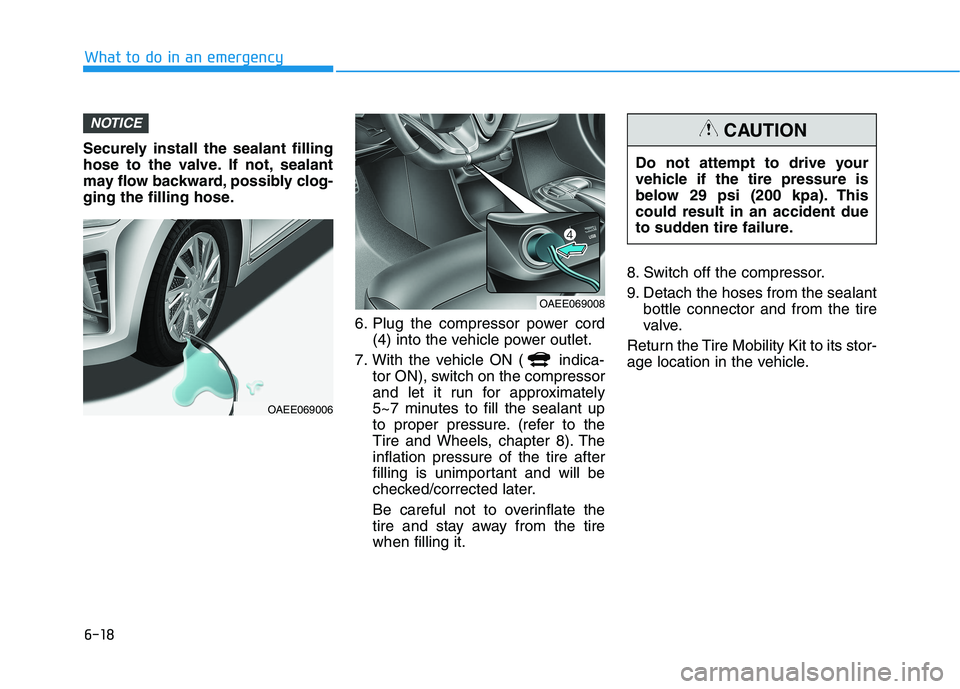
Securely install the sealant filling
hose to the valve. If not, sealant
may flow backward, possibly clog-
ging the filling hose.
6. Plug the compressor power cord
(4) into the vehicle power outlet.
7. With the vehicle ON ( indica-
tor ON), switch on the compressor
and let it run for approximately
5~7 minutes to fill the sealant up
to proper pressure. (refer to the
Tire and Wheels, chapter 8). The
inflation pressure of the tire after
filling is unimportant and will be
checked/corrected later.
Be careful not to overinflate the
tire and stay away from the tire
when filling it.8. Switch off the compressor.
9. Detach the hoses from the sealant
bottle connector and from the tire
valve.
Return the Tire Mobility Kit to its stor-
age location in the vehicle.
NOTICE
OAEE069006
OAEE069008
Do not attempt to drive your
vehicle if the tire pressure is
below 29 psi (200 kpa). This
could result in an accident due
to sudden tire failure.
CAUTION
Page 401 of 561
6-19
What to do in an emergency
6
Distributing the sealant
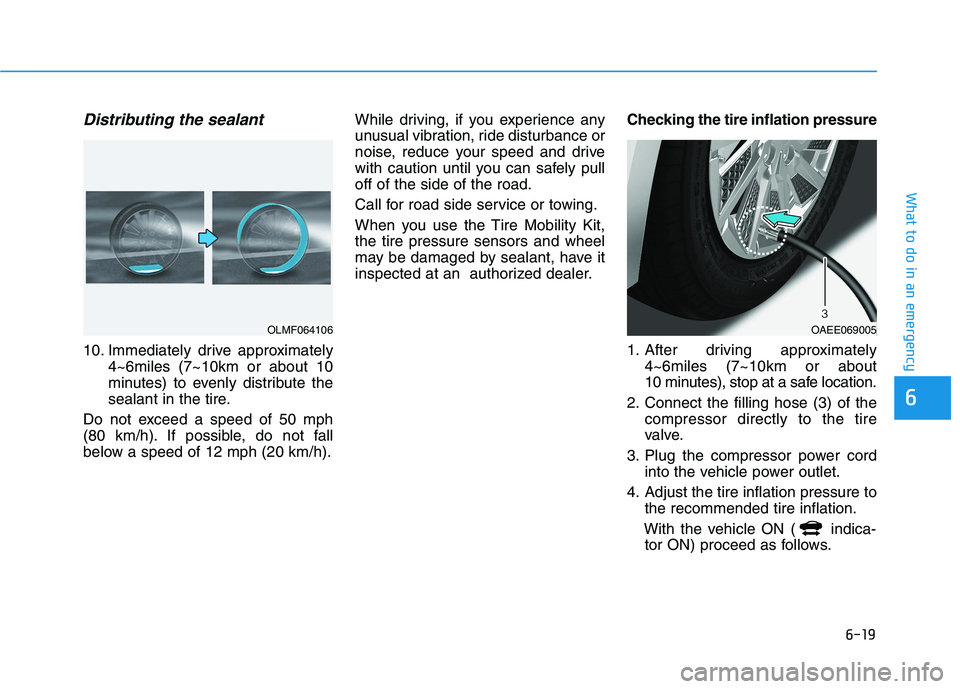
10. Immediately drive approximately
4~6miles (7~10km or about 10
minutes) to evenly distribute the
sealant in the tire.
Do not exceed a speed of 50 mph
(80 km/h). If possible, do not fall
below a speed of 12 mph (20 km/h).While driving, if you experience any
unusual vibration, ride disturbance or
noise, reduce your speed and drive
with caution until you can safely pull
off of the side of the road.
Call for road side service or towing.
When you use the Tire Mobility Kit,
the tire pressure sensors and wheel
may be damaged by sealant, have it
inspected at an authorized dealer.Checking the tire inflation pressure
1. After driving approximately
4~6miles (7~10km or about
10 minutes), stop at a safe location.
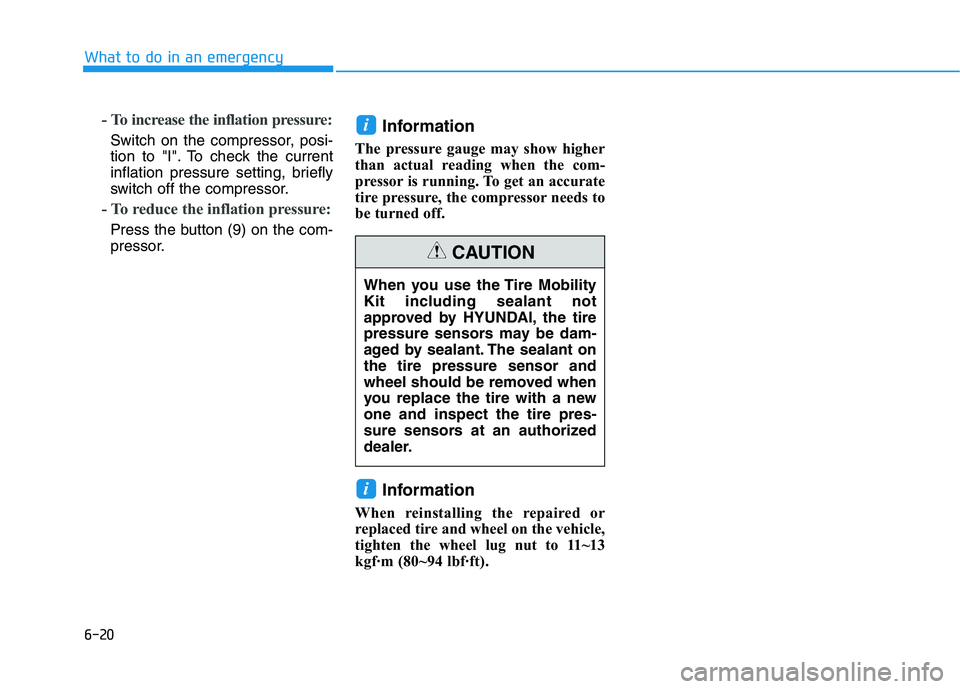
2. Connect the filling hose (3) of the
compressor directly to the tire
valve.
3. Plug the compressor power cord
into the vehicle power outlet.
4. Adjust the tire inflation pressure to
the recommended tire inflation.
With the vehicle ON ( indica-
tor ON) proceed as follows.
OLMF064106OAEE069005
Page 402 of 561
6-20
What to do in an emergency
- To increase the inflation pressure:
Switch on the compressor, posi-
tion to "I". To check the current
inflation pressure setting, briefly
switch off the compressor.
- To reduce the inflation pressure:
Press the button (9) on the com-
pressor.
Information
The pressure gauge may show higher
than actual reading when the com-
pressor is running. To get an accurate
tire pressure, the compressor needs to
be turned off.
Information
When reinstalling the repaired or
replaced tire and wheel on the vehicle,
tighten the wheel lug nut to 11~13
kgf·m (80~94 lbf·ft).
i
i
When you use the Tire Mobility
Kit including sealant not
approved by HYUNDAI, the tire
pressure sensors may be dam-
aged by sealant. The sealant on
the tire pressure sensor and
wheel should be removed when
you replace the tire with a new
one and inspect the tire pres-
sure sensors at an authorized
dealer.
CAUTION
Page 407 of 561
7
Maintenance
7
Maintenance
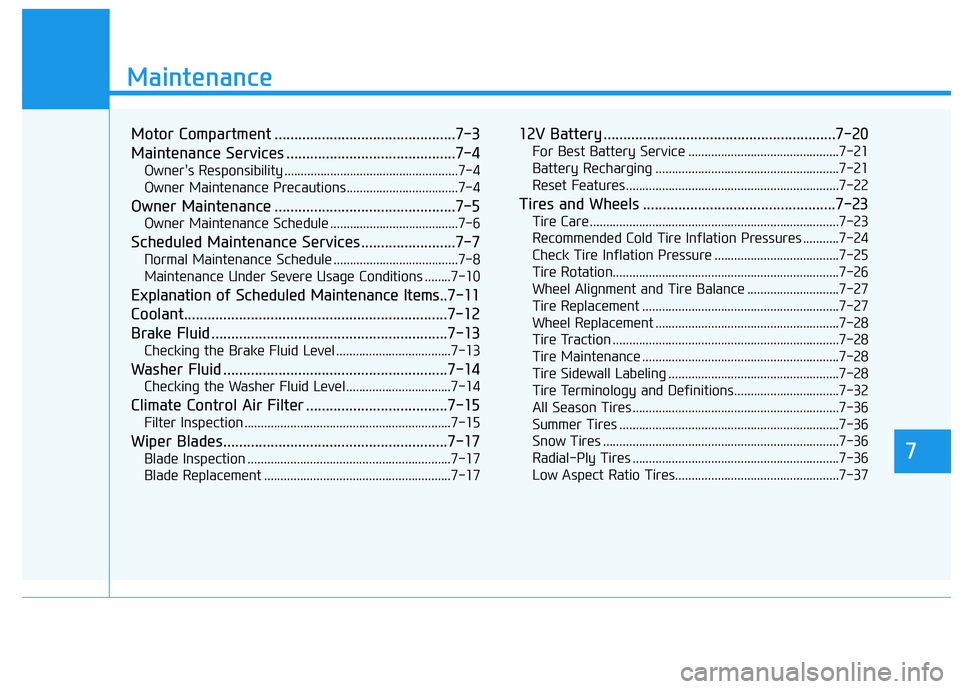
Motor Compartment ..............................................7-3
Maintenance Services ...........................................7-4
Owner's Responsibility .....................................................7-4
Owner Maintenance Precautions..................................7-4
Owner Maintenance ..............................................7-5
Owner Maintenance Schedule .......................................7-6
Scheduled Maintenance Services........................7-7
Normal Maintenance Schedule ......................................7-8
Maintenance Under Severe Usage Conditions ........7-10
Explanation of Scheduled Maintenance Items..7-11
Coolant...................................................................7-12
Brake Fluid ............................................................7-13
Checking the Brake Fluid Level ...................................7-13
Washer Fluid .........................................................7-14
Checking the Washer Fluid Level................................7-14
Climate Control Air Filter ....................................7-15
Filter Inspection ...............................................................7-15
Wiper Blades.........................................................7-17
Blade Inspection ..............................................................7-17
Blade Replacement .........................................................7-17
12V Battery ...........................................................7-20
For Best Battery Service ..............................................7-21
Battery Recharging ........................................................7-21
Reset Features.................................................................7-22
Tires and Wheels .................................................7-23
Tire Care ............................................................................7-23
Recommended Cold Tire Inflation Pressures ...........7-24
Check Tire Inflation Pressure ......................................7-25
Tire Rotation.....................................................................7-26
Wheel Alignment and Tire Balance ............................7-27
Tire Replacement ............................................................7-27
Wheel Replacement ........................................................7-28
Tire Traction .....................................................................7-28
Tire Maintenance ............................................................7-28
Tire Sidewall Labeling ....................................................7-28
Tire Terminology and Definitions................................7-32
All Season Tires ...............................................................7-36
Summer Tires ...................................................................7-36
Snow Tires ........................................................................7-36
Radial-Ply Tires ...............................................................7-36
Low Aspect Ratio Tires..................................................7-37
7
Page 412 of 561
7-6
Maintenance
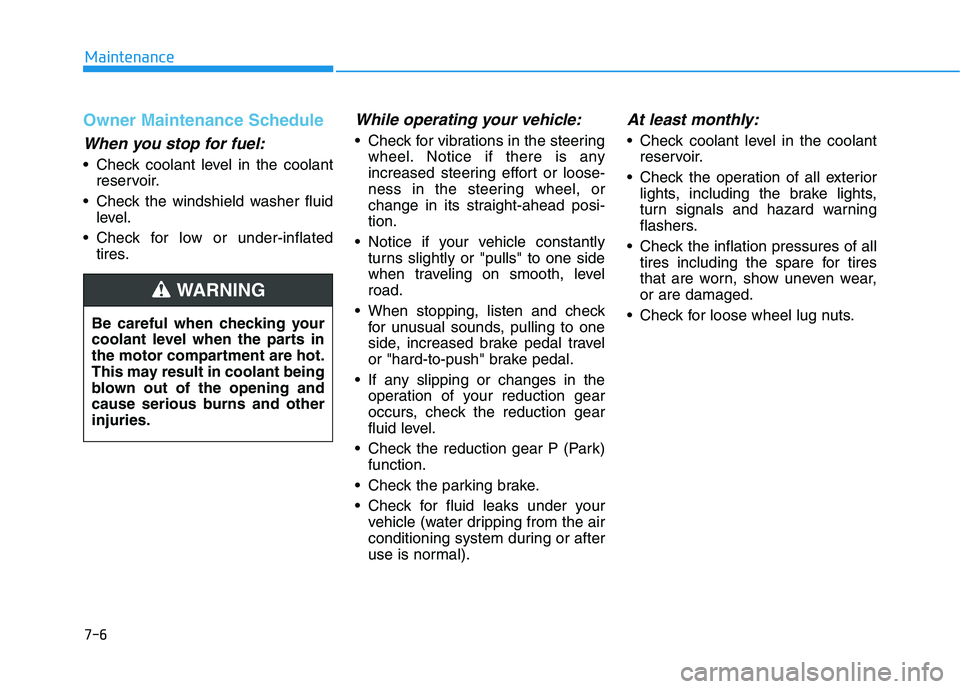
Owner Maintenance Schedule
When you stop for fuel:
• Check coolant level in the coolant
reservoir.
Check the windshield washer fluid
level.
Check for low or under-inflated
tires.
While operating your vehicle:
Check for vibrations in the steering
wheel. Notice if there is any
increased steering effort or loose-
ness in the steering wheel, or
change in its straight-ahead posi-
tion.
Notice if your vehicle constantly
turns slightly or "pulls" to one side
when traveling on smooth, level
road.
When stopping, listen and check
for unusual sounds, pulling to one
side, increased brake pedal travel
or "hard-to-push" brake pedal.
If any slipping or changes in the
operation of your reduction gear
occurs, check the reduction gear
fluid level.
Check the reduction gear P (Park)
function.
Check the parking brake.
Check for fluid leaks under your
vehicle (water dripping from the air
conditioning system during or after
use is normal).
At least monthly:
Check coolant level in the coolant
reservoir.
Check the operation of all exterior
lights, including the brake lights,
turn signals and hazard warning
flashers.
Check the inflation pressures of all
tires including the spare for tires
that are worn, show uneven wear,
or are damaged.
Check for loose wheel lug nuts.
Be careful when checking your
coolant level when the parts in
the motor compartment are hot.
This may result in coolant being
blown out of the opening and
cause serious burns and other
injuries.
WARNING