sensor Hyundai Ioniq Plug-in Hybrid 2018 User Guide
[x] Cancel search | Manufacturer: HYUNDAI, Model Year: 2018, Model line: Ioniq Plug-in Hybrid, Model: Hyundai Ioniq Plug-in Hybrid 2018Pages: 589, PDF Size: 21.53 MB
Page 112 of 589
3-20
Convenient features of your vehicle
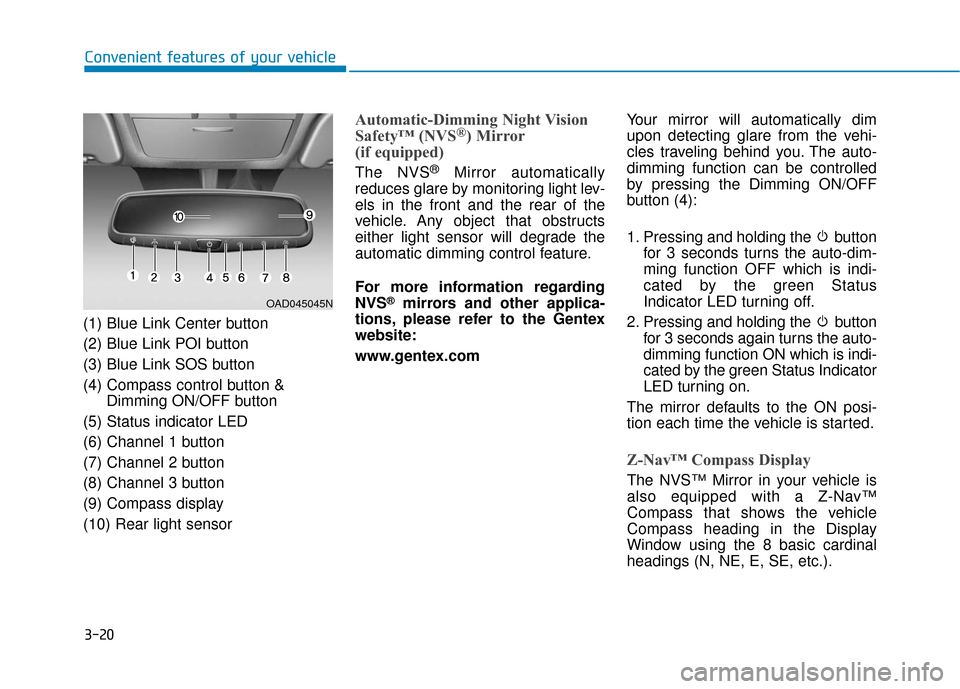
(1) Blue Link Center button
(2) Blue Link POI button
(3) Blue Link SOS button
(4) Compass control button & Dimming ON/OFF button
(5) Status indicator LED
(6) Channel 1 button
(7) Channel 2 button
(8) Channel 3 button
(9) Compass display
(10) Rear light sensor
Automatic-Dimming Night Vision
Safety™ (NVS®) Mirror
(if equipped)
The NVS®Mirror automatically
reduces glare by monitoring light lev-
els in the front and the rear of the
vehicle. Any object that obstructs
either light sensor will degrade the
automatic dimming control feature.
For more information regarding
NVS
®mirrors and other applica-
tions, please refer to the Gentex
website:
www.gentex.com Your mirror will automatically dim
upon detecting glare from the vehi-
cles traveling behind you. The auto-
dimming function can be controlled
by pressing the Dimming ON/OFF
button (4):
1. Pressing and holding the button
for 3 seconds turns the auto-dim-
ming function OFF which is indi-
cated by the green Status
Indicator LED turning off.
2. Pressing and holding the button for 3 seconds again turns the auto-
dimming function ON which is indi-
cated by the green Status Indicator
LED turning on.
The mirror defaults to the ON posi-
tion each time the vehicle is started.
Z-Nav™ Compass Display
The NVS™ Mirror in your vehicle is
also equipped with a Z-Nav™
Compass that shows the vehicle
Compass heading in the Display
Window using the 8 basic cardinal
headings (N, NE, E, SE, etc.).
OAD045045N
Page 119 of 589
3-27
Convenient features of your vehicle
3
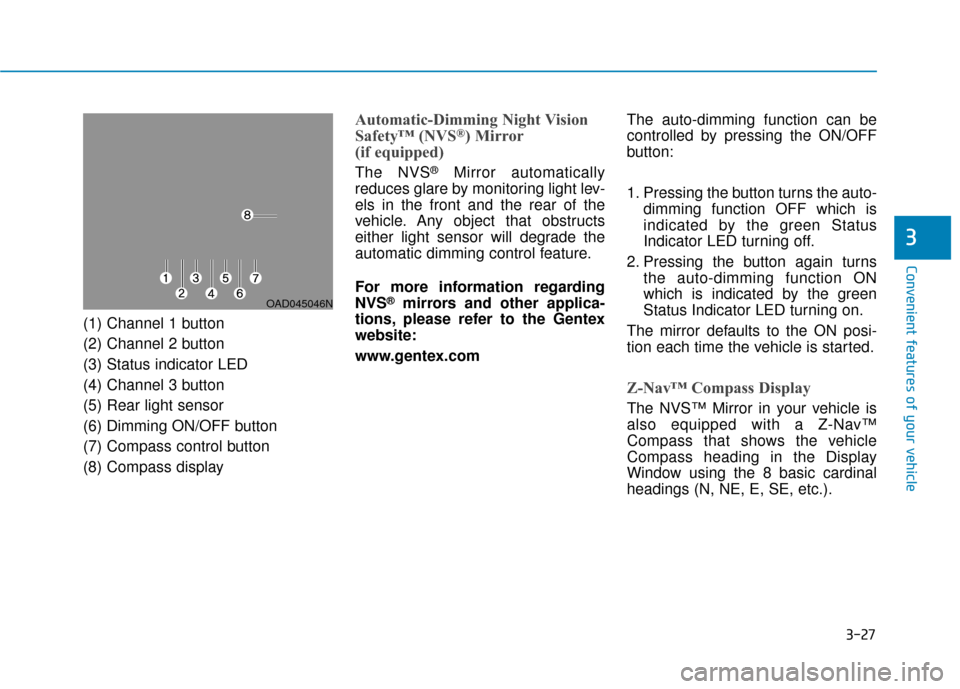
(1) Channel 1 button
(2) Channel 2 button
(3) Status indicator LED
(4) Channel 3 button
(5) Rear light sensor
(6) Dimming ON/OFF button
(7) Compass control button
(8) Compass display
Automatic-Dimming Night Vision
Safety™ (NVS®) Mirror
(if equipped)
The NVS®Mirror automatically
reduces glare by monitoring light lev-
els in the front and the rear of the
vehicle. Any object that obstructs
either light sensor will degrade the
automatic dimming control feature.
For more information regarding
NVS
®mirrors and other applica-
tions, please refer to the Gentex
website:
www.gentex.com The auto-dimming function can be
controlled by pressing the ON/OFF
button:
1. Pressing the button turns the auto-
dimming function OFF which is
indicated by the green Status
Indicator LED turning off.
2. Pressing the button again turns the auto-dimming function ON
which is indicated by the green
Status Indicator LED turning on.
The mirror defaults to the ON posi-
tion each time the vehicle is started.
Z-Nav™ Compass Display
The NVS™ Mirror in your vehicle is
also equipped with a Z-Nav™
Compass that shows the vehicle
Compass heading in the Display
Window using the 8 basic cardinal
headings (N, NE, E, SE, etc.).
OAD045046N
Page 164 of 589
3-72
Convenient features of your vehicle
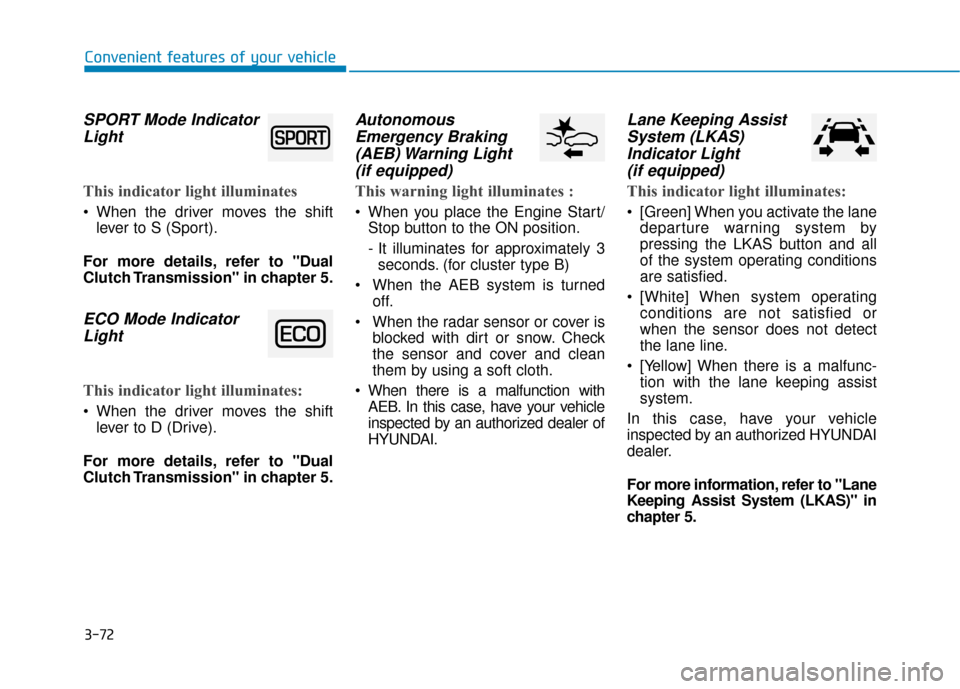
SPORT Mode IndicatorLight
This indicator light illuminates
When the driver moves the shift
lever to S (Sport).
For more details, refer to "Dual
Clutch Transmission" in chapter 5.
ECO Mode Indicator Light
This indicator light illuminates:
When the driver moves the shift
lever to D (Drive).
For more details, refer to "Dual
Clutch Transmission" in chapter 5.
Autonomous Emergency Braking(AEB) Warning Light (if equipped)
This warning light illuminates :
When you place the Engine Start/
Stop button to the ON position.
- It illuminates for approximately 3seconds. (for cluster type B)
When the AEB system is turned off.
When the radar sensor or cover is blocked with dirt or snow. Check
the sensor and cover and clean
them by using a soft cloth.
When there is a malfunction with AEB. In this case, have your vehicle
inspected by an authorized dealer of
HYUNDAI.
Lane Keeping AssistSystem (LKAS)Indicator Light (if equipped)
This indicator light illuminates:
[Green] When you activate the lane
departure warning system by
pressing the LKAS button and all
of the system operating conditions
are satisfied.
[White] When system operating conditions are not satisfied or
when the sensor does not detect
the lane line.
[Yellow] When there is a malfunc- tion with the lane keeping assist
system.
In this case, have your vehicle
inspected by an authorized HYUNDAI
dealer.
For more information, refer to "Lane
Keeping Assist System (LKAS)" in
chapter 5.
Page 208 of 589
3-116
Convenient features of your vehicle
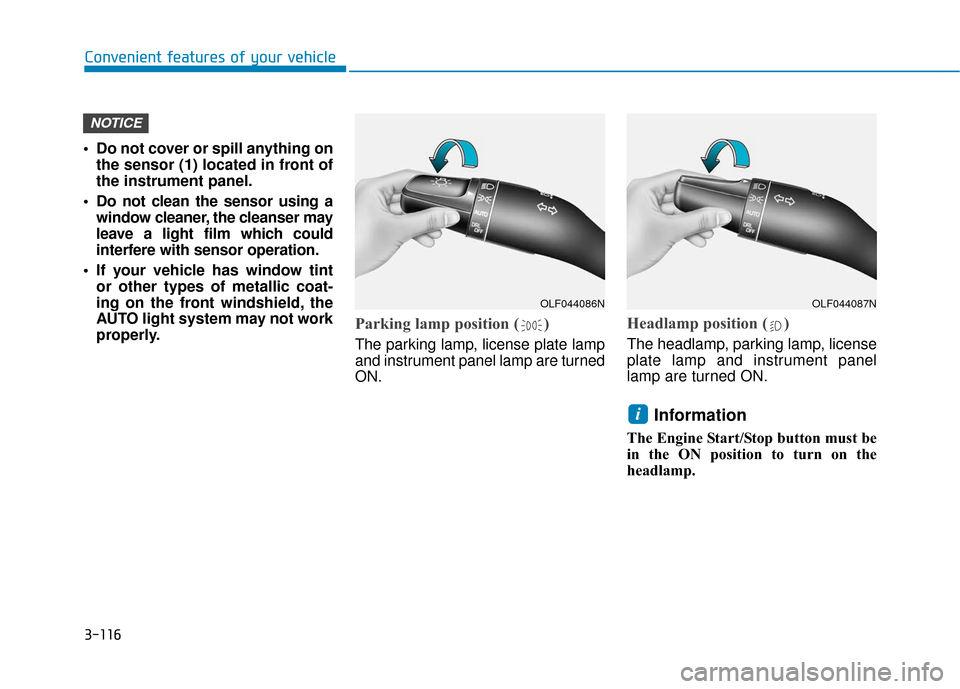
• Do not cover or spill anything on the sensor (1) located in front of
the instrument panel.
Do not clean the sensor using a window cleaner, the cleanser may
leave a light film which could
interfere with sensor operation.
If your vehicle has window tint or other types of metallic coat-
ing on the front windshield, the
AUTO light system may not work
properly.
Parking lamp position ( )
The parking lamp, license plate lamp
and instrument panel lamp are turned
ON.
Headlamp position ( )
The headlamp, parking lamp, license
plate lamp and instrument panel
lamp are turned ON.
Information
The Engine Start/Stop button must be
in the ON position to turn on the
headlamp.
i
NOTICE
OLF044086NOLF044087N
Page 218 of 589
3-126
Rear Parking Assist System
(if equipped)
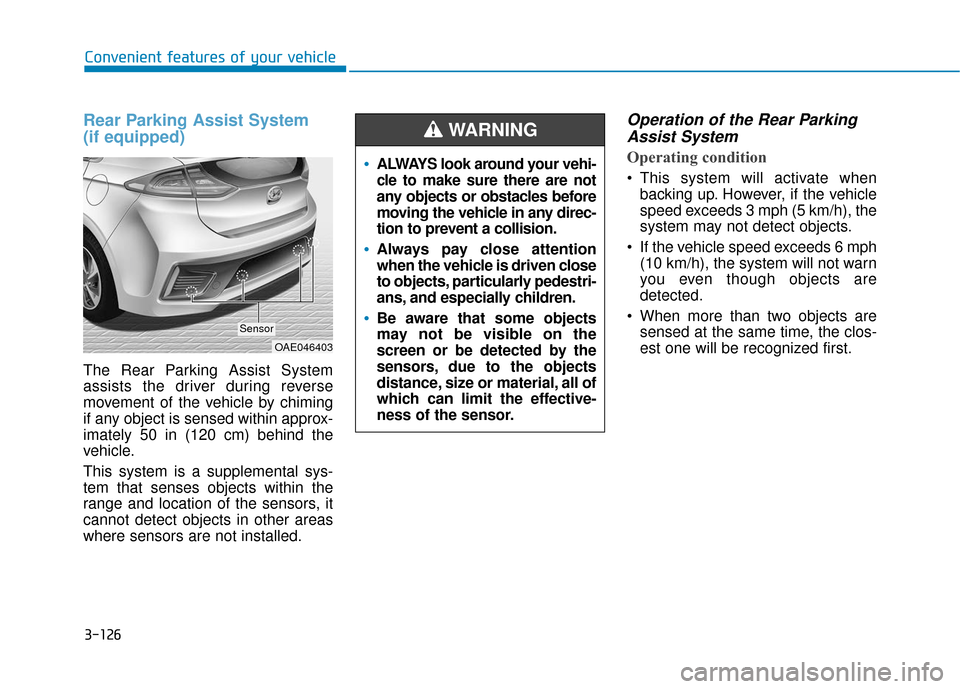
The Rear Parking Assist System
assists the driver during reverse
movement of the vehicle by chiming
if any object is sensed within approx-
imately 50 in (120 cm) behind the
vehicle.
This system is a supplemental sys-
tem that senses objects within the
range and location of the sensors, it
cannot detect objects in other areas
where sensors are not installed.
Operation of the Rear ParkingAssist System
Operating condition
This system will activate when
backing up. However, if the vehicle
speed exceeds 3 mph (5 km/h), the
system may not detect objects.
If the vehicle speed exceeds 6 mph (10 km/h), the system will not warn
you even though objects are
detected.
When more than two objects are sensed at the same time, the clos-
est one will be recognized first.
Convenient features of your vehicle
OAE046403
Sensor
ALWAYS look around your vehi-
cle to make sure there are not
any objects or obstacles before
moving the vehicle in any direc-
tion to prevent a collision.
Always pay close attention
when the vehicle is driven close
to objects, particularly pedestri-
ans, and especially children.
Be aware that some objects
may not be visible on the
screen or be detected by the
sensors, due to the objects
distance, size or material, all of
which can limit the effective-
ness of the sensor.
WARNING
Page 219 of 589
3-127
Convenient features of your vehicle
Types of warning sound and indicatorNon-operational conditions ofParking Assist System
The Rear Parking Assist System
may not operate normally when:
Moisture is frozen to the sensor.
The sensor is covered with dirt or
debris such as snow or ice, or the
sensor cover is blocked.
There is a possibility of the Rear
Parking Assist System malfunction
when:
Driving on uneven road surfacessuch as unpaved roads, gravel,
bumps, or gradient.
Objects generating excessive noise such as vehicle horns, loud motor-
cycle engines, or truck air brakes
can interfere with the sensor.
Heavy rain or water spray is present.
Wireless transmitters or mobile phones are present near the sensor.
The sensor is covered with snow.
Any non-factory equipment or accessories have been installed, or
if the vehicle bumper height or sen-
sor installation has been modified.
3
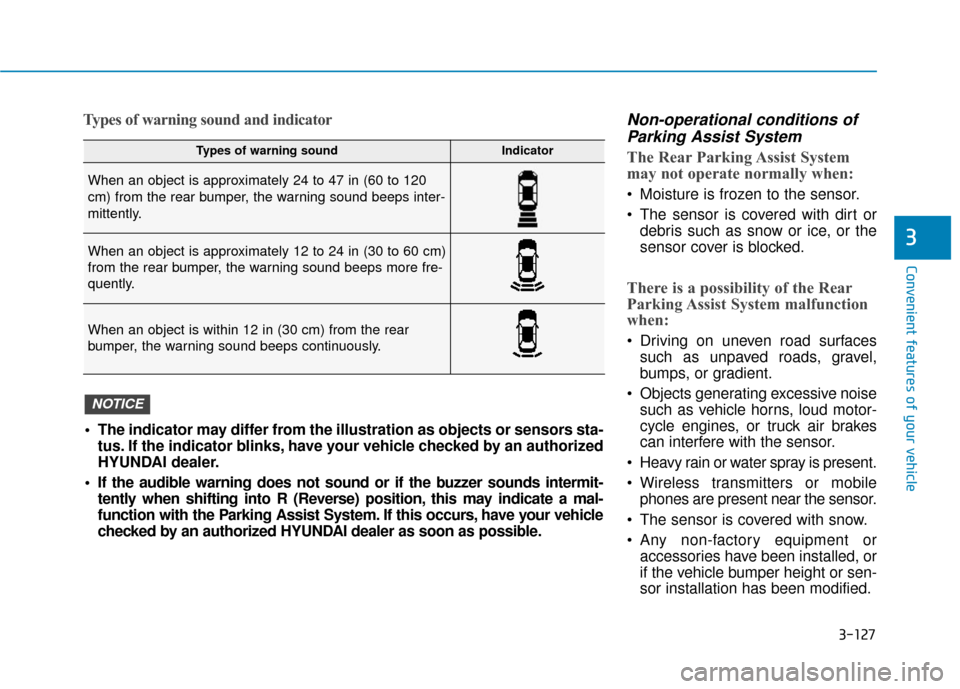
Types of warning soundIndicator
When an object is approximately 24 to 47 in (60 to 120
cm) from the rear bumper, the warning sound beeps inter-
mittently.
When an object is approximately 12 to 24 in (30 to 60 cm)
from the rear bumper, the warning sound beeps more fre-
quently.
When an object is within 12 in (30 cm) from the rear
bumper, the warning sound beeps continuously.
The indicator may differ from the illustration as objects or sensors sta-tus. If the indicator blinks, have your vehicle checked by an authorized
HYUNDAI dealer.
If the audible warning does not sound or if the buzzer sounds intermit- tently when shifting into R (Reverse) position, this may indicate a mal-
function with the Parking Assist System. If this occurs, have your vehicle
checked by an authorized HYUNDAI dealer as soon as possible.
NOTICE
Page 220 of 589
3-128
Detecting range may decrease when:
Outside air temperature is extreme-ly hot or cold.
Undetectable objects smaller than 40 inches (1 m) and narrower than
6 inches (14 cm) in diameter.
The following objects may not be
recognized by the sensor:
Sharp or slim objects such asropes, chains or small poles.
Objects, which tend to absorb sen- sor frequency such as clothes,
spongy material or snow.
Rear parking assist system pre-cautions
The rear parking assist system
may not operate consistently in
some circumstances depending on
the speed of the vehicle and the
shapes of the objects detected.
The rear parking assist system may malfunction if the vehicle bumper
height or sensor installation has
been modified or damaged. Any
non-factory installed equipment or
accessories may also interfere with
the sensor performance.
The sensor may not recognize objects less than 15 in. (40 cm)
from the sensor, or it may sense an
incorrect distance. Use caution.
When the sensor is blocked with snow, dirt, debris, or ice, the rear
parking assist system may be inop-
erative until the snow or ice melts,
or the debris is removed. Use a
soft cloth to wipe debris away from
the sensor.
Do not push, scratch or strike the sensor with any hard objects that
could damage the surface of the
sensor. Sensor damage could occur. Do not spray the sensors or its sur-
rounding area directly with a high
pressure washer. Doing so may
cause the sensors to fail to operate
normally.
Convenient features of your vehicle
Your new vehicle warranty does
not cover any accidents or dam-
age to the vehicle or injuries to
its occupants related to a Rear
Parking Assist System. Always
drive safely and cautiously.
WARNING
Page 223 of 589
3-131
Convenient features of your vehicle
3
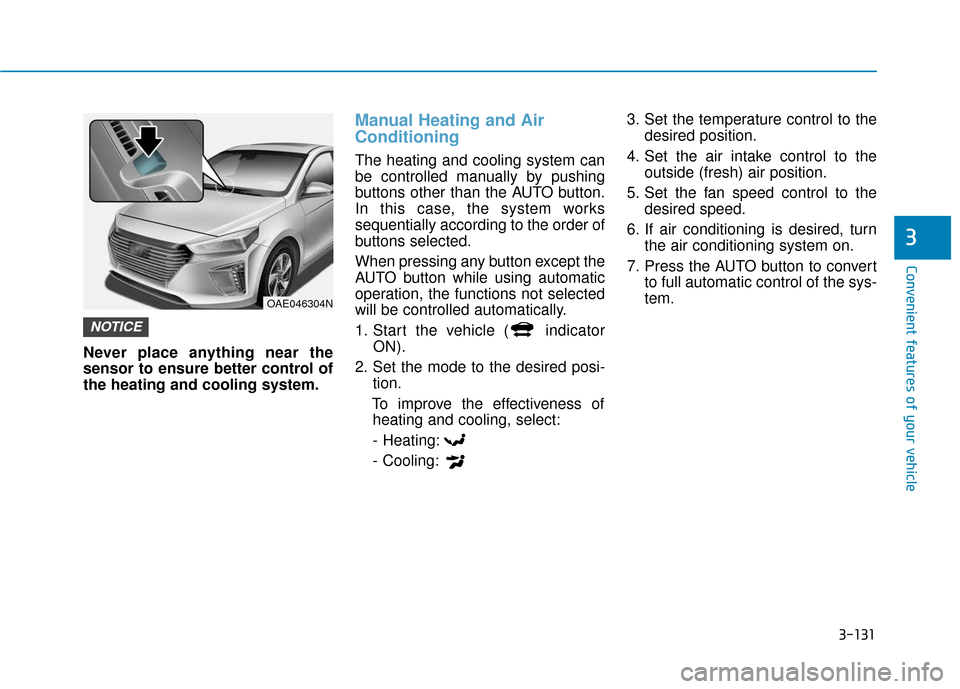
Never place anything near the
sensor to ensure better control of
the heating and cooling system.
Manual Heating and Air
Conditioning
The heating and cooling system can
be controlled manually by pushing
buttons other than the AUTO button.
In this case, the system works
sequentially according to the order of
buttons selected.
When pressing any button except the
AUTO button while using automatic
operation, the functions not selected
will be controlled automatically.
1. Start the vehicle ( indicatorON).
2. Set the mode to the desired posi- tion.
To improve the effectiveness of heating and cooling, select:
- Heating:
- Cooling: 3. Set the temperature control to the
desired position.
4. Set the air intake control to the outside (fresh) air position.
5. Set the fan speed control to the desired speed.
6. If air conditioning is desired, turn the air conditioning system on.
7. Press the AUTO button to convert to full automatic control of the sys-
tem.
NOTICE
OAE046304N
Page 236 of 589
3-144
When the Auto Defogging
System operates, the indi-
cator will illuminate.
If high levels of moisture are sensed in
the vehicle, the Auto Defogging System
will operate in the following order:
Step 1 : Outside air position
Step 2 : Operating the air conditioning
Step 3 : Blowing air toward the wind- shield
Step 4 : Increasing air flow toward the windshield
If the air conditioning is off or recircu-
lated air position is manually select-
ed while Auto Defogging System is
ON, the Auto Defogging System
Indicator will blink 3 times to signal
that the manual operation has been
canceled.To cancel or reset the
Auto Defogging System
Press the front windshield defroster
button for 3 seconds when the
Engine Start/Stop button is in the ON
position. When the Auto Defogging
System is canceled, the ADS OFF
symbol will blink 3 times and ADS
OFF will be displayed on the climate
control information screen.
When the Auto Defogging System is
reset, the ADS OFF symbol will blink
6 times without a signal.
Information
• When the air conditioning is turned on by Auto defogging system, if you
try to turn off the air conditioning, the
indicator will blink 3 times and the air
conditioning will not be turned off.
• For efficiency, do not select recircu- lated air position while the Auto
defogging system is operating.
• When Auto defogging mode is selected, fan speed, temperature and
intake mode which is adjusted man-
ually are canceled for better defog-
ging result. Do not remove the sensor cover
located on the upper end of the
windshield glass.
Damage to system parts could
occur and may not be covered by
your vehicle warranty.
NOTICE
i
Convenient features of your vehicle
Page 292 of 589
Driving your vehicle
5
Before Driving ........................................................5-4
Before Entering the Vehicle ...........................................5-4
Before Starting ..................................................................5-4
Engine Start/Stop Button .....................................5-6
Engine Start/Stop Button Positions .............................5-7
Starting the Vehicle ..........................................................5-9
Turning Off the Vehicle .................................................5-11
Dual Clutch Transmission ....................................5-12
Dual Clutch Transmission Operation ..........................5-12
Shift Lever Position ........................................................5-16
Paddle Shifter ..................................................................5-19
Parking ........................................................................\
.......5-20
Good Driving Practices ..................................................5-20
Coasting Guide (Plug-in hybrid vehicle) ..........5-22
Braking System ....................................................5-23
Power Brakes ...................................................................5-23
Disc Brake Wear Indicator ............................................5-24
Parking Brake...................................................................5-24
Anti-lock Brake System (ABS) ....................................5-26
Electronic Stability Control (ESC)................................5-28
Vehicle Stability Management (VSM).........................5-31
Hill-Start Assist Control (HAC) ....................................5-33
Good Braking Practices .................................................5-33
Blind Spot Detection System (BSD) ..................5-34
BSD (Blind Spot Detection) /
LCA (Lane Change Assist) .............................................5-35
RCTA (Rear Cross Traffic Alert) ..................................5-37
Detecting sensor .............................................................5-40
Limitations of the system .............................................5-41
Autonomous (Automatic) Emergency
Braking (AEB).......................................................5-43
System Setting and Activation.....................................5-43
AEB Warning Message and System Control ............5-45
AEB Sensor .......................................................................5\
-47
System Malfunction .......................................................5-49
Limitations of the System .............................................5-51
Lane Keeping Assist System (LKAS) .................5-56
LKAS Operation ...............................................................5-57
Warning Light and Message.........................................5-61
Limitations of the System .............................................5-62
LKAS Function Change ..................................................5-63
Cruise Control .......................................................5-64
Cruise Control Operation...............................................5-64