test HYUNDAI IX35 2014 Owner's Guide
[x] Cancel search | Manufacturer: HYUNDAI, Model Year: 2014, Model line: IX35, Model: HYUNDAI IX35 2014Pages: 1534, PDF Size: 39.76 MB
Page 972 of 1534
7 107
Maintenance
APPEARANCE CARE
Exterior care
Exterior general caution
It is very important to follow the label
directions when using any chemical
cleaner or polish. Read all warning andcaution statements that appear on thelabel.
Finish maintenance
Washing
To help protect your vehicle’s finish from
rust and deterioration, wash it thoroughlyand frequently at least once a month with
lukewarm or cold water.
If you use your vehicle for off-road driv-
ing, you should wash it after each off-
road trip. Pay special attention to the
removal of any accumulation of salt, dirt,
mud, and other foreign materials. Make
sure the drain holes in the lower edges of
the doors and rocker panels are keptclear and clean.
Insects, tar, tree sap, bird droppings,
industrial pollution and similar deposits
can damage your vehicle’s finish if not
removed immediately.
Even prompt washing with plain water
may not completely remove all these
deposits.
A mild soap, safe for use on painted sur-
faces, may be used.
After washing, rinse the vehicle thor-
oughly with lukewarm or cold water. Do
not allow soap to dry on the finish.
WARNING - Wet brakes
After washing the vehicle, test the
brakes while driving slowly to see if
they have been affected by water. If
braking performance is impaired,
dry the brakes by applying them
lightly while maintaining a slow for-
ward speed.
CAUTION
Do not use strong soap, chemical detergents or hot water, and do
not wash the vehicle in directsunlight or when the body of thevehicle is warm.
Be careful when washing the side windows of your vehicle.Especially, with high-pressure water, water may leak through thewindows and wet the interior.
To prevent damage to the plastic parts and lamps, do not cleanwith chemical solvents or strong detergents.
EL(FL) Eng 7.QXP 10/7/2013 9:33 AM Page 107
Page 974 of 1534
7 109
Maintenance
Bright-metal maintenance
To remove road tar and insects, use atar remover, not a scraper or other
sharp object.
To protect the surfaces of bright-metal parts from corrosion, apply a coating of
wax or chrome preservative and rub to
a high luster.
During winter weather or in coastal areas, cover the bright metal parts with
a heavier coating of wax or preserva-
tive. If necessary, coat the parts with
non-corrosive petroleum jelly or other
protective compound.
Underbody maintenance
Corrosive materials used for ice and
snow removal and dust control may col-
lect on the underbody. If these materials
are not removed, accelerated rusting can
occur on underbody parts such as the
fuel lines, frame, floor pan and exhaust
system, even though they have been
treated with rust protection.
Thoroughly flush the vehicle underbody
and wheel openings with lukewarm or
cold water once a month, after off-road
driving and at the end of each winter. Payspecial attention to these areas because
it is difficult to see all the mud and dirt. It
will do more harm than good to wet down
the road grime without removing it. The
lower edges of doors, rocker panels, and
frame members have drain holes that
should not be allowed to clog with dirt;
trapped water in these areas can cause
rusting.WARNING
After washing the vehicle, test the
brakes while driving slowly to see if
they have been affected by water. If
braking performance is impaired,
dry the brakes by applying them
lightly while maintaining a slow for-
ward speed.
EL(FL) Eng 7.QXP 10/7/2013 9:33 AM Page 109
Page 978 of 1534
7 113
Maintenance
EMISSION CONTROL SYSTEM
The emission control system of your
vehicle is covered by a written limited
warranty. Please see the warranty infor-
mation contained in the Service Passport
in your vehicle.
Your vehicle is equipped with an emis- sion control system to meet all emission
regulations. There are three emission control sys-
tems which are as follows.
(1) Crankcase emission control system
(2) Evaporative emission control system(3) Exhaust emission control system In order to assure the proper function of
the emission control systems, it is rec-
ommended that you have your car
inspected and maintained by an author-
ized HYUNDAI dealer or other repairshops that use qualified technicians inaccordance with the maintenance sched-
ule in this manual. Caution for the Inspection and
Maintenance Test (With Electronic
Stability Program (ESP) system)
To prevent the vehicle from misfir-
ing during dynamometer testing,
turn the Electronic Stability
Program (ESP) system off by press-
ing the ESP switch.
After dynamometer testing is com- pleted, turn the ESP system back on
by pressing the ESP switch again.
1. Crankcase emission control system
The positive crankcase ventilation sys-
tem is employed to prevent air pollution
caused by blow-by gases being emitted
from the crankcase. This system supplies
fresh filtered air to the crankcase through
the air intake hose. Inside the crankcase,
the fresh air mixes with blow-by gases,
which then pass through the PCV valveinto the induction system. 2. Evaporative emission control
System
The Evaporative Emission Control
System is designed to prevent fuel
vapors from escaping into the atmos-
phere.
Canister
Fuel vapors generated inside the fuel tank are absorbed and stored in the
onboard canister. When the engine is
running, the fuel vapors absorbed in the
canister are drawn into the surge tank
through the purge control solenoid valve.
Purge Control Solenoid Valve (PCSV)
The purge control solenoid valve is con-
trolled by the Engine Control Module
(ECM); when the engine coolant temper-
ature is low during idling, the PCSV clos-
es so that evaporated fuel is not taken
into the engine. After the engine warms-
up during ordinary driving, the PCSV
opens to introduce evaporated fuel to the
engine.
EL(FL) Eng 7.QXP 10/7/2013 9:33 AM Page 113
Page 994 of 1534
Introduction
2
1
This Owners Manual is designed to help
vehicle users derive the greatest possi-
ble amount of enjoyment and satisfaction
from driving the HYUNDAI vehicle. It isstrongly recommended that the entire
manual is read in order that all of the fea-
tures, safety systems and maintenancerequirements are understood.
To minimise the RISK of death or injury,
the "WARNING" and "CAUTION" state-
ments must be read and understood
before operating the vehicle.
Illustrations are used throughout the
manual to complement written descrip-
tions intended to best explain how to
enjoy using the vehicle.
Reading this manual will assist the vehi-
cle user to learn about and understand
the features, important safety informa-
tion, and driving recommendations.
The general layout of the manual is pro-
vided in the Table of Contents. The index
has an alphabetical listing of all the infor-
mation contained in the manual. The
manual has eight sections plus an index.
Each section begins with a brief list ofcontents to easily identify at a glance if
that section contains the informationbeing sought. "WARNING", "CAUTION", and "NOTICE"
information is provided to enhance the
personal safety of the vehicle user. This
information must be carefully read and
followed.
✽✽
NOTICE
A NOTICE indicates interesting or help-
ful information is being provided.
Petrol engine
Unleaded
For the optimal vehicle performance, we
recommend you to use unleaded petrol
with an octane rating of RON (Research
Octane Number) 95 /AKI (Anti Knock
Index) 91 or higher.
You may use unleaded petrol with an
octane rating of RON 91~94/AKI 87~90
but it may result in slight performance
reduction of the vehicle.
HOW TO USE THIS MANUAL FUEL REQUIREMENTS
WARNING
A WARNING indicates a situation in
which harm, serious bodily injury ordeath could result if the warning isignored.
CAUTION
A CAUTION indicates a situation in which damage to your vehicle couldresult if the caution is ignored.
CAUTION
NEVER USE LEADED FUEL. Theuse of leaded fuel is detrimental to the catalytic converter and will
damage the engine control sys- tem’s oxygen sensor and affectemission control.
Never add any fuel system cleaningagents to the fuel tank other than
what has been specified. (We rec- ommend that you consult a HYUNDAI authorised repairer fordetails.)
EL(FL) UK 1.QXP 8/5/2013 6:21 PM Page 2
Page 997 of 1534
15
Introduction
Biodiesel
Commercially supplied Diesel blends of no more than 7% biodiesel, commonly
known as "B7 Diesel" may be used in
your vehicle if Biodiesel meets EN 14214
or equivalent specifications. (EN stands
for "European Norm"). The use of biofu-
els exceeding 7%, made from rapeseed
methyl ester (RME), fatty acid methyl
ester (FAME), vegetable oil methyl ester
(VME) etc. or mixing diesel exceeding7% with biodiesel will cause increased
wear or damage to the engine and fuel
system. Repair or replacement of worn ordamaged components due to the use of
non approved fuels will not be covered by
the manufactures warranty.As with other vehicles of this type, failure
to operate this vehicle correctly mayresult in loss of control, an accident or
vehicle rollover.
Specific design characteristics (higher
ground clearance, track, etc.) give this
vehicle a higher centre of gravity than
other types of vehicles. In other words
they are not designed for cornering at the
same speeds as conventional 2-wheel
drive vehicles. Avoid sharp turns or
abrupt manoeuvres. Again, failure to
operate this vehicle correctly may result
in loss of control, an accident or vehicle
rollover.
Be sure to read the “Reducing
the risk of a rollover” driving guide-
lines, in section 5 of this manual. No special run-in period is needed. By
following a few simple precautions for the
first 600 miles (1,000 km) you may add to
the performance, economy and life of
your vehicle.
Do not race the engine.
Whilst driving, keep your engine speed
(rpm, or revolutions per minute)
between 2,000 rpm and 4,000 rpm.
Do not maintain a single speed for long
periods of time, either fast or slow.
Varying engine speed is needed to
properly run-in the engine.
Avoid hard stops, except in emergen- cies, to allow the brakes to seat prop-
erly.
Don't let the engine idle longer than 3
minutes at one time.
Don't tow a trailer/caravan during the first 1,200 miles (2,000 km) of opera-tion.
CAUTION
Never use any fuel, whether
diesel, B7 biodiesel or otherwise,that fails to meet the latest petro-leum industry specification.
Never use any fuel additives or treatments that are not recom-
mended or approved by the vehi-cle manufacturer.
VEHICLE HANDLING
INSTRUCTIONS VEHICLE RUN-IN PROCESS
EL(FL) UK 1.QXP 8/5/2013 6:21 PM Page 5
Page 1110 of 1534
439
Features of your vehicle
Inside rearview mirror
Adjust the rearview mirror to centre on
the view through the rear window. Make
this adjustment before you start driving.
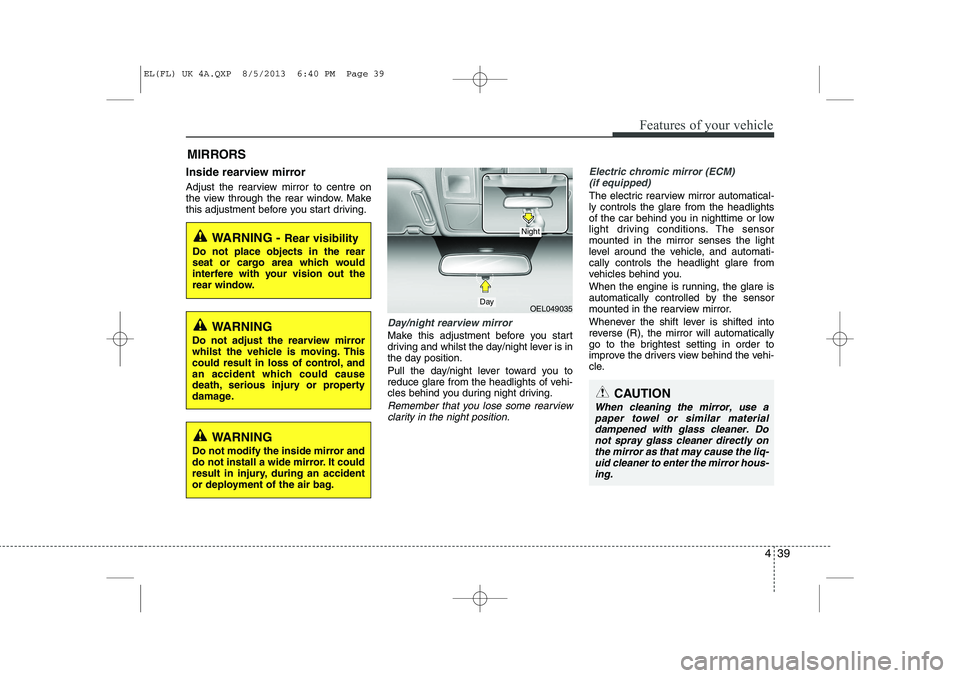
Day/night rearview mirror
Make this adjustment before you start
driving and whilst the day/night lever is in
the day position.
Pull the day/night lever toward you to
reduce glare from the headlights of vehi-
cles behind you during night driving.
Remember that you lose some rearviewclarity in the night position.
Electric chromic mirror (ECM) (if equipped)
The electric rearview mirror automatical- ly controls the glare from the headlights
of the car behind you in nighttime or low
light driving conditions. The sensormounted in the mirror senses the light
level around the vehicle, and automati-cally controls the headlight glare from
vehicles behind you.
When the engine is running, the glare is
automatically controlled by the sensor
mounted in the rearview mirror.
Whenever the shift lever is shifted into
reverse (R), the mirror will automatically
go to the brightest setting in order to
improve the drivers view behind the vehi-
cle.
MIRRORS
WARNING -
Rear visibility
Do not place objects in the rear
seat or cargo area which would
interfere with your vision out the
rear window.
OEL049035
CAUTION
When cleaning the mirror, use a paper towel or similar materialdampened with glass cleaner. Do not spray glass cleaner directly on
the mirror as that may cause the liq- uid cleaner to enter the mirror hous-ing.
Day
Night
WARNING
Do not adjust the rearview mirror
whilst the vehicle is moving. This
could result in loss of control, and
an accident which could cause
death, serious injury or property
damage.
WARNING
Do not modify the inside mirror and
do not install a wide mirror. It could
result in injury, during an accident
or deployment of the air bag.
EL(FL) UK 4A.QXP 8/5/2013 6:40 PM Page 39
Page 1358 of 1534
Driving your vehicle
24
5
R (Reverse)
Use this position to drive the vehicle
backward. N (Neutral)
The wheels and transaxle are not
engaged. The vehicle will roll freely even
on the slightest incline unless the parking
brake or service brakes are applied. D (Drive)
This is the normal forward driving posi-
tion. The transaxle will automatically shift
through a 6-gear sequence, providing the
best fuel economy and power.
For extra power when passing another
vehicle or climbing grades, depress the
accelerator fully, at which time the
transaxle will automatically downshift to
the next lower gear.
✽✽
NOTICE
Always come to a complete stop before shifting into D (Drive).
WARNING
Shifting into P (Park) whilst the vehicle is in motion will cause the
drive wheels to lock which will
cause you to lose control of the
vehicle.
Do not use the P (Park) position in place of the parking brake.
Always make sure the shift lever
is latched in the P (Park) position
and set the parking brake fully.
Never leave a child unattended in a vehicle.
CAUTION
The transaxle may be damaged if
you shift into P (Park) whilst the
vehicle is in motion.
CAUTION
Always come to a complete stopbefore shifting into or out of R
(Reverse); you may damage the transaxle if you shift into R(Reverse) whilst the vehicle is in motion, except as explained in
“Rocking the vehicle”, in this manu-al.
EL(FL) UK 5.QXP 8/5/2013 6:57 PM Page 24
Page 1368 of 1534
Driving your vehicle
34
5
Full-time 4WD vehicles must be tested
on a special four wheel chassis
dynamometer.
✽✽ NOTICE
Never engage the parking brake whilst performing these tests.
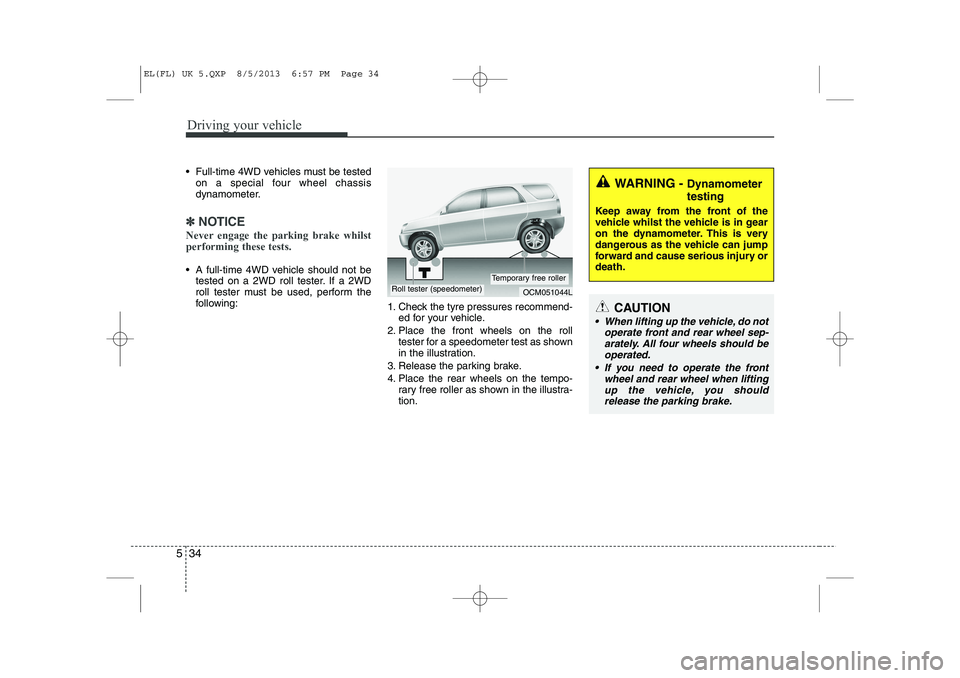
A full-time 4WD vehicle should not be tested on a 2WD roll tester. If a 2WD
roll tester must be used, perform the
following: 1. Check the tyre pressures recommend-
ed for your vehicle.
2. Place the front wheels on the roll tester for a speedometer test as shown
in the illustration.
3. Release the parking brake.
4. Place the rear wheels on the tempo- rary free roller as shown in the illustra- tion.
WARNING - Dynamometer testing
Keep away from the front of the
vehicle whilst the vehicle is in gear
on the dynamometer. This is very
dangerous as the vehicle can jump
forward and cause serious injury ordeath.
OCM051044LRoll tester (speedometer)Temporary free roller
CAUTION
When lifting up the vehicle, do not operate front and rear wheel sep-
arately. All four wheels should be operated.
If you need to operate the front wheel and rear wheel when lifting
up the vehicle, you shouldrelease the parking brake.
EL(FL) UK 5.QXP 8/5/2013 6:57 PM Page 34
Page 1369 of 1534
535
Driving your vehicle
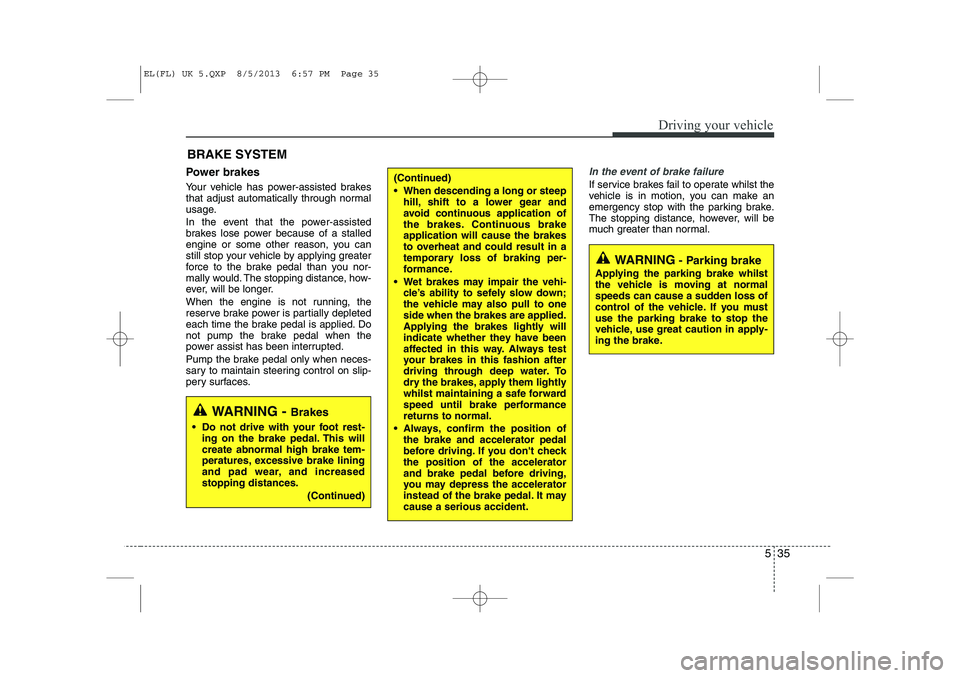
Power brakes
Your vehicle has power-assisted brakes
that adjust automatically through normal
usage.
In the event that the power-assisted
brakes lose power because of a stalled
engine or some other reason, you can
still stop your vehicle by applying greater
force to the brake pedal than you nor-
mally would. The stopping distance, how-
ever, will be longer.
When the engine is not running, the
reserve brake power is partially depleted
each time the brake pedal is applied. Do
not pump the brake pedal when the
power assist has been interrupted.
Pump the brake pedal only when neces-
sary to maintain steering control on slip-
pery surfaces.In the event of brake failure
If service brakes fail to operate whilst the
vehicle is in motion, you can make an
emergency stop with the parking brake.
The stopping distance, however, will be
much greater than normal.
BRAKE SYSTEM (Continued)
When descending a long or steep
hill, shift to a lower gear and
avoid continuous application of
the brakes. Continuous brakeapplication will cause the brakes
to overheat and could result in a
temporary loss of braking per-
formance.
Wet brakes may impair the vehi- cle’s ability to sefely slow down;
the vehicle may also pull to oneside when the brakes are applied.
Applying the brakes lightly will
indicate whether they have been
affected in this way. Always test
your brakes in this fashion after
driving through deep water. To
dry the brakes, apply them lightly
whilst maintaining a safe forward
speed until brake performancereturns to normal.
Always, confirm the position of the brake and accelerator pedal
before driving. If you don't checkthe position of the accelerator
and brake pedal before driving,
you may depress the accelerator
instead of the brake pedal. It maycause a serious accident.
WARNING - Parking brake
Applying the parking brake whilst
the vehicle is moving at normal
speeds can cause a sudden loss of
control of the vehicle. If you mustuse the parking brake to stop the
vehicle, use great caution in apply-
ing the brake.
WARNING - Brakes
Do not drive with your foot rest- ing on the brake pedal. This will create abnormal high brake tem-
peratures, excessive brake lining
and pad wear, and increasedstopping distances.
(Continued)
EL(FL) UK 5.QXP 8/5/2013 6:57 PM Page 35
Page 1372 of 1534
Driving your vehicle
38
5
Anti-lock brake system (ABS) The ABS continuously senses the speed
of the wheels. If the wheels are going to
lock, the ABS system repeatedly modu-
lates the hydraulic brake pressure to the
wheels.
When you apply your brakes under con-
ditions which may lock the wheels, you
may hear a “tik-tik’’ sound from the
brakes, or feel a corresponding sensation
in the brake pedal. This is normal and it
means your ABS is active.
In order to obtain the maximum benefit
from your ABS in an emergency situa-
tion, do not attempt to modulate your
brake pressure and do not try to pump
your brakes. Press your brake pedal as
hard as possible or as hard as the situa-
tion warrants and allow the ABS to con-
trol the force being delivered to the
brakes.
WARNING
ABS (or ESC) will not prevent acci-
dents due to improper or danger-
ous driving manoeuvres. Even
though vehicle control is improved
during emergency braking, always
maintain a safe distance between
you and objects ahead. Vehicle
speeds should always be reduced
during extreme road conditions.
The braking distance for vehicle
equipped with an anti-lock braking
system (Electronic Stability
Program System) may be longer
than for those without it in the fol-
lowing road conditions.
During these conditions the vehicle should be driven at reducedspeeds:
Rough, gravel or snow-covered roads.
With tyre chains installed.
On roads where the road surface is pitted or has different surface height.
(Continued)
(Continued)
The safety features of an ABS (or
ESC) equipped vehicle should not
be tested by high speed driving or
cornering. This could endanger the
safety of yourself or others.
EL(FL) UK 5.QXP 8/5/2013 6:57 PM Page 38