drive information HYUNDAI KONA EV 2021 Owners Manual
[x] Cancel search | Manufacturer: HYUNDAI, Model Year: 2021, Model line: KONA EV, Model: HYUNDAI KONA EV 2021Pages: 478, PDF Size: 32.83 MB
Page 4 of 478
F4
INTRODUCTION
Congratulations, and thank you for choosing HYUNDAI. We are pleased to welcome you to the growing number of dis-
cerning people who drive a HYUNDAI vehicle. We are very proud of the advanced engineering and high-quality con-
struction of each HYUNDAI we build.
Your Owner’s Manual will introduce you to the features and operation of your new HYUNDAI. To become familiar with
your new HYUNDAI, so that you can fully enjoy it, read this Owner’s Manual carefully before driving your new vehicle.
This manual contains important safety information and instructions intended to familiarize you with your vehicle’s con-
trols and safety features so you can safely operate your vehicle.
This manual also contains information on maintenance designed to enhance safe operation of the vehicle. It is recom-
mended that all service and maintenance on your car be performed by an authorized HYUNDAI dealer. HYUNDAI deal-
ers are prepared to provide high-quality service, maintenance and any other assistance that may be required.
This Owner’s Manual should be considered a permanent part of your vehicle, and should be kept in the vehicle so you
can refer to it at any time. The manual should stay with the vehicle if you sell it to provide the next owner with impor-
tant operating, safety and maintenance information.
HYUNDAI MOTOR AMERICA
Copyright 2020 HYUNDAI Motor America. All rights reserved. No part of this publication may be reproduced, stored
in any retrieval system or transmitted in any form or by any means without the prior written permission of HYUNDAI
Motor America.Severe vehicle damage may result from the use of poor quality lubricants that do not meet HYUNDAI spec-
ifications. You must always use high quality lubricants that meet the specifications listed on Page 8-6 in the
Vehicle Specifications section of the Owner's Manual.
CAUTION
Page 16 of 478
Safety system of your vehicle
Important Safety Precautions ..............................2-2
Always Wear Your Seat Belt ..........................................2-2
Restrain All Children .........................................................2-2
Air Bag Hazards .................................................................2-2
Driver Distraction ..............................................................2-2
Control Your Speed ...........................................................2-3
Keep Your Vehicle in Safe Condition ............................2-3
Seats ........................................................................2-4
Safety Precautions ...........................................................2-5
Front Seats .........................................................................2-6
Rear Seats.........................................................................2-13
Head Restraints ...............................................................2-16
Seat Heaters and Ventilated Seats .............................2-20
Seat Belts ..............................................................2-23
Seat Belt Safety Precautions .......................................2-23
Seat Belt Warning Light ................................................2-24
Seat Belt Restraint System...........................................2-26
Additional Seat Belt Safety Precautions ...................2-32
Care of Seat Belts...........................................................2-35
Child Restraint System (CRS) .............................2-36
Children Always in the Rear .........................................2-36
Selecting a Child Restraint System (CRS) .................2-37
Installing a Child Restraint System (CRS)..................2-39
Air Bag
- Advanced Supplemental Restraint System.....2-47
Where Are the Air Bags? ..............................................2-49
How Does the Air Bag System Operate?..................2-52
What to Expect After an Air Bag Inflates ................2-56
Occupant Classification System (OCS).......................2-57
Why Didn't My Air Bag Go Off in a Collision? ........2-63
SRS Care ............................................................................2-68
Additional Safety Precautions .....................................2-69
Air Bag Warning Labels .................................................2-69
This chapter provides you with important information about how to protect yourself and your passengers.
It explains how to properly use your seats and seat belts, and how your air bags work.
Additionally, this chapter explains how to properly restrain infants and children in your vehicle.
2
Page 36 of 478
2-21
Safety system of your vehicle
2
To prevent damage to the seat
heaters and seats:
Never use a solvent such as
paint thinner, benzene, alcohol
or gasoline to clean the seats.
Do not place heavy or sharp
objects on seats equipped with
seat heaters.
Do not change the seat cover. It
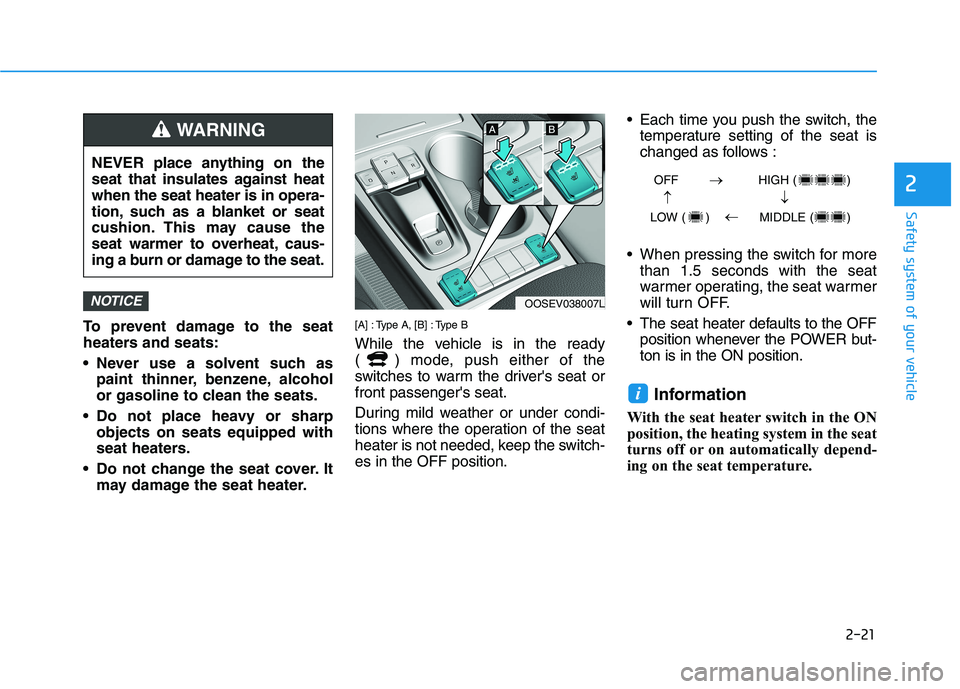
may damage the seat heater.[A] : Type A, [B] : Type B
While the vehicle is in the ready
( ) mode, push either of the
switches to warm the driver's seat or
front passenger's seat.
During mild weather or under condi-
tions where the operation of the seat
heater is not needed, keep the switch-
es in the OFF position. Each time you push the switch, the
temperature setting of the seat is
changed as follows :
When pressing the switch for more
than 1.5 seconds with the seat
warmer operating, the seat warmer
will turn OFF.
The seat heater defaults to the OFF
position whenever the POWER but-
ton is in the ON position.
Information
With the seat heater switch in the ON
position, the heating system in the seat
turns off or on automatically depend-
ing on the seat temperature.
i
NOTICE
NEVER place anything on the
seat that insulates against heat
when the seat heater is in opera-
tion, such as a blanket or seat
cushion. This may cause the
seat warmer to overheat, caus-
ing a burn or damage to the seat.
WARNING
OOSEV038007L
OFF HIGH ( )
LOW ( ) MIDDLE ( )
→→
→
→
Page 40 of 478
2-25
Safety system of your vehicle
2
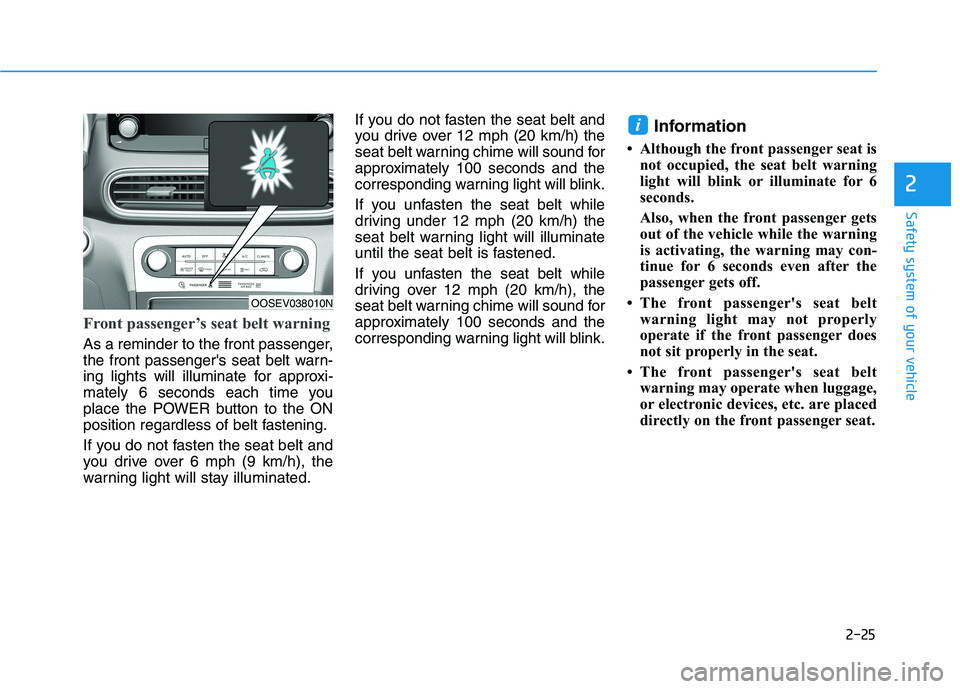
Front passenger’s seat belt warning
As a reminder to the front passenger,
the front passenger's seat belt warn-
ing lights will illuminate for approxi-
mately 6 seconds each time you
place the POWER button to the ON
position regardless of belt fastening.
If you do not fasten the seat belt and
you drive over 6 mph (9 km/h), the
warning light will stay illuminated.If you do not fasten the seat belt and
you drive over 12 mph (20 km/h) the
seat belt warning chime will sound for
approximately 100 seconds and the
corresponding warning light will blink.
If you unfasten the seat belt while
driving under 12 mph (20 km/h) the
seat belt warning light will illuminate
until the seat belt is fastened.
If you unfasten the seat belt while
driving over 12 mph (20 km/h), the
seat belt warning chime will sound for
approximately 100 seconds and the
corresponding warning light will blink.
Information
• Although the front passenger seat is
not occupied, the seat belt warning
light will blink or illuminate for 6
seconds.
Also, when the front passenger gets
out of the vehicle while the warning
is activating, the warning may con-
tinue for 6 seconds even after the
passenger gets off.
• The front passenger's seat belt
warning light may not properly
operate if the front passenger does
not sit properly in the seat.
• The front passenger's seat belt
warning may operate when luggage,
or electronic devices, etc. are placed
directly on the front passenger seat.
i
OOSEV038010N
Page 84 of 478
2-69
Safety system of your vehicle
2
Additional Safety Precautions
Passengers should not move out of
or change seats while the vehicle is
moving.A passenger who is not
wearing a seat belt during a crash or
emergency stop can be thrown
against the inside of the vehicle,
against other occupants, or be ejected
from the vehicle.
Do not use any accessories on seat
belts.Devices claiming to improve
occupant comfort or reposition the
seat belt can reduce the protection
provided by the seat belt and increase
the chance of serious injury in a crash
Do not modify the front seats.
Modification of the front seats could
interfere with the operation of the sup-
plemental restraint system sensing
components or side air bags.
Do not place items under the front
seats.Placing items under the front
seats could interfere with the opera-
tion of the supplemental restraint sys-
tem sensing components and wiring
harnesses.
Do not cause impact to the doors.
Impact to the doors when the POWER
button is in the ON position may cause
the air bags to inflate.Modifications to accommodate
disabilities.If you require modifica-
tion to your vehicle to accommodate
a disability, contact the HYUNDAI
Customer Connect Center at 800-
633-5151.
Adding equipment to or modify-
ing your air bag equipped vehicle
If you modify your vehicle by changing
your vehicle’s frame, bumper system,
front end or side sheet metal or ride
height, this may affect the operation of
your vehicle’s air bag system.
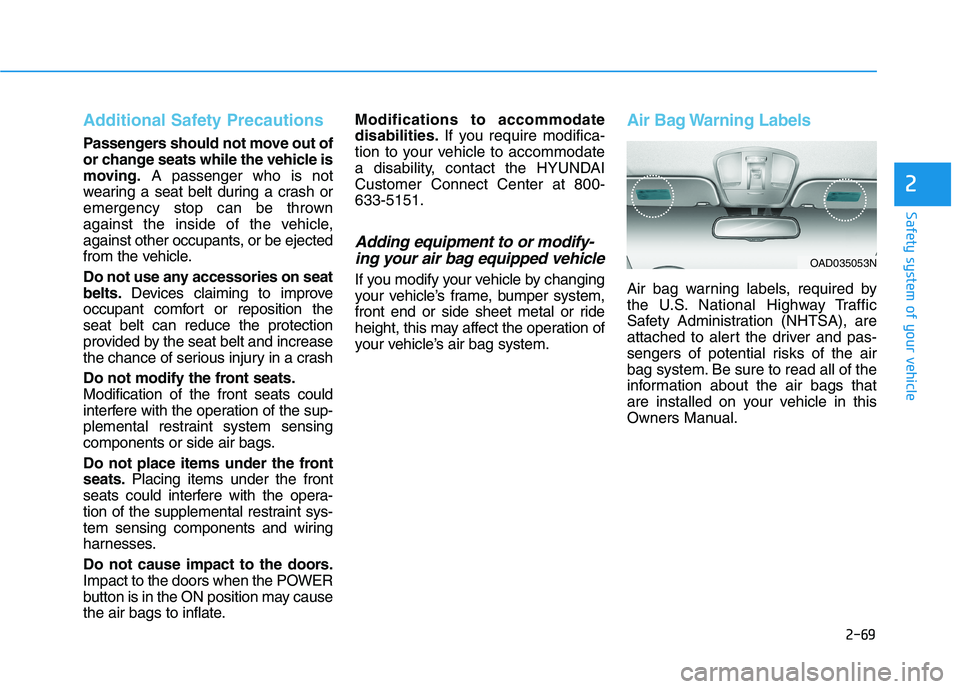
Air Bag Warning Labels
Air bag warning labels, required by
the U.S. National Highway Traffic
Safety Administration (NHTSA), are
attached to alert the driver and pas-
sengers of potential risks of the air
bag system. Be sure to read all of the
information about the air bags that
are installed on your vehicle in this
Owners Manual.
OAD035053N
Page 87 of 478
3-3
Convenient features of your vehicle
A AC
CC
CE
ES
SS
SI
IN
NG
G
Y
YO
OU
UR
R
V
VE
EH
HI
IC
CL
LE
E
3
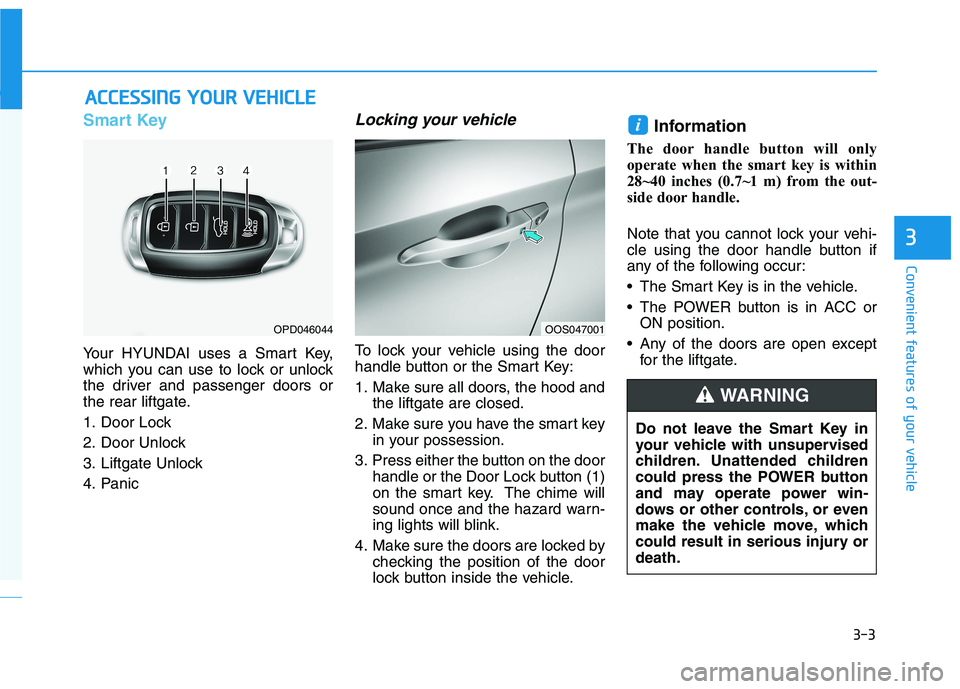
Smart Key
Your HYUNDAI uses a Smart Key,
which you can use to lock or unlock
the driver and passenger doors or
the rear liftgate.
1. Door Lock
2. Door Unlock
3. Liftgate Unlock
4. Panic
Locking your vehicle
To lock your vehicle using the door
handle button or the Smart Key:
1. Make sure all doors, the hood and
the liftgate are closed.
2. Make sure you have the smart key
in your possession.
3. Press either the button on the door
handle or the Door Lock button (1)
on the smart key. The chime will
sound once and the hazard warn-
ing lights will blink.
4. Make sure the doors are locked by
checking the position of the door
lock button inside the vehicle.
Information
The door handle button will only
operate when the smart key is within
28~40 inches (0.7~1 m) from the out-
side door handle.
Note that you cannot lock your vehi-
cle using the door handle button if
any of the following occur:
• The Smart Key is in the vehicle.
The POWER button is in ACC or
ON position.
Any of the doors are open except
for the liftgate.
i
OPD046044OOS047001
Do not leave the Smart Key in
your vehicle with unsupervised
children. Unattended children
could press the POWER button
and may operate power win-
dows or other controls, or even
make the vehicle move, which
could result in serious injury or
death.
WARNING
Page 88 of 478
3-4
Convenient features of your vehicle
Unlocking your vehicle
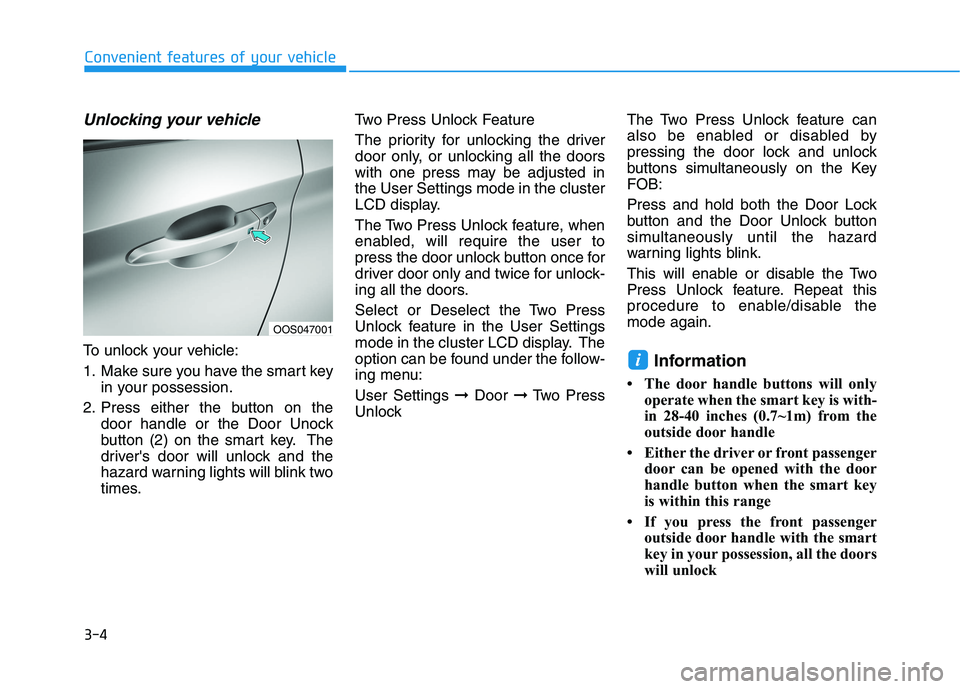
To unlock your vehicle:
1. Make sure you have the smart key
in your possession.
2. Press either the button on the
door handle or the Door Unock
button (2) on the smart key. The
driver's door will unlock and the
hazard warning lights will blink two
times.Two Press Unlock Feature
The priority for unlocking the driver
door only, or unlocking all the doors
with one press may be adjusted in
the User Settings mode in the cluster
LCD display.
The Two Press Unlock feature, when
enabled, will require the user to
press the door unlock button once for
driver door only and twice for unlock-
ing all the doors.
Select or Deselect the Two Press
Unlock feature in the User Settings
mode in the cluster LCD display. The
option can be found under the follow-
ing menu:
User Settings ➞Door ➞Two Press
UnlockThe Two Press Unlock feature can
also be enabled or disabled by
pressing the door lock and unlock
buttons simultaneously on the Key
FOB:
Press and hold both the Door Lock
button and the Door Unlock button
simultaneously until the hazard
warning lights blink.
This will enable or disable the Two
Press Unlock feature. Repeat this
procedure to enable/disable the
mode again.Information
• The door handle buttons will only
operate when the smart key is with-
in 28-40 inches (0.7~1m) from the
outside door handle
• Either the driver or front passenger
door can be opened with the door
handle button when the smart key
is within this range
• If you press the front passenger
outside door handle with the smart
key in your possession, all the doors
will unlock
i
OOS047001
Page 94 of 478
![HYUNDAI KONA EV 2021 Owners Manual 3-10
Convenient features of your vehicle
Operating Door Locks from
Outside the Vehicle
Mechanical key
[A] : Lock, [B] : Unlock
If you lock the drivers door with a
mechanical key, the driver’s door HYUNDAI KONA EV 2021 Owners Manual 3-10
Convenient features of your vehicle
Operating Door Locks from
Outside the Vehicle
Mechanical key
[A] : Lock, [B] : Unlock
If you lock the drivers door with a
mechanical key, the driver’s door](/img/35/56172/w960_56172-93.png)
3-10
Convenient features of your vehicle
Operating Door Locks from
Outside the Vehicle
Mechanical key
[A] : Lock, [B] : Unlock
If you lock the driver's door with a
mechanical key, the driver’s door will
lock. If you unlock the driver's door
with a mechanical key, you can open
and close the driver’s door only.
Once the doors are unlocked, they
may be opened by pulling the door
handle. When closing the door, push
the door by hand. Make sure that
doors are closed securely.
Smart key
Press the button on the driver's out-
side door handle while carrying the
Smart Key with you or press the
Door Unlock button on the Smart
Key, the driver's door will unlock.If you press the button on the front
passenger's outside door, all doors
will unlock.
Once the doors are unlocked, they
may be opened by pulling the door
handle.
When closing the door, push the
door by hand. Make sure that doors
are closed securely.
Information
• In cold and wet climates, door lock
and door mechanisms may not
work properly due to freezing con-
ditions.
• If the door is locked/unlocked mul-
tiple times in rapid succession with
either the vehicle key or door lock
switch, the system may stop operat-
ing temporarily in order to protect
the circuit and prevent damage to
system components.
• Two press unlock setting can be
changed in the User Settings mode
on the cluster.
i
D DO
OO
OR
R
L
LO
OC
CK
KS
S
OOSEV048001
OOS047001
OPD046004
Door
UnlockDoor
Lock
Page 95 of 478
3-11
Convenient features of your vehicle
3
Operating Door Locks from
Inside the Vehicle
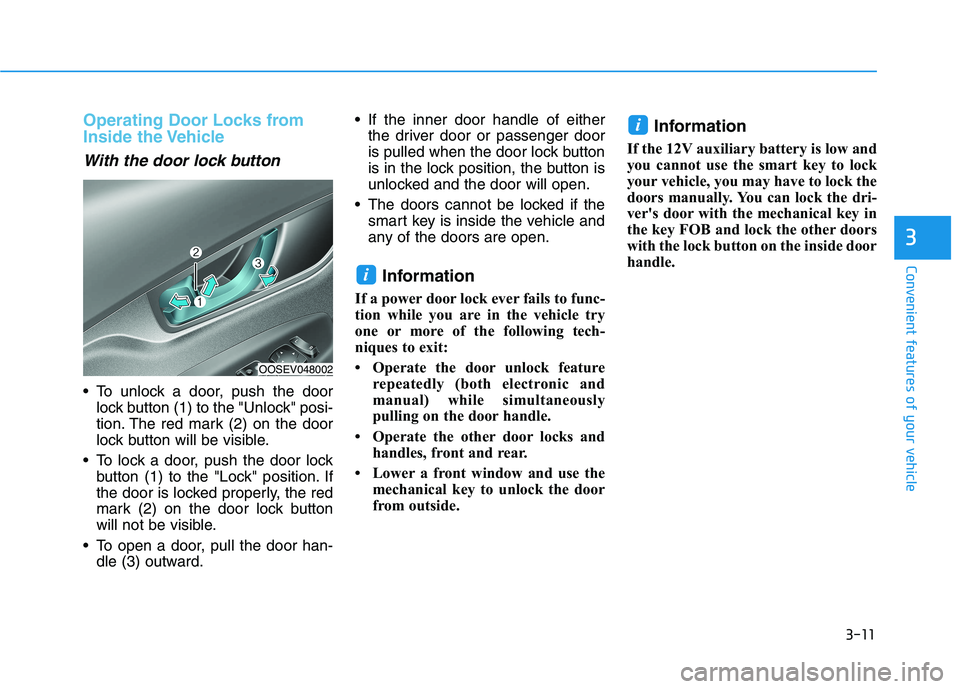
With the door lock button
To unlock a door, push the door
lock button (1) to the "Unlock" posi-
tion. The red mark (2) on the door
lock button will be visible.
To lock a door, push the door lock
button (1) to the "Lock" position. If
the door is locked properly, the red
mark (2) on the door lock button
will not be visible.
To open a door, pull the door han-
dle (3) outward. If the inner door handle of either
the driver door or passenger door
is pulled when the door lock button
is in the lock position, the button is
unlocked and the door will open.
The doors cannot be locked if the
smart key is inside the vehicle and
any of the doors are open.
Information
If a power door lock ever fails to func-
tion while you are in the vehicle try
one or more of the following tech-
niques to exit:
• Operate the door unlock feature
repeatedly (both electronic and
manual) while simultaneously
pulling on the door handle.
• Operate the other door locks and
handles, front and rear.
• Lower a front window and use the
mechanical key to unlock the door
from outside.
Information
If the 12V auxiliary battery is low and
you cannot use the smart key to lock
your vehicle, you may have to lock the
doors manually. You can lock the dri-
ver's door with the mechanical key in
the key FOB and lock the other doors
with the lock button on the inside door
handle.
i
i
OOSEV048002
Page 107 of 478
3-23
Convenient features of your vehicle
3
If you need to recalibrate the com-
pass:
1.Press and hold the Control Button
for more than 6 seconds. When the
compass memory is cleared, a "C"
will appear in the display.
2.Drive the vehicle in 2 complete cir-
cles at less than 5 mph (8 km/h).Integrated HomeLink®Wireless
Control System
The HomeLink®Wireless Control
System can replace up to three
hand-held radio-frequency (RF)
transmitters with a single built-in
device. This innovative feature will
learn the radio frequency codes of
most current transmitters to operate
devices such as gate operators,
garage door openers, entry door
locks, security systems, even home
lighting. Both standard and rolling
code-equipped transmitters can be
programmed by following the out-
lined procedures.
Additional HomeLink
®information
can be found at: www.homelink.com,
www.youtube.com/HomeLinkGentex
or by calling 1-800-355-3515.
Retain the original transmitter of the
RF device you are programming for
use in other vehicles as well as for
future HomeLink
®programming. It is
also suggested that upon the sale of
the vehicle, the programmed
HomeLink
®buttons be erased for
security purposes.Before programming HomeLink
®
to a garage door opener or gate
operator, make sure people and
objects are out of the way of the
device to prevent potential harm
or damage. Do not use the
HomeLink
®with any garage door
opener that lacks the safety stop
and reverse features required by
U.S. federal safety standards
(this includes any garage door
opener model manufactured
before April 1, 1982). A garage
door that cannot detect an object
- signaling the door to stop and
reverse - does not meet current
U.S. federal safety standards.
Using a garage door opener
without these features increases
the risk of serious injury or
death.
WARNING