engine HYUNDAI KONA EV 2021 Owners Manual
[x] Cancel search | Manufacturer: HYUNDAI, Model Year: 2021, Model line: KONA EV, Model: HYUNDAI KONA EV 2021Pages: 478, PDF Size: 32.83 MB
Page 4 of 478
F4
INTRODUCTION
Congratulations, and thank you for choosing HYUNDAI. We are pleased to welcome you to the growing number of dis-
cerning people who drive a HYUNDAI vehicle. We are very proud of the advanced engineering and high-quality con-
struction of each HYUNDAI we build.
Your Owner’s Manual will introduce you to the features and operation of your new HYUNDAI. To become familiar with
your new HYUNDAI, so that you can fully enjoy it, read this Owner’s Manual carefully before driving your new vehicle.
This manual contains important safety information and instructions intended to familiarize you with your vehicle’s con-
trols and safety features so you can safely operate your vehicle.
This manual also contains information on maintenance designed to enhance safe operation of the vehicle. It is recom-
mended that all service and maintenance on your car be performed by an authorized HYUNDAI dealer. HYUNDAI deal-
ers are prepared to provide high-quality service, maintenance and any other assistance that may be required.
This Owner’s Manual should be considered a permanent part of your vehicle, and should be kept in the vehicle so you
can refer to it at any time. The manual should stay with the vehicle if you sell it to provide the next owner with impor-
tant operating, safety and maintenance information.
HYUNDAI MOTOR AMERICA
Copyright 2020 HYUNDAI Motor America. All rights reserved. No part of this publication may be reproduced, stored
in any retrieval system or transmitted in any form or by any means without the prior written permission of HYUNDAI
Motor America.Severe vehicle damage may result from the use of poor quality lubricants that do not meet HYUNDAI spec-
ifications. You must always use high quality lubricants that meet the specifications listed on Page 8-6 in the
Vehicle Specifications section of the Owner's Manual.
CAUTION
Page 5 of 478
F5
1. What are HYUNDAI Genuine
Parts?
HYUNDAI Genuine Parts are the
same parts used by HYUNDAI
Motor Company to manufacture
vehicles. They are designed and
tested for the optimum safety, per-
formance, and reliability for our
customers.2. Why should you use genuine
parts?
HYUNDAI Genuine Parts are
engineered and built to meet rigid
manufacturing requirements.
Damage caused by using imita-
tion, counterfeit or used salvage
parts is not covered under the
HYUNDAI New Vehicle Limited
Warranty or any other HYUNDAI
warranty.
In addition, any damage to or fail-
ure of HYUNDAI Genuine Parts
caused by the installation or fail-
ure of an imitation, counterfeit or
used salvage part is not covered
by any HYUNDAI Warranty.3. How can you tell if you are pur-
chasing HYUNDAI Genuine
Parts?
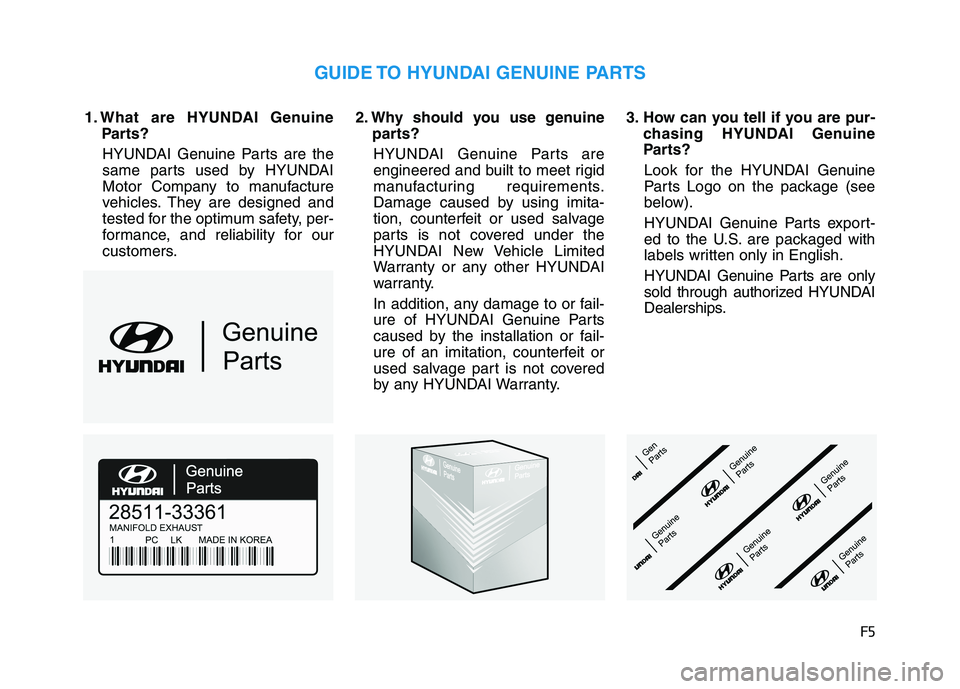
Look for the HYUNDAI Genuine
Parts Logo on the package (see
below).
HYUNDAI Genuine Parts export-
ed to the U.S. are packaged with
labels written only in English.
HYUNDAI Genuine Parts are only
sold through authorized HYUNDAI
Dealerships.
GUIDE TO HYUNDAI GENUINE PARTS
Page 7 of 478
F7
Introduction
NOTICE indicates a situation
which, if not avoided, could result
in vehicle damage. This vehicle should not be modi-
fied. Modification of your vehicle
could affect its performance, safety
or durability and may even violate
governmental safety regulations.
In addition, damage or perform-
ance problems resulting from any
modification may not be covered
under warranty.
If you use unauthorized electronic
devices, it may cause the vehicle to
operate abnormally, or may cause
vehicle damage or fire. For your
safety, do not use unauthorized
electronic devices.
NOTICE
CAUTION indicates a hazardous
situation which, if not avoided,
could result in minor or moder-
ate injury.
CAUTION
V VE
EH
HI
IC
CL
LE
E
M
MO
OD
DI
IF
FI
IC
CA
AT
TI
IO
ON
NS
S
CALIFORNIA PROPOSITION 65
WARNING
Items contained in motor vehi-
cles or emitted from them are
known to the State of California
to cause cancer and birth
defects or reproductive harm.
These include:
•Gasoline and its vapors
Engine exhaust
Used engine oil
Interior passenger compart-
ment components and materi-
als
Component parts which are
subject to heat and wear
In addition, battery posts, termi-
nals and related accessories
contain lead, lead compounds
and other chemicals known to
the State of California to cause
cancer and reproductive harm.
WARNING
Page 126 of 478
3-42
Convenient features of your vehicle
Closing the hood
1. Before closing the hood, check in
and around the motor compart-
ment to ensure the following:
- Any tools or other loose objects
are removed from the motor
room area or hood opening area
- All glove, rags, or other com-
bustible material is removed
from the engine compartment
- All filler caps are tightly and cor-
rectly installed
2. Lower the hood halfway (lifted
approximately 12 inches (30 cm)
from the closed position) and push
down to securely lock in place.
Then double check to be sure the
hood is secure. If the hood can be
raised slightly, it is not securely
locked. Open it again and close it
with more force.
Before closing the hood,
ensure all obstructions are
removed from around the
hood opening.
Always double check to be
sure that the hood is firmly
latched before driving away.
Check there is no hood open
warning light or message dis-
played on the instrument clus-
ter. Driving with the hood
opened may cause a total loss
of visibility, which might
result in an accident.
Do not move the vehicle with
the hood in the raised posi-
tion, as vision is obstructed,
which might result in an acci-
dent, and the hood could fall
or be damaged.
WARNING
Grasp the support rod in the
area wrapped in rubber.
The support rod must be
inserted completely into the
hole provided whenever you
inspect the motor compart-
ment. This will prevent the
hood from falling and possi-
bly injuring you.
WARNING
Page 151 of 478
3-67
Convenient features of your vehicle
3
Door, Hood, Liftgate open
indicator
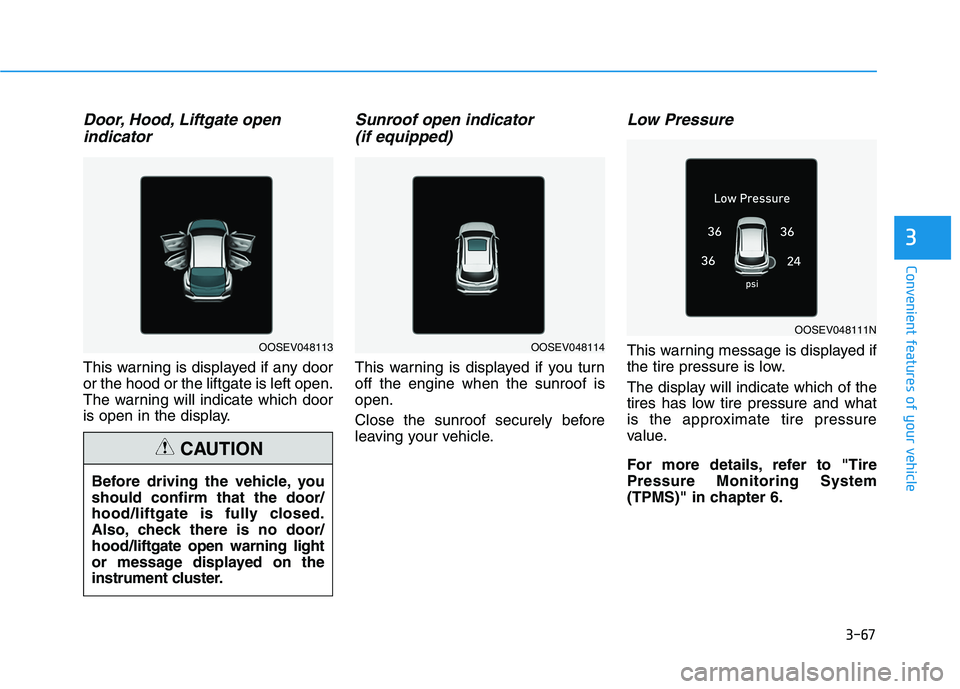
This warning is displayed if any door
or the hood or the liftgate is left open.
The warning will indicate which door
is open in the display.
Sunroof open indicator
(if equipped)
This warning is displayed if you turn
off the engine when the sunroof is
open.
Close the sunroof securely before
leaving your vehicle.
Low Pressure
This warning message is displayed if
the tire pressure is low.
The display will indicate which of the
tires has low tire pressure and what
is the approximate tire pressure
value.
For more details, refer to "Tire
Pressure Monitoring System
(TPMS)" in chapter 6.
OOSEV048111N
OOSEV048114
Before driving the vehicle, you
should confirm that the door/
hood/liftgate is fully closed.
Also, check there is no door/
hood/liftgate open warning light
or message displayed on the
instrument cluster.
CAUTION
OOSEV048113
Page 160 of 478
3-76
When this warning message is
displayed, do not accelerate or
start the vehicle suddenly.
When the high voltage battery
level is low, the power down
warning illuminates and the
power output from the vehicle is
limited. Charge the battery
immediately since your vehicle
may not drive uphill or skid on a
slope with the warning light ON.
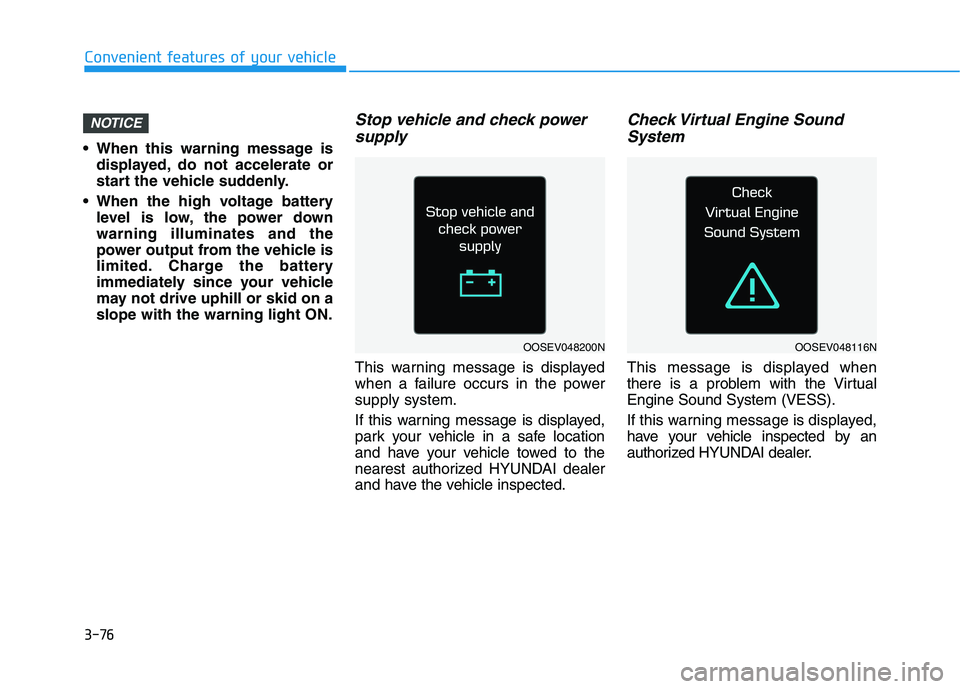
Stop vehicle and check power
supply
This warning message is displayed
when a failure occurs in the power
supply system.
If this warning message is displayed,
park your vehicle in a safe location
and have your vehicle towed to the
nearest authorized HYUNDAI dealer
and have the vehicle inspected.
Check Virtual Engine Sound
System
This message is displayed when
there is a problem with the Virtual
Engine Sound System (VESS).
If this warning message is displayed,
have your vehicle inspected by an
authorized HYUNDAI dealer.
NOTICE
Convenient features of your vehicle
OOSEV048200NOOSEV048116N
Page 181 of 478
3-97
Convenient features of your vehicle
3
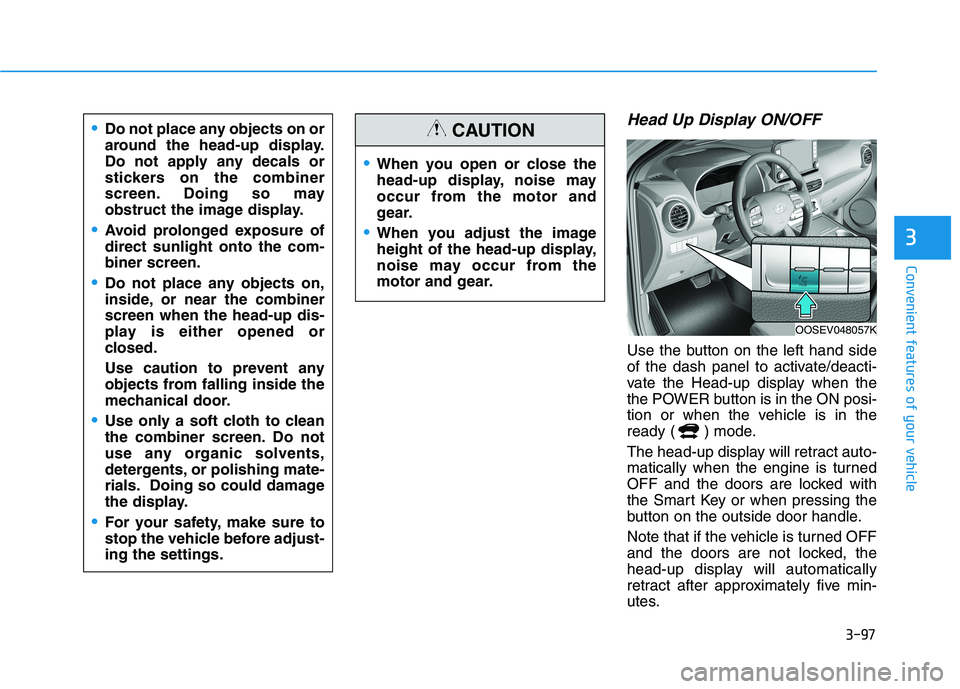
Head Up Display ON/OFF
Use the button on the left hand side
of the dash panel to activate/deacti-
vate the Head-up display when the
the POWER button is in the ON posi-
tion or when the vehicle is in the
ready ( ) mode.
The head-up display will retract auto-
matically when the engine is turned
OFF and the doors are locked with
the Smart Key or when pressing the
button on the outside door handle.
Note that if the vehicle is turned OFF
and the doors are not locked, the
head-up display will automatically
retract after approximately five min-
utes.
When you open or close the
head-up display, noise may
occur from the motor and
gear.
When you adjust the image
height of the head-up display,
noise may occur from the
motor and gear.
CAUTIONDo not place any objects on or
around the head-up display.
Do not apply any decals or
stickers on the combiner
screen. Doing so may
obstruct the image display.
Avoid prolonged exposure of
direct sunlight onto the com-
biner screen.
Do not place any objects on,
inside, or near the combiner
screen when the head-up dis-
play is either opened or
closed.
Use caution to prevent any
objects from falling inside the
mechanical door.
Use only a soft cloth to clean
the combiner screen. Do not
use any organic solvents,
detergents, or polishing mate-
rials. Doing so could damage
the display.
For your safety, make sure to
stop the vehicle before adjust-
ing the settings.
OOSEV048057K
Page 201 of 478
3-117
Convenient features of your vehicle
3
Conditions Where Reverse
Parking Distance Warning sys-
tem May Not Operate
Reverse Parking Distance
Warning system may not oper-
ate normally when any of the
following occur:
The sensor is covered with dirt or
debris such as snow or ice, or the
sensor cover is blocked.
Reverse Parking Distance
Warning system may experi-
ence a malfunction when the
following occurs:
Driving on uneven road surfaces
such as unpaved roads, gravel,
bumps, or gradient.
Objects generating excessive noise
such as vehicle horns, loud motor-
cycle engines, or truck air brakes
can interfere with the sensor.
Heavy rain or water spray is present.
Wireless transmitters or mobile
phones are present near the sensor.
The sensor is covered with snow.
Any non-factory equipment or acces-
sories have been installed, or if the
vehicle bumper height or sensor
installation has been modified.
Detecting range may decrease
when:
Outside air temperature is extreme-
ly hot or cold.
The following objects may not
be recognized by the sensor:
Sharp or slim objects such as
ropes, chains or small poles.
Objects, which tend to absorb sen-
sor frequency such as clothes,
spongy material or snow.
Undetectable objects smaller than
40 inches (1 m) and narrower than
6 inches (14 cm) in diameter.
Page 205 of 478
3-121
Convenient features of your vehicle
3
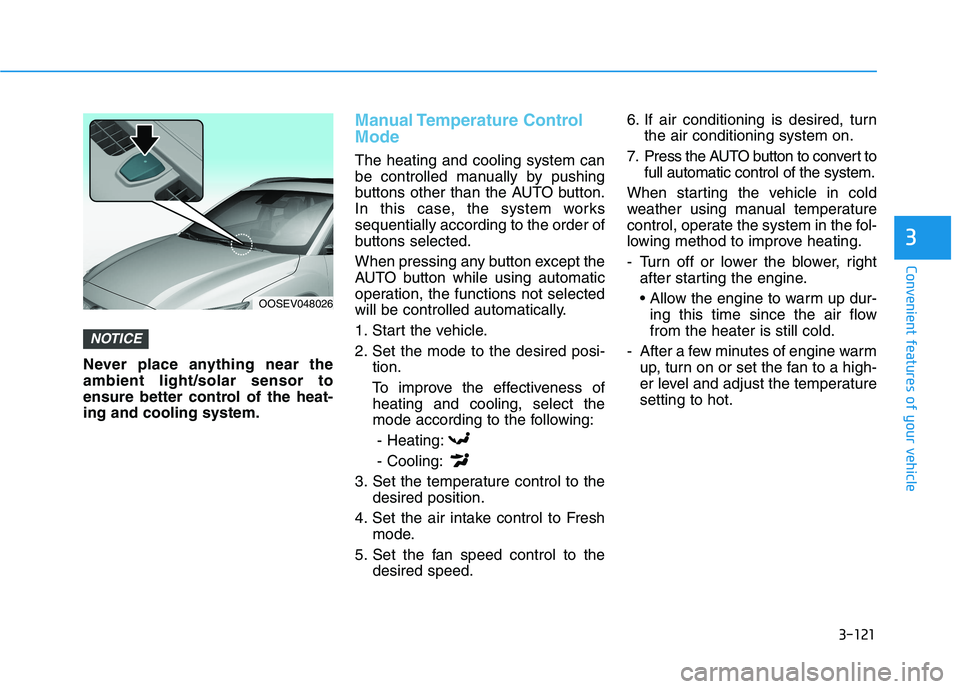
Never place anything near the
ambient light/solar sensor to
ensure better control of the heat-
ing and cooling system.
Manual Temperature Control
Mode
The heating and cooling system can
be controlled manually by pushing
buttons other than the AUTO button.
In this case, the system works
sequentially according to the order of
buttons selected.
When pressing any button except the
AUTO button while using automatic
operation, the functions not selected
will be controlled automatically.
1. Start the vehicle.
2. Set the mode to the desired posi-
tion.
To improve the effectiveness of
heating and cooling, select the
mode according to the following:
- Heating:
- Cooling:
3. Set the temperature control to the
desired position.
4. Set the air intake control to Fresh
mode.
5. Set the fan speed control to the
desired speed.6. If air conditioning is desired, turn
the air conditioning system on.
7. Press the AUTO button to convert to
full automatic control of the system.
When starting the vehicle in cold
weather using manual temperature
control, operate the system in the fol-
lowing method to improve heating.
- Turn off or lower the blower, right
after starting the engine.
• Allow the engine to warm up dur-
ing this time since the air flow
from the heater is still cold.
- After a few minutes of engine warm
up, turn on or set the fan to a high-
er level and adjust the temperature
setting to hot.
NOTICE
OOSEV048026
Page 213 of 478
3-129
Convenient features of your vehicle
3
Air conditioning
1. Start the engine.
2. Press the air conditioning button.
3. Select the Face Level mode.
4. Set the air intake control to
Recirculation mode temporarily to
allow the cabin to cool quickly.
When the desired temperature in
the cabin is reached, change the
air intake control back to Fresh
mode.
5. Adjust the fan speed control and
temperature control to maintain
maximum comfort.
When maximum cooling is desired,
set the temperature control to the
MAX A/C position, then set the fan
speed control to the highest setting.
Air conditioning system operation
tips
If the vehicle has been parked in
direct sunlight during hot weather,
open the windows for a short time
to let the hot air inside the vehicle
escape.
After sufficient cooling has been
achieved, switch back from recircu-
lation mode to fresh mode.
To help decrease the humidity
inside the vehicle on rainy or humid
days, operate the air conditioning
system with the windows and sun-
roof closed. It is useful to operate the air condi-
tioning system periodically through-
out the year. Turn on the A/C sys-
tem at least once a month for a few
minutes to maintain system pres-
sure and help optimize A/C per-
formance.
Note that if you operate the air con-
ditioner to cool your vehicle with
the mode set to or when
the outside relative humidity is
high, moisture may collect on the
outer surface of the windshield
glass causing the windshield to fog
up on the outside and limit your
visibility.
If this occurs, use the windshield
wipers to clear the glass. In addi-
tion, change the mode selection
knob or button on the climate con-
trol system to the mode to
redirect cooling air away from the
windshield.