brake HYUNDAI KONA EV 2023 Owners Manual
[x] Cancel search | Manufacturer: HYUNDAI, Model Year: 2023, Model line: KONA EV, Model: HYUNDAI KONA EV 2023Pages: 548, PDF Size: 49.14 MB
Page 10 of 548
01
1-5
VeHiCle modiFiCaTions
• This vehicle should not be modified. Modification of your vehicle could affect its
performance, safety or durability and may even violate governmental safety and
emissions regulations.
In addition, damage or performance problems resulting from any modification may
not be covered under warranty.
• If you use unauthorized electronic devices, it may cause the vehicle to operate
abnormally, wire damage, battery discharge and fire.
VeHiCle daTa ColleCTion and eVenT daTa reCorders
This vehicle is equipped with an event data recorder (EDR). The main purpose of
an EDR is to record, in certain crash or near crash-like situations, such as an air bag
deployment or hitting a road obstacle, data that will assist in understanding how a
vehicle’s systems performed. The EDR is designed to record data related to vehicle
dynamics and safety systems for a short period of time, typically 30 seconds or less.
The EDR in this vehicle is designed to record such data as: • How various systems in your vehicle were operating;
• Whether or not the driver and passenger safety belts were buckled/ fastened;
• How far (if at all) the driver was depressing the accelerator and/or brake pedal; and,
• How fast the vehicle was traveling.
These data can help provide a better understanding of the circumstances in which
crashes and injuries occur. NOTE: EDR data are recorded by your vehicle only if a
non-trivial crash situation occurs; no data are recorded by the EDR under normal
driving conditions and no personal data (e.g., name, gender, age, and crash location)
are recorded. However, other parties, such as law enforcement, could combine the
EDR data with the type of personally identifying data routinely acquired during a crash
investigation.
To read data recorded by an EDR, special equipment is required, and access to the
vehicle or the EDR is needed. In addition to the vehicle manufacturer, other parties,
such as law enforcement, that have the special equipment, can read the information if
they have access to the vehicle or the EDR.
Page 20 of 548

01
1-15
OOSEV040494L
System Setting and Activation
System setting
The driver can activate the Utility mode
function when the following conditions
are satisfied. • The vehicle is in the ready (
) mode
and the gear is shifted to P (Park).
• The EPB (Electronic Parking Brake) is applied.
• ‘EV settings
ÞUtility mode’ is
selected on the infotainment system
screen.
System Activation
When the system is activated:• The (
) indicator will turn off and
the () indicator will illuminate on
the cluster.
• All electric devices are usable but the
vehicle cannot be driven.
• The EPB can be cancelled by pressing
the EPB switch.
Gear cannot be shifted out of P (Park).
If a shift attempt is made, a message
“Shifting conditions not met” will be
displayed on the infotainment system
screen.
System Deactivation
The Utility mode can be deactivated by
pressing the START/STOP button to the
OFF position. The function cannot be
deactivated from the EV settings. Winter mode
OOSEV040540L
In cold climates and during winter
months, electric vehicle range may
reduce and charging times may increase.
This is primarily due to reduced
performance of the EV battery when
exposed to cold temperatures.
Some vehicles may come equipped with
Winter mode selectable option. The
Winter mode feature can be selected in
the EV Settings menu.
When selected, Winter mode enables
the use of the EV battery coolant heater.
This mode is recommended to improve
EV battery performance in cold climate conditions.
Note that EV range may reduce when
Winter mode is enabled, as electrical
energy is used to maintain the EV battery
temperature.
Winter mode enables operation of the
EV battery coolant heater. While driving
your vehicle, if the battery temperature
is low or the A/C and/or heater is turned
ON, the EV battery coolant heater will be used.
Note that the EV battery coolant heater
will not be used when the EV battery
SOC is low.
à This mode is available for the vehicles
equipped with the battery heater.
Page 29 of 548
Foreword / Electric Vehicle System Overview
1-24
AC Charge
„„AC Charger
OLFP0Q4057N
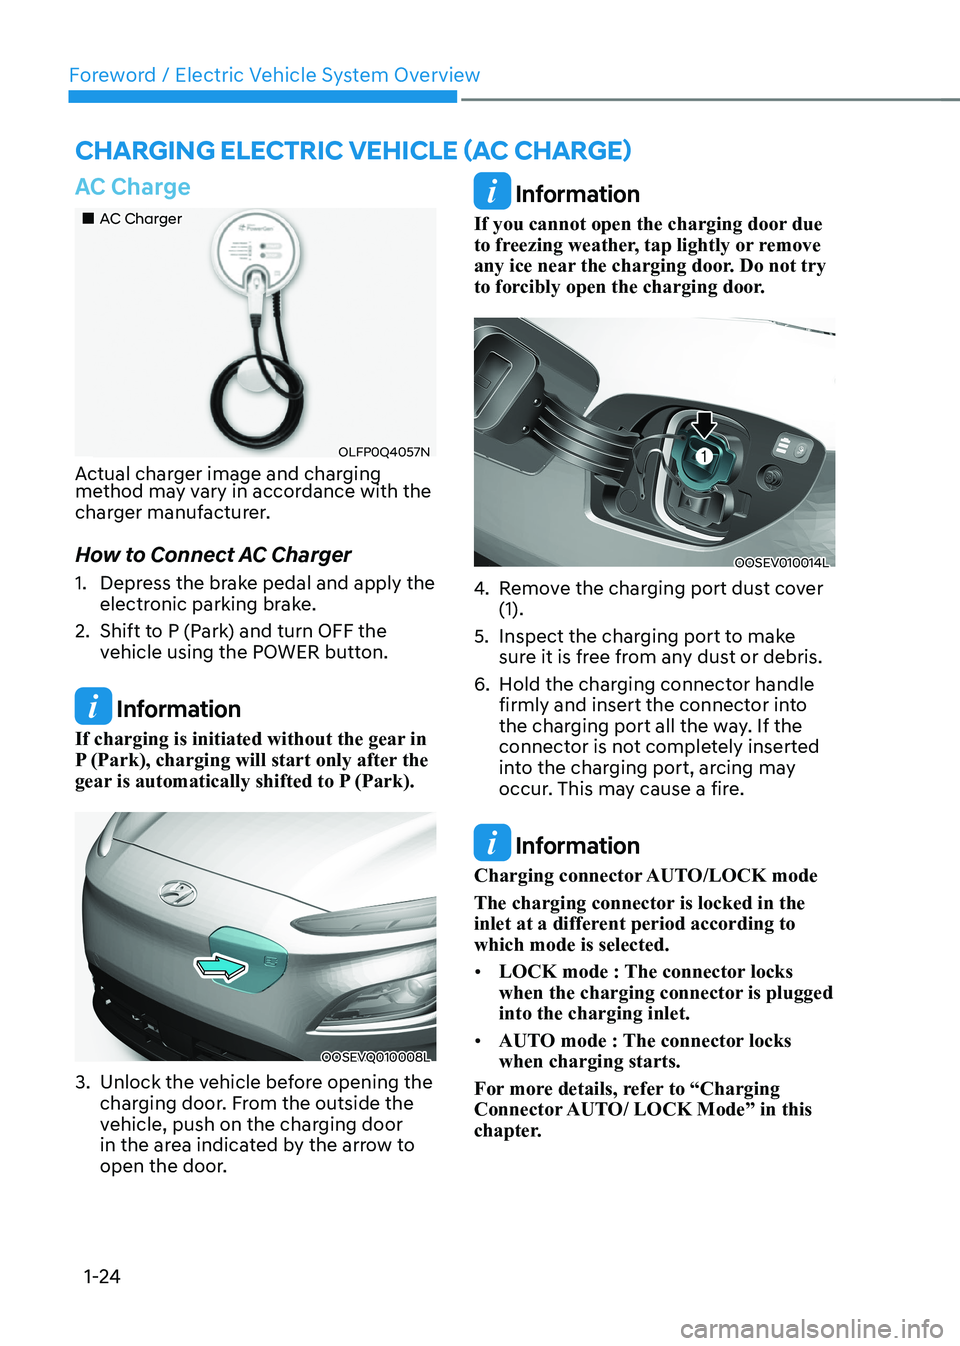
Actual charger image and charging
method may vary in accordance with the
charger manufacturer.
How to Connect AC Charger
1. Depress the brake pedal and apply the electronic parking brake.
2. Shift to P (Park) and turn OFF the vehicle using the POWER button.
Information
If charging is initiated without the gear in
P (Park), charging will start only after the
gear is automatically shifted to P (Park).
OOSEVQ010008L
3. Unlock the vehicle before opening the charging door. From the outside the
vehicle, push on the charging door
in the area indicated by the arrow to
open the door.
Information
If you cannot open the charging door due
to freezing weather, tap lightly or remove
any ice near the charging door. Do not try
to forcibly open the charging door.
OOSEV010014L
4. Remove the charging port dust cover (1).
5. Inspect the charging port to make sure it is free from any dust or debris.
6. Hold the charging connector handle firmly and insert the connector into
the charging port all the way. If the
connector is not completely inserted
into the charging port, arcing may
occur. This may cause a fire.
Information
Charging connector AUTO/LOCK mode
The charging connector is locked in the
inlet at a different period according to which mode is selected. • LOCK mode : The connector locks
when the charging connector is plugged into the charging inlet.
• AUTO mode : The connector locks when charging starts.
For more details, refer to “Charging
Connector AUTO/ LOCK Mode” in this
chapter.
Charging ElECtriC VEhiClE (aC ChargE)
Page 34 of 548
01
1-29
How to Connect DC Charger
1. Depress the brake pedal and apply the
electronic parking brake.
2. Shift to P (Park) and turn OFF the vehicle using the POWER button.
Information
If charging is initiated without the gear in
P (Park), charging will start only after the
gear is automatically shifted to P (Park).
OOSEVQ010008L
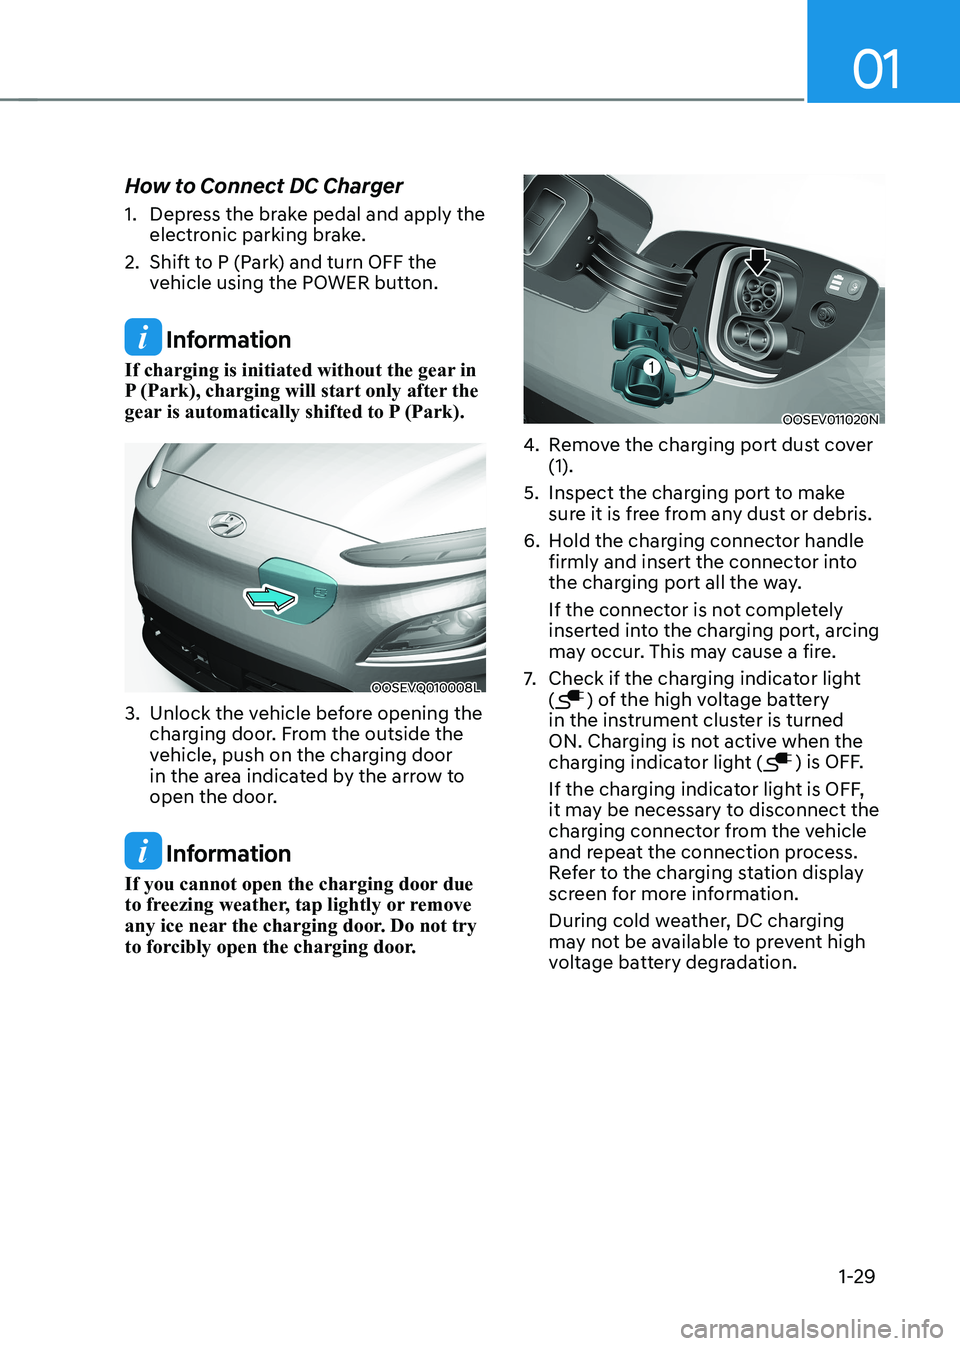
3. Unlock the vehicle before opening the charging door. From the outside the
vehicle, push on the charging door
in the area indicated by the arrow to
open the door.
Information
If you cannot open the charging door due
to freezing weather, tap lightly or remove
any ice near the charging door. Do not try
to forcibly open the charging door.
OOSEV011020N
4. Remove the charging port dust cover (1).
5. Inspect the charging port to make sure it is free from any dust or debris.
6. Hold the charging connector handle firmly and insert the connector into
the charging port all the way.
If the connector is not completely
inserted into the charging port, arcing
may occur. This may cause a fire.
7. Check if the charging indicator light (
) of the high voltage battery
in the instrument cluster is turned
ON. Charging is not active when the
charging indicator light (
) is OFF.
If the charging indicator light is OFF,
it may be necessary to disconnect the
charging connector from the vehicle
and repeat the connection process.
Refer to the charging station display
screen for more information.
During cold weather, DC charging
may not be available to prevent high
voltage battery degradation.
Page 40 of 548
01
1-35
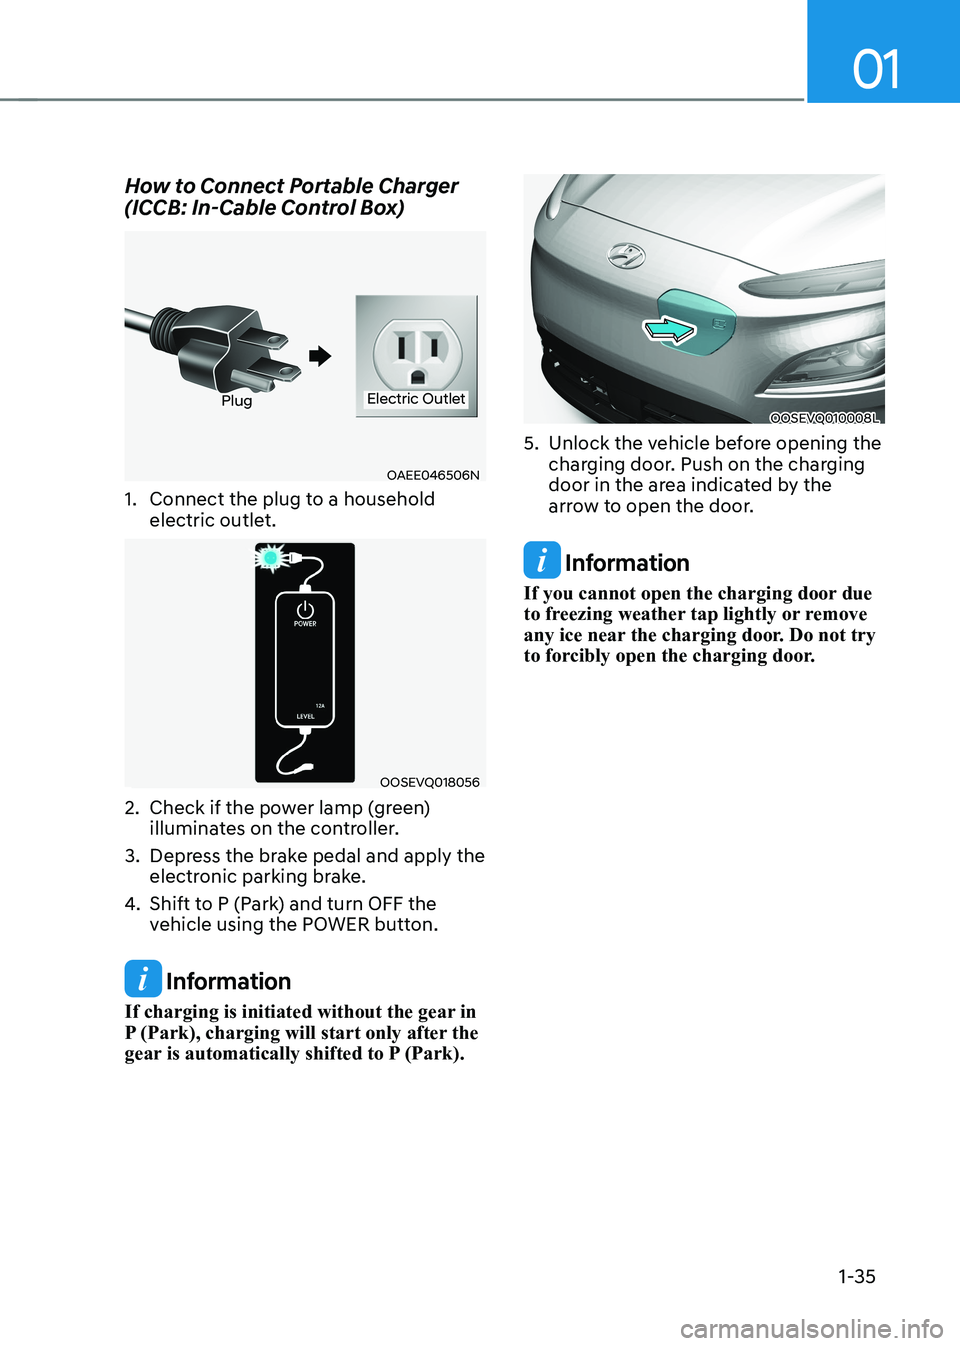
How to Connect Portable Charger
(ICCB: In-Cable Control Box)
OAEE046506N
PlugElectric Outlet
1. Connect the plug to a household electric outlet.
OOSEVQ018056
2. Check if the power lamp (green) illuminates on the controller.
3. Depress the brake pedal and apply the electronic parking brake.
4. Shift to P (Park) and turn OFF the
vehicle using the POWER button.
Information
If charging is initiated without the gear in
P (Park), charging will start only after the
gear is automatically shifted to P (Park).
OOSEVQ010008L
5. Unlock the vehicle before opening the charging door. Push on the charging
door in the area indicated by the
arrow to open the door.
Information
If you cannot open the charging door due
to freezing weather tap lightly or remove
any ice near the charging door. Do not try
to forcibly open the charging door.
Page 50 of 548

01
1-45
driVing and operaTing inFormaTion
How to Start the Vehicle
1. Holding the smart key, sit in the driver’s seat.
2. Fasten the seat belt before starting the vehicle.
3. Make sure to engage the parking brake.
4. Turn OFF all electrical devices.
5. Make sure to depress and hold the brake pedal.
6. While depressing the brake pedal, shift to P (Park).
7. Depress and hold the brake pedal
while pressing the Start/Stop button.
8. When the “
” indicator is ON, you
can drive the vehicle. When the “
” indicator is OFF, you
cannot drive the vehicle. Start the
vehicle again.
9. Depress and hold the brake pedal and
shift to the desired position.
Information
While the charging cable is connected, the
gear cannot be shift from P (Park) to any
other gear for safety reasons.
10. Release the parking brake and slowly release the brake pedal. Check if the
vehicle slowly moves forward, then
depress the accelerator pedal.
How to Stop the Vehicle
1. Hold down the brake pedal while the
vehicle is parked.
2. While depressing the brake pedal, shift to P (Park).
3. While depressing the brake pedal, engage the parking brake.
4. While depressing the brake pedal,
press the Start/Stop button and turn
off the vehicle.
5. Check if the “
” indicator is turned
OFF on the instrument cluster. When the “
” indicator is ON and
the gear is in a position other than
P (Park), the driver can accidently
depress the accelerator pedal, causing
the vehicle to move unexpectedly.
Page 53 of 548
Foreword / Electric Vehicle System Overview
1-48
Power/Charge Gauge
OOSEV040474L
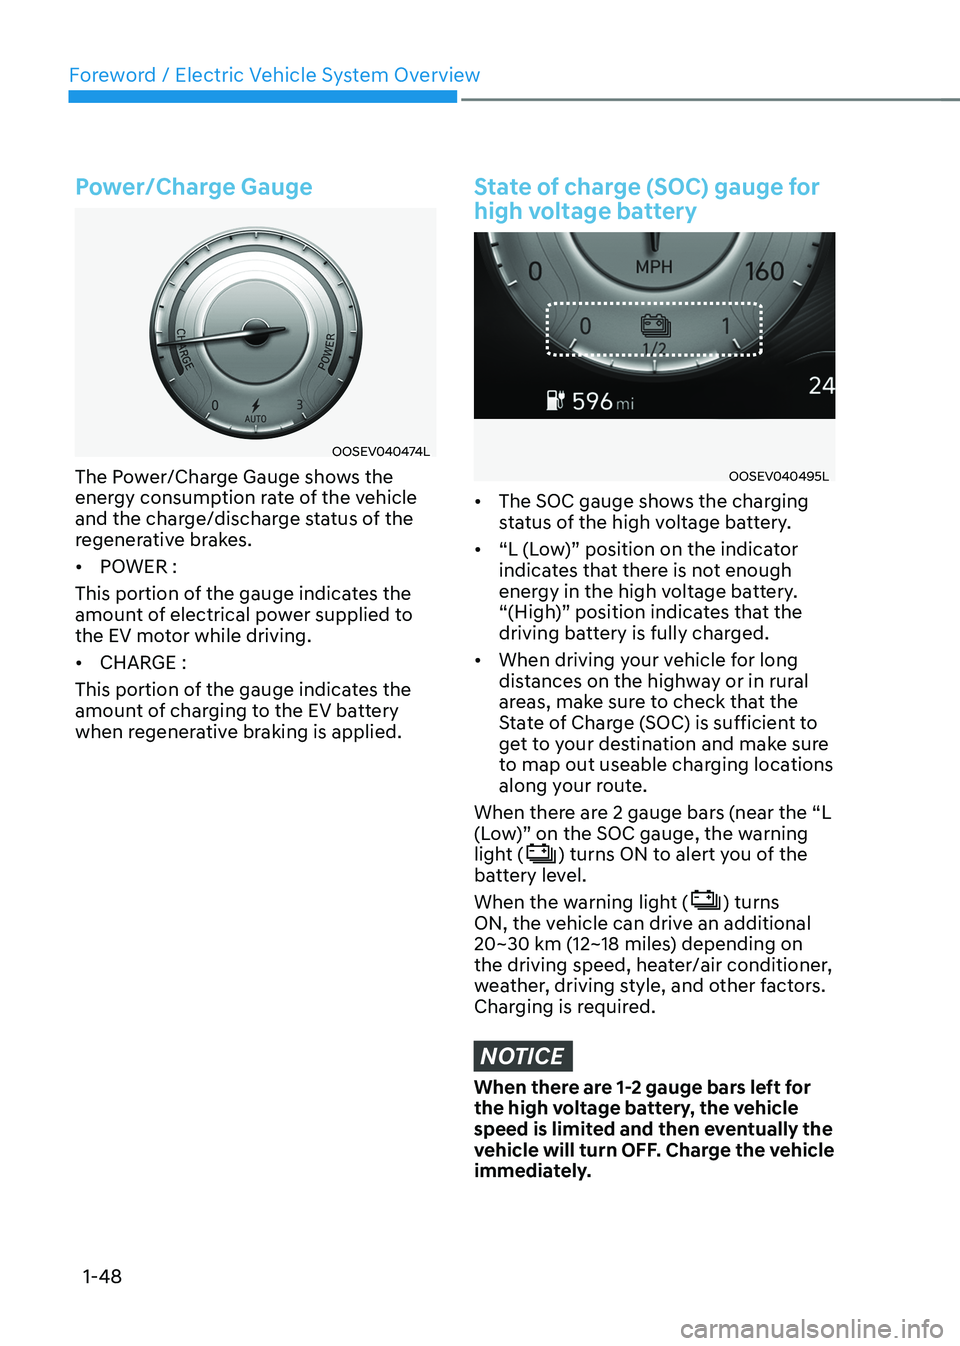
The Power/Charge Gauge shows the
energy consumption rate of the vehicle
and the charge/discharge status of the
regenerative brakes. • POWER :
This portion of the gauge indicates the
amount of electrical power supplied to
the EV motor while driving. • CHARGE :
This portion of the gauge indicates the
amount of charging to the EV battery
when regenerative braking is applied.
State of charge (SOC) gauge for
high voltage battery
OOSEV040495L
• The SOC gauge shows the charging
status of the high voltage battery.
• “L (Low)” position on the indicator
indicates that there is not enough
energy in the high voltage battery.
“(High)” position indicates that the
driving battery is fully charged.
• When driving your vehicle for long
distances on the highway or in rural
areas, make sure to check that the
State of Charge (SOC) is sufficient to
get to your destination and make sure
to map out useable charging locations
along your route.
When there are 2 gauge bars (near the “L
(Low)” on the SOC gauge, the warning
light (
) turns ON to alert you of the
battery level.
When the warning light (
) turns
ON, the vehicle can drive an additional
20~30 km (12~18 miles) depending on
the driving speed, heater/air conditioner,
weather, driving style, and other factors.
Charging is required.
NOTICE
When there are 1-2 gauge bars left for
the high voltage battery, the vehicle
speed is limited and then eventually the
vehicle will turn OFF. Charge the vehicle
immediately.
Page 55 of 548
Foreword / Electric Vehicle System Overview
1-50
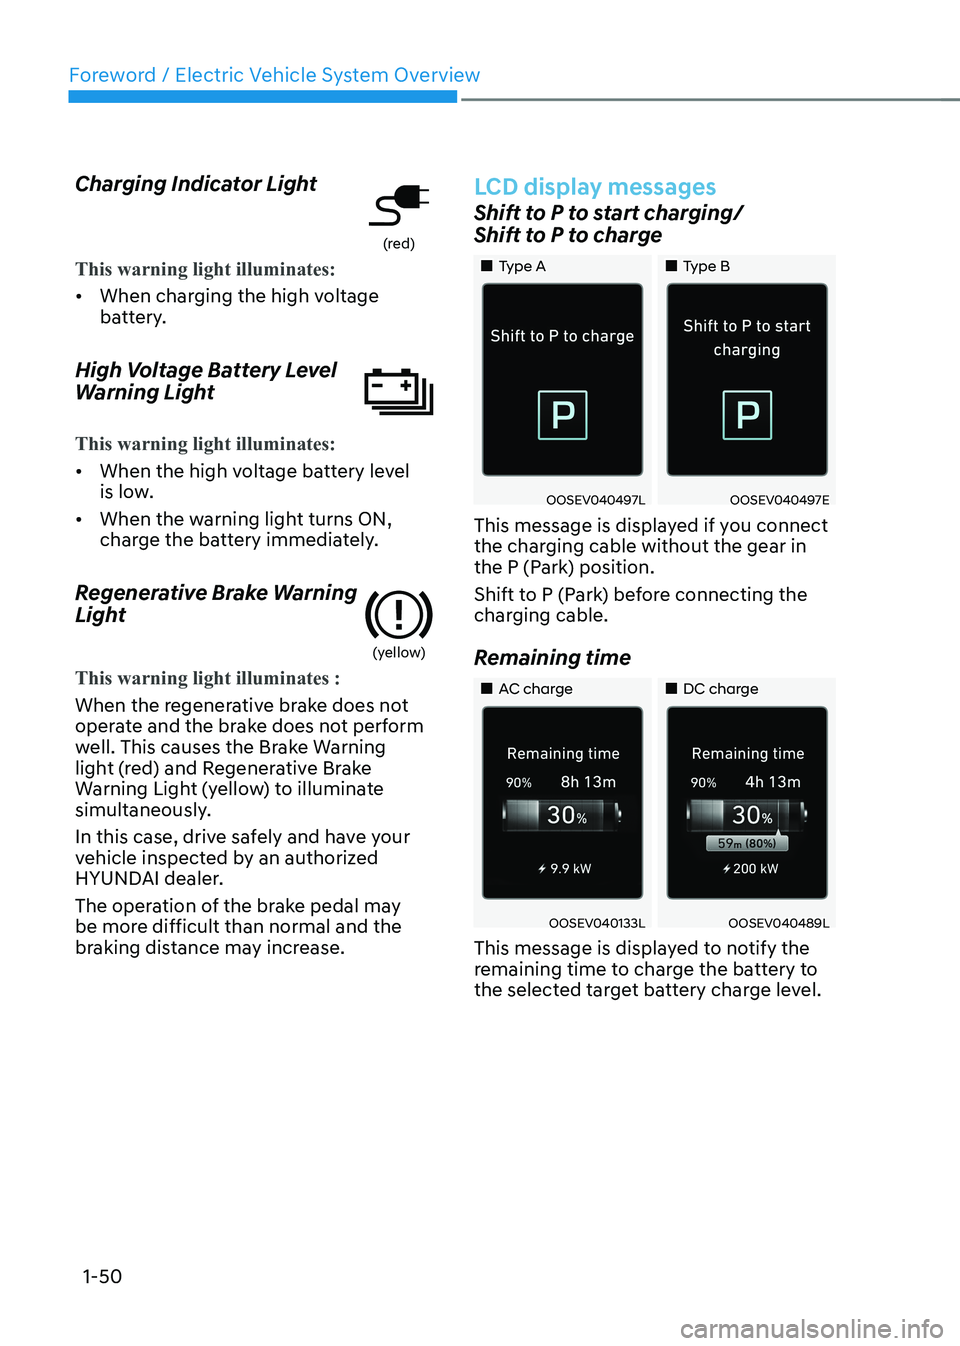
Charging Indicator Light
(red)
This warning light illuminates:
•
When charging the high voltage
battery.
High Voltage Battery Level
Warning Light
This warning light illuminates:
• When the high voltage battery level
is low.
• When the warning light turns ON,
charge the battery immediately.
Regenerative Brake Warning
Light
(yellow)
This warning light illuminates :
When the regenerative brake does not
operate and the brake does not perform
well. This causes the Brake Warning
light (red) and Regenerative Brake
Warning Light (yellow) to illuminate
simultaneously.
In this case, drive safely and have your
vehicle inspected by an authorized
HYUNDAI dealer.
The operation of the brake pedal may
be more difficult than normal and the
braking distance may increase.
LCD display messages
Shift to P to start charging/
Shift to P to charge
„„Type A „„Type B
OOSEV040497LOOSEV040497E
This message is displayed if you connect
the charging cable without the gear in
the P (Park) position.
Shift to P (Park) before connecting the
charging cable.
Remaining time
„„AC charge „„DC charge
OOSEV040133LOOSEV040489L
This message is displayed to notify the
remaining time to charge the battery to
the selected target battery charge level.
Page 57 of 548
Foreword / Electric Vehicle System Overview
1-52
Charging Stopped. Check the cable
connection/Charging interrupted.
Please check the cable connection
„„Type A
„„Type B
OOSEV040502LOOSEV040502E
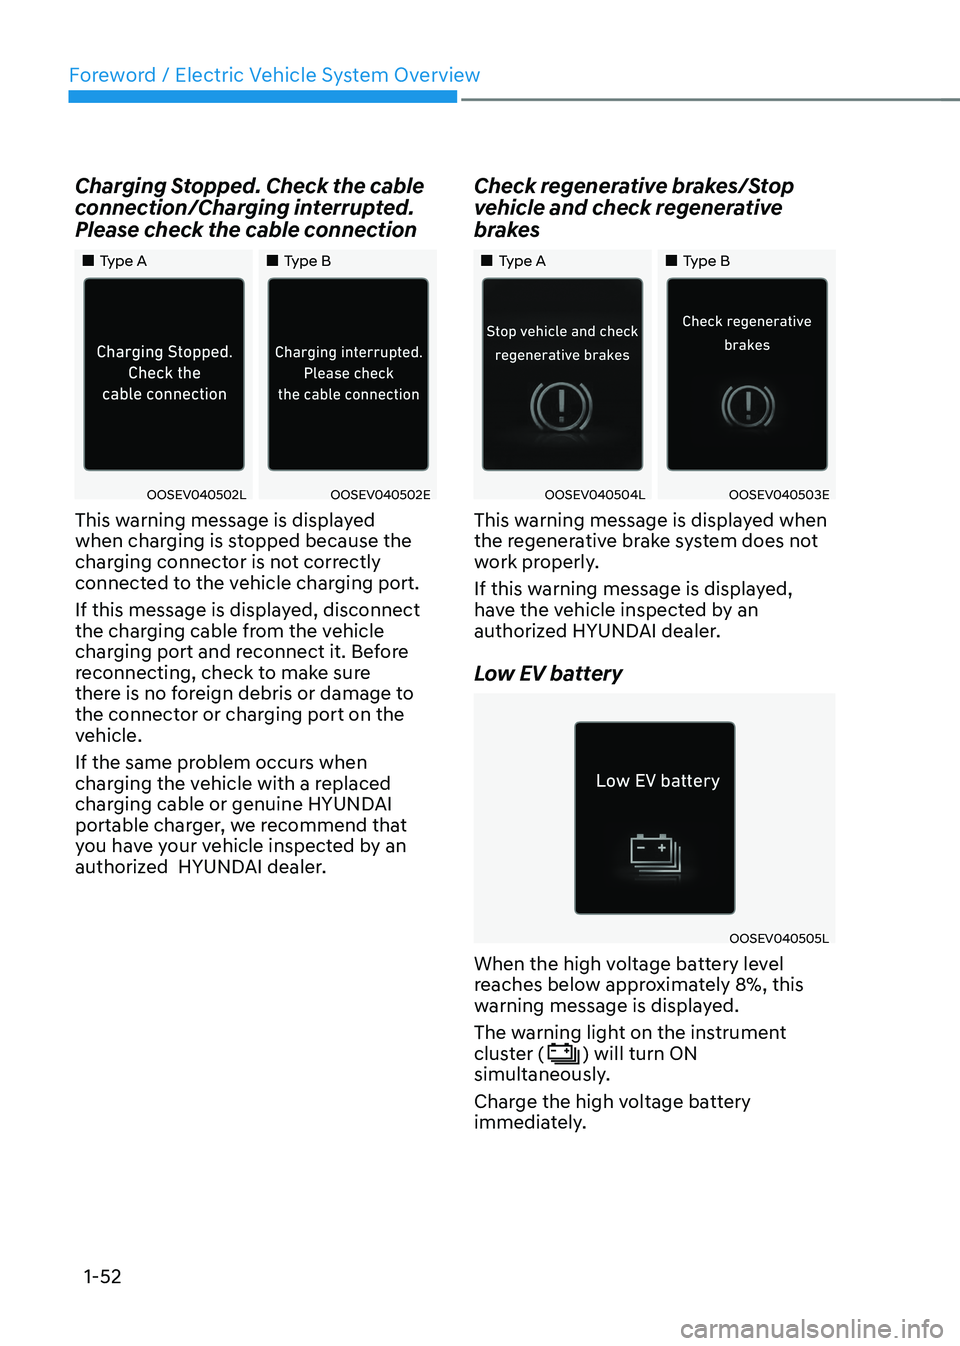
This warning message is displayed
when charging is stopped because the
charging connector is not correctly
connected to the vehicle charging port.
If this message is displayed, disconnect
the charging cable from the vehicle
charging port and reconnect it. Before
reconnecting, check to make sure
there is no foreign debris or damage to
the connector or charging port on the
vehicle.
If the same problem occurs when
charging the vehicle with a replaced
charging cable or genuine HYUNDAI
portable charger, we recommend that
you have your vehicle inspected by an
authorized HYUNDAI dealer. Check regenerative brakes/Stop
vehicle and check regenerative
brakes
„„Type A
„„Type B
OOSEV040504LOOSEV040503E
This warning message is displayed when
the regenerative brake system does not
work properly.
If this warning message is displayed,
have the vehicle inspected by an
authorized HYUNDAI dealer.
Low EV battery
OOSEV040505L
When the high voltage battery level
reaches below approximately 8%, this
warning message is displayed.
The warning light on the instrument
cluster (
) will turn ON
simultaneously.
Charge the high voltage battery
immediately.
Page 61 of 548

Foreword / Electric Vehicle System Overview
1-56
Energy flow
The electric vehicle system informs
the drivers its energy flow in various
operating modes. While driving, the
current energy flow is specified in three modes.
Vehicle stop
OOSEV040481L
The vehicle is stopped.
(No energy flow)
EV propulsion
OOSEV040482L
Only the motor power is used to drive the
vehicle.
(Battery → Wheel) Regeneration
OOSEV040139L
The high-voltage battery is charged up
by the regenerative brake system.
(Wheel → Battery)