Hyundai Matrix 2003 Owner's Manual
Manufacturer: HYUNDAI, Model Year: 2003, Model line: Matrix, Model: Hyundai Matrix 2003Pages: 312, PDF Size: 4.1 MB
Page 181 of 312
A100A01L-EAT
Guide to Hyundai Genuine Parts
1. What are Hyundai Genuine Parts? Hyundai Genuine Parts are the same parts used by Hyundai Motor Company to man-ufacture vehicles. They are designed andtested for the optimum safety, performance,and reliability to our customers.
2. Why should you use genuine parts? Hyundai Genuine Parts are engineeredand built to meet rigid original manufactur-ing requirements. Using imitation, counter-feit or used salvage parts is not coveredunder the Hyundai New Vehicle LimitedWarranty or any other Hyundai warranty. In addition, any damage to or failure ofGenuine Hyundai Parts caused by theinstallation or failure of an imitation, coun-terfeit or used salvage part is not coveredby Hyundai Motor Company.
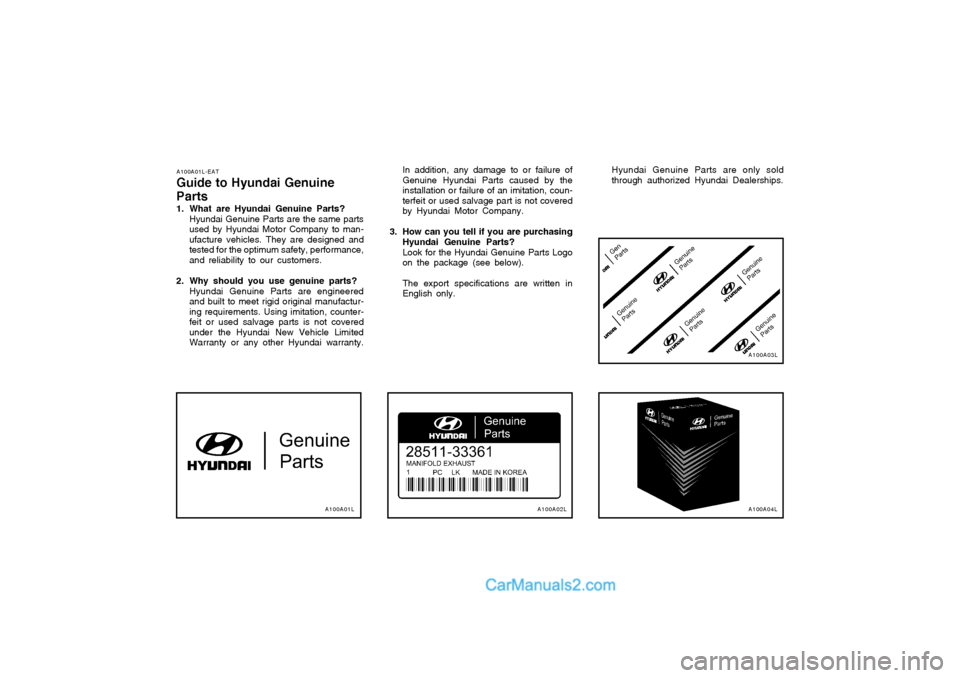
3. How can you tell if you are purchasing Hyundai Genuine Parts? Look for the Hyundai Genuine Parts Logo on the package (see below). The export specifications are written in English only. Hyundai Genuine Parts are only soldthrough authorized Hyundai Dealerships.
A100A01LA100A02LA100A04L
A100A03L
Page 182 of 312
1- 1
CONTROLS AND EQUIPMENTfrom jerry cans or by means of a funnel that the fuel being used is unleaded. The use of leaded fuel in this vehicle will result in irreversible pollution of the catalyst ele-ment. Such pollution will prevent correct op-eration of the catalyst and give rise to in-creased operating temperatures leading tothe catalyst element melting and restrictingthe exhaust flow along with an increase inexhaust emission levels. CAUTION: The vehicle warranty will not extend to damage arising from the use of incorrectfuels. Use Diesel Diesel fuel of 52 to 54 cetane is used in Hyundai vehicle. If two types of diesel fuel areavailable, use summer or winter fuel properlyaccording to the following temperature condi-tions.
o Above 23°F (-5°C) ... Summer type diesel fuel.
o Below 23°F (-5°C) ... Winter type diesel fuel. Watch the fuel level in the tank very carefully : If the engine stops through fuel failure, thecircuits must be completely purged to permitrestarting.
SB000A1-E
1. CONTROLS AND
EQUIPMENT
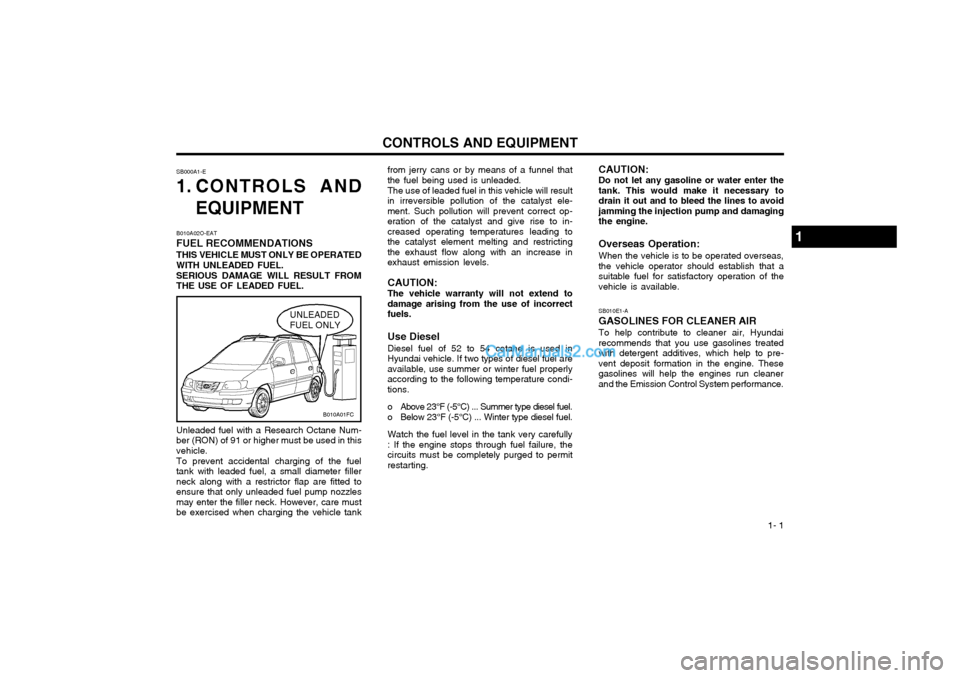
B010A02O-EAT FUEL RECOMMENDATIONS THIS VEHICLE MUST ONLY BE OPERATED WITH UNLEADED FUEL. SERIOUS DAMAGE WILL RESULT FROM THE USE OF LEADED FUEL.
UNLEADED FUEL ONLY
Unleaded fuel with a Research Octane Num- ber (RON) of 91 or higher must be used in thisvehicle. To prevent accidental charging of the fuel tank with leaded fuel, a small diameter fillerneck along with a restrictor flap are fitted toensure that only unleaded fuel pump nozzlesmay enter the filler neck. However, care mustbe exercised when charging the vehicle tank SB010E1-A GASOLINES FOR CLEANER AIR To help contribute to cleaner air, Hyundai recommends that you use gasolines treatedwith detergent additives, which help to pre-vent deposit formation in the engine. Thesegasolines will help the engines run cleanerand the Emission Control System performance.
CAUTION: Do not let any gasoline or water enter the tank. This would make it necessary todrain it out and to bleed the lines to avoidjamming the injection pump and damagingthe engine. Overseas Operation: When the vehicle is to be operated overseas, the vehicle operator should establish that asuitable fuel for satisfactory operation of thevehicle is available.
1
B010A01FC
Page 183 of 312
CONTROLS AND EQUIPMENT
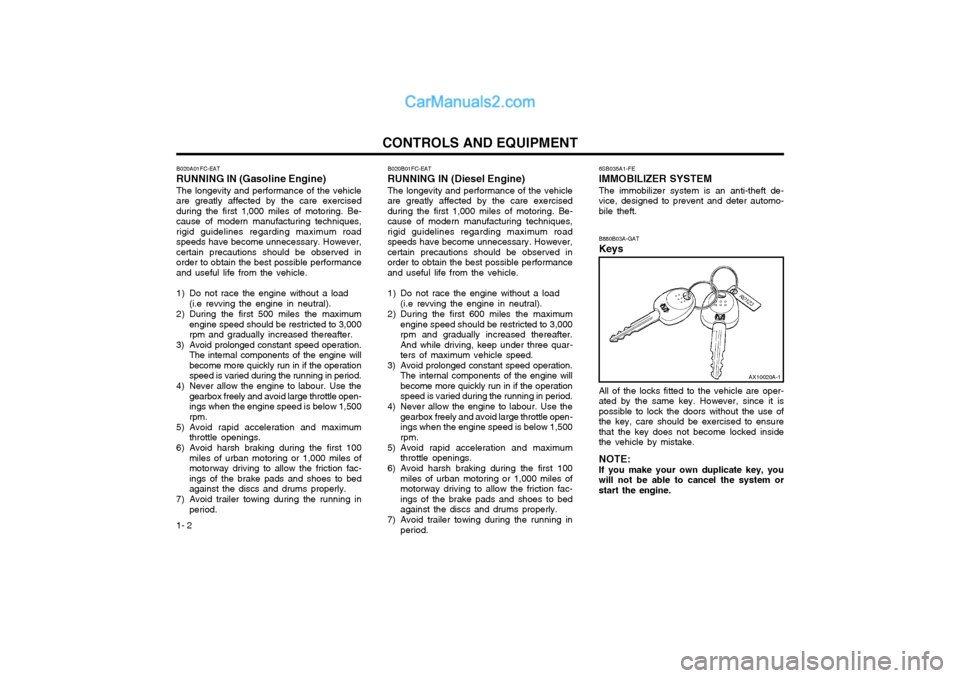
1- 2 6SB035A1-FE IMMOBILIZER SYSTEM The immobilizer system is an anti-theft de- vice, designed to prevent and deter automo-bile theft. B880B03A-GAT Keys All of the locks fitted to the vehicle are oper- ated by the same key. However, since it ispossible to lock the doors without the use ofthe key, care should be exercised to ensurethat the key does not become locked insidethe vehicle by mistake. NOTE: If you make your own duplicate key, you will not be able to cancel the system orstart the engine.
B020A01FC-EAT RUNNING IN (Gasoline Engine) The longevity and performance of the vehicle are greatly affected by the care exercisedduring the first 1,000 miles of motoring. Be-cause of modern manufacturing techniques,rigid guidelines regarding maximum roadspeeds have become unnecessary. However,certain precautions should be observed inorder to obtain the best possible performanceand useful life from the vehicle.
1) Do not race the engine without a load
(i.e revving the engine in neutral).
2) During the first 500 miles the maximum engine speed should be restricted to 3,000 rpm and gradually increased thereafter.
3) Avoid prolonged constant speed operation. The internal components of the engine willbecome more quickly run in if the operationspeed is varied during the running in period.
4) Never allow the engine to labour. Use the gearbox freely and avoid large throttle open-ings when the engine speed is below 1,500rpm.
5) Avoid rapid acceleration and maximum throttle openings.
6) Avoid harsh braking during the first 100 miles of urban motoring or 1,000 miles ofmotorway driving to allow the friction fac-ings of the brake pads and shoes to bedagainst the discs and drums properly.
7) Avoid trailer towing during the running in period.
AX10020A-1
B020B01FC-EAT
RUNNING IN (Diesel Engine)
The longevity and performance of the vehicle
are greatly affected by the care exercised during the first 1,000 miles of motoring. Be-cause of modern manufacturing techniques,rigid guidelines regarding maximum roadspeeds have become unnecessary. However,certain precautions should be observed inorder to obtain the best possible performanceand useful life from the vehicle.
1) Do not race the engine without a load
(i.e revving the engine in neutral).
2) During the first 600 miles the maximum engine speed should be restricted to 3,000 rpm and gradually increased thereafter.And while driving, keep under three quar-ters of maximum vehicle speed.
3) Avoid prolonged constant speed operation. The internal components of the engine willbecome more quickly run in if the operationspeed is varied during the running in period.
4) Never allow the engine to labour. Use the gearbox freely and avoid large throttle open-ings when the engine speed is below 1,500rpm.
5) Avoid rapid acceleration and maximum throttle openings.
6) Avoid harsh braking during the first 100 miles of urban motoring or 1,000 miles ofmotorway driving to allow the friction fac-ings of the brake pads and shoes to bedagainst the discs and drums properly.
7) Avoid trailer towing during the running in period.
Page 184 of 312

1- 3
CONTROLS AND EQUIPMENT
B880C02A-GAT
Key Numbers
The vehicle key number is recorded upon a
metal tag attached to the keys when the vehicle is first delivered to you. The key number should be recorded and kept
in a safe place in case the need to orderfurther keys arises. New keys are availablefrom any Hyundai dealer by quoting the rel-evant key number.
In the interest of security, the metal tag at-
tached to the keys which bears the key num-ber should be removed from the key ring afteryou receive your new vehicle. In addition, keynumbers cannot be provided by Hyundai forsecurity reasons.
If you need additional keys or if you should
lose your keys, your authorized Hyundai dealercan make new keys. SB040B1-F Locking, unlocking front doors with key
o The door can be locked or unlocked with a
key.
o Lock the door by turning the key toward the front of the vehicle and unlock it by turning the key toward the rear.
AX10030A-1
B040A02Y-AAT DOOR LOCKS WARNING:
o Unlocked doors can be dangerous. Be- fore you drive away (especially if there are children in the car), be sure that allthe doors are securely closed and lockedso that the doors cannot be inadvert-ently opened from the inside. This helpsensure that doors will not be openedaccidentally. Also, when combined withthe proper use of seat belts, locking thedoors helps keep occupants from beingejected from the car in case of an acci-dent.
o Before opening the door, always look for and avoid oncoming traffic.
o In case of accident the door is unlocked automatically (If installed)
LOCK
UNLOCK
HFC2004-D
Page 185 of 312
CONTROLS AND EQUIPMENT
1- 4
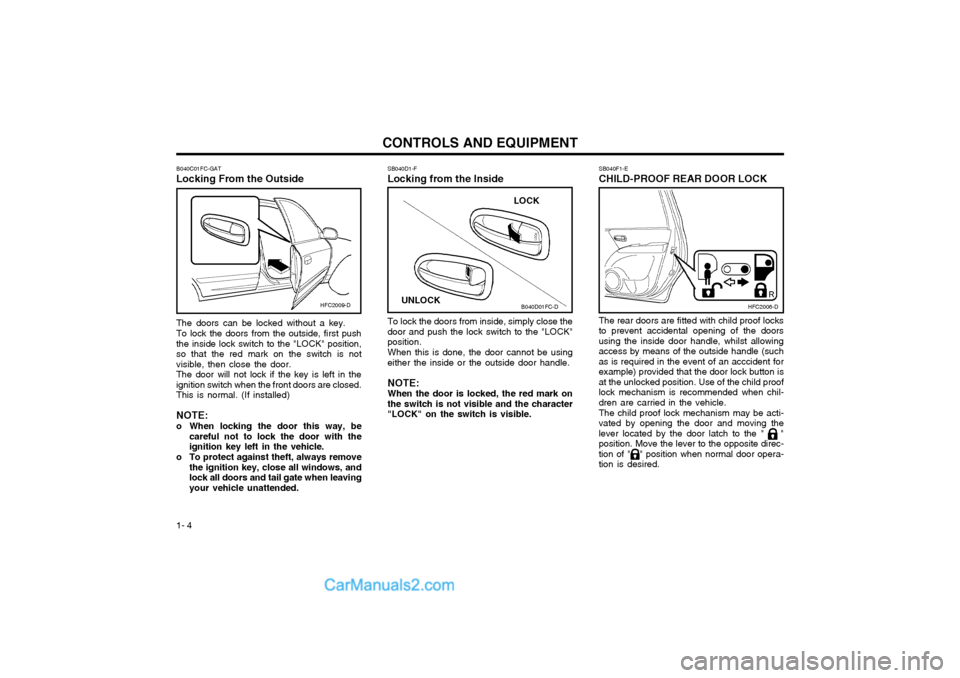
SB040F1-E CHILD-PROOF REAR DOOR LOCK The rear doors are fitted with child proof locks to prevent accidental opening of the doorsusing the inside door handle, whilst allowingaccess by means of the outside handle (suchas is required in the event of an acccident forexample) provided that the door lock button isat the unlocked position. Use of the child prooflock mechanism is recommended when chil-dren are carried in the vehicle. The child proof lock mechanism may be acti- vated by opening the door and moving thelever located by the door latch to the " "position. Move the lever to the opposite direc-tion of " " position when normal door opera-tion is desired.
SB040D1-F Locking from the Inside
B040D01FC-D
To lock the doors from inside, simply close the
door and push the lock switch to the "LOCK" position.
When this is done, the door cannot be using
either the inside or the outside door handle.
NOTE:When the door is locked, the red mark on
the switch is not visible and the character"LOCK" on the switch is visible.HFC2006-D
LOCK
UNLOCK
B040C01FC-GAT Locking From the Outside The doors can be locked without a key. To lock the doors from the outside, first push the inside lock switch to the "LOCK" position,so that the red mark on the switch is notvisible, then close the door.The door will not lock if the key is left in theignition switch when the front doors are closed.This is normal. (If installed) NOTE:
o When locking the door this way, be
careful not to lock the door with the ignition key left in the vehicle.
o To protect against theft, always remove the ignition key, close all windows, andlock all doors and tail gate when leavingyour vehicle unattended.
HFC2009-D
Page 186 of 312
1- 5
CONTROLS AND EQUIPMENT
SB040G1-F
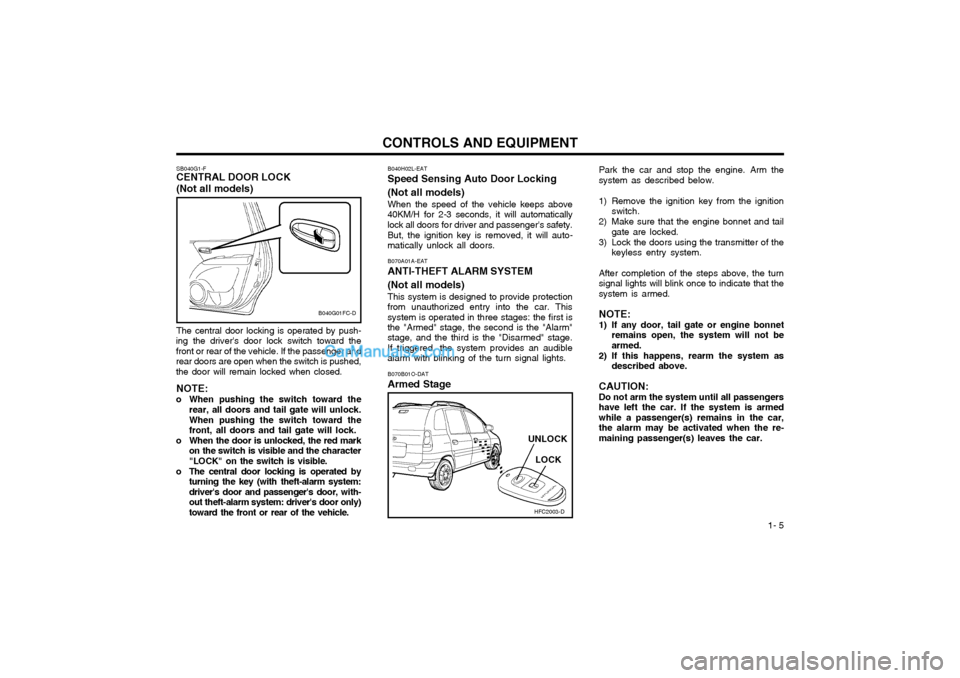
CENTRAL DOOR LOCK (Not all models) The central door locking is operated by push-
ing the driver's door lock switch toward the front or rear of the vehicle. If the passenger andrear doors are open when the switch is pushed,the door will remain locked when closed.
NOTE:
o When pushing the switch toward the rear, all doors and tail gate will unlock. When pushing the switch toward the front, all doors and tail gate will lock.
o When the door is unlocked, the red mark on the switch is visible and the character"LOCK" on the switch is visible.
o The central door locking is operated by turning the key (with theft-alarm system:driver's door and passenger's door, with-out theft-alarm system: driver's door only)toward the front or rear of the vehicle. B070A01A-EAT
ANTI-THEFT ALARM SYSTEM (Not all models)
This system is designed to provide protection
from unauthorized entry into the car. This system is operated in three stages: the first isthe "Armed" stage, the second is the "Alarm" stage, and the third is the "Disarmed" stage. If triggered, the system provides an audiblealarm with blinking of the turn signal lights.
HFC2003-D
LOCK
UNLOCK
B040G01FC-D
B070B01O-DAT
Armed Stage Park the car and stop the engine. Arm the system as described below.
1) Remove the ignition key from the ignition
switch.
2) Make sure that the engine bonnet and tail gate are locked.
3) Lock the doors using the transmitter of the keyless entry system.
After completion of the steps above, the turn signal lights will blink once to indicate that thesystem is armed. NOTE:
1) If any door, tail gate or engine bonnet remains open, the system will not be armed.
2) If this happens, rearm the system as described above.
CAUTION: Do not arm the system until all passengers have left the car. If the system is armedwhile a passenger(s) remains in the car,the alarm may be activated when the re-maining passenger(s) leaves the car.
B040H02L-EAT
Speed Sensing Auto Door Locking (Not all models)
When the speed of the vehicle keeps above
40KM/H for 2-3 seconds, it will automatically lock all doors for driver and passenger's safety.
But, the ignition key is removed, it will auto-
matically unlock all doors.
Page 187 of 312
CONTROLS AND EQUIPMENT
1- 6 The system will be disarmed when the driver's or passenger's door is unlocked by depress-ing the "UNLOCK" button on the transmitter. After completion of the step above, the turn signal light will blink twice to indicate that thesystem is disarmed. NOTE: Once the system has been disarmed, it can not be rearmed except by repeating thearming procedures. CAUTION: Only the transmitter can disarm the armed stage. If the transmitter does not disarmthe system, it is necessary to take thefollowing steps;
1. Unlock the door with the key, which will
cause, the alarm to be activated.
2. Insert the key in the ignition key cylin- der and turn the ignition key to "ON" position.
3. Wait for 30 seconds. After completion of the steps above, the system will be disarmed. B070F01A-EAT Keyless Entry System (Not all models) Locking doors
1. Close all doors.
2. Push the "LOCK" button on the transmit-
ter.
3. At the same time all doors lock, the turn signal light will blink once to indicate that the system is armed.
Unlocking doors
1. Push the "UNLOCK" button on the trans- mitter.
2. At the same time all doors unlock, the turn signal light will blink twice to indicate that the system is disarmed.
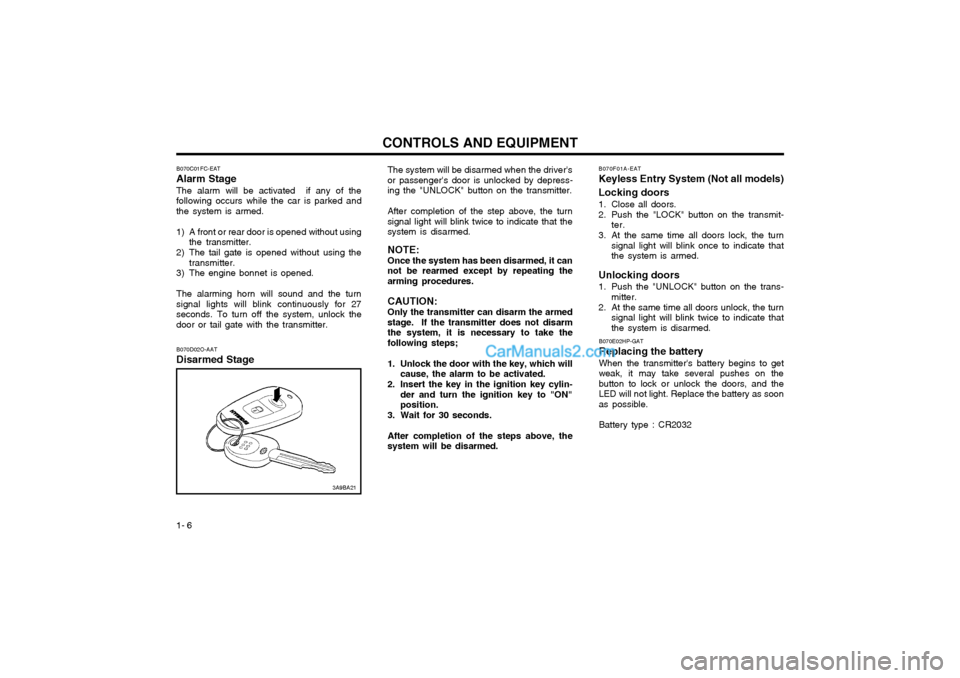
B070E02HP-GAT Replacing the batteryWhen the transmitter's battery begins to get weak, it may take several pushes on thebutton to lock or unlock the doors, and theLED will not light. Replace the battery as soonas possible. Battery type : CR2032
B070C01FC-EAT Alarm Stage The alarm will be activated if any of the following occurs while the car is parked andthe system is armed.
1) A front or rear door is opened without using
the transmitter.
2) The tail gate is opened without using the transmitter.
3) The engine bonnet is opened.The alarming horn will sound and the turn signal lights will blink continuously for 27seconds. To turn off the system, unlock thedoor or tail gate with the transmitter.
B070D02O-AAT Disarmed Stage
3A9BA21
Page 188 of 312
1- 7
CONTROLS AND EQUIPMENT
SB060A1-E DOOR WINDOWS The front door windows may be opened or closed by turning the window regulator handle.Ensure that when the windows are closed,nothing may become trapped between theglass and the door frame. WARNING: When opening or closing the windows, make sure your passenger's arms andhands are safety out of the way.B060A01E-EAT
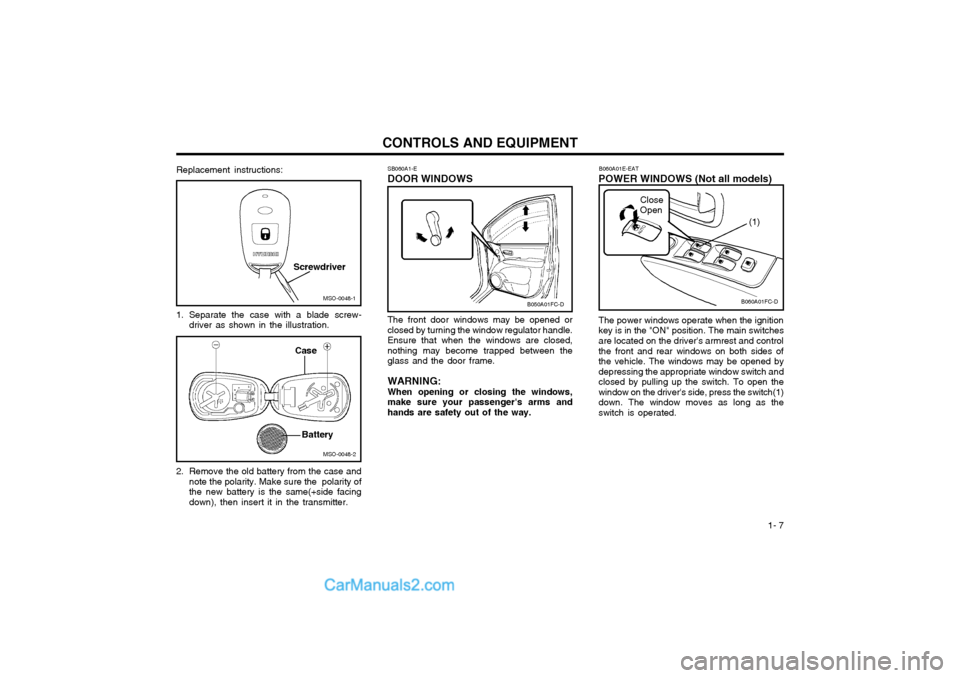
POWER WINDOWS (Not all models) The power windows operate when the ignition key is in the "ON" position. The main switchesare located on the driver's armrest and control the front and rear windows on both sides of the vehicle. The windows may be opened bydepressing the appropriate window switch andclosed by pulling up the switch. To open thewindow on the driver's side, press the switch(1)down. The window moves as long as theswitch is operated.
MSO-0048-1
MSO-0048-2
Screwdriver
Case
Battery
B050A01FC-D
Close Open
B060A01FC-D
(1)
Replacement instructions:
1. Separate the case with a blade screw- driver as shown in the illustration.
2. Remove the old battery from the case and note the polarity. Make sure the polarity of the new battery is the same(+side facingdown), then insert it in the transmitter.
Page 189 of 312
CONTROLS AND EQUIPMENT
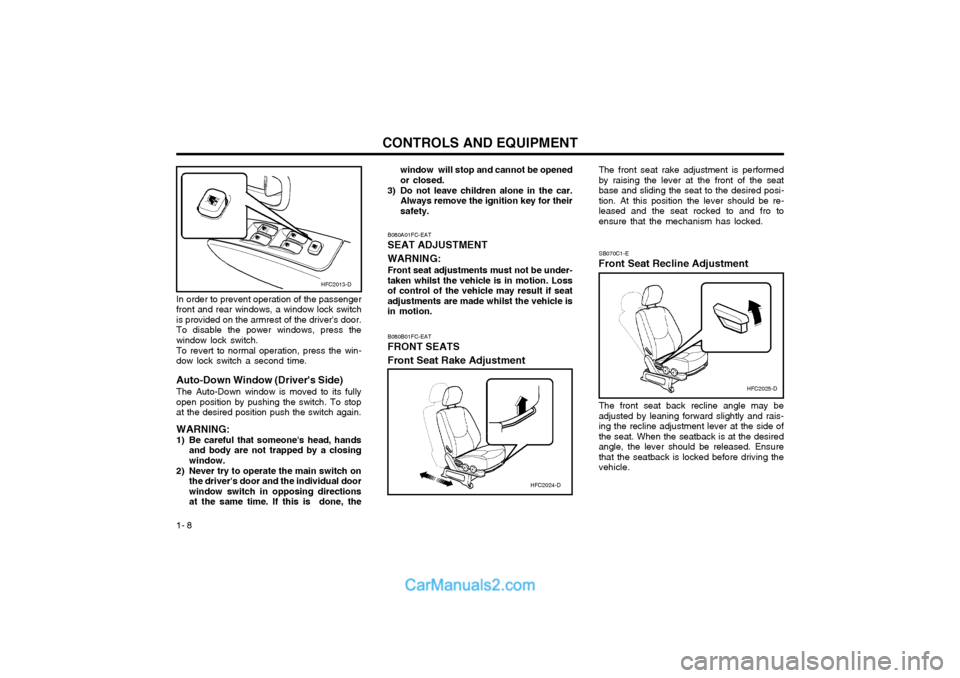
1- 8 The front seat rake adjustment is performed by raising the lever at the front of the seatbase and sliding the seat to the desired posi-tion. At this position the lever should be re-leased and the seat rocked to and fro toensure that the mechanism has locked. SB070C1-E
Front Seat Recline Adjustment
The front seat back recline angle may be adjusted by leaning forward slightly and rais-ing the recline adjustment lever at the side ofthe seat. When the seatback is at the desiredangle, the lever should be released. Ensurethat the seatback is locked before driving thevehicle.
B080B01FC-EAT FRONT SEATS Front Seat Rake Adjustment
HFC2024-D
HFC2025-D
B080A01FC-EAT SEAT ADJUSTMENT WARNING: Front seat adjustments must not be under- taken whilst the vehicle is in motion. Lossof control of the vehicle may result if seatadjustments are made whilst the vehicle isin motion. window will stop and cannot be openedor closed.
3) Do not leave children alone in the car. Always remove the ignition key for theirsafety.
In order to prevent operation of the passengerfront and rear windows, a window lock switchis provided on the armrest of the driver's door.To disable the power windows, press thewindow lock switch. To revert to normal operation, press the win- dow lock switch a second time. Auto-Down Window (Driver's Side) The Auto-Down window is moved to its fully open position by pushing the switch. To stopat the desired position push the switch again. WARNING:
1) Be careful that someone's head, hands and body are not trapped by a closing window.
2) Never try to operate the main switch on the driver's door and the individual doorwindow switch in opposing directionsat the same time. If this is done, the
HFC2013-D
Page 190 of 312
1- 9
CONTROLS AND EQUIPMENTSB070F1-F
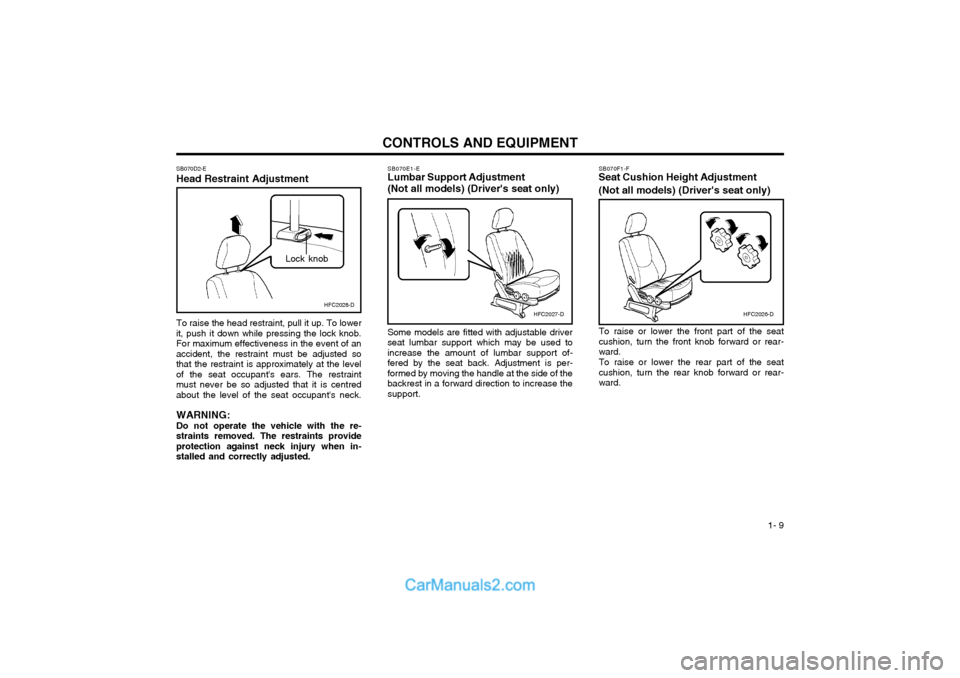
Seat Cushion Height Adjustment (Not all models) (Driver's seat only)
To raise or lower the front part of the seat cushion, turn the front knob forward or rear-ward. To raise or lower the rear part of the seat cushion, turn the rear knob forward or rear-ward.
SB070E1-E Lumbar Support Adjustment (Not all models) (Driver's seat only) Some models are fitted with adjustable driver seat lumbar support which may be used toincrease the amount of lumbar support of-fered by the seat back. Adjustment is per-formed by moving the handle at the side of thebackrest in a forward direction to increase thesupport.
SB070D2-E Head Restraint Adjustment To raise the head restraint, pull it up. To lower
it, push it down while pressing the lock knob. For maximum effectiveness in the event of anaccident, the restraint must be adjusted sothat the restraint is approximately at the levelof the seat occupant's ears. The restraintmust never be so adjusted that it is centredabout the level of the seat occupant's neck.
WARNING:Do not operate the vehicle with the re-
straints removed. The restraints provideprotection against neck injury when in-stalled and correctly adjusted.
HFC2027-DHFC2026-DHFC2028-D
Lock knob