ECO mode Hyundai Matrix 2004 Owner's Guide
[x] Cancel search | Manufacturer: HYUNDAI, Model Year: 2004, Model line: Matrix, Model: Hyundai Matrix 2004Pages: 317, PDF Size: 5.12 MB
Page 188 of 317
CONTROLS AND EQUIPMENT
1- 6 The system will be disarmed when the driver's
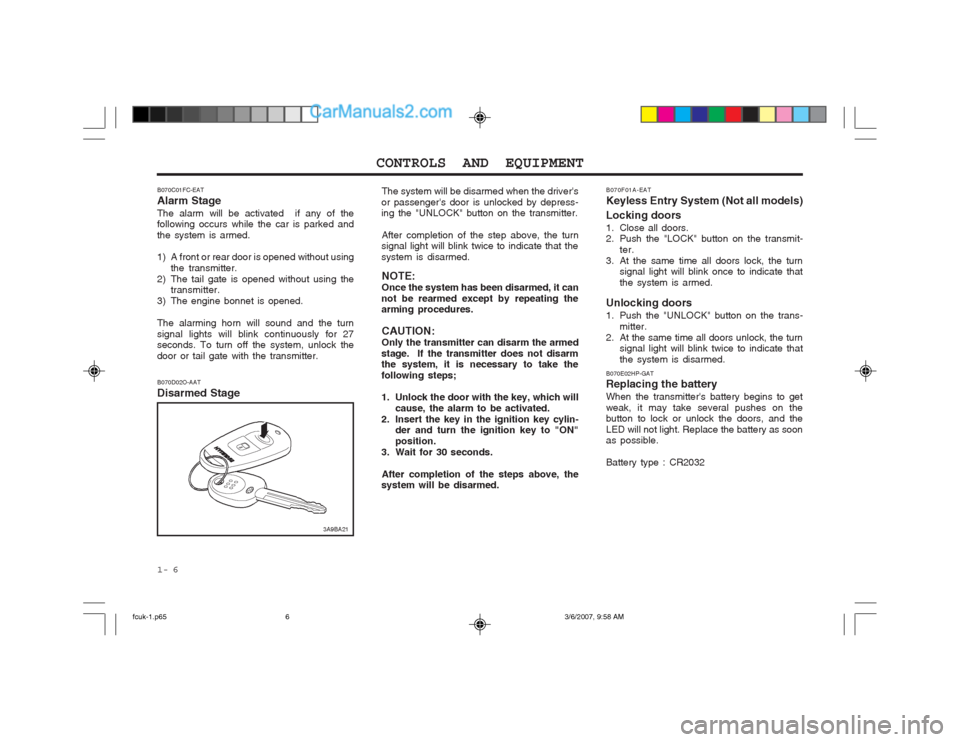
or passenger's door is unlocked by depress- ing the "UNLOCK" button on the transmitter.
After completion of the step above, the turn
signal light will blink twice to indicate that the system is disarmed.
NOTE:Once the system has been disarmed, it can
not be rearmed except by repeating the arming procedures.
CAUTION: Only the transmitter can disarm the armed
stage. If the transmitter does not disarm the system, it is necessary to take the following steps;
1. Unlock the door with the key, which will
cause, the alarm to be activated.
2. Insert the key in the ignition key cylin- der and turn the ignition key to "ON" position.
3. Wait for 30 seconds.
After completion of the steps above, the
system will be disarmed. B070F01A-EAT Keyless Entry System (Not all models) Locking doors
1. Close all doors.
2. Push the "LOCK" button on the transmit-
ter.
3. At the same time all doors lock, the turn signal light will blink once to indicate that the system is armed.
Unlocking doors
1. Push the "UNLOCK" button on the trans- mitter.
2. At the same time all doors unlock, the turn signal light will blink twice to indicate that the system is disarmed.
B070E02HP-GAT Replacing the battery When the transmitter's battery begins to get weak, it may take several pushes on the button to lock or unlock the doors, and the LED will not light. Replace the battery as soon as possible. Battery type : CR2032
B070C01FC-EAT Alarm StageThe alarm will be activated if any of the following occurs while the car is parked and the system is armed.
1) A front or rear door is opened without using
the transmitter.
2) The tail gate is opened without using the transmitter.
3) The engine bonnet is opened. The alarming horn will sound and the turn signal lights will blink continuously for 27 seconds. To turn off the system, unlock the door or tail gate with the transmitter.
B070D02O-AAT Disarmed Stage
3A9BA21
fcuk-1.p65 3/6/2007, 9:58 AM
6
Page 189 of 317
1- 7
CONTROLS AND EQUIPMENT
SB060A1-E
DOOR WINDOWS
The front door windows may be opened or
closed by turning the window regulator handle. Ensure that when the windows are closed, nothing may become trapped between the glass and the door frame.
WARNING: When opening or closing the windows,
make sure your passenger's arms and hands are safety out of the way. B060A01E-EAT POWER WINDOWS (Not all models) The power windows operate when the ignition key is in the "ON" position. The main switchesare located on the driver's armrest and controlthe front and rear windows on both sides of the vehicle. The windows may be opened by depressing the appropriate window switch and closed by pulling up the switch. To open the window on the driver's side, press the switch(1) down. The window moves as long as the switch is operated.
MSO-0048-1
MSO-0048-2
Screwdriver
Case
Battery
B050A01FC-D
Close Open
B060A01FC-D
(1)
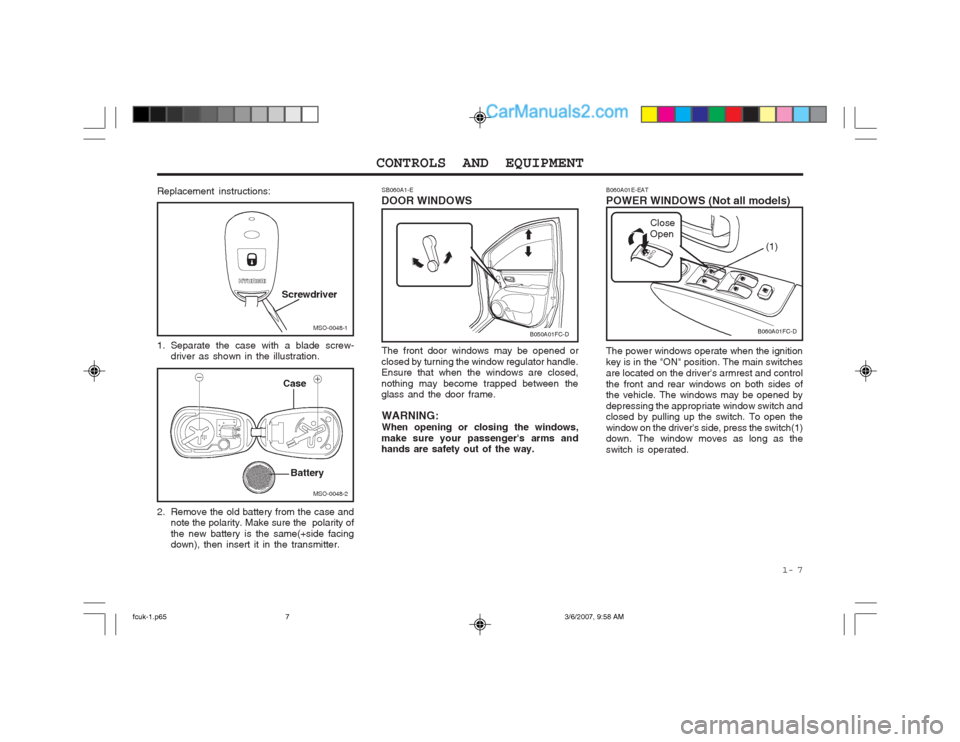
Replacement instructions:
1. Separate the case with a blade screw-
driver as shown in the illustration.
2. Remove the old battery from the case and note the polarity. Make sure the polarity of the new battery is the same(+side facing down), then insert it in the transmitter.
fcuk-1.p65 3/6/2007, 9:58 AM
7
Page 196 of 317
CONTROLS AND EQUIPMENT
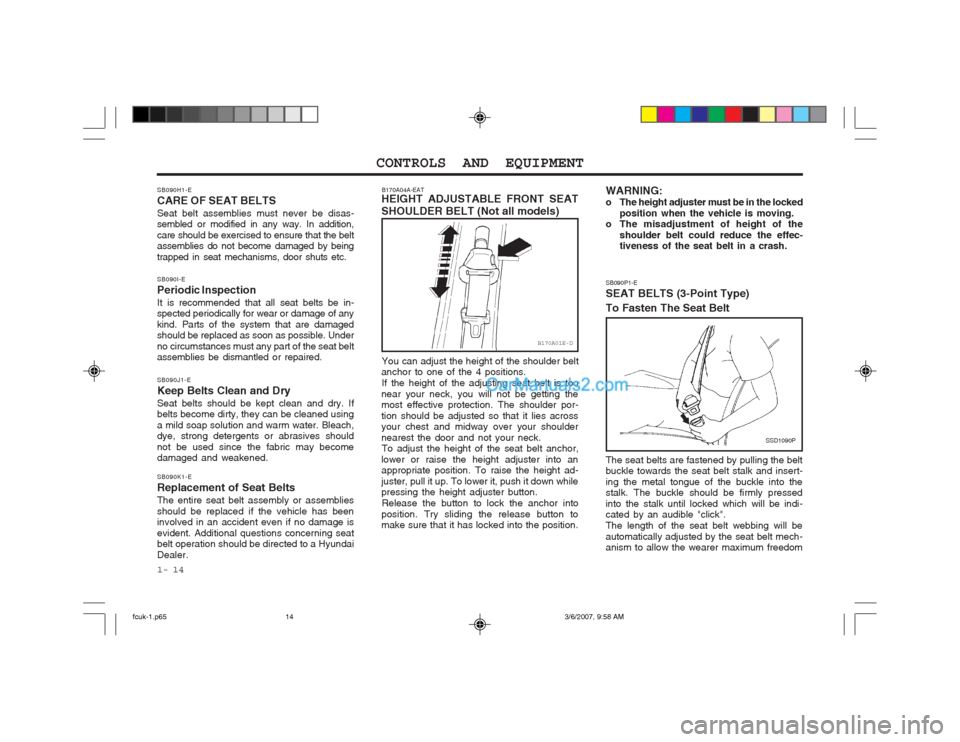
1- 14 SB090P1-E SEAT BELTS (3-Point Type) To Fasten The Seat Belt
SSD1090P
The seat belts are fastened by pulling the belt buckle towards the seat belt stalk and insert- ing the metal tongue of the buckle into the stalk. The buckle should be firmly pressed into the stalk until locked which will be indi- cated by an audible "click". The length of the seat belt webbing will beautomatically adjusted by the seat belt mech- anism to allow the wearer maximum freedom
WARNING:
o The height adjuster must be in the locked
position when the vehicle is moving.
o The misadjustment of height of the
shoulder belt could reduce the effec- tiveness of the seat belt in a crash.
B170A01E-D
B170A04A-EAT
HEIGHT ADJUSTABLE FRONT SEAT SHOULDER BELT (Not all models)
You can adjust the height of the shoulder belt
anchor to one of the 4 positions.
If the height of the adjusting seat belt is too
near your neck, you will not be getting the most effective protection. The shoulder por- tion should be adjusted so that it lies across your chest and midway over your shoulder nearest the door and not your neck. To adjust the height of the seat belt anchor,
lower or raise the height adjuster into an appropriate position. To raise the height ad- juster, pull it up. To lower it, push it down while pressing the height adjuster button. Release the button to lock the anchor into
position. Try sliding the release button tomake sure that it has locked into the position.
SB090H1-E CARE OF SEAT BELTSSeat belt assemblies must never be disas- sembled or modified in any way. In addition, care should be exercised to ensure that the belt assemblies do not become damaged by being trapped in seat mechanisms, door shuts etc. SB090I-E Periodic InspectionIt is recommended that all seat belts be in- spected periodically for wear or damage of any kind. Parts of the system that are damaged should be replaced as soon as possible. Under no circumstances must any part of the seat belt assemblies be dismantled or repaired. SB090J1-E Keep Belts Clean and DrySeat belts should be kept clean and dry. If belts become dirty, they can be cleaned using a mild soap solution and warm water. Bleach, dye, strong detergents or abrasives should not be used since the fabric may become damaged and weakened. SB090K1-E Replacement of Seat BeltsThe entire seat belt assembly or assemblies should be replaced if the vehicle has been involved in an accident even if no damage is evident. Additional questions concerning seat belt operation should be directed to a Hyundai Dealer.
fcuk-1.p65
3/6/2007, 9:58 AM
14
Page 212 of 317
CONTROLS AND EQUIPMENT
1- 30 SB210E1-E
OVERDRIVE OFF INDICATOR LIGHT (Not all models)
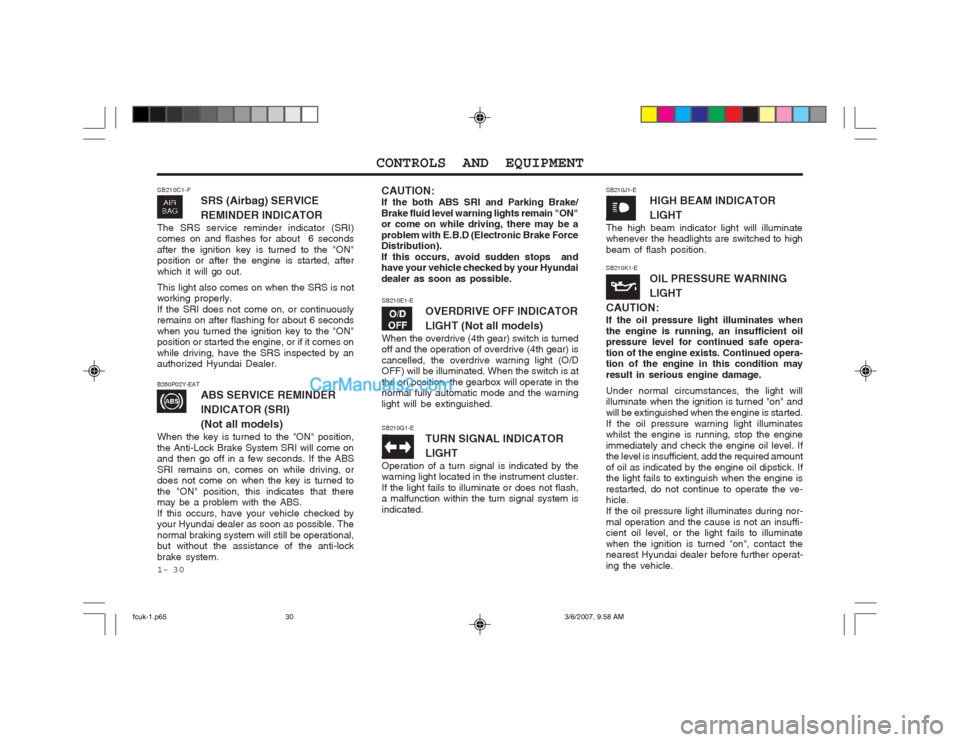
When the overdrive (4th gear) switch is turned off and the operation of overdrive (4th gear) is cancelled, the overdrive warning light (O/D OFF) will be illuminated. When the switch is at the on position, the gearbox will operate in the normal fully automatic mode and the warning light will be extinguished.
B260P02Y-EAT
ABS SERVICE REMINDER INDICATOR (SRI)(Not all models)
When the key is turned to the "ON" position, the Anti-Lock Brake System SRI will come on and then go off in a few seconds. If the ABS SRI remains on, comes on while driving, or does not come on when the key is turned to the "ON" position, this indicates that there may be a problem with the ABS. If this occurs, have your vehicle checked by your Hyundai dealer as soon as possible. The normal braking system will still be operational, but without the assistance of the anti-lock brake system.
CAUTION: If the both ABS SRI and Parking Brake/Brake fluid level warning lights remain "ON" or come on while driving, there may be a
problem with E.B.D (Electronic Brake Force Distribution). If this occurs, avoid sudden stops and have your vehicle checked by your Hyundai dealer as soon as possible. SB210K1-E
OIL PRESSURE WARNING LIGHT
CAUTION: If the oil pressure light illuminates when the engine is running, an insufficient oil pressure level for continued safe opera- tion of the engine exists. Continued opera- tion of the engine in this condition may result in serious engine damage. Under normal circumstances, the light will illuminate when the ignition is turned "on" and will be extinguished when the engine is started.If the oil pressure warning light illuminates whilst the engine is running, stop the engine immediately and check the engine oil level. If the level is insufficient, add the required amount of oil as indicated by the engine oil dipstick. If the light fails to extinguish when the engine is restarted, do not continue to operate the ve- hicle. If the oil pressure light illuminates during nor-mal operation and the cause is not an insuffi- cient oil level, or the light fails to illuminate when the ignition is turned "on", contact the nearest Hyundai dealer before further operat- ing the vehicle.
SB210G1-E TURN SIGNAL INDICATOR LIGHT
Operation of a turn signal is indicated by the warning light located in the instrument cluster. If the light fails to illuminate or does not flash, a malfunction within the turn signal system is indicated.
SB210J1-E HIGH BEAM INDICATOR LIGHT
The high beam indicator light will illuminate whenever the headlights are switched to high beam of flash position.
SB210C1-F
SRS (Airbag) SERVICE REMINDER INDICATOR
The SRS service reminder indicator (SRI) comes on and flashes for about 6 seconds after the ignition key is turned to the "ON" position or after the engine is started, after which it will go out. This light also comes on when the SRS is not working properly. If the SRI does not come on, or continuously remains on after flashing for about 6 seconds when you turned the ignition key to the "ON" position or started the engine, or if it comes on while driving, have the SRS inspected by an authorized Hyundai Dealer.
fcuk-1.p65 3/6/2007, 9:58 AM
30
Page 214 of 317
CONTROLS AND EQUIPMENT
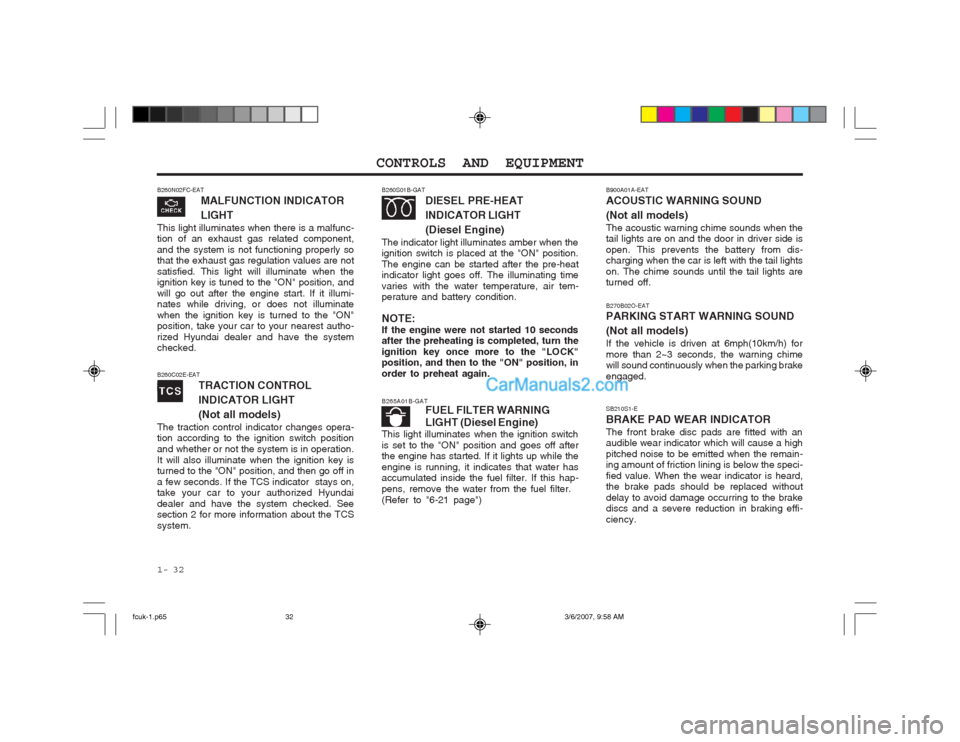
1- 32 SB210S1-E BRAKE PAD WEAR INDICATORThe front brake disc pads are fitted with an audible wear indicator which will cause a high pitched noise to be emitted when the remain- ing amount of friction lining is below the speci- fied value. When the wear indicator is heard, the brake pads should be replaced without delay to avoid damage occurring to the brake discs and a severe reduction in braking effi- ciency.
B260N02FC-EAT
MALFUNCTION INDICATOR LIGHT
This light illuminates when there is a malfunc- tion of an exhaust gas related component, and the system is not functioning properly so that the exhaust gas regulation values are not satisfied. This light will illuminate when the ignition key is tuned to the "ON" position, and will go out after the engine start. If it illumi- nates while driving, or does not illuminate when the ignition key is turned to the "ON" position, take your car to your nearest autho- rized Hyundai dealer and have the system checked.
B260S01B-GAT DIESEL PRE-HEAT INDICATOR LIGHT(Diesel Engine)
The indicator light illuminates amber when the ignition switch is placed at the "ON" position. The engine can be started after the pre-heat indicator light goes off. The illuminating time varies with the water temperature, air tem- perature and battery condition. NOTE: If the engine were not started 10 seconds after the preheating is completed, turn the ignition key once more to the "LOCK" position, and then to the "ON" position, in order to preheat again.
B265A01B-GAT FUEL FILTER WARNING LIGHT (Diesel Engine)
This light illuminates when the ignition switch is set to the "ON" position and goes off after the engine has started. If it lights up while the engine is running, it indicates that water has accumulated inside the fuel filter. If this hap- pens, remove the water from the fuel filter.(Refer to "6-21 page")
B260C02E-EAT
TRACTION CONTROL INDICATOR LIGHT(Not all models)
The traction control indicator changes opera- tion according to the ignition switch position and whether or not the system is in operation.It will also illuminate when the ignition key is turned to the "ON" position, and then go off in a few seconds. If the TCS indicator stays on, take your car to your authorized Hyundai dealer and have the system checked. See section 2 for more information about the TCS system.
B270B02O-EAT PARKING START WARNING SOUND (Not all models) If the vehicle is driven at 6mph(10km/h) for more than 2~3 seconds, the warning chime will sound continuously when the parking brake engaged.
B900A01A-EAT ACOUSTIC WARNING SOUND (Not all models) The acoustic warning chime sounds when the tail lights are on and the door in driver side is open. This prevents the battery from dis- charging when the car is left with the tail lights on. The chime sounds until the tail lights are turned off.
fcuk-1.p65
3/6/2007, 9:58 AM
32
Page 217 of 317
1- 35
CONTROLS AND EQUIPMENT
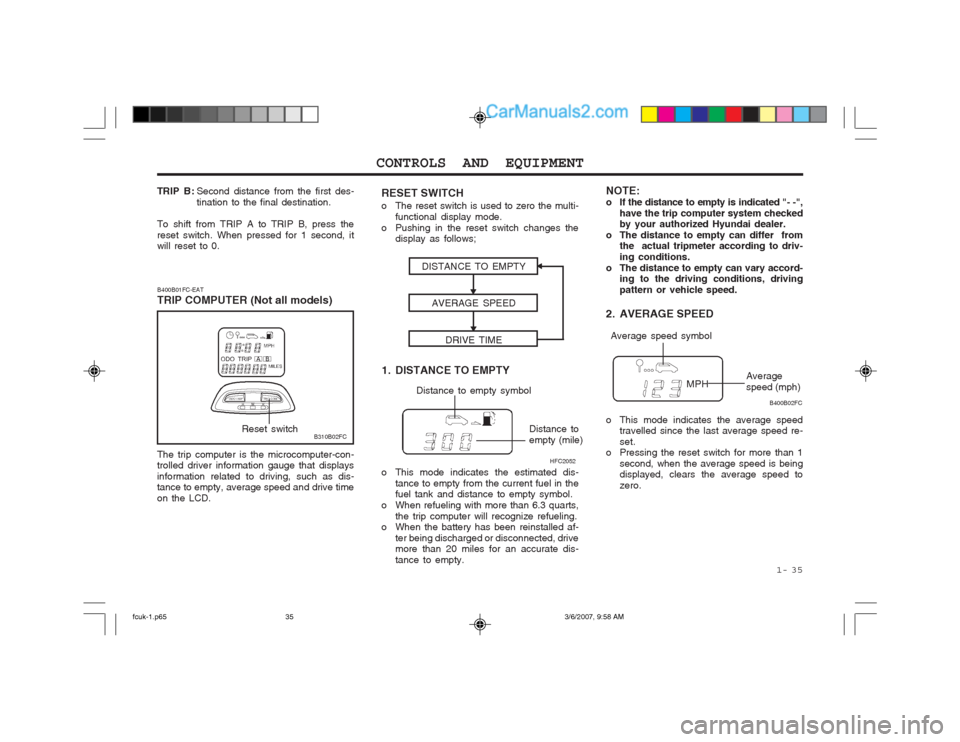
The trip computer is the microcomputer-con- trolled driver information gauge that displays information related to driving, such as dis- tance to empty, average speed and drive time on the LCD.
B310B02FC
B400B01FC-EAT TRIP COMPUTER (Not all models)Reset switch
1. DISTANCE TO EMPTYDISTANCE TO EMPTY
AVERAGE SPEED
DRIVE TIME
Distance to empty symbol
Distance to empty (mile)
o This mode indicates the estimated dis- tance to empty from the current fuel in the fuel tank and distance to empty symbol.
o When refueling with more than 6.3 quarts, the trip computer will recognize refueling.
o When the battery has been reinstalled af-
ter being discharged or disconnected, drivemore than 20 miles for an accurate dis- tance to empty. NOTE:
o If the distance to empty is indicated "- -",
have the trip computer system checked by your authorized Hyundai dealer.
o The distance to empty can differ from the actual tripmeter according to driv- ing conditions.
o The distance to empty can vary accord- ing to the driving conditions, drivingpattern or vehicle speed.
2. AVERAGE SPEED
o This mode indicates the average speed travelled since the last average speed re- set.
o Pressing the reset switch for more than 1
second, when the average speed is being displayed, clears the average speed to zero.
Average speed symbol
Average speed (mph)
HFC2052 B400B02FC
TRIP B :
Second distance from the first des-tination to the final destination.
To shift from TRIP A to TRIP B, press thereset switch. When pressed for 1 second, it will reset to 0.
RESET SWITCH
o The reset switch is used to zero the multi- functional display mode.
o Pushing in the reset switch changes the display as follows;
fcuk-1.p65 3/6/2007, 9:58 AM
35
Page 218 of 317
CONTROLS AND EQUIPMENT
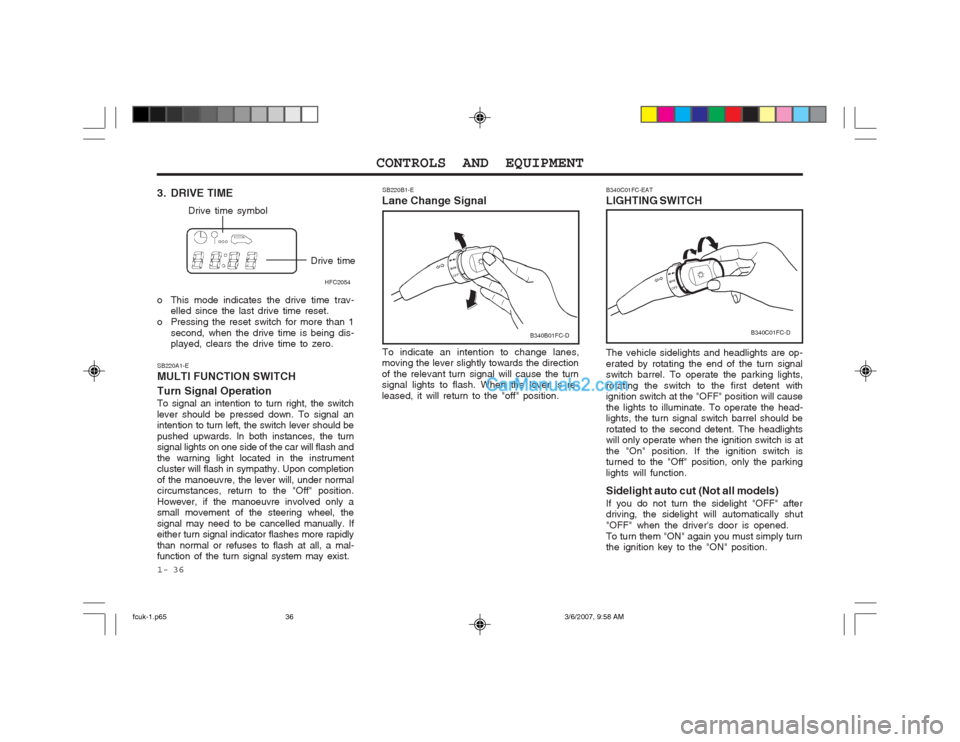
1- 36 The vehicle sidelights and headlights are op- erated by rotating the end of the turn signal switch barrel. To operate the parking lights, rotating the switch to the first detent with ignition switch at the "OFF" position will cause the lights to illuminate. To operate the head- lights, the turn signal switch barrel should be rotated to the second detent. The headlights will only operate when the ignition switch is at the "On" position. If the ignition switch is turned to the "Off" position, only the parking lights will function. Sidelight auto cut (Not all models) If you do not turn the sidelight "OFF" after driving, the sidelight will automatically shut "OFF" when the driver's door is opened.To turn them "ON" again you must simply turn the ignition key to the "ON" position.
B340C01FC-EAT LIGHTING SWITCH
SB220A1-EMULTI FUNCTION SWITCH Turn Signal Operation To signal an intention to turn right, the switch lever should be pressed down. To signal an intention to turn left, the switch lever should be pushed upwards. In both instances, the turn signal lights on one side of the car will flash and the warning light located in the instrument cluster will flash in sympathy. Upon completion of the manoeuvre, the lever will, under normal circumstances, return to the "Off" position. However, if the manoeuvre involved only a small movement of the steering wheel, the signal may need to be cancelled manually. If either turn signal indicator flashes more rapidly than normal or refuses to flash at all, a mal- function of the turn signal system may exist. SB220B1-E
Lane Change Signal
To indicate an intention to change lanes,
moving the lever slightly towards the direction of the relevant turn signal will cause the turn signal lights to flash. When the lever is re- leased, it will return to the "off" position.
3. DRIVE TIME
Drive time symbol
Drive timeHFC2054
o This mode indicates the drive time trav- elled since the last drive time reset.
o Pressing the reset switch for more than 1 second, when the drive time is being dis- played, clears the drive time to zero. B340C01FC-D
B340B01FC-D
fcuk-1.p65
3/6/2007, 9:58 AM
36
Page 219 of 317
1- 37
CONTROLS AND EQUIPMENT
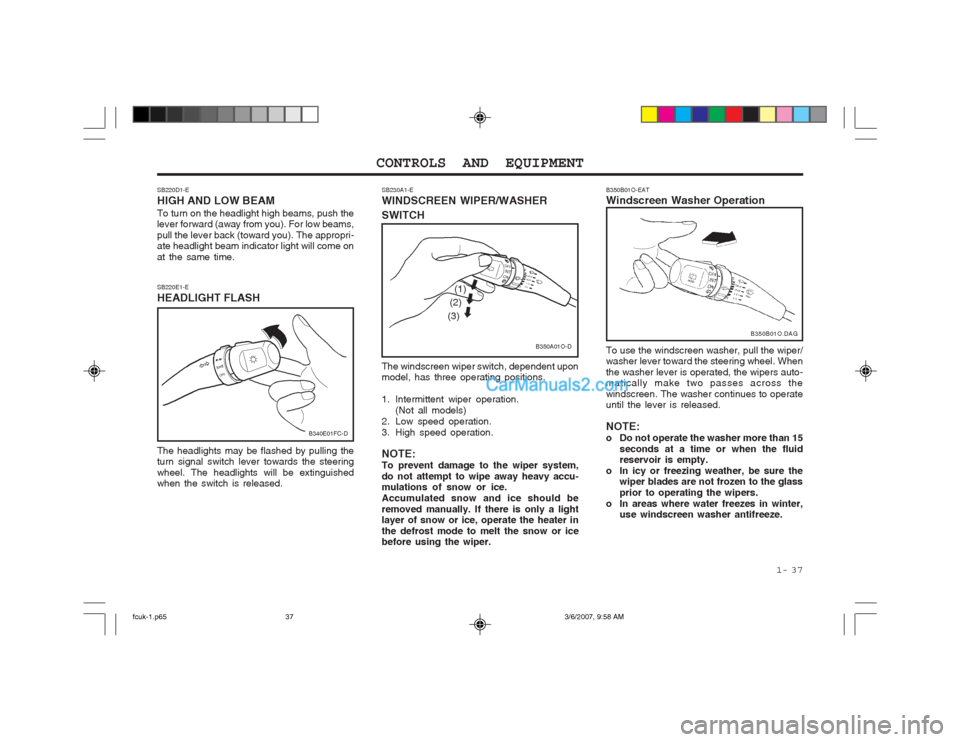
The windscreen wiper switch, dependent upon model, has three operating positions.
1. Intermittent wiper operation.
(Not all models)
2. Low speed operation.
3. High speed operation. NOTE: To prevent damage to the wiper system,do not attempt to wipe away heavy accu- mulations of snow or ice. Accumulated snow and ice should beremoved manually. If there is only a light layer of snow or ice, operate the heater in the defrost mode to melt the snow or ice before using the wiper.
SB230A1-E WINDSCREEN WIPER/WASHER SWITCH
SB220E1-E HEADLIGHT FLASH The headlights may be flashed by pulling the turn signal switch lever towards the steering wheel. The headlights will be extinguished when the switch is released.
SB220D1-E HIGH AND LOW BEAMTo turn on the headlight high beams, push the lever forward (away from you). For low beams, pull the lever back (toward you). The appropri- ate headlight beam indicator light will come on at the same time.
B340E01FC-D
B350A01O-D
(1)
(2)
(3)
B350B01O-EAT Windscreen Washer Operation To use the windscreen washer, pull the wiper/ washer lever toward the steering wheel. When the washer lever is operated, the wipers auto- matically make two passes across the windscreen. The washer continues to operate until the lever is released. NOTE:
o Do not operate the washer more than 15 seconds at a time or when the fluid reservoir is empty.
o In icy or freezing weather, be sure the wiper blades are not frozen to the glass prior to operating the wipers.
o In areas where water freezes in winter, use windscreen washer antifreeze. B350B01O.DAG
fcuk-1.p65
3/6/2007, 9:58 AM
37
Page 221 of 317

1- 39
CONTROLS AND EQUIPMENT
NOTE: The engine must be running for the heatedrear window to operate.
SB250A1-E HEATED REAR WINDOW To operate the heated rear window depress the switch shown. The heated rear window will automatically turn off after 20 minutes or when the ignition is turned off. The system may be turned off manually by depressing the switch again. CAUTION: The inside of the rear windscreen should never be cleaned with a hard or sharp imple- ment since damage to the heating element may occur. The glass should only be cleaned with a soft cloth or chamois leather with the use only of a mild detergent or proprietary glass cleaner where necessary. Only hori- zontal movement of the cloth should be made when cleaning the glass and care should be exercised to ensure that the heat- ing elements are not damaged by rings or jewellery whilst the glass is being cleaned. B360A01Y-GAT REAR FOG LIGHT SWITCH To turn on the rear fog lights, push the switch. They will come on when the headlight switch is in the second position and the key is in the "ON" position.
HFC2080-D
B360B01FC-1
B360B01FC-EAT FRONT FOG LIGHT SWITCH (Not all models) To turn on the front fog lights, push the switch in the "ON" position. They will come on when the headlight switch is in the first or second position.
B360A01FC-1
fcuk-1.p65
3/6/2007, 9:58 AM
39
Page 224 of 317
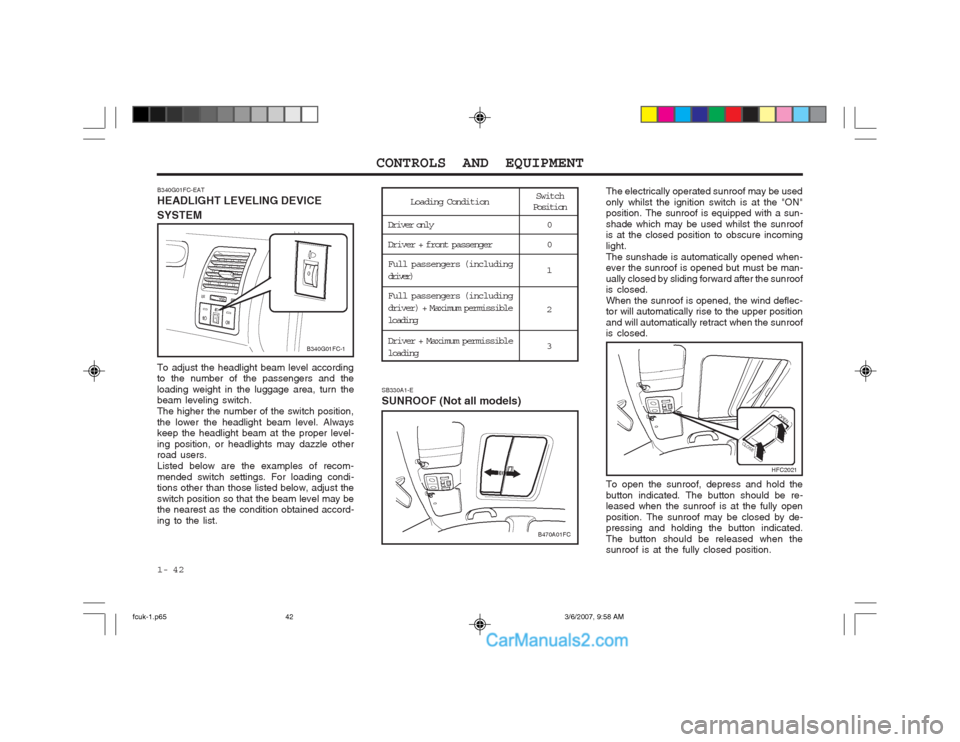
CONTROLS AND EQUIPMENT
1- 42 SB330A1-E SUNROOF (Not all models)
To adjust the headlight beam level according to the number of the passengers and the loading weight in the luggage area, turn the beam leveling switch. The higher the number of the switch position,the lower the headlight beam level. Always keep the headlight beam at the proper level- ing position, or headlights may dazzle other road users. Listed below are the examples of recom-mended switch settings. For loading condi- tions other than those listed below, adjust the
switch position so that the beam level may be the nearest as the condition obtained accord- ing to the list.
Switch
PositionLoading Condition
Driver only
Driver + front passenger Full passengers (including driver)
Full passengers (including
driver) + Maximum permissibleloading Driver + Maximum permissible
loading 0 0 1 2 3
B340G01FC-EAT HEADLIGHT LEVELING DEVICE SYSTEM
The electrically operated sunroof may be used only whilst the ignition switch is at the "ON" position. The sunroof is equipped with a sun- shade which may be used whilst the sunroof is at the closed position to obscure incoming light.The sunshade is automatically opened when- ever the sunroof is opened but must be man- ually closed by sliding forward after the sunroof is closed. When the sunroof is opened, the wind deflec- tor will automatically rise to the upper position and will automatically retract when the sunroof is closed. To open the sunroof, depress and hold the button indicated. The button should be re- leased when the sunroof is at the fully open position. The sunroof may be closed by de- pressing and holding the button indicated. The button should be released when the sunroof is at the fully closed position.
HFC2021
B470A01FC
B340G01FC-1
fcuk-1.p65
3/6/2007, 9:58 AM
42