oil change Hyundai Matrix 2005 User Guide
[x] Cancel search | Manufacturer: HYUNDAI, Model Year: 2005, Model line: Matrix, Model: Hyundai Matrix 2005Pages: 407, PDF Size: 10.31 MB
Page 342 of 407

5VEHICLE MAINTENANCE REQUIREMENTS
8EXPLANATION OF SCHEDULED MAINTENANCE ITEMS
!
F060M01A-AAT o Engine Oil and Filter The engine oil and filter should be changed at the intervals specified in the maintenance schedule. If the car is being driven in severe conditions,more frequent oil and filter changes are required. F060B01A-AAT
o Drive Belts Inspect all drive belts for evidence of cuts, cracks, excessive wear or oil saturation and replace if necessary. Drive belts should be checked periodi-cally for proper tension and adjusted as necessary. F060C01A-AAT
o Fuel Filter
A clogged filter can limit the speed at
which the vehicle may be driven, dam-age the emission system and cause hard starting. If an excessive amountof foreign matter accumulates in the fuel tank, the filter may require re- placement more frequently. After installing a new filter, run the
engine for several minutes, and checkfor leaks at the connections. Fuel fil- ters should be installed by trained technicians. WARNING (Diesel only):
Never work on injection system with engine running or within 30 sec- onds after shutting off engine. Highpressure pump, rail, injectors and high pressure pipes are subject to high pressure even after the enginestopped. The fuel jet produced by fuel leaks may cause serious injury, if it touch the body. People usingpacemakers should not move than 30cm closer to the ECU or wiring harness within the engine roomwhile engine is running, since the high currents in the Common Rail system produce considerable mag-netic fields.
F060D01TB-AAT
o Fuel Lines, Fuel Hoses and Connections
Check the fuel lines, fuel hoses and
connections for leakage and damage.Replace any damaged or leaking partsimmediately.
Page 344 of 407
5VEHICLE MAINTENANCE REQUIREMENTS
10
F070F01A-AAT
o Brake Hoses and Lines
Visually check for proper installation, chafing, cracks, deterioration and any leakage. Replace any deteriorated or damaged parts immediately. F070G02A-AAT
o Brake Fluid
Check brake fluid level in the brakefluid reservoir. The level should be between "MIN" and "MAX" marks on the side of the reservoir. Use onlyhydraulic brake fluid conforming to DOT 3 or DOT 4.
F070H01A-AAT
o Rear Brake Drums and
Linings, Parking Brake
Check the rear brake drums and lin-
ings for scoring, burning, leaking fluid, broken parts, and excessive wear. In- spect the parking brake system in- cluding the parking brake lever andcables. For detailed service proce- dures, refer to the Shop Manual.
F070D01A-AAT o Manual Transaxle Oil Inspect the manual transaxle oil ac- cording to the maintenance schedule. NOTE: If the oil level is low, check for possible leaks before adding oil. Do not overfill. F070E06A-AAT
o Automatic Transaxle Fluid
The fluid level should be in the "HOT"range of the dipstick, after the engine and transaxle are at normal operating temperature. Check the automatictransaxle fluid level with the engine running and the transaxle in neutral, with the parking brake properly ap-plied. Use HYUNDAI GENUINE ATF SP III, DIAMOND ATF SP III, SK ATF SP III or other brands approved byHyundai Motor Co., when adding or changing fluid. Using the wrong ATF may result in damage to the ATM.
F070C01A-AAT o Engine Coolant The coolant should be changed at the intervals specified in the mainte- nance schedule.
Page 354 of 407

6
DO-IT-YOURSELF MAINTENANCE
9CHANGING THE OIL AND FILTER
!
G040A04FC-GAT
Gasoline engine
The engine oil and filter should be changed at those intervals specified in the maintenance schedule in Sec-tion 5. If the car is being driven in severe conditions, more frequent oil and filter changes are required. G040A03EThe procedure for changing the oil
and filter is as follows:
1. Park the car on level ground and
set the parking brake. Start the engine and let it warm up until the needle on the coolant temperaturegauge moves above the lowest mark. Turn the engine off and place the gear selector lever in "P" (auto-matic) or reverse gear (manual transaxle).
2. Open the hood and remove the engine oil filler cap.
3. Slide underneath the car and loosen the oil pan drain plug by turning itcounterclockwise with a wrench of the proper size. Be sure that adrain pan is in position to catch the oil as it drains out, then remove the drain plug.
WARNING:
Be very careful when draining the
engine oil as it may be hot enough to burn you! 4. When the oil has stopped draining,
replace the drain plug using a new washer and retighten by turning it clockwise. Oil pan drain plug tightening torque :
Oil filler cap
Drain plug
Oil filler F040A02TB
1.6 DOHC
1.8 DOHC
1.6 DOHC 1.8 DOHC 4.0 ~ 4.5 3.5 ~ 4.5
E.CExcept E.C
4.0 ~ 4.5 kgf.m
5. Remove the oil filter by turning it counterclockwise with a oil filter wrench of the proper size. A cer-tain amount of oil will come out when you remove the filter. So be sure to have your drain pan inplace underneath it.
6. Install a new oil filter in accordance with the instructions on the cartonor on the filter itself. Do not over- tighten. Oil filter tightening torque: 1.2~1.6kgf.m
Oil filler cap
Drain plug
Oil filler
Page 355 of 407
6 DO-IT-YOURSELF MAINTENANCE
10
CAUTION:
Slowly pour the recommended oil using by a funnel. Do not overfillnot to damage engine.
!
NOTE: Always dispose of used engine oil in an environmentally acceptablemanner. It is suggested that it be placed in a sealed container and taken to a service station for maybereclaimation. Do not pour the oil on the ground or put it in with the household trash.
Be sure that the mounting surfaceon the engine is clean and that theold gasket is removed completely. Lubricate the new gasket on the filter with clean engine oil beforeinstallation.
7. Remove the engine oil level dip- stick.
8. Refill the crankcase with the rec-
ommended engine oil. Refer tothe specification in chapter 9 for engine oil capacity.
!
9. Start the engine and check to be sure no oil is leaking from the drain plug or oil filter.
10.Shut off the engine and recheck the oil level. WARNING:
Used motor oil may cause irrita-
tion or cancer of the skin if left in contact with the skin for prolongedperiods of time. Wash your hands thoroughly with soap and warm water as soon as possible afterhandling used oil. G040B04FC-GAT
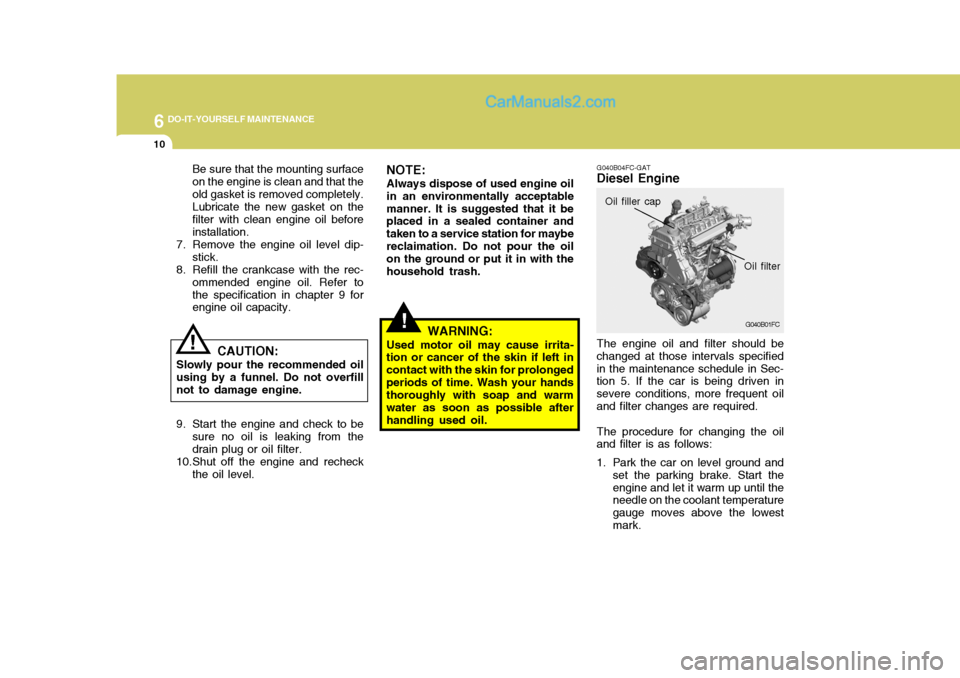
Diesel Engine
Oil filter
G040B01FC
Oil filler cap
The engine oil and filter should be
changed at those intervals specified in the maintenance schedule in Sec- tion 5. If the car is being driven in severe conditions, more frequent oiland filter changes are required.
The procedure for changing the oil
and filter is as follows:
1. Park the car on level ground and
set the parking brake. Start the engine and let it warm up until the needle on the coolant temperature gauge moves above the lowestmark.
Page 357 of 407

6 DO-IT-YOURSELF MAINTENANCE
12
!
!
CHECKING AND CHANGING THE ENGINE COOLANT
G050B01A-AAT
Recommended Engine Coolant
G050B01FC
G050A01A-AAT
WARNING:
Do not remove the radiator cap
when the engine is hot. When the engine is hot, the engine coolant is under pressure and may eruptthrough the opening if the cap is removed. You could be seriously burned if you do not observe thisprecaution. Do not remove the radiator cap until the radiator is cool to the touch.
G050B02FC
Gasoline engine
Diesel engine
Use a high quality ethylene-glycol
coolant in a 50/50 mix with water.
10.Start the engine and check to be
sure no oil is leaking from thedrain plug or oil filter.
11.Shut off the engine and recheck
the oil level.
NOTE:
o It is recommended that the en- gine oil and filter should be changed by an authorized Hyundai dealer.
o Always dispose of used engine oil in an environmentally accept-able manner. It is suggested that it be placed in a sealed container and taken to a service station formaybe reclaimation. Do not pour the oil on the ground or put it into the household trash.
WARNING:
Used motor oil may cause irrita- tion or cancer of the skin if left in contact with the skin for prolongedperiods of time. Wash your hands thoroughly with soap and warm water as soon as possible afterhandling used oil.
Page 381 of 407

6 DO-IT-YOURSELF MAINTENANCE
36
ing should be checked using an aim- ing screen as shown in the illustra-tion. Turn on the headlight switch. (Low Beam Position)
1. Adjust headlights so that main axisof light is parallel to center line of the body and is aligned with point "P" shown in the illustration.
2. Dotted lines in the illustration show the center of headlights. Specifications: "H" Horizontal center line of headlights from ground : 656 mm (26.8 in.) "W" Distance between each headlightcenter: 1,164 mm (47.7 in.) "L" Distance between the headlights and the wall that the lights are tested against : 3,000 mm (118 in.).REPLACING HEADLIGHT BULBS
G260A03A-GAT Before attempting to replace a head- light bulb, be sure the switch is turned to the "OFF" position. The next paragraph shows how to reach the headlight bulbs so they may be changed. Be sure to replacethe burned-out bulb with one of the same number and wattage rating. See page 6-38 for the wattage de- scriptions.
CAUTION:
Keep the lamps out of contact with petroleum products, such as oil,gasoline, etc.
!
G290B01FC-GAT
Adjustment After Headlight Assembly Replacement
If the vehicle has had front body repair and the headlight assemblyhas been replaced, the headlight aim- G290B01L
L
W
H
H Cut-off line
"P"
30mm (1.18 in.)
Vertical line
Horizontal line
Ground line
LHD
G290B01L-D
LW
H
H Cut-off line
"P"
30mm (1.18 in.)
Vertical line
Horizontal line
Ground line
RHD