parking brake Hyundai Matrix 2005 Owner's Manual
[x] Cancel search | Manufacturer: HYUNDAI, Model Year: 2005, Model line: Matrix, Model: Hyundai Matrix 2005Pages: 407, PDF Size: 10.31 MB
Page 37 of 407
1- 29
CONTROLS AND EQUIPMENTHFC002-D
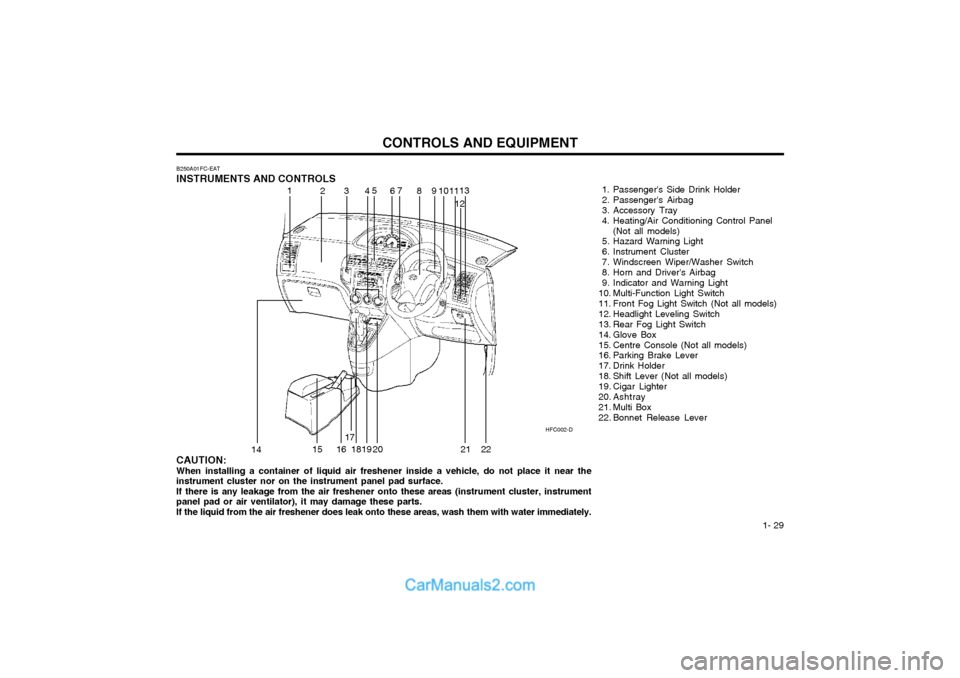
B250A01FC-EAT INSTRUMENTS AND CONTROLS
1. Passenger's Side Drink Holder
2. Passenger's Airbag
3. Accessory Tray
4. Heating/Air Conditioning Control Panel(Not all models)
5. Hazard Warning Light
6. Instrument Cluster
7. Windscreen Wiper/Washer Switch
8. Horn and Driver's Airbag
9. Indicator and Warning Light
10. Multi-Function Light Switch
11. Front Fog Light Switch (Not all models)
12. Headlight Leveling Switch
13. Rear Fog Light Switch
14. Glove Box
15. Centre Console (Not all models)
16. Parking Brake Lever
17. Drink Holder
18. Shift Lever (Not all models)
19. Cigar Lighter
20. Ashtray
21. Multi Box
22. Bonnet Release Lever
CAUTION: When installing a container of liquid air freshener inside a vehicle, do not place it near the instrument cluster nor on the instrument panel pad surface.If there is any leakage from the air freshener onto these areas (instrument cluster, instrumentpanel pad or air ventilator), it may damage these parts. If the liquid from the air freshener does leak onto these areas, wash them with water immediately. 1
2
34 5
67
89 1011
1213
14 15 1617
1819
20 2122
Page 38 of 407
CONTROLS AND EQUIPMENT
1- 30
B260A01FC-EAT
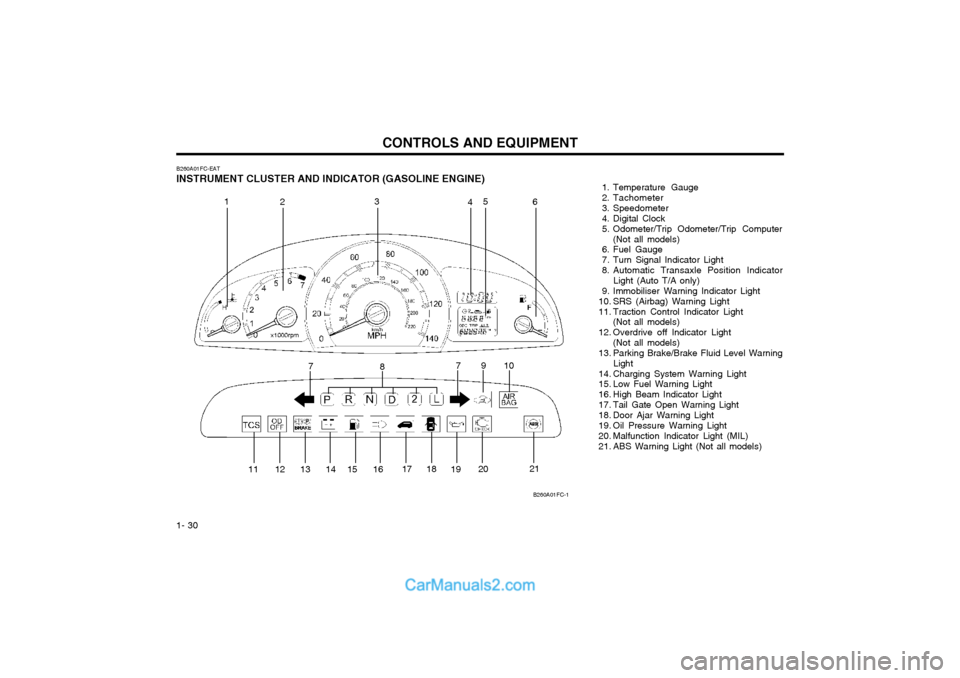
INSTRUMENT CLUSTER AND INDICATOR (GASOLINE ENGINE) 1. Temperature Gauge
2. Tachometer
3. Speedometer
4. Digital Clock
5. Odometer/Trip Odometer/Trip Computer
(Not all models)
6. Fuel Gauge
7. Turn Signal Indicator Light
8. Automatic Transaxle Position Indicator Light (Auto T/A only)
9. Immobiliser Warning Indicator Light
10. SRS (Airbag) Warning Light
11. Traction Control Indicator Light (Not all models)
12. Overdrive off Indicator Light (Not all models)
13. Parking Brake/Brake Fluid Level Warning Light
14. Charging System Warning Light
15. Low Fuel Warning Light
16. High Beam Indicator Light
17. Tail Gate Open Warning Light
18. Door Ajar Warning Light
19. Oil Pressure Warning Light
20. Malfunction Indicator Light (MIL)
21. ABS Warning Light (Not all models)
B260A01FC-1
1
2 3
45
6
7 8 910
11 12 13 14 15 16 17 18
1920 21
7
Page 39 of 407
1- 31
CONTROLS AND EQUIPMENT
B260B01FC-EAT
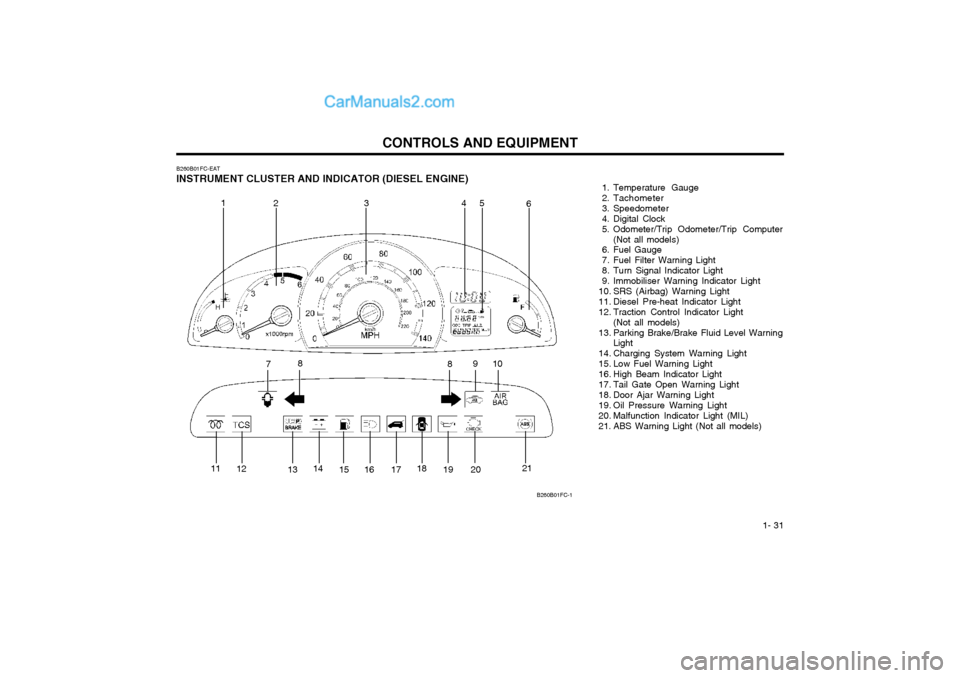
INSTRUMENT CLUSTER AND INDICATOR (DIESEL ENGINE) 1. Temperature Gauge
2. Tachometer
3. Speedometer
4. Digital Clock
5. Odometer/Trip Odometer/Trip Computer
(Not all models)
6. Fuel Gauge
7. Fuel Filter Warning Light
8. Turn Signal Indicator Light
9. Immobiliser Warning Indicator Light
10. SRS (Airbag) Warning Light
11. Diesel Pre-heat Indicator Light
12. Traction Control Indicator Light
(Not all models)
13. Parking Brake/Brake Fluid Level Warning Light
14. Charging System Warning Light
15. Low Fuel Warning Light
16. High Beam Indicator Light
17. Tail Gate Open Warning Light
18. Door Ajar Warning Light
19. Oil Pressure Warning Light
20. Malfunction Indicator Light (MIL)
21. ABS Warning Light (Not all models)
B260B01FC-1
1 23 4 5
6
7 8
910
8
11 12
1314
15 16 17 18
19 20 21
Page 40 of 407
CONTROLS AND EQUIPMENT
1- 32 SB210E1-E
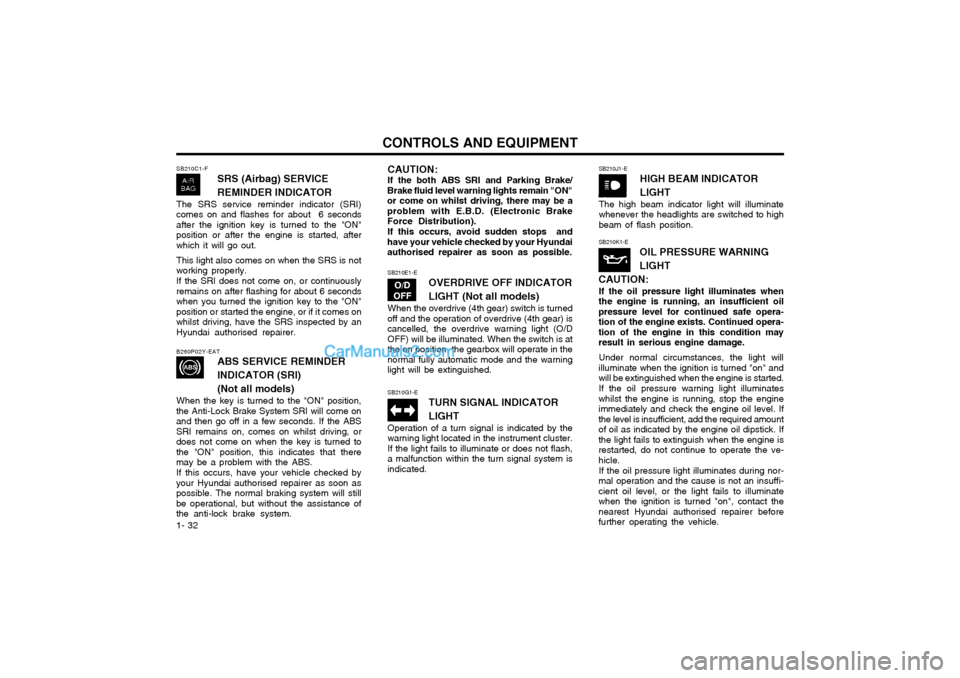
OVERDRIVE OFF INDICATOR LIGHT (Not all models)
When the overdrive (4th gear) switch is turned
off and the operation of overdrive (4th gear) is cancelled, the overdrive warning light (O/DOFF) will be illuminated. When the switch is atthe on position, the gearbox will operate in thenormal fully automatic mode and the warninglight will be extinguished.
B260P02Y-EAT
ABS SERVICE REMINDER INDICATOR (SRI)(Not all models)
When the key is turned to the "ON" position,
the Anti-Lock Brake System SRI will come on and then go off in a few seconds. If the ABSSRI remains on, comes on whilst driving, ordoes not come on when the key is turned tothe "ON" position, this indicates that theremay be a problem with the ABS.
If this occurs, have your vehicle checked by
your Hyundai authorised repairer as soon aspossible. The normal braking system will stillbe operational, but without the assistance ofthe anti-lock brake system.
CAUTION: If the both ABS SRI and Parking Brake/
Brake fluid level warning lights remain "ON" or come on whilst driving, there may be aproblem with E.B.D. (Electronic Brake
Force Distribution).
If this occurs, avoid sudden stops and
have your vehicle checked by your Hyundaiauthorised repairer as soon as possible. SB210K1-E
OIL PRESSURE WARNING LIGHT
CAUTION: If the oil pressure light illuminates when
the engine is running, an insufficient oil pressure level for continued safe opera-tion of the engine exists. Continued opera-tion of the engine in this condition mayresult in serious engine damage.
Under normal circumstances, the light will
illuminate when the ignition is turned "on" andwill be extinguished when the engine is started.
If the oil pressure warning light illuminates
whilst the engine is running, stop the engineimmediately and check the engine oil level. Ifthe level is insufficient, add the required amountof oil as indicated by the engine oil dipstick. Ifthe light fails to extinguish when the engine isrestarted, do not continue to operate the ve-hicle.
If the oil pressure light illuminates during nor-
mal operation and the cause is not an insuffi-cient oil level, or the light fails to illuminatewhen the ignition is turned "on", contact thenearest Hyundai authorised repairer beforefurther operating the vehicle.
SB210G1-E
TURN SIGNAL INDICATOR LIGHT
Operation of a turn signal is indicated by the
warning light located in the instrument cluster. If the light fails to illuminate or does not flash,a malfunction within the turn signal system isindicated.
SB210J1-E
HIGH BEAM INDICATOR LIGHT
The high beam indicator light will illuminate whenever the headlights are switched to highbeam of flash position.
SB210C1-F
SRS (Airbag) SERVICE REMINDER INDICATOR
The SRS service reminder indicator (SRI) comes on and flashes for about 6 secondsafter the ignition key is turned to the "ON"position or after the engine is started, afterwhich it will go out. This light also comes on when the SRS is not working properly. If the SRI does not come on, or continuously remains on after flashing for about 6 secondswhen you turned the ignition key to the "ON"position or started the engine, or if it comes onwhilst driving, have the SRS inspected by anHyundai authorised repairer.
Page 41 of 407
1- 33
CONTROLS AND EQUIPMENTcircuits becoming defective, approximately fifty per cent of the normal braking perfor-mance will be available. If failure of one of the circuits occurs, the required amount of pedal effort, pedal traveland stopping distance will be increased. Useof the gearbox is recommended to assist inbringing the vehicle to rest. The vehicle mustnot be driven once brake failure has occurreduntil the system has been repaired and isfunctioning normally. The braking system employs a vacuum servo in order that the pedal efforts are reduced.Power for the servo is derived from the engineand therefore, in the event of the enginestopping or the vehicle being towed, pedalefforts will be substantially increased.
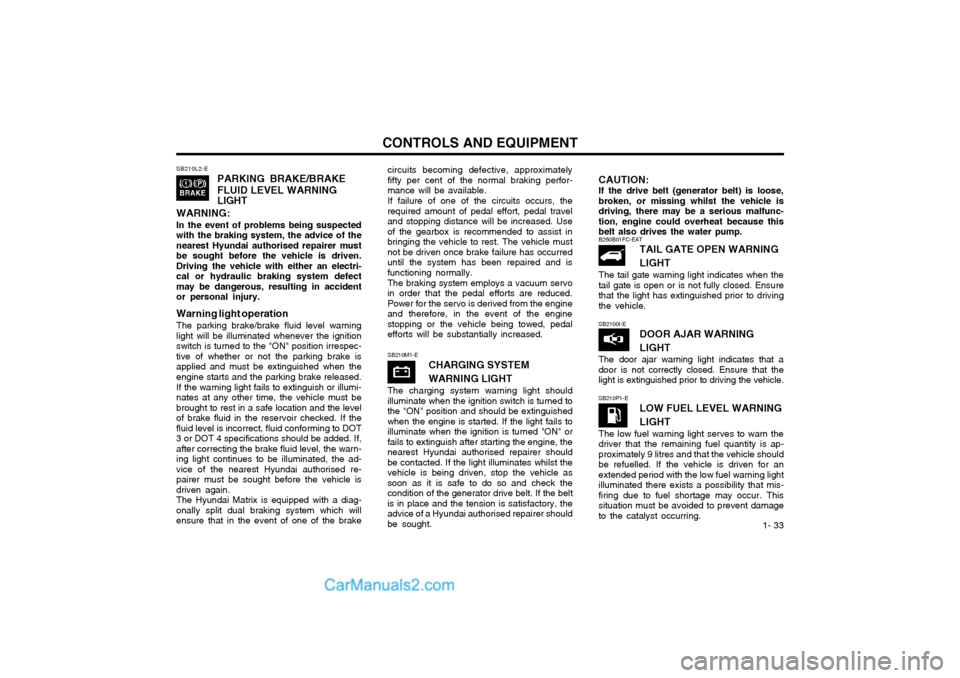
SB210L2-E
PARKING BRAKE/BRAKE FLUID LEVEL WARNING LIGHT
WARNING: In the event of problems being suspected with the braking system, the advice of thenearest Hyundai authorised repairer mustbe sought before the vehicle is driven.Driving the vehicle with either an electri-cal or hydraulic braking system defectmay be dangerous, resulting in accidentor personal injury. Warning light operation The parking brake/brake fluid level warning light will be illuminated whenever the ignitionswitch is turned to the "ON" position irrespec-tive of whether or not the parking brake isapplied and must be extinguished when theengine starts and the parking brake released. If the warning light fails to extinguish or illumi- nates at any other time, the vehicle must bebrought to rest in a safe location and the levelof brake fluid in the reservoir checked. If thefluid level is incorrect, fluid conforming to DOT3 or DOT 4 specifications should be added. If,after correcting the brake fluid level, the warn-ing light continues to be illuminated, the ad-vice of the nearest Hyundai authorised re-pairer must be sought before the vehicle isdriven again.The Hyundai Matrix is equipped with a diag-onally split dual braking system which willensure that in the event of one of the brake
CAUTION: If the drive belt (generator belt) is loose, broken, or missing whilst the vehicle isdriving, there may be a serious malfunc-tion, engine could overheat because thisbelt also drives the water pump.
SB210M1-E CHARGING SYSTEM WARNING LIGHT
The charging system warning light should illuminate when the ignition switch is turned tothe "ON" position and should be extinguishedwhen the engine is started. If the light fails toilluminate when the ignition is turned "ON" orfails to extinguish after starting the engine, thenearest Hyundai authorised repairer shouldbe contacted. If the light illuminates whilst thevehicle is being driven, stop the vehicle assoon as it is safe to do so and check thecondition of the generator drive belt. If the beltis in place and the tension is satisfactory, theadvice of a Hyundai authorised repairer shouldbe sought.
B260B01FC-EAT TAIL GATE OPEN WARNING LIGHT
The tail gate warning light indicates when the tail gate is open or is not fully closed. Ensurethat the light has extinguished prior to drivingthe vehicle. SB2100I-E DOOR AJAR WARNING LIGHT
The door ajar warning light indicates that a door is not correctly closed. Ensure that thelight is extinguished prior to driving the vehicle.
SB210P1-E
LOW FUEL LEVEL WARNING LIGHT
The low fuel warning light serves to warn the driver that the remaining fuel quantity is ap-proximately 9 litres and that the vehicle shouldbe refuelled. If the vehicle is driven for anextended period with the low fuel warning lightilluminated there exists a possibility that mis-firing due to fuel shortage may occur. Thissituation must be avoided to prevent damageto the catalyst occurring.
Page 42 of 407
CONTROLS AND EQUIPMENT
1- 34 SB210S1-E
BRAKE PAD WEAR INDICATOR
The front brake disc pads are fitted with an
audible wear indicator which will cause a high pitched noise to be emitted when the remain-ing amount of friction lining is below the speci-fied value. When the wear indicator is heard,the brake pads should be replaced withoutdelay to avoid damage occurring to the brakediscs and a severe reduction in braking effi-ciency.
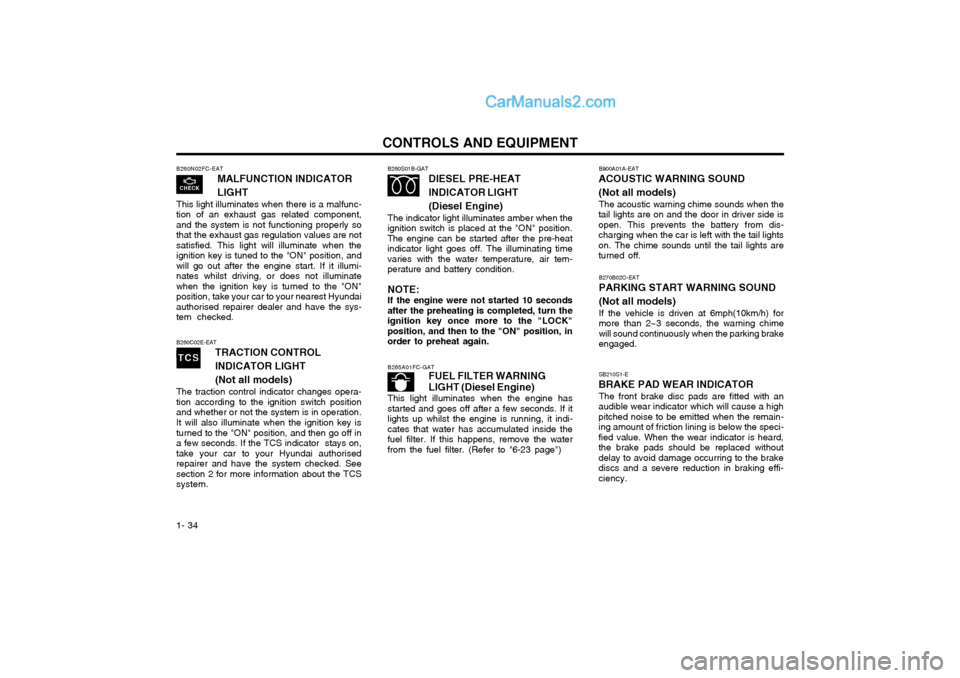
B260N02FC-EAT
MALFUNCTION INDICATOR LIGHT
This light illuminates when there is a malfunc- tion of an exhaust gas related component,and the system is not functioning properly sothat the exhaust gas regulation values are notsatisfied. This light will illuminate when theignition key is tuned to the "ON" position, andwill go out after the engine start. If it illumi-nates whilst driving, or does not illuminatewhen the ignition key is turned to the "ON"position, take your car to your nearest Hyundaiauthorised repairer dealer and have the sys-tem checked.
B260S01B-GAT DIESEL PRE-HEAT INDICATOR LIGHT(Diesel Engine)
The indicator light illuminates amber when the
ignition switch is placed at the "ON" position. The engine can be started after the pre-heatindicator light goes off. The illuminating timevaries with the water temperature, air tem-perature and battery condition.
NOTE: If the engine were not started 10 seconds
after the preheating is completed, turn the ignition key once more to the "LOCK"position, and then to the "ON" position, inorder to preheat again.
B265A01FC-GAT FUEL FILTER WARNING
LIGHT (Diesel Engine)
This light illuminates when the engine has started and goes off after a few seconds. If itlights up whilst the engine is running, it indi-cates that water has accumulated inside thefuel filter. If this happens, remove the waterfrom the fuel filter. (Refer to "6-23 page")
B260C02E-EAT
TRACTION CONTROL INDICATOR LIGHT(Not all models)
The traction control indicator changes opera- tion according to the ignition switch positionand whether or not the system is in operation. It will also illuminate when the ignition key is turned to the "ON" position, and then go off ina few seconds. If the TCS indicator stays on,take your car to your Hyundai authorisedrepairer and have the system checked. Seesection 2 for more information about the TCSsystem.
B270B02O-EAT PARKING START WARNING SOUND (Not all models) If the vehicle is driven at 6mph(10km/h) for more than 2~3 seconds, the warning chimewill sound continuously when the parking brake engaged.
B900A01A-EAT
ACOUSTIC WARNING SOUND (Not all models)
The acoustic warning chime sounds when the
tail lights are on and the door in driver side is open. This prevents the battery from dis-charging when the car is left with the tail lightson. The chime sounds until the tail lights areturned off.
Page 57 of 407
1- 49
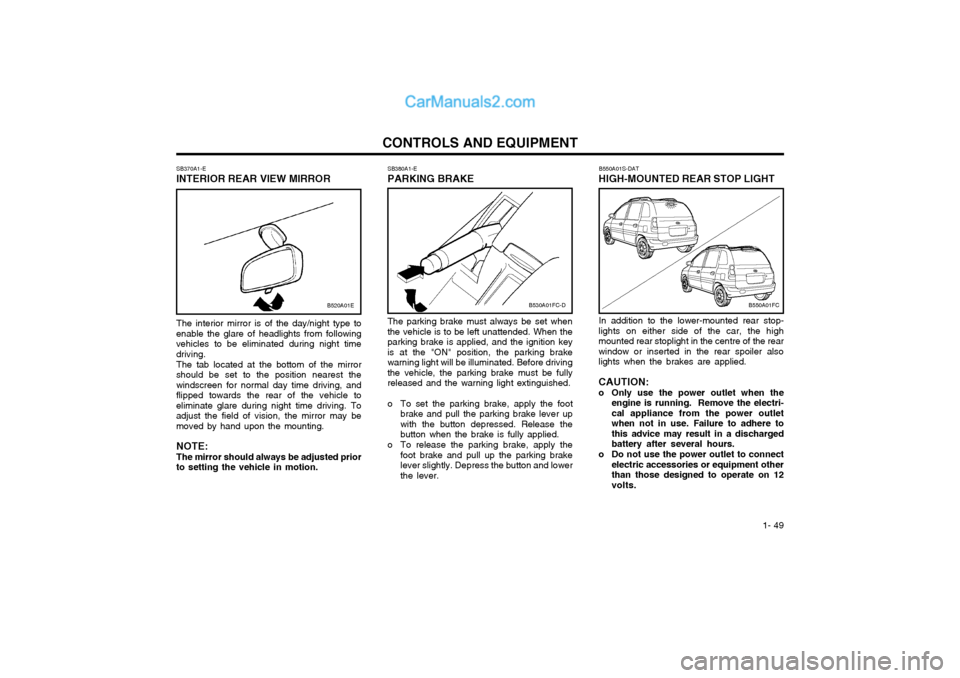
CONTROLS AND EQUIPMENTSB380A1-E PARKING BRAKE The parking brake must always be set when the vehicle is to be left unattended. When theparking brake is applied, and the ignition keyis at the "ON" position, the parking brakewarning light will be illuminated. Before drivingthe vehicle, the parking brake must be fullyreleased and the warning light extinguished.
o To set the parking brake, apply the foot brake and pull the parking brake lever up with the button depressed. Release thebutton when the brake is fully applied.
o To release the parking brake, apply the foot brake and pull up the parking brakelever slightly. Depress the button and lowerthe lever.
SB370A1-E
INTERIOR REAR VIEW MIRROR
The interior mirror is of the day/night type to
enable the glare of headlights from followingvehicles to be eliminated during night timedriving.
The tab located at the bottom of the mirror
should be set to the position nearest thewindscreen for normal day time driving, andflipped towards the rear of the vehicle toeliminate glare during night time driving. Toadjust the field of vision, the mirror may bemoved by hand upon the mounting.
NOTE:The mirror should always be adjusted prior
to setting the vehicle in motion.
B530A01FC-DB550A01FC
B520A01E
B550A01S-DAT
HIGH-MOUNTED REAR STOP LIGHT
In addition to the lower-mounted rear stop-
lights on either side of the car, the high
mounted rear stoplight in the centre of the rearwindow or inserted in the rear spoiler alsolights when the brakes are applied. CAUTION:
o Only use the power outlet when the engine is running. Remove the electri-cal appliance from the power outletwhen not in use. Failure to adhere tothis advice may result in a dischargedbattery after several hours.
o Do not use the power outlet to connect electric accessories or equipment otherthan those designed to operate on 12volts.
Page 74 of 407
DRIVING YOUR HYUNDAI
2- 2
C020A01O-EAT BEFORE STARTING THE ENGINEBefore you start the engine, you should al- ways:
1. Look around the vehicle to be sure there
are no flat tyres, puddles of oil or water or other indications of possible trouble.
2. After entering the car, check to be sure the parking brake is engaged.
3. Check that all windows, and lights are clean.
4. Check that the interior and exterior mirrors are clean and in position.
5. Check your seat, seatback and headrestraint to be sure they are in their proper positions.
6. Close all doors.
7. Fasten your seat belt and be sure that all other occupants have fastened theirs.
8. Turn off all lights and accessories that are not needed.
9. When you turn the ignition switch to "ON" check that all appropriate warning lights areoperating and that you have sufficient fuel.
10.Check the operation of warning lights and all bulbs when key is in the "ON" position.
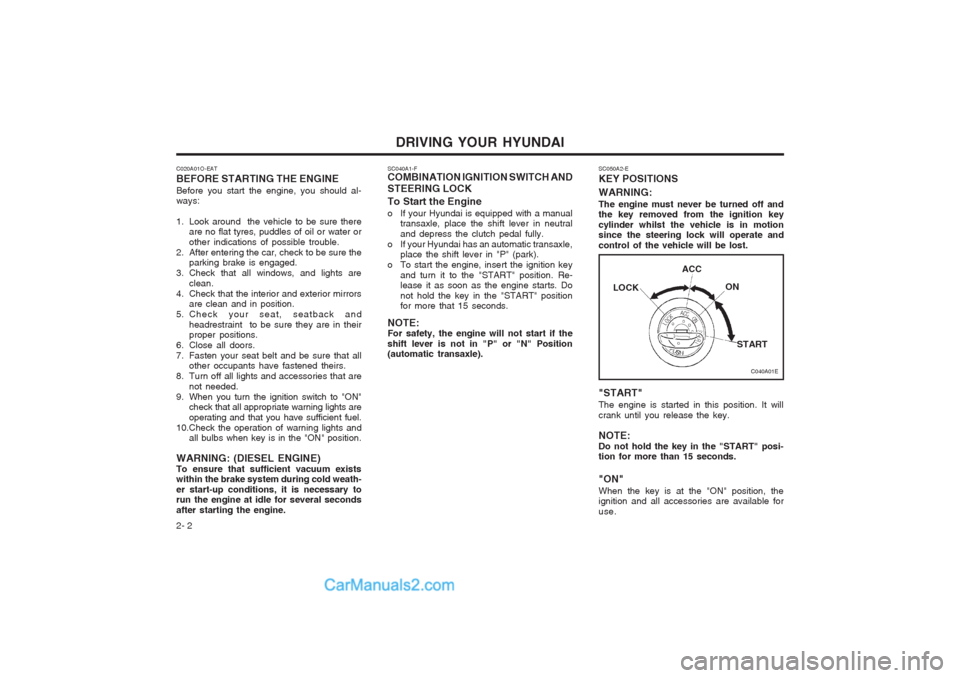
WARNING: (DIESEL ENGINE)To ensure that sufficient vacuum exists within the brake system during cold weath- er start-up conditions, it is necessary to run the engine at idle for several seconds after starting the engine. SC040A1-F COMBINATION IGNITION SWITCH AND STEERING LOCK To Start the Engine
o If your Hyundai is equipped with a manual
transaxle, place the shift lever in neutral and depress the clutch pedal fully.
o If your Hyundai has an automatic transaxle, place the shift lever in "P" (park).
o To start the engine, insert the ignition key and turn it to the "START" position. Re- lease it as soon as the engine starts. Do not hold the key in the "START" position for more that 15 seconds.
NOTE:For safety, the engine will not start if the shift lever is not in "P" or "N" Position (automatic transaxle). SC050A2-E KEY POSITIONS WARNING: The engine must never be turned off and the key removed from the ignition key cylinder whilst the vehicle is in motion since the steering lock will operate and control of the vehicle will be lost. "START" The engine is started in this position. It will crank until you release the key. NOTE: Do not hold the key in the "START" posi- tion for more than 15 seconds. "ON" When the key is at the "ON" position, the ignition and all accessories are available for use.
C040A01E
LOCK
ACC
ON
START
Page 78 of 407

DRIVING YOUR HYUNDAI
2- 6 The shift points as shown above are recom- mended for optimum fuel economy and per- formance.
SC100A1-F
RECOMMENDED SHIFT POINTS
Shift
from-to
1-2 2-33-4 4-5 Recommended
mph (km/h)
15 (20) 25 (40) 35 (55) 45 (75)
C090A01FC-D
C090A01A-GAT AUTOMATIC TRANSAXLE The highly efficient Hyundai automatic transaxle has four forward speeds and one reverse speed. It has a conventional shift pattern as shown in the illustration. At night, with the first position of the multi-function switch, the appropriate symbol on the shift pattern indicator will be illuminated according to the range selected. CAUTION: Never shift into "R" or "P" position whilstthe vehicle is moving. NOTE:
Depress the brake pedal and push the button when shifting. Push the button when shifting.The selector lever can be shifted free- ly.SC090D1-F To Remove the Ignition Key
1. Turn the ignition key to the "ACC" position.
2. Simultaneously push and turn the ignitionkey counterclockwise from the "ACC" posi- tion to the "LOCK" position.
3. The key can be removed in the "LOCK"
position.
C070C01E
LOCK
ACC
ON
START
SC090B1-F Using the ClutchThe clutch should be pressed all the way to the floor before shifting, then released slowly. Do not rest your foot on the clutch pedal whilst driving. This can cause unnecessary wear.Do not partially engage the clutch to hold the car on an incline. This causes unnecessary wear.Use the parking brake to hold the car on an incline. Do not operate the clutch pedal rapidly and repeatedly.
Page 80 of 407
DRIVING YOUR HYUNDAI
2- 8 o Always engage the parking brake when
the vehicle is unattended, never use the "P" position in place of the parking brake.
o Under normal circumstances, the selector
should be placed in the "D" position andthe transaxle allowed to select the most ideal ratio for the circumstances. In this position maximum fuel economy will be achieved.
o When descending steep gradients where
engine braking is required, the selector should be placed at the "2" or "L" position depending upon the vehicle speed.
o When ascending steep gradients using large throttle openings, the transaxle mayre-peatedly change between two adjacent ratios. This is a normal characteristic and may be prevented by cancelling the over- drive facility if the shifting occurs between third and fourth ratios, selecting position "2" if the shifting occurs between third and second ratios or selecting position "1" if the shifting occurs between first and second ratios.
o Never move the selector to or from the "P" or "N" position with the accelerator de-pressed.
o Ensure that the overdrive switch is at the "ON" position for maximum economy. o If rapid acceleration is required, fully de-
press the accelerator pedal. In this condi- tion, the kickdown mechanism will be oper- ated and the transaxle will automatically downshift according to the vehicle speed.
o The automatic transaxle may be used to
great effect if the vehicle becomes stuck insnow or mud by allowing the vehicle to be rocked to and fro. The engine speed should be held at approximately 1,000rpm by means of the accelerator pedal and the selector lever moved between the "D" and "R" positions to induce a rocking motion.
o Do not depress the accelerator pedal with
the brakes applied and the selector at the "R", "D", "2" or "L" position.
o Turn the overdrive switch on for good fuel economy and smooth driving. But if enginebraking is needed in the "D" range or if repeated upshifting and downshifting be- tween the 3rd and 4th gear is needed when climbing a gentle slope, it is recom- mended that the overdrive switch be turned off. Turn the overdrive switch back on immediately afterward.
C090I02A-EAT CAUTION:
o Shift into "R" and "P" only when the
vehicle has completely stopped.
o Do not accelerate the engine in reverse or any of the forward positions with the brakes applied.
o Always apply the footbrake when shift- ing from "P" or "N", to "R", "D", "2" or"L" position.
o Do not use the "P" (Park) position in place of the parking brake. Always setthe parking brake, shift the transaxle into "P" (Park) and turn off the ignition when you leave the vehicle, even mo- mentarily. Never leave the vehicle unat- tended whilst the engine is running.
o Check the automatic transaxle fluid level regularly, and add fluid as necessary.See the maintenance schedule for theproper fluid recommendation.
FC120D2-E
General Operating Instructions
o The button in the selector handle must be depressed before the selector can be moved.
o The engine may only be started when the selector is at position "P" or "N".
o Ensure that the footbrake is firmly applied when shifting from "P" or "N" to "D", "2", "L" or "R" and vice versa.