stop start Hyundai Santa Fe 2003 Owner's Manual
[x] Cancel search | Manufacturer: HYUNDAI, Model Year: 2003, Model line: Santa Fe, Model: Hyundai Santa Fe 2003Pages: 221, PDF Size: 15.98 MB
Page 15 of 221
FEATURES OF YOUR HYUNDAI 1- 3
B010F01A-AATOperation in Foreign Countries
If you are going to drive your Hyundai in another
country, be sure to:
o Observe all regulations regarding registra-
tion and insurance.
o Determine that acceptable fuel is available.
B020A01S-AATBREAKING IN YOUR NEW HYUNDAI
During the First 1,200 Miles (2,000 Km)
No formal "break-in" procedure is required with
your new Hyundai. However, you can contrib-
ute to the economical operation and durability of
your Hyundai by observing the following recom-
mendations during the first 1,200 miles (2,000
km).
o Don't drive faster than 55 MPH (88 km/h).
o While driving, keep your engine speed (rpm,
or revolutions per minute) between 2,000
rpm and 4,000 rpm.
o Use moderate acceleration. Don't start
quickly or depress the accelerator pedal
fully.
o For the first 200 miles (300 km), try to avoid
hard stops.
o Don't lug the engine (in other words, don't
drive so slowly in too high a gear that the
engine "bucks"-shift to a lower gear).
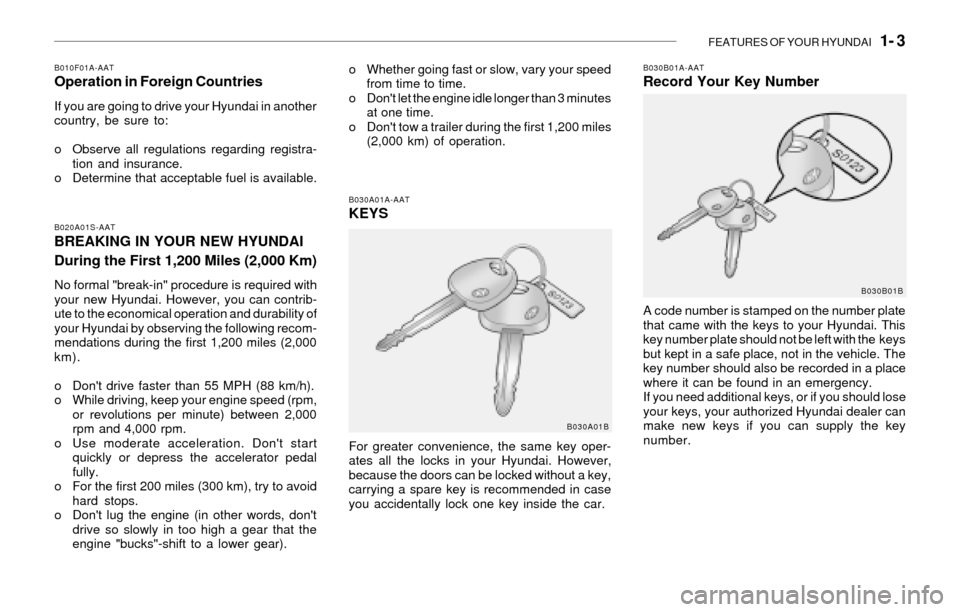
B030A01A-AATKEYS
B030B01A-AATRecord Your Key Numbero Whether going fast or slow, vary your speed
from time to time.
o Don't let the engine idle longer than 3 minutes
at one time.
o Don't tow a trailer during the first 1,200 miles
(2,000 km) of operation.
A code number is stamped on the number plate
that came with the keys to your Hyundai. This
key number plate should not be left with the keys
but kept in a safe place, not in the vehicle. The
key number should also be recorded in a place
where it can be found in an emergency.
If you need additional keys, or if you should lose
your keys, your authorized Hyundai dealer can
make new keys if you can supply the key
number.
B030A01B
For greater convenience, the same key oper-
ates all the locks in your Hyundai. However,
because the doors can be locked without a key,
carrying a spare key is recommended in case
you accidentally lock one key inside the car.
B030B01B
Page 49 of 221
FEATURES OF YOUR HYUNDAI 1- 37
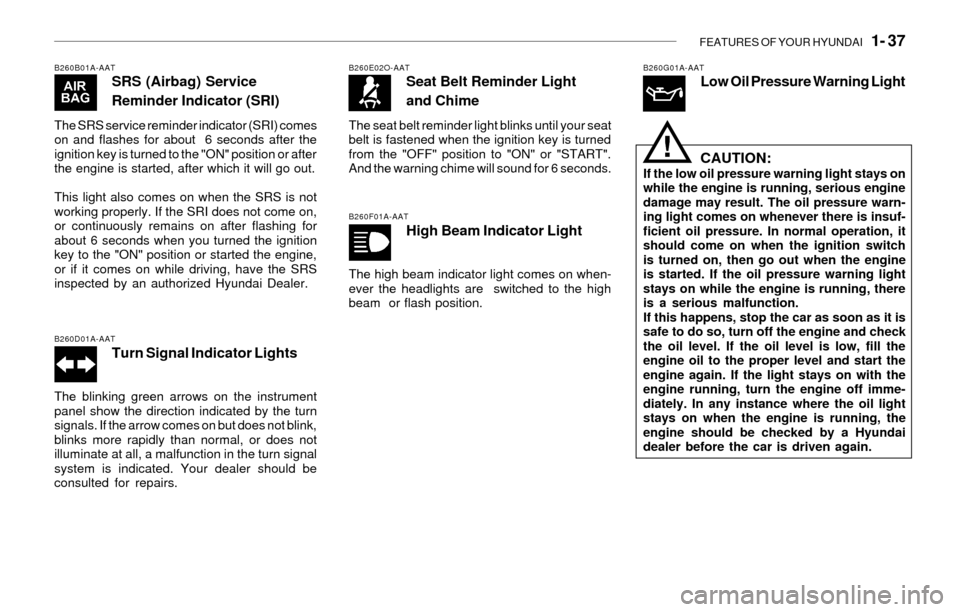
B260B01A-AATSRS (Airbag) Service
Reminder Indicator (SRI)
The SRS service reminder indicator (SRI) comes
on and flashes for about 6 seconds after the
ignition key is turned to the "ON" position or after
the engine is started, after which it will go out.
This light also comes on when the SRS is not
working properly. If the SRI does not come on,
or continuously remains on after flashing for
about 6 seconds when you turned the ignition
key to the "ON" position or started the engine,
or if it comes on while driving, have the SRS
inspected by an authorized Hyundai Dealer.
B260D01A-AATTurn Signal Indicator Lights
The blinking green arrows on the instrument
panel show the direction indicated by the turn
signals. If the arrow comes on but does not blink,
blinks more rapidly than normal, or does not
illuminate at all, a malfunction in the turn signal
system is indicated. Your dealer should be
consulted for repairs.
B260E02O-AATSeat Belt Reminder Light
and Chime
The seat belt reminder light blinks until your seat
belt is fastened when the ignition key is turned
from the "OFF" position to "ON" or "START".
And the warning chime will sound for 6 seconds.
B260F01A-AATHigh Beam Indicator Light
The high beam indicator light comes on when-
ever the headlights are switched to the high
beam or flash position.
B260G01A-AATLow Oil Pressure Warning Light
CAUTION:
If the low oil pressure warning light stays on
while the engine is running, serious engine
damage may result. The oil pressure warn-
ing light comes on whenever there is insuf-
ficient oil pressure. In normal operation, it
should come on when the ignition switch
is turned on, then go out when the engine
is started. If the oil pressure warning light
stays on while the engine is running, there
is a serious malfunction.
If this happens, stop the car as soon as it is
safe to do so, turn off the engine and check
the oil level. If the oil level is low, fill the
engine oil to the proper level and start the
engine again. If the light stays on with the
engine running, turn the engine off imme-
diately. In any instance where the oil light
stays on when the engine is running, the
engine should be checked by a Hyundai
dealer before the car is driven again.
!
Page 50 of 221
1- 38 FEATURES OF YOUR HYUNDAI
!
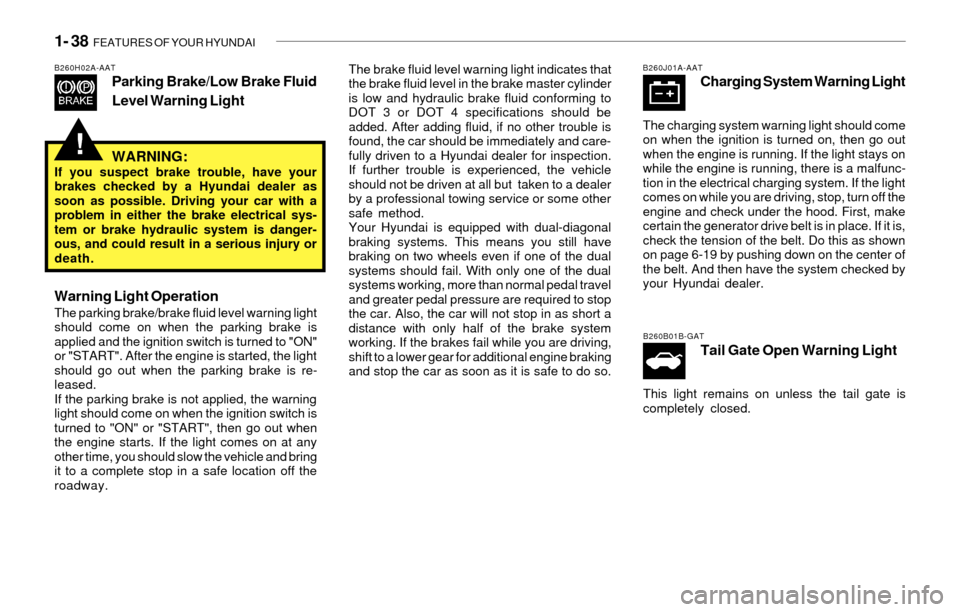
B260H02A-AATParking Brake/Low Brake Fluid
Level Warning LightThe brake fluid level warning light indicates that
the brake fluid level in the brake master cylinder
is low and hydraulic brake fluid conforming to
DOT 3 or DOT 4 specifications should be
added. After adding fluid, if no other trouble is
found, the car should be immediately and care-
fully driven to a Hyundai dealer for inspection.
If further trouble is experienced, the vehicle
should not be driven at all but taken to a dealer
by a professional towing service or some other
safe method.
Your Hyundai is equipped with dual-diagonal
braking systems. This means you still have
braking on two wheels even if one of the dual
systems should fail. With only one of the dual
systems working, more than normal pedal travel
and greater pedal pressure are required to stop
the car. Also, the car will not stop in as short a
distance with only half of the brake system
working. If the brakes fail while you are driving,
shift to a lower gear for additional engine braking
and stop the car as soon as it is safe to do so.
WARNING:If you suspect brake trouble, have your
brakes checked by a Hyundai dealer as
soon as possible. Driving your car with a
problem in either the brake electrical sys-
tem or brake hydraulic system is danger-
ous, and could result in a serious injury or
death.
Warning Light OperationThe parking brake/brake fluid level warning light
should come on when the parking brake is
applied and the ignition switch is turned to "ON"
or "START". After the engine is started, the light
should go out when the parking brake is re-
leased.
If the parking brake is not applied, the warning
light should come on when the ignition switch is
turned to "ON" or "START", then go out when
the engine starts. If the light comes on at any
other time, you should slow the vehicle and bring
it to a complete stop in a safe location off the
roadway.
B260J01A-AATCharging System Warning Light
The charging system warning light should come
on when the ignition is turned on, then go out
when the engine is running. If the light stays on
while the engine is running, there is a malfunc-
tion in the electrical charging system. If the light
comes on while you are driving, stop, turn off the
engine and check under the hood. First, make
certain the generator drive belt is in place. If it is,
check the tension of the belt. Do this as shown
on page 6-19 by pushing down on the center of
the belt. And then have the system checked by
your Hyundai dealer.
B260B01B-GAT
Tail Gate Open Warning Light
This light remains on unless the tail gate is
completely closed.
Page 51 of 221
FEATURES OF YOUR HYUNDAI 1- 39
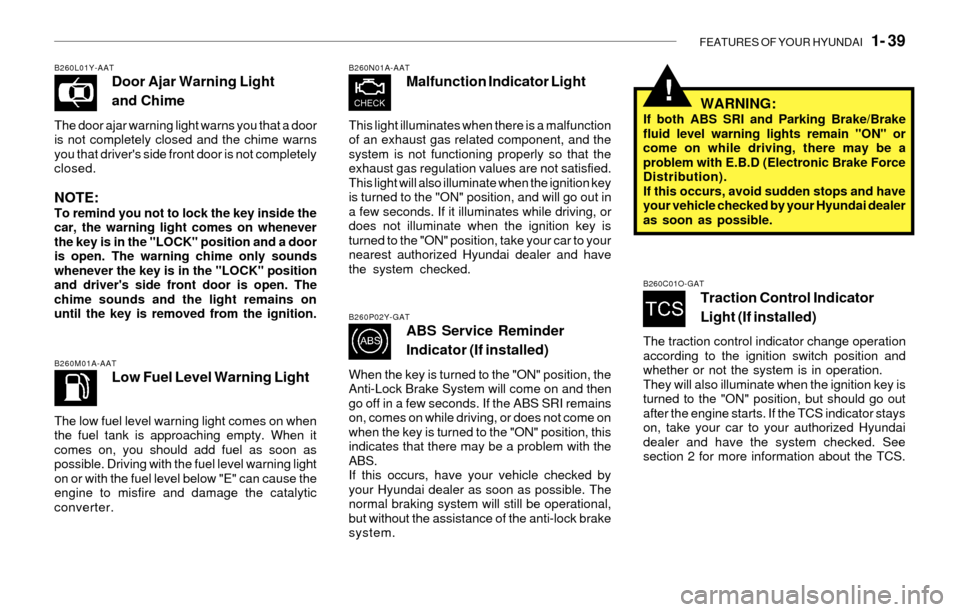
B260L01Y-AATDoor Ajar Warning Light
and Chime
The door ajar warning light warns you that a door
is not completely closed and the chime warns
you that driver's side front door is not completely
closed.
NOTE:To remind you not to lock the key inside the
car, the warning light comes on whenever
the key is in the "LOCK" position and a door
is open. The warning chime only sounds
whenever the key is in the "LOCK" position
and driver's side front door is open. The
chime sounds and the light remains on
until the key is removed from the ignition.
!
B260M01A-AATLow Fuel Level Warning Light
The low fuel level warning light comes on when
the fuel tank is approaching empty. When it
comes on, you should add fuel as soon as
possible. Driving with the fuel level warning light
on or with the fuel level below "E" can cause the
engine to misfire and damage the catalytic
converter.
B260N01A-AATMalfunction Indicator Light
This light illuminates when there is a malfunction
of an exhaust gas related component, and the
system is not functioning properly so that the
exhaust gas regulation values are not satisfied.
This light will also illuminate when the ignition key
is turned to the "ON" position, and will go out in
a few seconds. If it illuminates while driving, or
does not illuminate when the ignition key is
turned to the "ON" position, take your car to your
nearest authorized Hyundai dealer and have
the system checked.
B260P02Y-GATABS Service Reminder
Indicator (If installed)
When the key is turned to the "ON" position, the
Anti-Lock Brake System will come on and then
go off in a few seconds. If the ABS SRI remains
on, comes on while driving, or does not come on
when the key is turned to the "ON" position, this
indicates that there may be a problem with the
ABS.
If this occurs, have your vehicle checked by
your Hyundai dealer as soon as possible. The
normal braking system will still be operational,
but without the assistance of the anti-lock brake
system.
WARNING:If both ABS SRI and Parking Brake/Brake
fluid level warning lights remain "ON" or
come on while driving, there may be a
problem with E.B.D (Electronic Brake Force
Distribution).
If this occurs, avoid sudden stops and have
your vehicle checked by your Hyundai dealer
as soon as possible.
B260C01O-GATTraction Control Indicator
Light (If installed)
The traction control indicator change operation
according to the ignition switch position and
whether or not the system is in operation.
They will also illuminate when the ignition key is
turned to the "ON" position, but should go out
after the engine starts. If the TCS indicator stays
on, take your car to your authorized Hyundai
dealer and have the system checked. See
section 2 for more information about the TCS.
Page 68 of 221
1- 56 FEATURES OF YOUR HYUNDAI
!
!
HOMELINK PROGRAMMING
CAUTION:
o Make sure people and/or objects are out
of the way of any garage doors or gates
you may be operating during the pro-
gramming procedures.
o Keep original transmitters for potential
future programming needs, or in case
you sell the vehicle.
o In the event you do sell your vehicle, it's
recommended you erase your pro-
grammed HomeLink mirror buttons.
WARNING:Do not use HomeLink with any garage door
opener that lacks the safety stop and re-
verse feature as required by federal safety
standards (includes garage doors manu-
factured before April 1, 1982), as these
doors can increase the risk of serious injury
or death. Call 1-800-355-3515 or visit
www.homelink.com for more information.
NOTE:If programming a garage door opener or
gate, it is advised to unplug the device
during the "cycling" process to prevent
possible motor burnout.
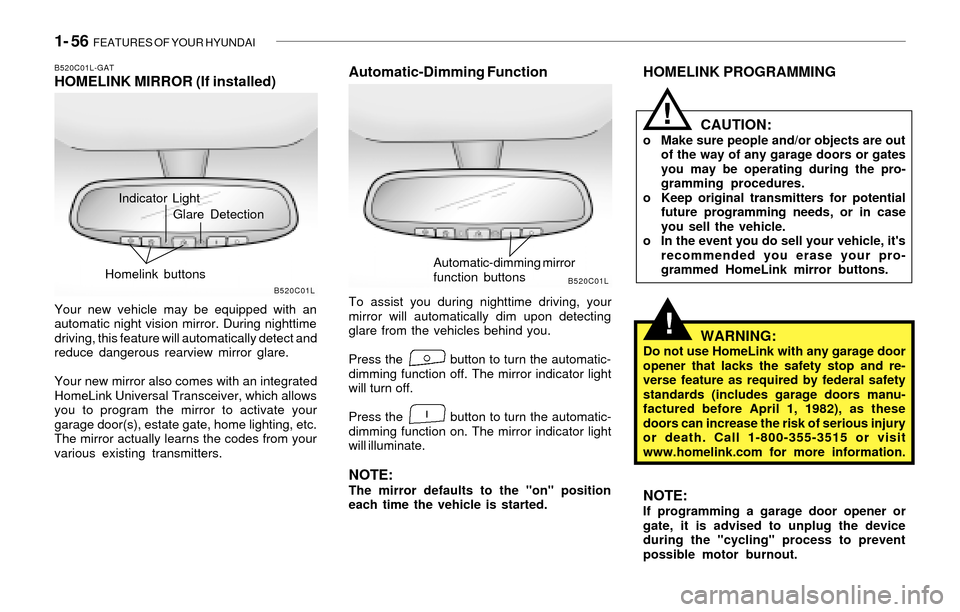
Indicator Light
B520C01L-GATHOMELINK MIRROR (If installed)
Your new vehicle may be equipped with an
automatic night vision mirror. During nighttime
driving, this feature will automatically detect and
reduce dangerous rearview mirror glare.
Your new mirror also comes with an integrated
HomeLink Universal Transceiver, which allows
you to program the mirror to activate your
garage door(s), estate gate, home lighting, etc.
The mirror actually learns the codes from your
various existing transmitters.
Automatic-Dimming Function
To assist you during nighttime driving, your
mirror will automatically dim upon detecting
glare from the vehicles behind you.
Press the button to turn the automatic-
dimming function off. The mirror indicator light
will turn off.
Press the button to turn the automatic-
dimming function on. The mirror indicator light
will illuminate.
NOTE:The mirror defaults to the "on" position
each time the vehicle is started.
B520C01LB520C01L
Glare Detection
Homelink buttons
Automatic-dimming mirror
function buttons
Page 74 of 221
1- 62 FEATURES OF YOUR HYUNDAI
!WARNING:o The fuel cap must be tightened at least
3 clicks, otherwise " " light will
illuminate.
o Gasoline vapors are dangerous. Before
refueling, always stop the engine and
never allow sparks or open flames near
the filler area. If you need to replace the
filler cap, use a genuine Hyundai re-
placement part.
B560A02O
!
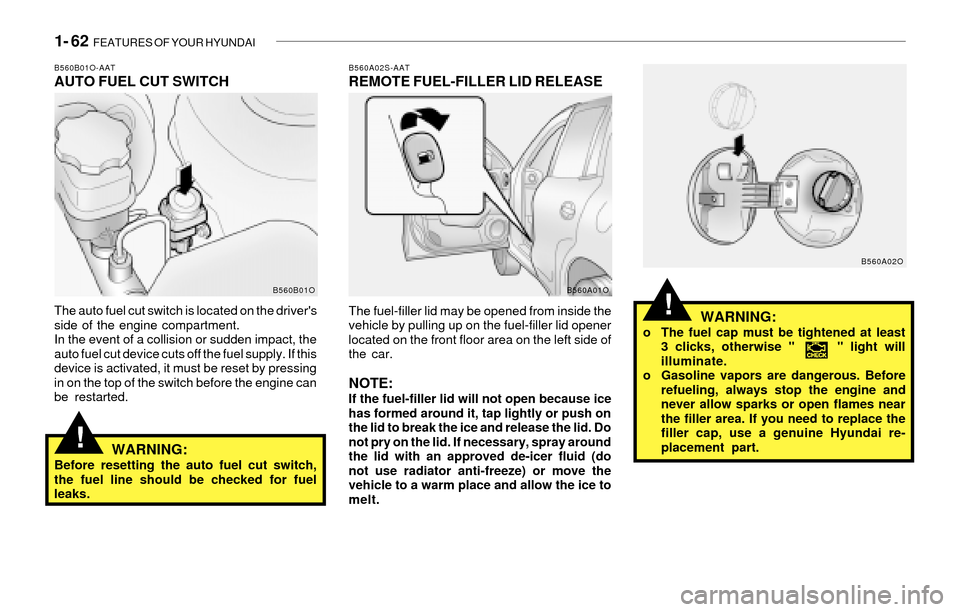
B560B01O-AATAUTO FUEL CUT SWITCH
The auto fuel cut switch is located on the driver's
side of the engine compartment.
In the event of a collision or sudden impact, the
auto fuel cut device cuts off the fuel supply. If this
device is activated, it must be reset by pressing
in on the top of the switch before the engine can
be restarted.
WARNING:Before resetting the auto fuel cut switch,
the fuel line should be checked for fuel
leaks.
B560A02S-AATREMOTE FUEL-FILLER LID RELEASE
The fuel-filler lid may be opened from inside the
vehicle by pulling up on the fuel-filler lid opener
located on the front floor area on the left side of
the car.
NOTE:If the fuel-filler lid will not open because ice
has formed around it, tap lightly or push on
the lid to break the ice and release the lid. Do
not pry on the lid. If necessary, spray around
the lid with an approved de-icer fluid (do
not use radiator anti-freeze) or move the
vehicle to a warm place and allow the ice to
melt.
B560B01OB560A01O
Page 108 of 221
1- 96 FEATURES OF YOUR HYUNDAI
D285D01O-AATPlaying a Cassette Tape
Your tape player is built to work best with tapes
that are up to 30 to 45 minutes long on each side.
Tapes longer than that are so thin they may not
work well in this player. The longer side with the
tape visible should face to the right. If the ignition
is on, but the radio is off, the tape can be inserted
and will begin playing. A tape symbol is shown
on the display whenever a tape is inserted. If you
hear nothing but a garbled sound, the tape may
not be in squarely. Press EJECT to remove the
tape and start over.
While the tape is playing, use the VOL, AUDIO
and SEEK controls just as you do for the radio.
The display will show TAPE and an arrow
showing which side of the tape is playing. You
can insert a tape when the ignition is off.
If an error appears on the display, see "Cas-
sette Tape Message" later in this section.
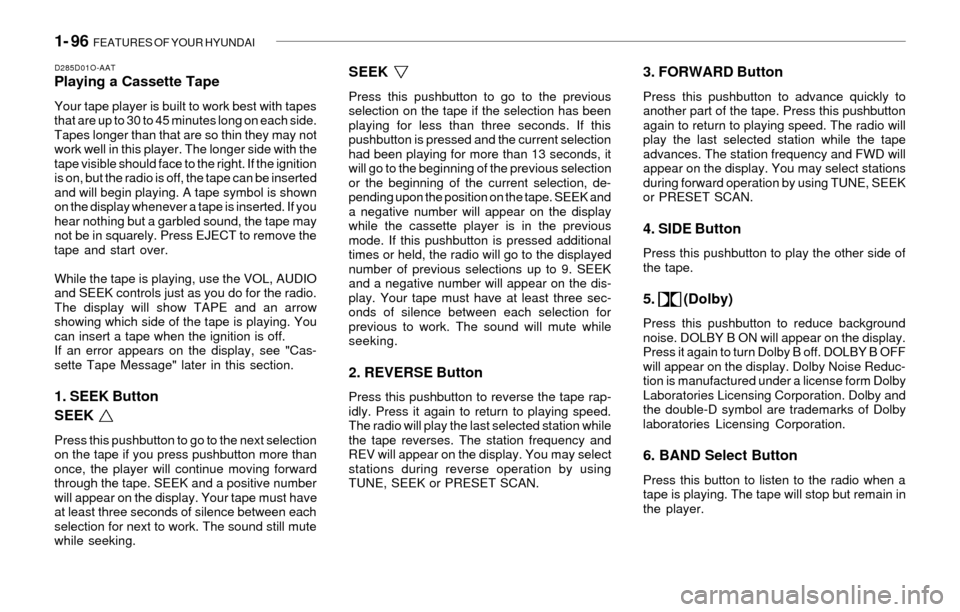
1. SEEK Button
SEEK
Press this pushbutton to go to the next selection
on the tape if you press pushbutton more than
once, the player will continue moving forward
through the tape. SEEK and a positive number
will appear on the display. Your tape must have
at least three seconds of silence between each
selection for next to work. The sound still mute
while seeking.
SEEK
Press this pushbutton to go to the previous
selection on the tape if the selection has been
playing for less than three seconds. If this
pushbutton is pressed and the current selection
had been playing for more than 13 seconds, it
will go to the beginning of the previous selection
or the beginning of the current selection, de-
pending upon the position on the tape. SEEK and
a negative number will appear on the display
while the cassette player is in the previous
mode. If this pushbutton is pressed additional
times or held, the radio will go to the displayed
number of previous selections up to 9. SEEK
and a negative number will appear on the dis-
play. Your tape must have at least three sec-
onds of silence between each selection for
previous to work. The sound will mute while
seeking.
2. REVERSE Button
Press this pushbutton to reverse the tape rap-
idly. Press it again to return to playing speed.
The radio will play the last selected station while
the tape reverses. The station frequency and
REV will appear on the display. You may select
stations during reverse operation by using
TUNE, SEEK or PRESET SCAN.
3. FORWARD Button
Press this pushbutton to advance quickly to
another part of the tape. Press this pushbutton
again to return to playing speed. The radio will
play the last selected station while the tape
advances. The station frequency and FWD will
appear on the display. You may select stations
during forward operation by using TUNE, SEEK
or PRESET SCAN.
4. SIDE Button
Press this pushbutton to play the other side of
the tape.
5. (Dolby)
Press this pushbutton to reduce background
noise. DOLBY B ON will appear on the display.
Press it again to turn Dolby B off. DOLBY B OFF
will appear on the display. Dolby Noise Reduc-
tion is manufactured under a license form Dolby
Laboratories Licensing Corporation. Dolby and
the double-D symbol are trademarks of Dolby
laboratories Licensing Corporation.
6. BAND Select Button
Press this button to listen to the radio when a
tape is playing. The tape will stop but remain in
the player.
Page 112 of 221
1- 100 FEATURES OF YOUR HYUNDAI
D285F01O-AATPlaying a Compact Disc
Insert a disc partway into the slot. Label side up.
The player will pull it in and the disc should begin
playing. The display will show the CD symbol.
You can inset a compact disc with the ignition off.
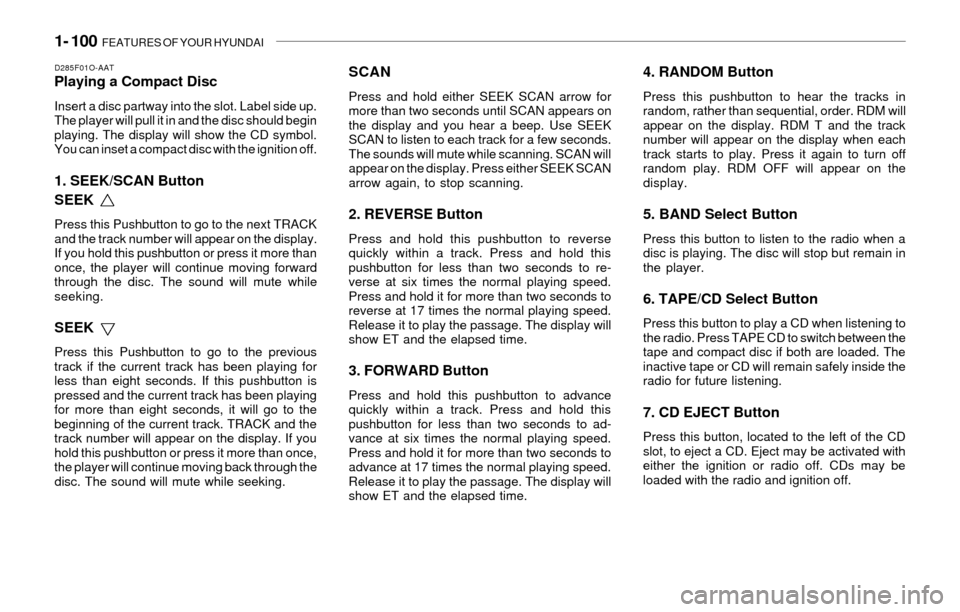
1. SEEK/SCAN Button
SEEK
Press this Pushbutton to go to the next TRACK
and the track number will appear on the display.
If you hold this pushbutton or press it more than
once, the player will continue moving forward
through the disc. The sound will mute while
seeking.
SEEK
Press this Pushbutton to go to the previous
track if the current track has been playing for
less than eight seconds. If this pushbutton is
pressed and the current track has been playing
for more than eight seconds, it will go to the
beginning of the current track. TRACK and the
track number will appear on the display. If you
hold this pushbutton or press it more than once,
the player will continue moving back through the
disc. The sound will mute while seeking.
SCAN
Press and hold either SEEK SCAN arrow for
more than two seconds until SCAN appears on
the display and you hear a beep. Use SEEK
SCAN to listen to each track for a few seconds.
The sounds will mute while scanning. SCAN will
appear on the display. Press either SEEK SCAN
arrow again, to stop scanning.
2. REVERSE Button
Press and hold this pushbutton to reverse
quickly within a track. Press and hold this
pushbutton for less than two seconds to re-
verse at six times the normal playing speed.
Press and hold it for more than two seconds to
reverse at 17 times the normal playing speed.
Release it to play the passage. The display will
show ET and the elapsed time.
3. FORWARD Button
Press and hold this pushbutton to advance
quickly within a track. Press and hold this
pushbutton for less than two seconds to ad-
vance at six times the normal playing speed.
Press and hold it for more than two seconds to
advance at 17 times the normal playing speed.
Release it to play the passage. The display will
show ET and the elapsed time.
4. RANDOM Button
Press this pushbutton to hear the tracks in
random, rather than sequential, order. RDM will
appear on the display. RDM T and the track
number will appear on the display when each
track starts to play. Press it again to turn off
random play. RDM OFF will appear on the
display.
5. BAND Select Button
Press this button to listen to the radio when a
disc is playing. The disc will stop but remain in
the player.
6. TAPE/CD Select Button
Press this button to play a CD when listening to
the radio. Press TAPE CD to switch between the
tape and compact disc if both are loaded. The
inactive tape or CD will remain safely inside the
radio for future listening.
7. CD EJECT Button
Press this button, located to the left of the CD
slot, to eject a CD. Eject may be activated with
either the ignition or radio off. CDs may be
loaded with the radio and ignition off.
Page 118 of 221
1- 106 FEATURES OF YOUR HYUNDAI
D295D01O-AAT1. LOAD Button
This compact disc playing will accommodate up
to six discs.
To insert one disc do the following:
1. Turn the ignition on.
2. Press and release the LOAD Button.
3. Wait for the light, located to the right of the slot,
to turn green.
4. Load a disc. Insert a disc partway into the slot,
label side up. The player will pull the disc in.
When the disc is inserted, the CD symbol will be
displayed. If you select an EQ setting for your
disc, it will be activated each time you play a disc.
If the radio is on or off, the disc will begin to play
automatically.
To inset multiple discs do the followings:
1. Turn the ignition on.
2. Press and hold the LOAD button for two
seconds.
You will then hear two beeps and the light,
located to the right of the slot, will begin to
flash.
3. Once the light stops flashing and turns
green. Load a disc. Insert a disc partway into
the slot, label side up.The player will pull the disc in.
Once the disc is loaded, the light will begin
flashing again. Once the light stop flashing
and turns green you can then load another
disc. The disc player takes up to six discs.
Do not try to load more than six.
When a disc is inserted, the CD symbol will
be displayed. If more than one disc has been
loaded, number for each disc will be dis-
played. If you select an EQ setting for your
disc, it will be activated each time you play a
disc.
If the radio is on or off, the last disc loaded will
begin to play automatically.
4. To load more than one disc but less than six,
complete Steps 1, 2 and 3. When you have
finished loading discs, with the radio on or off,
press LOAD to cancel the loading function.
The radio will begin to play the last CD loaded.
As each new track starts to play, the track
number will appear on the display.
Playing a Specific Loaded CD
For every CD loaded, a number will appear on
the radio display. To play a specific CD, first
press the CD select button to start playing a CD.
Then press the numbered button that corre-
sponds to the CD you want to play.
A small bar will appear under the CD number that
is playing, it could be due to one of the following
conditions:o The road is too rough. The disc should play
when the road is smoother.
o The disc is dirty, scratched, wet or upside
down.
o The air is very humid. If so, wait about an hour
and try again.
If any error occurs repeatedly or if an error can't
be corrected, please contact your dealer. If
your radio displays an error message, write it
down and provide it to your dealer when report-
ing the problem.
2. CD EJECT Button
This button will eject a disc or discs, if you have
multiple discs loaded. To eject a disc or discs
from the disc player perform one of the following
steps:
o Press and release the eject button to eject
the disc that is currently playing.
o To eject all of the discs, press this button for
two seconds, you will hear three beeps, and
the light will flash to let you know when a disc
is being ejected.
When the eject button is pressed, the receiver
will eject the disc and REMOVE CD will be
displayed. You can now remove the disc. If the
disc is not removed, after 25 seconds, the disc
will be automatically pulled back into the re-
ceiver, If you try to push the disc back into the
receiver, before the 25 second time period is
Page 119 of 221
FEATURES OF YOUR HYUNDAI 1- 107
complete, the receiver will sense an error and
will try to eject the disc several times before
stopping. You cannot repeatedly press the eject
button to eject the disc after you have tried to
push the CD in manually. The receivers 25-
second eject timer will reset at each press of
eject, which will cause the receiver to not eject
the disc until the 25-second time period has
elapsed.
Once the player stops and the disc is ejected,
remove the disc. After removing the disc, press
the VOLUME PWR knob off and then on again.
This will clear the disc-sensing feature and
enable discs to be loaded into the player again.
3. REVERSE Button
Press and hold this button reverse quickly
within a track. Release it to play the passage.
You will hear sound at a reduced volume. The
display will show elapsed time.
4. FORWARD Button
Press and hold this button to advance quickly
within a track. Release it to play the passage.
You will hear sound at a reduced volume. The
display will show elapsed time.
5. REPEAT Button
With repeat button, you can repeat one track or
an entire disc. To use repeat, do the following:
o To repeat the track you are listening to,
press and release the RPT button. RPT
track will appear on the display. Press RPT
again to turn it off.
o To repeat the disc you are listening to, press
and hold the RPT button for two seconds.
Press RPT again to turn it off.
6. RANDOM Button
With random, you can listen to the tracks in
random, rather than sequential order, on all of
the discs or on one disc.
To use random, do the following:
o Press and release the RDM button to play
the tracks on all of the discs that are loaded,
in random order. RDM will appear in the
display. Press RDM to turn if off.
o To play the tracks on the disc you are
listening to in random order, press and hold
RDM for more than two seconds. You will
hear three beeps and RDM will appear on the
display. Press RDM again to turn if off.
7. AUTO EQUALIZER
Press AUTO EQ to select the desired preset
equalization setting while playing a compact
disc. The equalization will be automatically set
whenever you play a compact disc.
8. SEEK/SCAN BUTTON
SEEK
Press the down arrow while playing a CD to go
to the start of the current track if more than ten
seconds have played. Press the up arrow to go
to the next track. If you press the button more
than once, the player will continue moving back-
ward or forward through the disc.
SCAN
Press and hold either SEEK SCAN arrow for
more than two seconds until SCAN appears on
the display and you hear a beep. Use SEEK
SCAN to listen to each track for a few seconds.
The sounds will mute while scanning. SCAN will
appear on the display. Press either SEEK SCAN
arrow again, to stop scanning.
DISC SCAN
Press and hold either SEEK SCAN arrow for
more than four seconds until DISC SCAN ap-
pears on the display and you hear a beep. Use
DISC SCAN to listen to the first track, for ten
seconds of each disc loaded. The sound will
mute while scanning to the next track. DISC
SCAN will appear on the display. Press either
SEEK SCAN arrow again, to stop scanning.