oil pressure Hyundai Santa Fe 2009 Owner's Manual - RHD (UK, Australia)
[x] Cancel search | Manufacturer: HYUNDAI, Model Year: 2009, Model line: Santa Fe, Model: Hyundai Santa Fe 2009Pages: 269, PDF Size: 9.78 MB
Page 10 of 269
YOUR VEHICLE AT A GLANCE
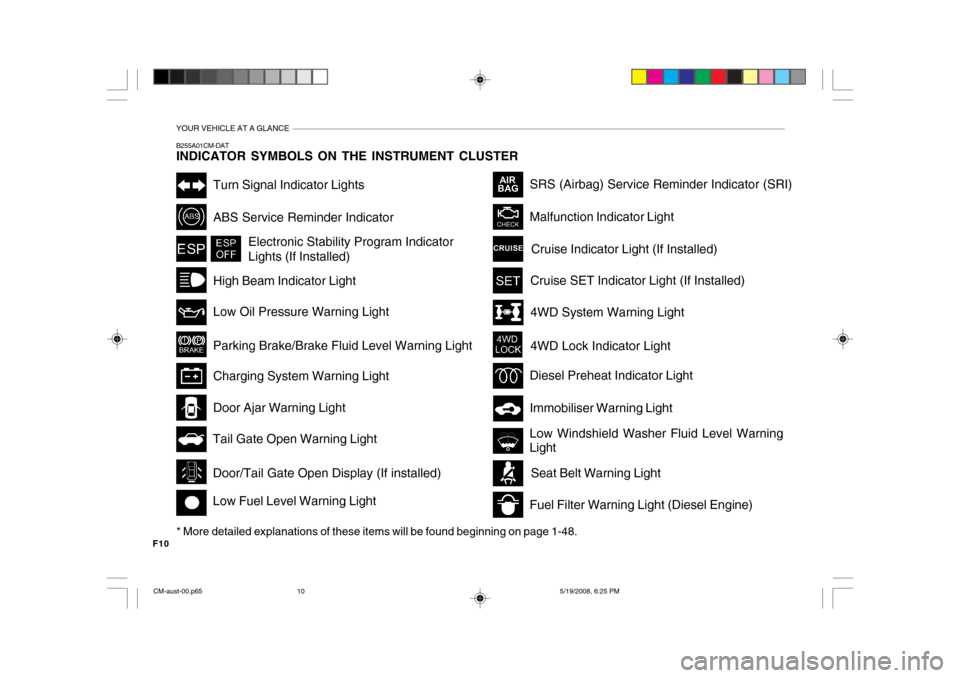
F10B255A01CM-DAT INDICATOR SYMBOLS ON THE INSTRUMENT CLUSTER
* More detailed explanations of these items will be found beginning on page 1-48.
4WD System Warning Light
Malfunction Indicator Light
SRS (Airbag) Service Reminder Indicator (SRI)
Tail Gate Open Warning Light
Low Fuel Level Warning Light Door Ajar Warning Light
ABS Service Reminder Indicator
Turn Signal Indicator Lights
High Beam Indicator Light Low Oil Pressure Warning Light Parking Brake/Brake Fluid Level Warning Light Charging System Warning Light
Immobiliser Warning Light
4WD Lock Indicator Light
Electronic Stability Program Indicator Lights (If Installed)
Cruise SET Indicator Light (If Installed)
Door/Tail Gate Open Display (If installed)
Cruise Indicator Light (If Installed)
Low Windshield Washer Fluid Level Warning LightSeat Belt Warning Light
Diesel Preheat Indicator Light
Fuel Filter Warning Light (Diesel Engine)
CM-aust-00.p65 5/19/2008, 6:25 PM
10
Page 56 of 269
1
FEATURES OF YOUR HYUNDAI
45
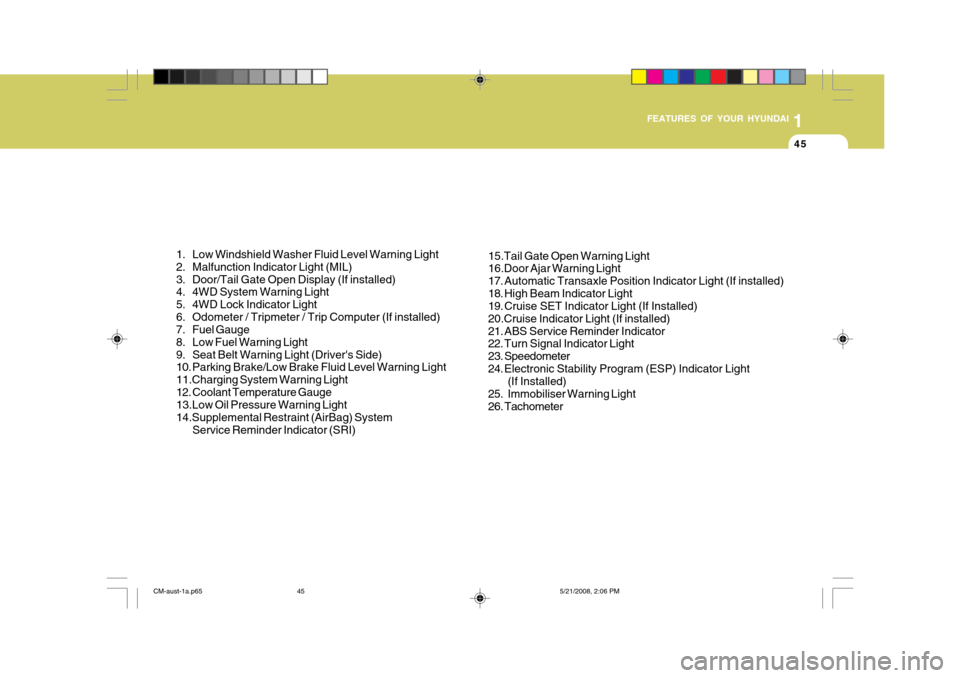
1. Low Windshield Washer Fluid Level Warning Light
2. Malfunction Indicator Light (MIL)
3. Door/Tail Gate Open Display (If installed)
4. 4WD System Warning Light
5. 4WD Lock Indicator Light
6. Odometer / Tripmeter / Trip Computer (If installed)
7. Fuel Gauge
8. Low Fuel Warning Light
9. Seat Belt Warning Light (Driver's Side)
10. Parking Brake/Low Brake Fluid Level Warning Light 11.Charging System Warning Light
12. Coolant Temperature Gauge 13.Low Oil Pressure Warning Light 14.Supplemental Restraint (AirBag) System Service Reminder Indicator (SRI) 15.Tail Gate Open Warning Light 16.Door Ajar Warning Light
17. Automatic Transaxle Position Indicator Light (If installed)
18. High Beam Indicator Light
19. Cruise SET Indicator Light (If Installed) 20.Cruise Indicator Light (If installed)
21. ABS Service Reminder Indicator
22. Turn Signal Indicator Light
23. Speedometer
24. Electronic Stability Program (ESP) Indicator Light
(If Installed)
25. Immobiliser Warning Light
26. Tachometer
CM-aust-1a.p65 5/21/2008, 2:06 PM
45
Page 58 of 269
1
FEATURES OF YOUR HYUNDAI
47
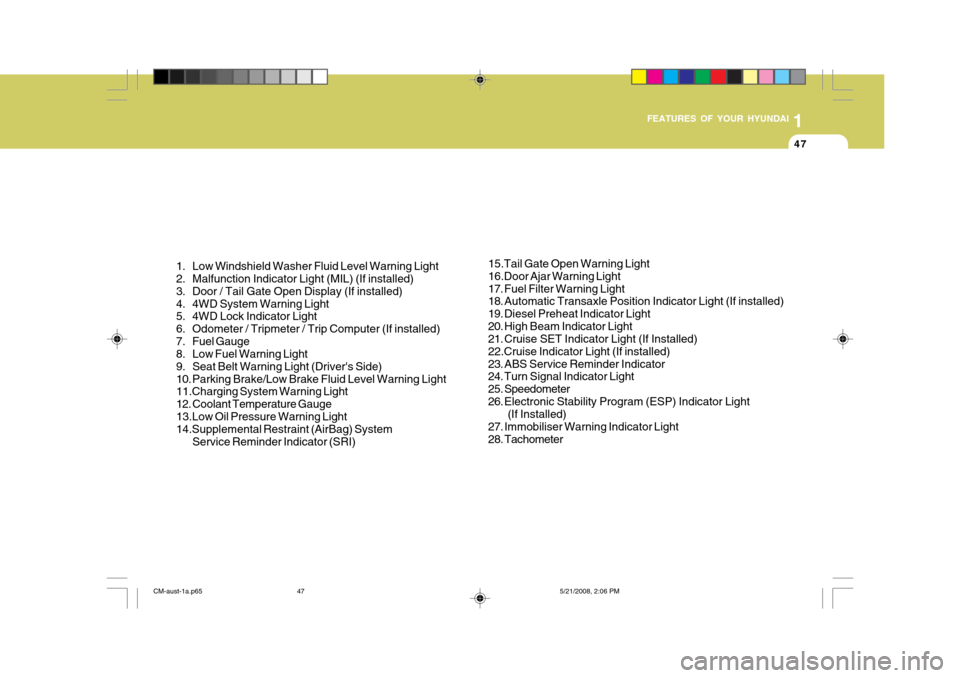
1. Low Windshield Washer Fluid Level Warning Light
2. Malfunction Indicator Light (MIL) (If installed)
3. Door / Tail Gate Open Display (If installed)
4. 4WD System Warning Light
5. 4WD Lock Indicator Light
6. Odometer / Tripmeter / Trip Computer (If installed)
7. Fuel Gauge
8. Low Fuel Warning Light
9. Seat Belt Warning Light (Driver's Side)
10. Parking Brake/Low Brake Fluid Level Warning Light 11.Charging System Warning Light
12. Coolant Temperature Gauge13.Low Oil Pressure Warning Light 14.Supplemental Restraint (AirBag) System Service Reminder Indicator (SRI) 15.Tail Gate Open Warning Light 16.Door Ajar Warning Light
17. Fuel Filter Warning Light
18. Automatic Transaxle Position Indicator Light (If installed)
19. Diesel Preheat Indicator Light
20. High Beam Indicator Light
21. Cruise SET Indicator Light (If Installed) 22.Cruise Indicator Light (If installed)
23. ABS Service Reminder Indicator
24. Turn Signal Indicator Light
25. Speedometer
26. Electronic Stability Program (ESP) Indicator Light
(If Installed)
27. Immobiliser Warning Indicator Light
28. Tachometer
CM-aust-1a.p65 5/21/2008, 2:06 PM
47
Page 60 of 269
1
FEATURES OF YOUR HYUNDAI
49
!
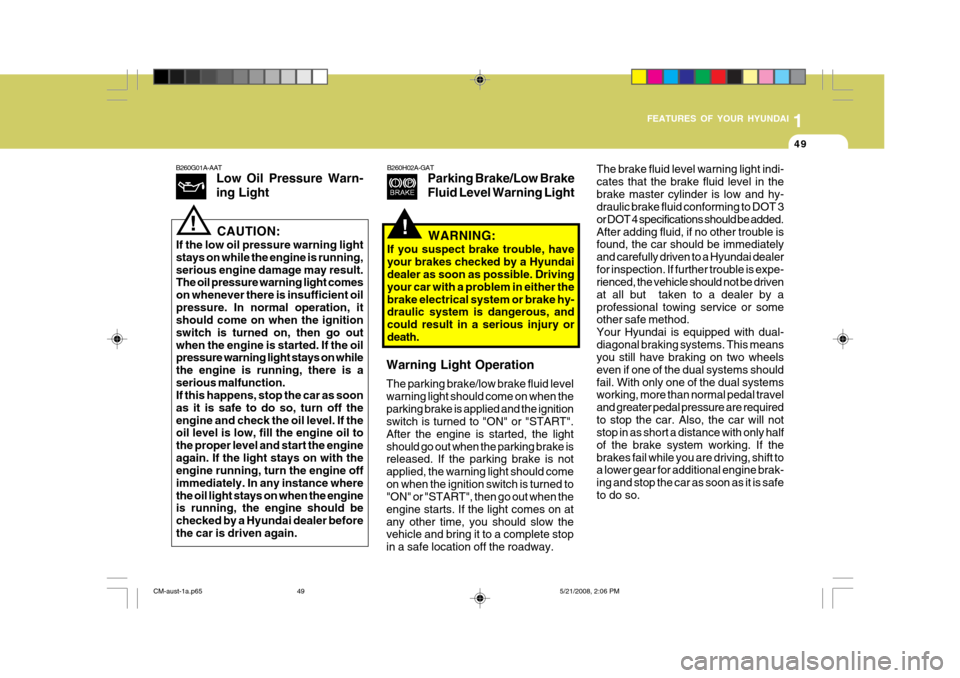
B260G01A-AAT
Low Oil Pressure Warn- ing Light
CAUTION:
If the low oil pressure warning light stays on while the engine is running,serious engine damage may result. The oil pressure warning light comes on whenever there is insufficient oilpressure. In normal operation, it should come on when the ignition switch is turned on, then go outwhen the engine is started. If the oil pressure warning light stays on while the engine is running, there is aserious malfunction. If this happens, stop the car as soon as it is safe to do so, turn off theengine and check the oil level. If the oil level is low, fill the engine oil to the proper level and start the engineagain. If the light stays on with the engine running, turn the engine off immediately. In any instance wherethe oil light stays on when the engine is running, the engine should be checked by a Hyundai dealer beforethe car is driven again.
!
B260H02A-GAT Parking Brake/Low Brake Fluid Level Warning Light
WARNING:
If you suspect brake trouble, have your brakes checked by a Hyundai dealer as soon as possible. Driving your car with a problem in either thebrake electrical system or brake hy- draulic system is dangerous, and could result in a serious injury or death.
Warning Light Operation The parking brake/low brake fluid level warning light should come on when theparking brake is applied and the ignition switch is turned to "ON" or "START". After the engine is started, the lightshould go out when the parking brake is released. If the parking brake is not applied, the warning light should comeon when the ignition switch is turned to "ON" or "START", then go out when the engine starts. If the light comes on atany other time, you should slow the vehicle and bring it to a complete stop in a safe location off the roadway. The brake fluid level warning light indi-cates that the brake fluid level in thebrake master cylinder is low and hy- draulic brake fluid conforming to DOT 3 or DOT 4 specifications should be added.After adding fluid, if no other trouble is found, the car should be immediately and carefully driven to a Hyundai dealerfor inspection. If further trouble is expe- rienced, the vehicle should not be driven at all but taken to a dealer by aprofessional towing service or some other safe method. Your Hyundai is equipped with dual-diagonal braking systems. This means you still have braking on two wheels even if one of the dual systems shouldfail. With only one of the dual systems working, more than normal pedal travel and greater pedal pressure are requiredto stop the car. Also, the car will not stop in as short a distance with only half of the brake system working. If thebrakes fail while you are driving, shift to a lower gear for additional engine brak- ing and stop the car as soon as it is safeto do so.
CM-aust-1a.p65
5/21/2008, 2:06 PM
49
Page 170 of 269
2
DRIVING YOUR HYUNDAI
25
C160J01A-AAT Don't Let Ice and Snow Accumu- late Underneath Under some conditions, snow and ice can build up under the fenders andinterfere with the steering. When driving in severe winter conditions where this may happen, you should periodicallycheck underneath the car to be sure the movement of the front wheels and the steering components are not obstructed. C160K01A-DAT Carry Emergency Equipment Depending on the severity of the weather where you drive your car, you should carry appropriate emergency equip-ment. Some of the items you may want to carry include tyre chains, tow straps or chains, flashlight, emergency flares,sand, a shovel, jumper cables, a win- dow scraper, gloves, ground cloth, cov- eralls, a blanket, etc.HIGHER SPEED MOTORING
C170A01A-DAT Pre-Trip Inspections
1. Tyres: Adjust the tyre inflation pressures tospecification. Low tyre inflation pres- sures will result in overheating and possible failure of the tyres. Avoid us-ing worn or damaged tyres which may result in reduced traction or tyre failure. NOTE: Never exceed the maximum tyre in- flation pressure shown on the tyres.
2. Fuel, engine coolant and engine oil: High speed travel consumes more fuel than urban motoring. Do not forget tocheck both engine coolant and engine oil.
3. Drive belt: A loose or damaged drive belt may result in overheating of the engine.
C160I01A-AAT Don't Let Your Parking Brake Freeze Under some conditions your parking brake can freeze in the engaged posi-tion. This is most likely to happen when there is an accumulation of snow or ice around or near the rear brakes or if thebrakes are wet. If there is a risk the parking brake may freeze, apply it only temporarily while you put the gearselector lever in "P" (automatic) or in first or reverse gear (manual transaxle) and block the rear wheels so the carcannot roll. Then release the parking brake.
CM-aust-2.p65
5/19/2008, 6:35 PM
25
Page 204 of 269
5VEHICLE MAINTENANCE REQUIREMENTS
8
F060B01A-AAT
o Drive Belts Inspect all drive belts for evidence of cuts, cracks, excessive wear or oil and replace if necessary. Drive beltsshould be checked periodically for proper tension and adjusted as neces- sary. F060D01TB-AAT
o Fuel Lines, Fuel Hoses and
Connections
Check the fuel lines, fuel hoses andconnections for leakage and damage. Have a trained technician replace any damaged or leaking parts immediately.EXPLANATION OF SCHEDULED MAINTENANCE ITEMS
F060M01A-AAT
o Engine Oil and Filter The engine oil and filter should be changed at the intervals specified in the maintenance schedule. If the car is being driven in severe conditions,more frequent oil and filter changes are required. F060C01A-AAT
o Fuel Filter
A clogged filter can limit the speed at
which the vehicle may be driven, dam-age the emission system and cause hard starting. If an excessive amountof foreign matter accumulates in the fuel tank, the filter may require re- placement more frequently. After installing a new filter, run the
engine for several minutes, and checkfor leaks at the connections. Fuel fil- ters should be installed by trained technicians.
!WARNING (DIESEL ONLY):
Never work on injection system with engine running or within 30 sec- onds after shutting off engine. High pressure pump, rail, injectors andhigh pressure pipes are subject to high pressure even after the engine stopped. The fuel jet produced byfuel leaks may cause serious injury, if it touch the body. People using pacemakers should not move than30cm closer to the ECU or wiring harness within the engine room while engine is running, since thehigh currents in the Common Rail system produce considerable mag- netic fields.
CM-aust-5.p65 5/19/2008, 6:37 PM
8
Page 212 of 269
6
DO-IT-YOURSELF MAINTENANCE
5GENERAL CHECKS
G020A03A-AAT
Engine Compartment
The following should be checked regu- larly:
o Engine oil level and condition
o Transaxle fluid level and condition
o Brake fluid level
o Engine coolant level
o Windshield washer fluid level
o Accessory drive belt condition
o Engine coolant hose condition
o Fluid leaks (on or below compo- nents)
o Power steering fluid level
o Battery condition
o Air cleaner filter condition G020B01A-DAT
Vehicle Exterior
The following should be checked
monthly:
o Overall appearance and condition
o Wheel condition and wheel nut
torque
o Exhaust system condition
o Light condition and operation
o Windshield glass condition
o Wiper blade condition
o Paint condition and body corrosion
o Fluid leaks
o Door and bonnet lock condition
o Tyre pressure and condition (including spare tyre) G020C01A-DAT Vehicle Interior The following should be checked each time when the vehicle is driven:
o Lights operation
o Windshield wiper operation
o Horn operation
o Demister, heating system operation
(and air conditioning, if installed)
o Steering operation and condition
o Mirror condition and operation
o Turn signal light operation
o Accelerator pedal operation
o Brake operation, including parking
brake
o Manual transaxle operation, includ-
ing clutch operation
o Automatic transaxle operation, in- cluding "Park" mechanism opera-tion
o Seat control condition and operation
o Seat belt condition and operation
o Sun visor operation If you notice anything that does not operate correctly or appears to befunctioning incorrectly, inspect it care- fully and seek assistance from your Hyundai dealer if service is needed.
CM-aust-6.p65 5/19/2008, 6:37 PM
5
Page 216 of 269
6
DO-IT-YOURSELF MAINTENANCE
9
!!
!
CHECKING THE ENGINE COOLANT
G050A01CM-DAT
WARNING:
Do not remove the radiator cap when the engine is hot. When the engineis hot, the engine coolant is under pressure and may erupt through the opening if the cap is removed. Youcould be seriously burned if you do not observe this precaution. Do not remove the radiator cap until theradiator is cool to touch.
WARNING:
Used motor oil may cause irritation or cancer of the skin if left in contact with the skin for prolonged periods of time. Wash your hands thoroughly with soap and warm water as soon as possible after handling used oil.
CAUTION:
Slowly pour the recommended oil
using by a funnel. Do not overfill not to damage engine.
!
WARNING:
Be very careful not to touch the radiator hose when adding the en- gine oil as it may be hot enough toburn you.
! CAUTION:
o Engine coolant can damage the finish of your car. If you spill engine coolant on the car, wash it off thoroughly with clean water.
o The engine in your vehicle has aluminum engine parts and must be protected by an ethylene-gly-col base coolant to prevent corro- sion and freezing. And, do not use the hard (tap) water. The hard water can cause engine damage from corrosion, overheating or freezing.
1. Remove the oil filler cap by turning
it counterclockwise.
2. Add oil, then check the level again. Do not overfill.
3. Replace the cap by turning it clock- wise.
NOTE: It is recommended that the engine
oil and oil filter should be changed by an authorised Hyundai dealer.
CM-aust-6.p65 5/19/2008, 6:38 PM
9
Page 235 of 269
6DO-IT-YOURSELF MAINTENANCE
28
OCM055007L
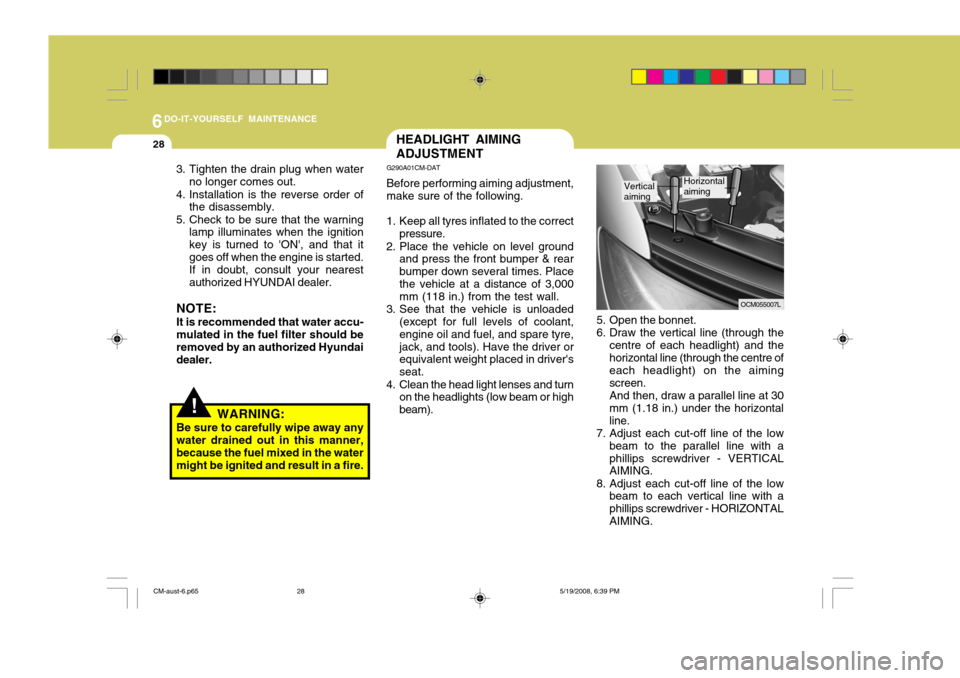
5. Open the bonnet.
6. Draw the vertical line (through the centre of each headlight) and thehorizontal line (through the centre of each headlight) on the aiming screen.And then, draw a parallel line at 30mm (1.18 in.) under the horizontalline.
7. Adjust each cut-off line of the low
beam to the parallel line with aphillips screwdriver - VERTICAL AIMING.
8. Adjust each cut-off line of the low beam to each vertical line with a phillips screwdriver - HORIZONTALAIMING.
Vertical aimingHorizontal aiming
HEADLIGHT AIMING ADJUSTMENT
G290A01CM-DAT Before performing aiming adjustment, make sure of the following.
1. Keep all tyres inflated to the correct pressure.
2. Place the vehicle on level ground and press the front bumper & rear bumper down several times. Placethe vehicle at a distance of 3,000 mm (118 in.) from the test wall.
3. See that the vehicle is unloaded (except for full levels of coolant, engine oil and fuel, and spare tyre,jack, and tools). Have the driver or equivalent weight placed in driver's seat.
4. Clean the head light lenses and turn on the headlights (low beam or highbeam).
!WARNING:
Be sure to carefully wipe away any water drained out in this manner, because the fuel mixed in the watermight be ignited and result in a fire.
3. Tighten the drain plug when water
no longer comes out.
4. Installation is the reverse order of the disassembly.
5. Check to be sure that the warning lamp illuminates when the ignitionkey is turned to 'ON', and that itgoes off when the engine is started.If in doubt, consult your nearestauthorized HYUNDAI dealer.
NOTE: It is recommended that water accu- mulated in the fuel filter should be removed by an authorized Hyundai dealer.
CM-aust-6.p65 5/19/2008, 6:39 PM
28