parking brake Hyundai Santa Fe 2009 Owner's Manual - RHD (UK, Australia)
[x] Cancel search | Manufacturer: HYUNDAI, Model Year: 2009, Model line: Santa Fe, Model: Hyundai Santa Fe 2009Pages: 269, PDF Size: 9.78 MB
Page 9 of 269
F9
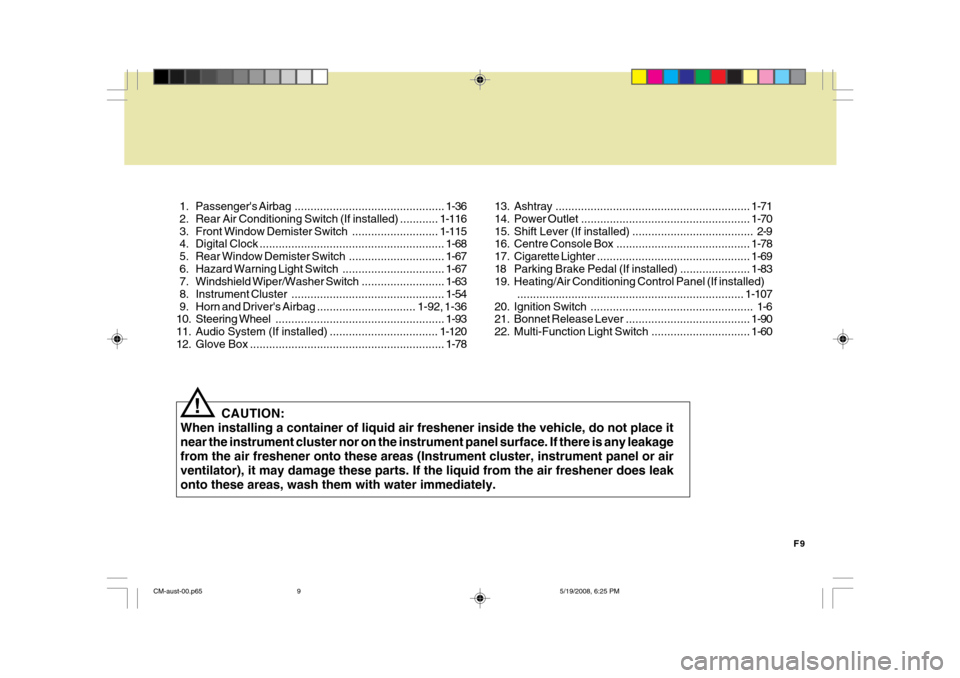
1. Passenger's
Airbag............................................... 1-36
2. Rear Air Conditioning Sw itch (If installed) ............1-116
3. Front Window Demister Switch........................... 1-115
4. Digital Clock .......................................................... 1-68
5. Rear Window Demi ster Switch .............................. 1-67
6. Hazard Warning Light Switch................................ 1-67
7. Windshield W iper/Washer Switch ..........................1-63
8. Instrument Cluster ................................................ 1-54
9. Horn and Driver' s Airbag ............................... 1-92, 1-36
10. Steering Wheel ..................................................... 1-93
11. Audio System (If installed) .................................. 1-120
12. Glove Box ............................................................. 1-78
CAUTION:
When installing a container of liquid air freshener inside the vehicle, do not place it near the instrument cluster nor on the instrument panel surface. If there is any leakagefrom the air freshener onto these areas (Instrument cluster, instrument panel or airventilator), it may damage these parts. If the liquid from the air freshener does leakonto these areas, wash them with water immediately.
! 13. Ashtray
............................................................. 1-71
14. Power Outlet ..................................................... 1-70
15. Shift Lever (If installed) ...................................... 2-9
16. Centre Console Box .......................................... 1-78
17. Cigarette Lighter ................................................ 1-69
18 Parking Brake Pedal (If installed) ...................... 1-83
19. Heating/Air Conditioning Control Panel (If installed)
....................................................................... 1-107
20. Ignition Switch ................................................... 1-6
21. Bonnet Release Lever ....................................... 1-90
22. Multi-Function Light Switch ............................... 1-60
CM-aust-00.p65 5/19/2008, 6:25 PM
9
Page 10 of 269
YOUR VEHICLE AT A GLANCE
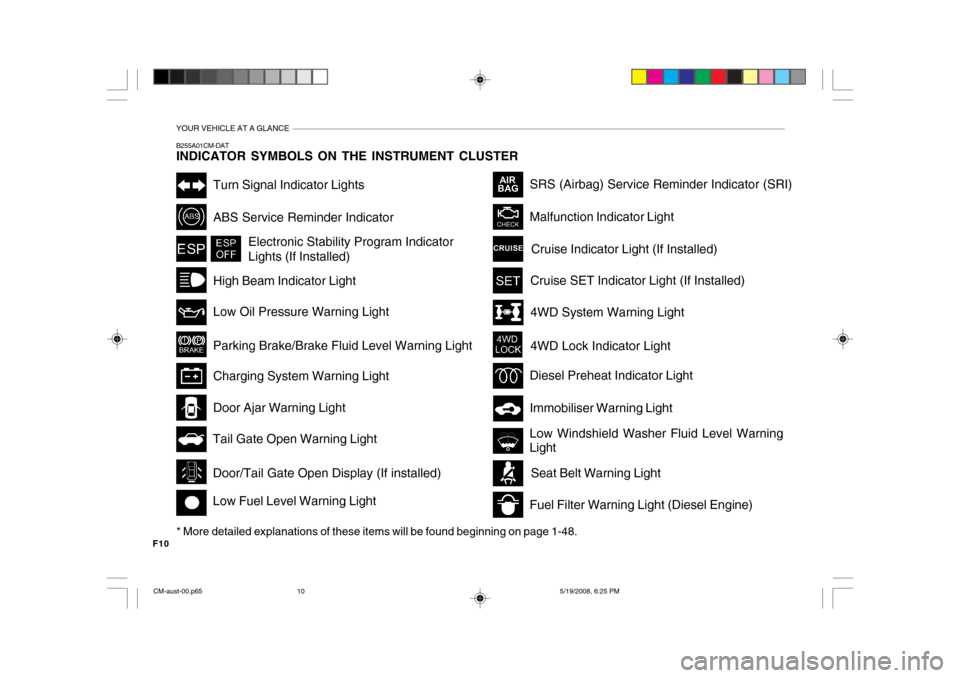
F10B255A01CM-DAT INDICATOR SYMBOLS ON THE INSTRUMENT CLUSTER
* More detailed explanations of these items will be found beginning on page 1-48.
4WD System Warning Light
Malfunction Indicator Light
SRS (Airbag) Service Reminder Indicator (SRI)
Tail Gate Open Warning Light
Low Fuel Level Warning Light Door Ajar Warning Light
ABS Service Reminder Indicator
Turn Signal Indicator Lights
High Beam Indicator Light Low Oil Pressure Warning Light Parking Brake/Brake Fluid Level Warning Light Charging System Warning Light
Immobiliser Warning Light
4WD Lock Indicator Light
Electronic Stability Program Indicator Lights (If Installed)
Cruise SET Indicator Light (If Installed)
Door/Tail Gate Open Display (If installed)
Cruise Indicator Light (If Installed)
Low Windshield Washer Fluid Level Warning LightSeat Belt Warning Light
Diesel Preheat Indicator Light
Fuel Filter Warning Light (Diesel Engine)
CM-aust-00.p65 5/19/2008, 6:25 PM
10
Page 56 of 269
1
FEATURES OF YOUR HYUNDAI
45
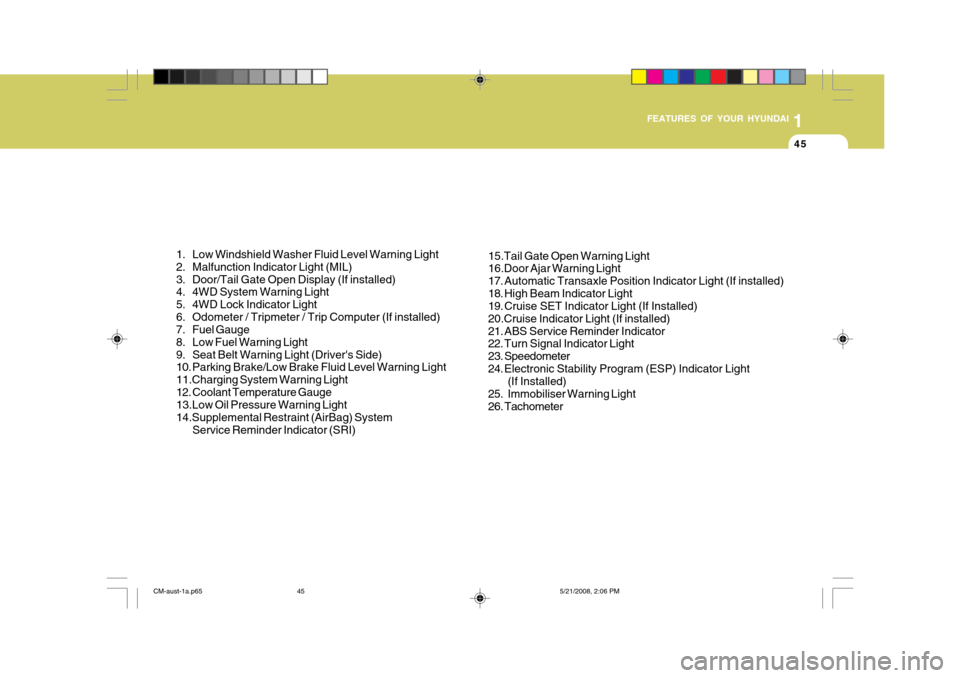
1. Low Windshield Washer Fluid Level Warning Light
2. Malfunction Indicator Light (MIL)
3. Door/Tail Gate Open Display (If installed)
4. 4WD System Warning Light
5. 4WD Lock Indicator Light
6. Odometer / Tripmeter / Trip Computer (If installed)
7. Fuel Gauge
8. Low Fuel Warning Light
9. Seat Belt Warning Light (Driver's Side)
10. Parking Brake/Low Brake Fluid Level Warning Light 11.Charging System Warning Light
12. Coolant Temperature Gauge 13.Low Oil Pressure Warning Light 14.Supplemental Restraint (AirBag) System Service Reminder Indicator (SRI) 15.Tail Gate Open Warning Light 16.Door Ajar Warning Light
17. Automatic Transaxle Position Indicator Light (If installed)
18. High Beam Indicator Light
19. Cruise SET Indicator Light (If Installed) 20.Cruise Indicator Light (If installed)
21. ABS Service Reminder Indicator
22. Turn Signal Indicator Light
23. Speedometer
24. Electronic Stability Program (ESP) Indicator Light
(If Installed)
25. Immobiliser Warning Light
26. Tachometer
CM-aust-1a.p65 5/21/2008, 2:06 PM
45
Page 58 of 269
1
FEATURES OF YOUR HYUNDAI
47
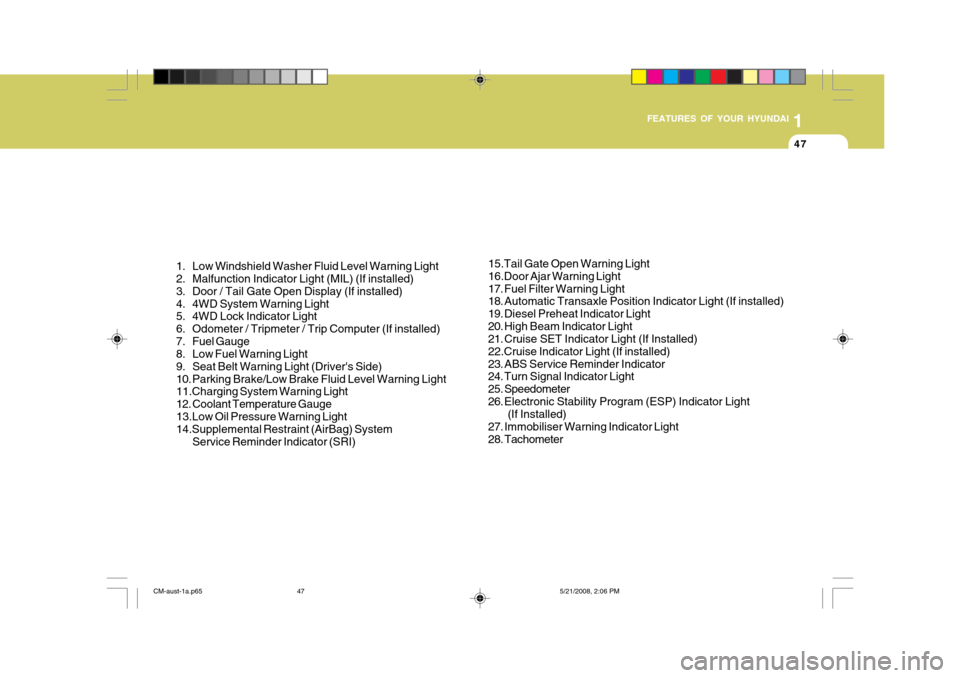
1. Low Windshield Washer Fluid Level Warning Light
2. Malfunction Indicator Light (MIL) (If installed)
3. Door / Tail Gate Open Display (If installed)
4. 4WD System Warning Light
5. 4WD Lock Indicator Light
6. Odometer / Tripmeter / Trip Computer (If installed)
7. Fuel Gauge
8. Low Fuel Warning Light
9. Seat Belt Warning Light (Driver's Side)
10. Parking Brake/Low Brake Fluid Level Warning Light 11.Charging System Warning Light
12. Coolant Temperature Gauge13.Low Oil Pressure Warning Light 14.Supplemental Restraint (AirBag) System Service Reminder Indicator (SRI) 15.Tail Gate Open Warning Light 16.Door Ajar Warning Light
17. Fuel Filter Warning Light
18. Automatic Transaxle Position Indicator Light (If installed)
19. Diesel Preheat Indicator Light
20. High Beam Indicator Light
21. Cruise SET Indicator Light (If Installed) 22.Cruise Indicator Light (If installed)
23. ABS Service Reminder Indicator
24. Turn Signal Indicator Light
25. Speedometer
26. Electronic Stability Program (ESP) Indicator Light
(If Installed)
27. Immobiliser Warning Indicator Light
28. Tachometer
CM-aust-1a.p65 5/21/2008, 2:06 PM
47
Page 59 of 269
1FEATURES OF YOUR HYUNDAI
48
B260D01A-AAT
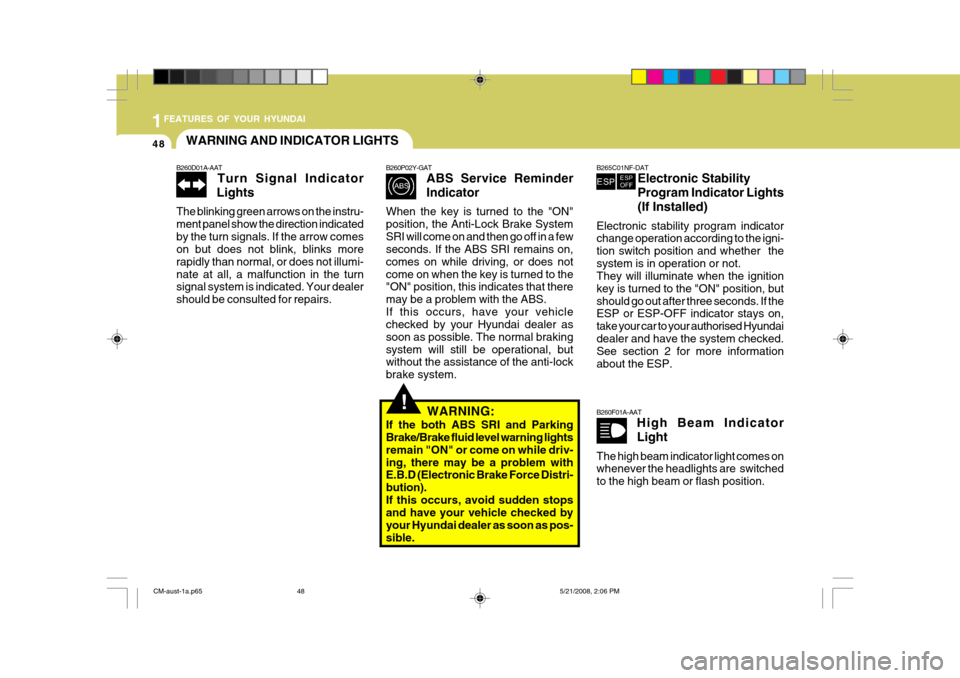
Turn Signal Indicator
Lights
The blinking green arrows on the instru- ment panel show the direction indicatedby the turn signals. If the arrow comes on but does not blink, blinks more rapidly than normal, or does not illumi-nate at all, a malfunction in the turn signal system is indicated. Your dealer should be consulted for repairs. WARNING AND INDICATOR LIGHTS
B260F01A-AAT
High Beam Indicator Light
The high beam indicator light comes on whenever the headlights are switched to the high beam or flash position.!
B260P02Y-GAT ABS Service Reminder Indicator
When the key is turned to the "ON" position, the Anti-Lock Brake SystemSRI will come on and then go off in a few seconds. If the ABS SRI remains on, comes on while driving, or does notcome on when the key is turned to the "ON" position, this indicates that there may be a problem with the ABS.If this occurs, have your vehicle checked by your Hyundai dealer as soon as possible. The normal brakingsystem will still be operational, but without the assistance of the anti-lock brake system.
WARNING:
If the both ABS SRI and Parking Brake/Brake fluid level warning lights remain "ON" or come on while driv-ing, there may be a problem with E.B.D (Electronic Brake Force Distri- bution).If this occurs, avoid sudden stops and have your vehicle checked by your Hyundai dealer as soon as pos-sible.
B265C01NF-DAT Electronic Stability Program Indicator Lights(If Installed)
Electronic stability program indicator change operation according to the igni- tion switch position and whether thesystem is in operation or not. They will illuminate when the ignition key is turned to the "ON" position, butshould go out after three seconds. If the ESP or ESP-OFF indicator stays on, take your car to your authorised Hyundaidealer and have the system checked. See section 2 for more information about the ESP.
CM-aust-1a.p65 5/21/2008, 2:06 PM
48
Page 60 of 269
1
FEATURES OF YOUR HYUNDAI
49
!
B260G01A-AAT
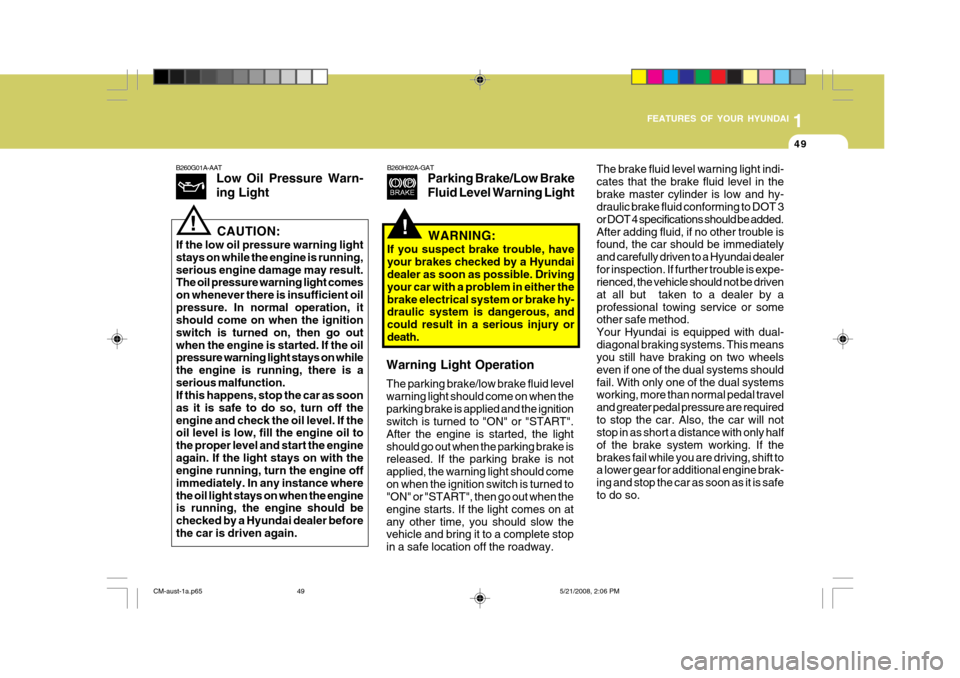
Low Oil Pressure Warn- ing Light
CAUTION:
If the low oil pressure warning light stays on while the engine is running,serious engine damage may result. The oil pressure warning light comes on whenever there is insufficient oilpressure. In normal operation, it should come on when the ignition switch is turned on, then go outwhen the engine is started. If the oil pressure warning light stays on while the engine is running, there is aserious malfunction. If this happens, stop the car as soon as it is safe to do so, turn off theengine and check the oil level. If the oil level is low, fill the engine oil to the proper level and start the engineagain. If the light stays on with the engine running, turn the engine off immediately. In any instance wherethe oil light stays on when the engine is running, the engine should be checked by a Hyundai dealer beforethe car is driven again.
!
B260H02A-GAT Parking Brake/Low Brake Fluid Level Warning Light
WARNING:
If you suspect brake trouble, have your brakes checked by a Hyundai dealer as soon as possible. Driving your car with a problem in either thebrake electrical system or brake hy- draulic system is dangerous, and could result in a serious injury or death.
Warning Light Operation The parking brake/low brake fluid level warning light should come on when theparking brake is applied and the ignition switch is turned to "ON" or "START". After the engine is started, the lightshould go out when the parking brake is released. If the parking brake is not applied, the warning light should comeon when the ignition switch is turned to "ON" or "START", then go out when the engine starts. If the light comes on atany other time, you should slow the vehicle and bring it to a complete stop in a safe location off the roadway. The brake fluid level warning light indi-cates that the brake fluid level in thebrake master cylinder is low and hy- draulic brake fluid conforming to DOT 3 or DOT 4 specifications should be added.After adding fluid, if no other trouble is found, the car should be immediately and carefully driven to a Hyundai dealerfor inspection. If further trouble is expe- rienced, the vehicle should not be driven at all but taken to a dealer by aprofessional towing service or some other safe method. Your Hyundai is equipped with dual-diagonal braking systems. This means you still have braking on two wheels even if one of the dual systems shouldfail. With only one of the dual systems working, more than normal pedal travel and greater pedal pressure are requiredto stop the car. Also, the car will not stop in as short a distance with only half of the brake system working. If thebrakes fail while you are driving, shift to a lower gear for additional engine brak- ing and stop the car as soon as it is safeto do so.
CM-aust-1a.p65
5/21/2008, 2:06 PM
49
Page 94 of 269
1
FEATURES OF YOUR HYUNDAI
83PARKING BRAKE
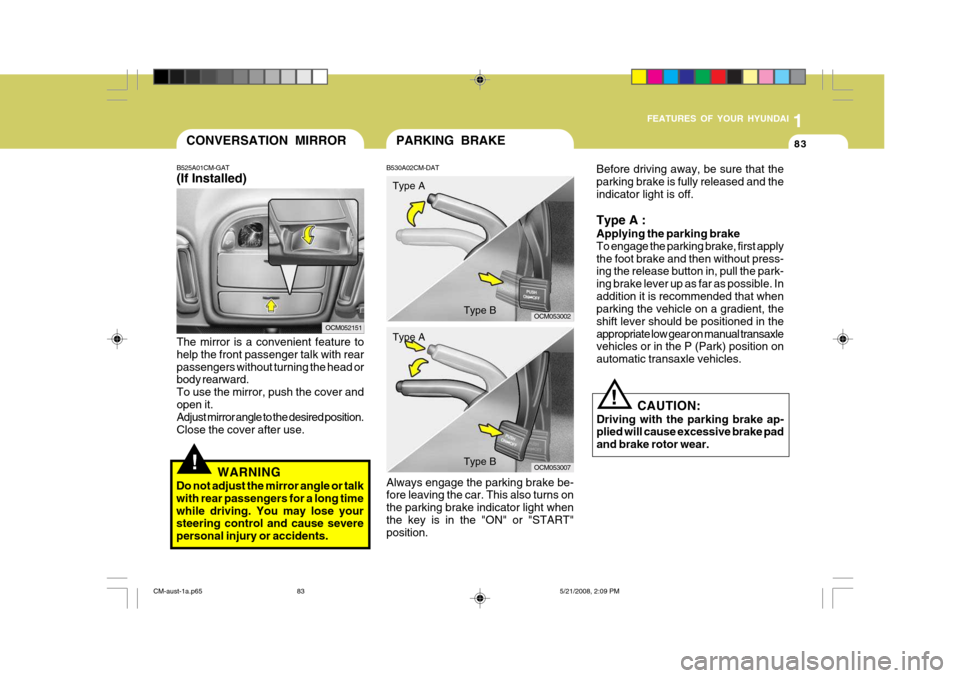
B530A02CM-DAT Always engage the parking brake be- fore leaving the car. This also turns on the parking brake indicator light whenthe key is in the "ON" or "START" position. Type A
Type B
Type AType B
OCM053002
OCM053007Before driving away, be sure that the parking brake is fully released and theindicator light is off. Type A : Applying the parking brake To engage the parking brake, first applythe foot brake and then without press- ing the release button in, pull the park- ing brake lever up as far as possible. Inaddition it is recommended that when parking the vehicle on a gradient, the shift lever should be positioned in theappropriate low gear on manual transaxle vehicles or in the P (Park) position on automatic transaxle vehicles.!
The mirror is a convenient feature to help the front passenger talk with rearpassengers without turning the head or body rearward. To use the mirror, push the cover andopen it. Adjust mirror angle to the desired position. Close the cover after use.
WARNING
Do not adjust the mirror angle or talkwith rear passengers for a long timewhile driving. You may lose your steering control and cause severe personal injury or accidents.
CONVERSATION MIRROR
B525A01CM-GAT (If Installed)
OCM052151
CAUTION:
Driving with the parking brake ap- plied will cause excessive brake pad and brake rotor wear.
!
CM-aust-1a.p65 5/21/2008, 2:09 PM
83
Page 95 of 269
1FEATURES OF YOUR HYUNDAI
84
!
TAIL GATE
B540A01CM-AAT
WARNING:
The tail gate should always be kept completely closed while the vehicleis in motion. If it is left open or ajar, poisonous exhaust gases may enter the car resulting in serious illness ordeath to the occupants. See addi- tional warnings concerning exhaust gases on page 2-2.
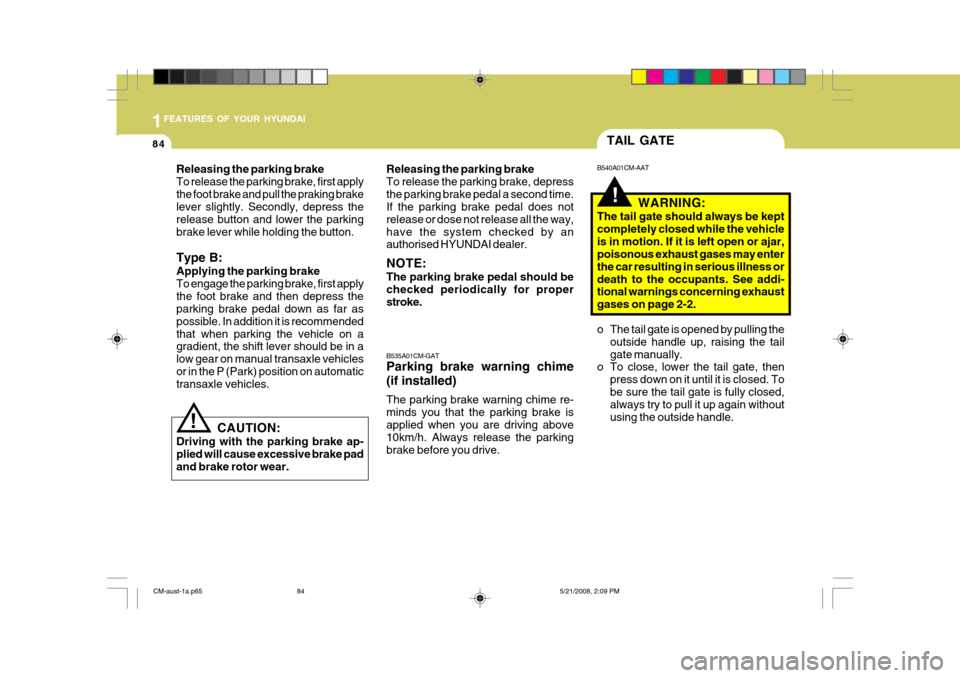
o The tail gate is opened by pulling the outside handle up, raising the tail gate manually.
o To close, lower the tail gate, then
press down on it until it is closed. Tobe sure the tail gate is fully closed, always try to pull it up again without using the outside handle.
Releasing the parking brakeTo release the parking brake, first applythe foot brake and pull the praking brake lever slightly. Secondly, depress the release button and lower the parkingbrake lever while holding the button. Type B: Applying the parking brake To engage the parking brake, first applythe foot brake and then depress the parking brake pedal down as far as possible. In addition it is recommendedthat when parking the vehicle on a gradient, the shift lever should be in a low gear on manual transaxle vehiclesor in the P (Park) position on automatic transaxle vehicles.
B535A01CM-GAT Parking brake warning chime (if installed) The parking brake warning chime re- minds you that the parking brake isapplied when you are driving above 10km/h. Always release the parking brake before you drive.
Releasing the parking brakeTo release the parking brake, depressthe parking brake pedal a second time. If the parking brake pedal does not release or dose not release all the way,have the system checked by an authorised HYUNDAI dealer. NOTE: The parking brake pedal should be checked periodically for proper stroke.
!
CAUTION:
Driving with the parking brake ap- plied will cause excessive brake pad and brake rotor wear.
CM-aust-1a.p65 5/21/2008, 2:09 PM
84
Page 153 of 269
2DRIVING YOUR HYUNDAI
8
C070D02O-AAT Good Driving Practices
o Never take the car out of gear andcoast down a hill. This is extremely hazardous. Always leave the car in gear.
o Don't "ride" the brakes. This can cause them to overheat and mal-function. Instead, when you are driv- ing down a long hill, slow down andshift to a lower gear. When you do this, engine braking will help slow the car.
o Slow down before shifting to a lower gear. This will help avoid over-rev-ving the engine, which can causedamage.
o Slow down when you encounter cross
winds. This gives you much bettercontrol of your car.
o Be sure the car is completely stopped
before you attempt to shift into re-verse. The transaxle can be dam- aged if you do not. To shift into reverse, depress the clutch, movethe shift lever to neutral, wait three seconds, then shift to the reverse position.
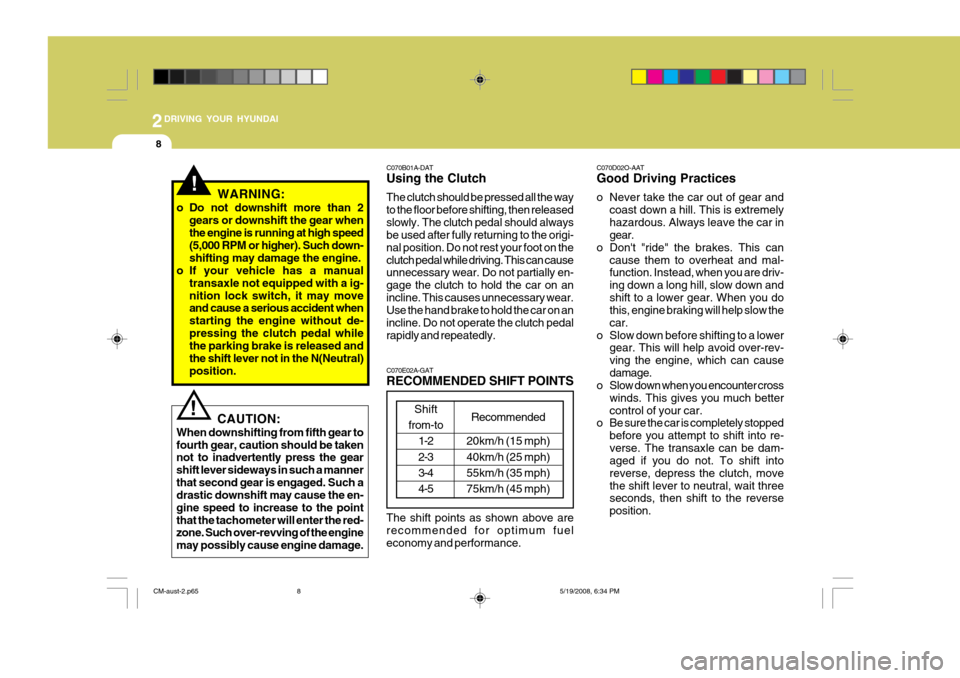
C070B01A-DAT Using the Clutch The clutch should be pressed all the way to the floor before shifting, then releasedslowly. The clutch pedal should always be used after fully returning to the origi- nal position. Do not rest your foot on theclutch pedal while driving. This can cause unnecessary wear. Do not partially en- gage the clutch to hold the car on anincline. This causes unnecessary wear. Use the hand brake to hold the car on an incline. Do not operate the clutch pedalrapidly and repeatedly. C070E02A-GAT RECOMMENDED SHIFT POINTS The shift points as shown above are recommended for optimum fuel economy and performance.
Shift
from-to 1-2 2-33-4 4-5
Recommended
20km/h (15 mph) 40km/h (25 mph)55km/h (35 mph) 75km/h (45 mph)
!WARNING:
o Do not downshift more than 2 gears or downshift the gear when the engine is running at high speed (5,000 RPM or higher). Such down-shifting may damage the engine.
o If your vehicle has a manual
transaxle not equipped with a ig-nition lock switch, it may move and cause a serious accident when starting the engine without de-pressing the clutch pedal while the parking brake is released and the shift lever not in the N(Neutral)position.
! CAUTION:
When downshifting from fifth gear to fourth gear, caution should be taken not to inadvertently press the gear shift lever sideways in such a mannerthat second gear is engaged. Such a drastic downshift may cause the en- gine speed to increase to the pointthat the tachometer will enter the red- zone. Such over-revving of the engine may possibly cause engine damage.
CM-aust-2.p65 5/19/2008, 6:34 PM
8
Page 155 of 269
2DRIVING YOUR HYUNDAI
10
C090C01A-AAT o R (Reverse): Use for backing up the vehicle. Bring the car to a complete stop before shift-ing the selector lever to "R" position. C090D02A-AAT o N (Neutral): In the "N" position, the transaxle is in neutral, which means that no gears are engaged. The engine can be startedwith the shift lever in "N" position, although this is not recommended ex- cept if the engine stalls while the car ismoving. C090E01CM-AAT
o D(Drive): Use for normal driving. Bring the car to a complete stop before shifting the selector to "D" position. The transaxle will automatically shift through a four/five gear sequence.
CAUTION:
Never shift into "R" or "P" position while the vehicle is moving.
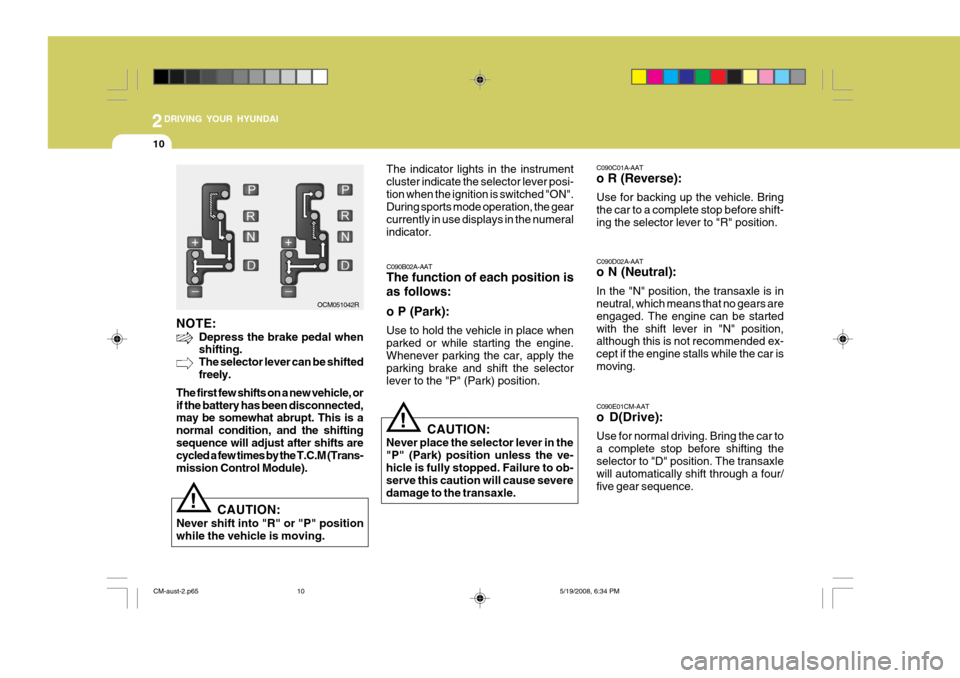
! The indicator lights in the instrument cluster indicate the selector lever posi-tion when the ignition is switched "ON". During sports mode operation, the gear currently in use displays in the numeralindicator. C090B02A-AAT The function of each position is as follows: o P (Park): Use to hold the vehicle in place when parked or while starting the engine. Whenever parking the car, apply the parking brake and shift the selectorlever to the "P" (Park) position.
CAUTION:
Never place the selector lever in the"P" (Park) position unless the ve-hicle is fully stopped. Failure to ob- serve this caution will cause severe damage to the transaxle.
!
NOTE:
Depress the brake pedal when shifting. The selector lever can be shiftedfreely.
The first few shifts on a new vehicle, orif the battery has been disconnected, may be somewhat abrupt. This is a normal condition, and the shiftingsequence will adjust after shifts are cycled a few times by the T.C.M (Trans- mission Control Module). OCM051042R
CM-aust-2.p65
5/19/2008, 6:34 PM
10