remote control Hyundai Santa Fe 2012 Owner's Manual
[x] Cancel search | Manufacturer: HYUNDAI, Model Year: 2012, Model line: Santa Fe, Model: Hyundai Santa Fe 2012Pages: 419, PDF Size: 5.61 MB
Page 80 of 419
4
Keys / 4-2
Remote keyless entry / 4-3
Theft-alarm system / 4-5
Door locks / 4-7
Tailgate / 4-11
Windows / 4-13
Hood / 4-17
Fuel filler lid / 4-19
Sunroof / 4-22
Steering wheel / 4-26
Mirrors / 4-28
Instrument cluster / 4-40
Rearview camera / 4-56
Hazard warning flasher / 4-56
Lighting / 4-57
Wipers and washers / 4-61
Interior light / 4-63
Defroster / 4-66
Manual climate control system / 4-67
Automatic climate control system / 4-76
Windshield defrosting and defogging / 4-86
Cluster ionizer / 4-88
Storage compartment / 4-89
Interior features / 4-92
Exterior features / 4-101
Audio system / 4-102
Features of your vehicle
Page 117 of 419
Features of your vehicle
38
4
D140200AUN
Outside rearview mirror
Be sure to adjust mirror angles before
driving.
Your vehicle is equipped with both left-
hand and right-hand outside rearview
mirrors. The mirrors can be adjusted
remotely with the remote switch. The mir-
ror heads can be folded back to prevent
damage during an automatic car wash or
when passing in a narrow street.
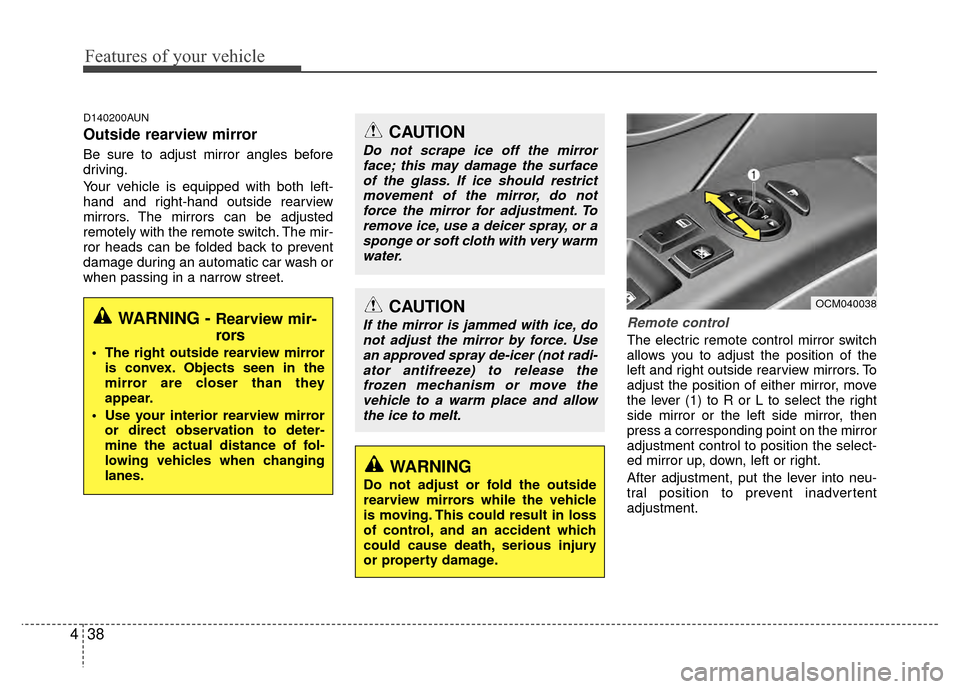
Remote control
The electric remote control mirror switch
allows you to adjust the position of the
left and right outside rearview mirrors. To
adjust the position of either mirror, move
the lever (1) to R or L to select the right
side mirror or the left side mirror, then
press a corresponding point on the mirror
adjustment control to position the select-
ed mirror up, down, left or right.
After adjustment, put the lever into neu-
tral position to prevent inadvertent
adjustment.
CAUTION
If the mirror is jammed with ice, do
not adjust the mirror by force. Use an approved spray de-icer (not radi-ator antifreeze) to release thefrozen mechanism or move thevehicle to a warm place and allowthe ice to melt.
WARNING
Do not adjust or fold the outside
rearview mirrors while the vehicle
is moving. This could result in loss
of control, and an accident which
could cause death, serious injury
or property damage.
OCM040038
CAUTION
Do not scrape ice off the mirrorface; this may damage the surfaceof the glass. If ice should restrictmovement of the mirror, do notforce the mirror for adjustment. To remove ice, use a deicer spray, or asponge or soft cloth with very warmwater.
WARNING - Rearview mir-
rors
The right outside rearview mirror is convex. Objects seen in the
mirror are closer than they
appear.
Use your interior rearview mirror or direct observation to deter-
mine the actual distance of fol-
lowing vehicles when changing
lanes.
Page 181 of 419
Features of your vehicle
102
4
✽
✽
NOTICE
If you install an aftermarket HID head
lamp, your vehicle’s audio and electron-
ic device may malfunction.
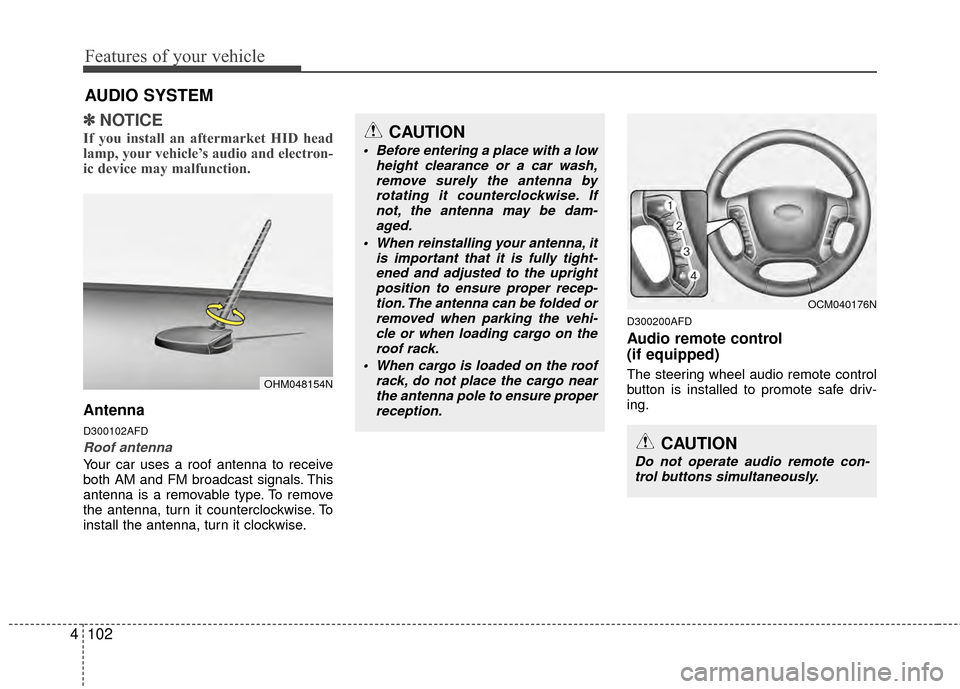
Antenna
D300102AFD
Roof antenna
Your car uses a roof antenna to receive
both AM and FM broadcast signals. This
antenna is a removable type. To remove
the antenna, turn it counterclockwise. To
install the antenna, turn it clockwise.
D300200AFD
Audio remote control
(if equipped)
The steering wheel audio remote control
button is installed to promote safe driv-
ing.
AUDIO SYSTEM
CAUTION
• Before entering a place with a low
height clearance or a car wash,remove surely the antenna byrotating it counterclockwise. Ifnot, the antenna may be dam- aged.
When reinstalling your antenna, it is important that it is fully tight-ened and adjusted to the uprightposition to ensure proper recep-tion. The antenna can be folded orremoved when parking the vehi-cle or when loading cargo on theroof rack.
When cargo is loaded on the roof rack, do not place the cargo nearthe antenna pole to ensure properreception.
OHM048154N
CAUTION
Do not operate audio remote con-trol buttons simultaneously.
OCM040176N
Page 210 of 419
4131
Features of your vehicle
■Bluetooth®wireless technology
Audio Music Streaming
The audio system supports Bluetooth®
wireless technology A2DP (Audio
Advanced Distribution Profile) and
AVRCP (Audio Video Remote Control
Profile) technologies.
Both profiles provide steaming of music
via compatible “PAIRED” Bluetooth
®
wireless technology enabled Cellular
phone.
To stream music from the Bluetooth
®
wireless technology enabled cellular
phone, play your music files on your cel-
lular phone according to your cellular
phone user’s manual and press the
, button on the
audio system until “MP3 play” is dis-
played on the LCD.
The audio system head unit displays
‘MP3 MODE’.
NOTE:
all music and sound files your cellu-
lar phone supports can be played
by the audio system.
®wireless technology
compatible cellular phones must
include A2DP and AVRCP capabili-
ties.
AVRCP compatible Bluetooth
®wireless technology cel-
lular phones may not play music
through the audio system initially.
These cellular phones may need to
have the Bluetooth
®wireless tech-
nology streaming enabled, for
example;
i.e : Menu
➟Filemanager➟Music➟Option➟Play via Bluetooth
cellular phone for more information.
To cancel Bluetooth
®wireless tech-
nology enabled cellular phone
music streaming, stop music play-
back on the cellular phone or
change the audio mode to AM/FM,
XM, CD, iPod, ect.
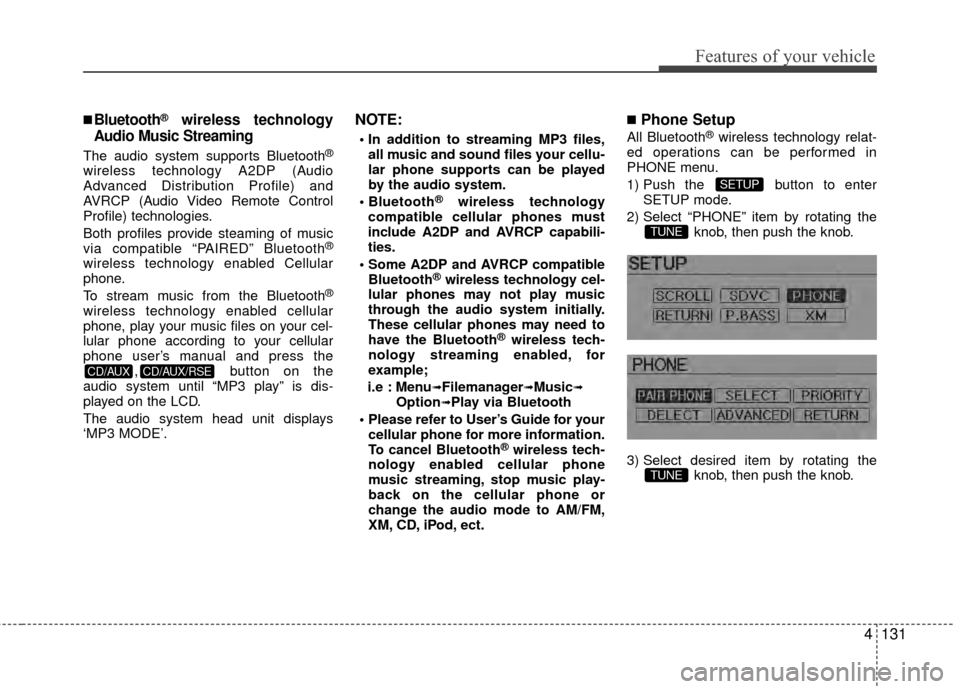
■Phone Setup
All Bluetooth®wireless technology relat-
ed operations can be performed in
PHONE menu.
1) Push the button to enter SETUP mode.
2) Select “PHONE” item by rotating the knob, then push the knob.
3) Select desired item by rotating the knob, then push the knob.
TUNE
TUNE
SETUP
CD/AUX/RSE CD/AUX
Page 214 of 419
4135
Features of your vehicle
✽
✽Tip
■Voice Operation
To get the best performance out of the
Voice Recognition System, observe the
followings:
- Keep the interior of the vehicle as quiet as possible. Close the window
to eliminate surrounding noise
(traffic noise, vibration sounds,
etc), which may disturb recogniz-
ing the voice command correctly.
- Speak a command after a beep sound within 5 seconds. Otherwise
the command will not be received
properly.
- Speak in a natural voice without pausing between words.
- While receiving voice commands, press the button on the steer-
ing wheel remote controller to ter-
minate guidance. Voice command
will convert back to waiting mode
to allow the user to say a new voice
command.
■Making a Phone Call
➀Press button.
➁Say the following command.
- Call
- Call
- Call
- Call
Note:
Calls can be immediately connected
to contacts who name or voice tag are
saved in the phonebook(or contacts).
A phone call can be made by speaking
names registered in the audio system.
➀Press button.
➁Say “Call”.
\bSay “By name” when prompted.
➃Say desired name (in Phonebook or
voice tag).
➄Say desired location (phone number
type). Only stored locations can be
selected.
➅ Say “Yes” to confirm and make a call.
✽ ✽ Tip
A shortcut to each of the following func-
tions is available:
1. Say “Call Name”
Page 219 of 419
Features of your vehicle
140
4
✽
✽
NOTICE
The RSE requires a few seconds of set
up time after the ignition switch is
turned ON or to ACC mode.
Your RSE system is already set up and
ready for use, and can be turned on by
pushing the POWER/VOLUME knob on
the RSE control panel or the POWER
ON/OFF button on the remote
controll. The vehicle's ignition must be
turned on or in accessory power mode.
The RSE system can also be turned OFF
by the Audio Unit.
Components
Your RSE consists of several compo-
nents:
Monitor (LCD display)
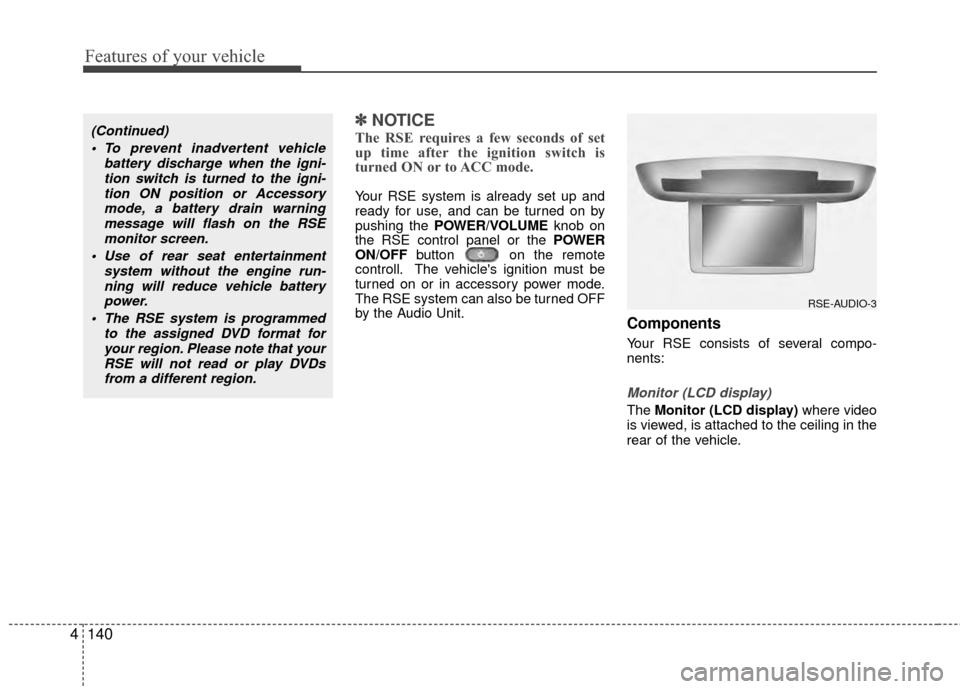
The Monitor (LCD display) where video
is viewed, is attached to the ceiling in the
rear of the vehicle.
(Continued)
To prevent inadvertent vehicle battery discharge when the igni-tion switch is turned to the igni-tion ON position or Accessorymode, a battery drain warningmessage will flash on the RSEmonitor screen.
Use of rear seat entertainment system without the engine run-ning will reduce vehicle battery power.
The RSE system is programmed to the assigned DVD format foryour region. Please note that yourRSE will not read or play DVDsfrom a different region.
RSE-AUDIO-3
Page 220 of 419
4141
Features of your vehicle
RSE Control Panel
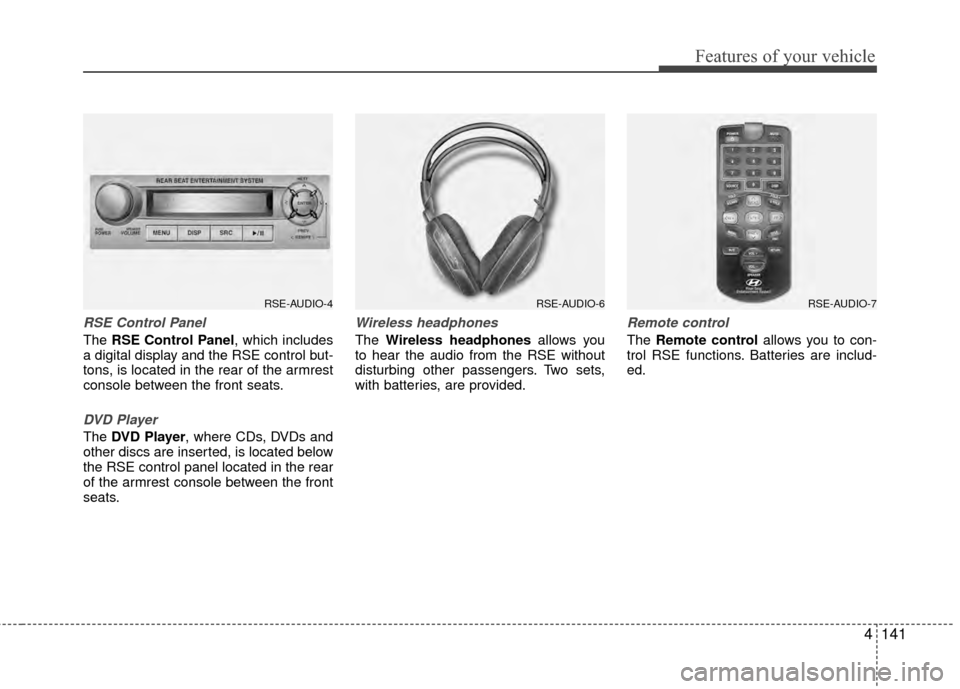
The RSE Control Panel, which includes
a digital display and the RSE control but-
tons, is located in the rear of the armrest
console between the front seats.
DVD Player
The DVD Player, where CDs, DVDs and
other discs are inserted, is located below
the RSE control panel located in the rear
of the armrest console between the front
seats.
Wireless headphones
The Wireless headphones allows you
to hear the audio from the RSE without
disturbing other passengers. Two sets,
with batteries, are provided.
Remote control
The Remote control allows you to con-
trol RSE functions. Batteries are includ-
ed.
RSE-AUDIO-4RSE-AUDIO-6RSE-AUDIO-7
Page 222 of 419
4143
Features of your vehicle
Audio via Vehicle Speakers
To hear the audio from the RSE through
the vehicle's speakers, the RSE button
(located in the front radio control) must
be selected. Regardless of whether RSE
audio is selected for the vehicle speakers
or not, when the RSE audio is playing it
can be heard in the headphones.
Volume Control
You can adjust the volume of the audio
heard in the vehicle speakers from the
RSE control panel or the remote control.
From the RSE control panel, rotate the
POWER/VOLUMEknob. From the
remote control, press "VOL +" to
increase the volume and "VOL - " to
decrease the volume.
Adjusting the volume in this way will not
affect the wireless headphone volume. To
adjust the headphones, turn the VOL
control wheel on the headphones.
Headphones
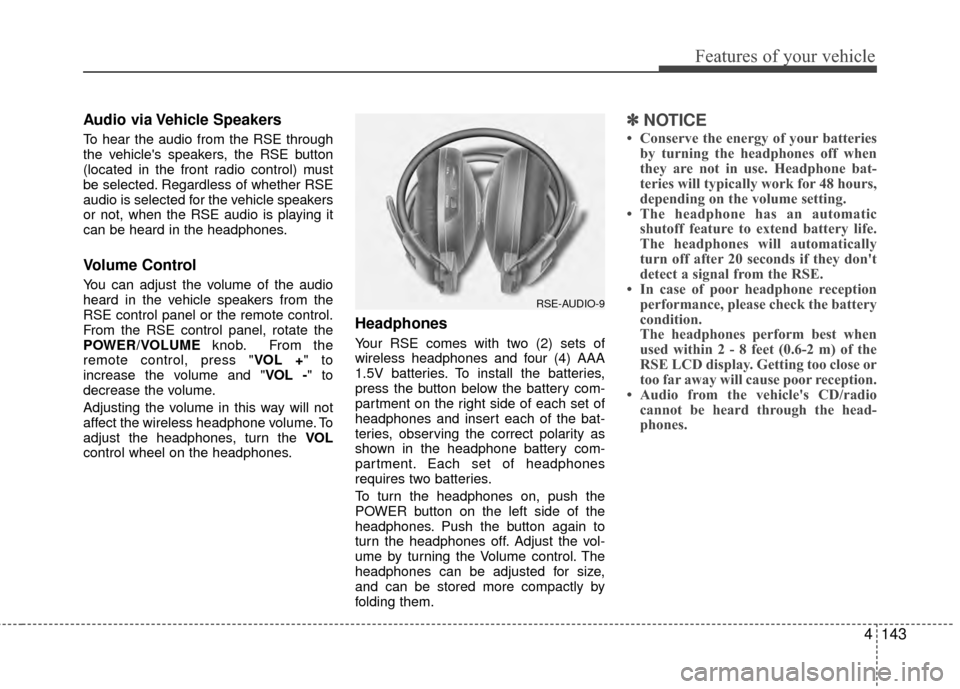
Your RSE comes with two (2) sets of
wireless headphones and four (4) AAA
1.5V batteries. To install the batteries,
press the button below the battery com-
partment on the right side of each set of
headphones and insert each of the bat-
teries, observing the correct polarity as
shown in the headphone battery com-
partment. Each set of headphones
requires two batteries.
To turn the headphones on, push the
POWER button on the left side of the
headphones. Push the button again to
turn the headphones off. Adjust the vol-
ume by turning the Volume control. The
headphones can be adjusted for size,
and can be stored more compactly by
folding them.
✽ ✽ NOTICE
• Conserve the energy of your batteries
by turning the headphones off when
they are not in use. Headphone bat-
teries will typically work for 48 hours,
depending on the volume setting.
• The headphone has an automatic shutoff feature to extend battery life.
The headphones will automatically
turn off after 20 seconds if they don't
detect a signal from the RSE.
• In case of poor headphone reception performance, please check the battery
condition.
The headphones perform best when
used within 2 - 8 feet (0.6-2 m) of the
RSE LCD display. Getting too close or
too far away will cause poor reception.
• Audio from the vehicle's CD/radio cannot be heard through the head-
phones.
RSE-AUDIO-9
Page 223 of 419
Features of your vehicle
144
4
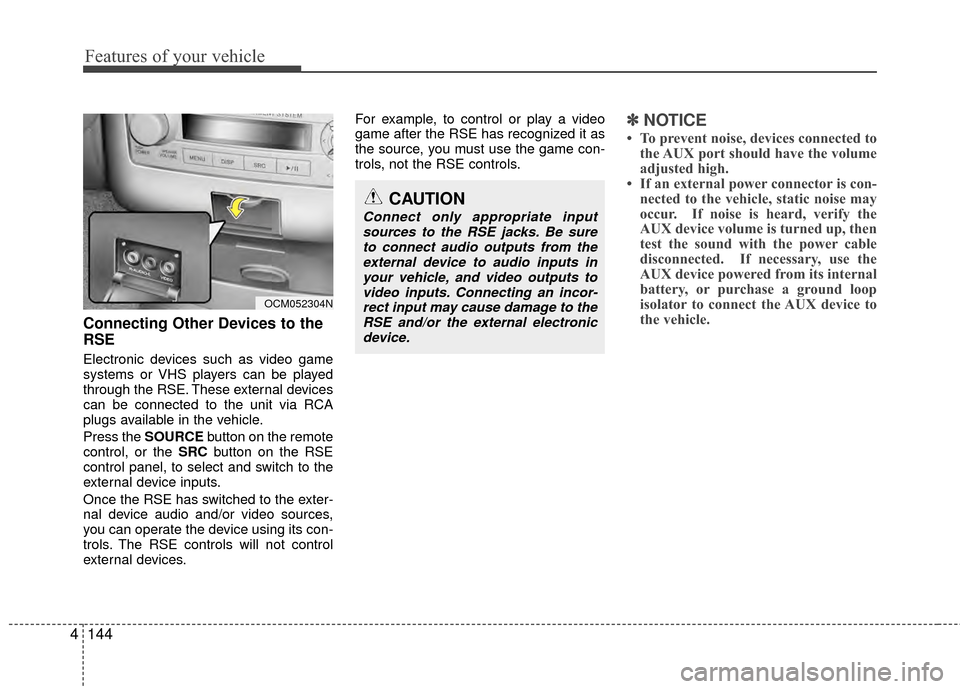
Connecting Other Devices to the
RSE
Electronic devices such as video game
systems or VHS players can be played
through the RSE. These external devices
can be connected to the unit via RCA
plugs available in the vehicle.
Press the SOURCE button on the remote
control, or the SRC button on the RSE
control panel, to select and switch to the
external device inputs.
Once the RSE has switched to the exter-
nal device audio and/or video sources,
you can operate the device using its con-
trols. The RSE controls will not control
external devices. For example, to control or play a video
game after the RSE has recognized it as
the source, you must use the game con-
trols, not the RSE controls.
✽ ✽
NOTICE
• To prevent noise, devices connected to
the AUX port should have the volume
adjusted high.
• If an external power connector is con- nected to the vehicle, static noise may
occur. If noise is heard, verify the
AUX device volume is turned up, then
test the sound with the power cable
disconnected. If necessary, use the
AUX device powered from its internal
battery, or purchase a ground loop
isolator to connect the AUX device to
the vehicle.
OCM052304N
CAUTION
Connect only appropriate input
sources to the RSE jacks. Be sureto connect audio outputs from theexternal device to audio inputs inyour vehicle, and video outputs tovideo inputs. Connecting an incor-rect input may cause damage to theRSE and/or the external electronicdevice.
Page 224 of 419
4145
Features of your vehicle
RSE Lock Function
Front seat passengers can use the RSE
Lock function to prevent rear seat pas-
sengers from operating the RSE. To lock
the RSE, press and hold the CD/AUX
button on the vehicle radio for more than
2 seconds.
"Lock" will appear on the RSE LCD dis-
play, as well as on the RSE control panel.
None of the RSE control panel or remote
controller buttons will function while the
RSE is locked. Rear seat passengers will
still be able to eject or insert a disc in the
player, as well as power on/off the sys-
tem.
Press and hold the CD/AUX button again
to turn off the RSE lock.
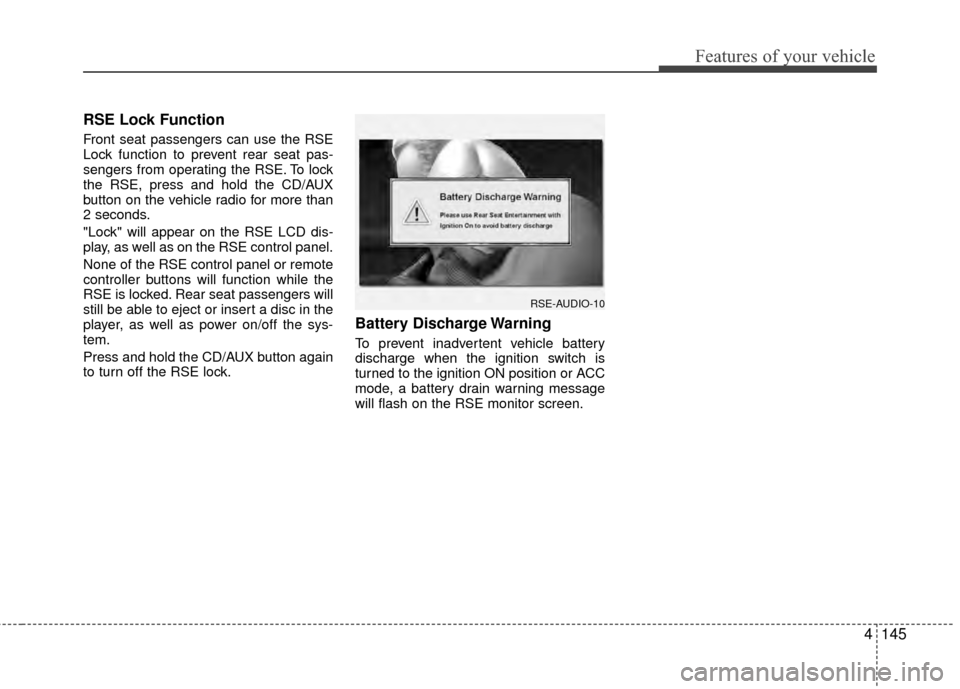
Battery Discharge Warning
To prevent inadvertent vehicle battery
discharge when the ignition switch is
turned to the ignition ON position or ACC
mode, a battery drain warning message
will flash on the RSE monitor screen.
RSE-AUDIO-10