seat adjustment Hyundai Santa Fe 2018 Owner's Manual
[x] Cancel search | Manufacturer: HYUNDAI, Model Year: 2018, Model line: Santa Fe, Model: Hyundai Santa Fe 2018Pages: 570, PDF Size: 16.8 MB
Page 28 of 570
37
Safety features of your vehicle
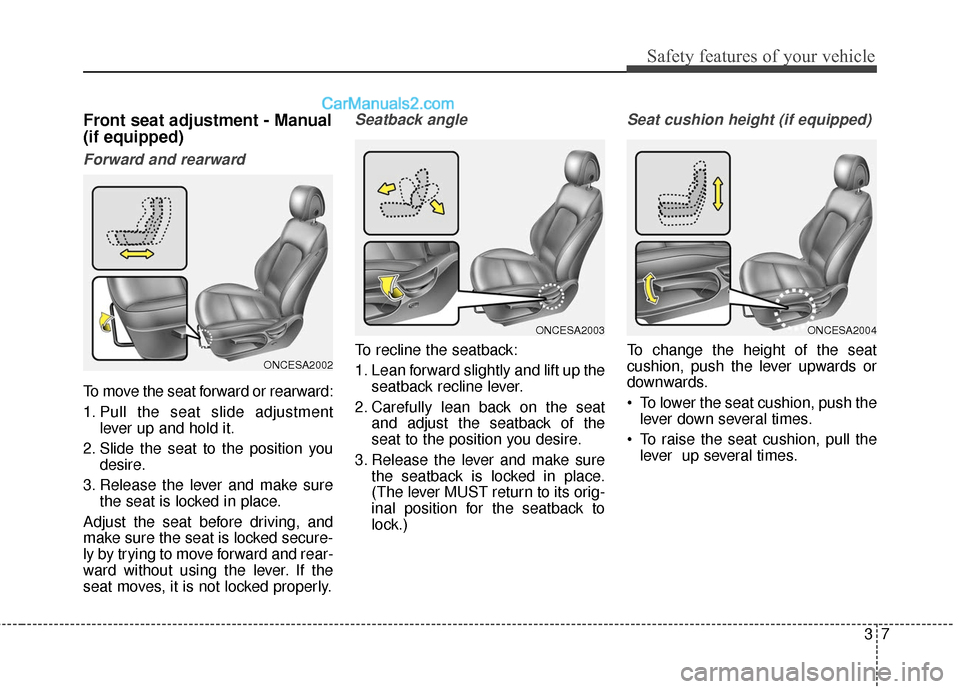
Front seat adjustment - Manual
(if equipped)
Forward and rearward
To move the seat forward or rearward:
1. Pull the seat slide adjustmentlever up and hold it.
2. Slide the seat to the position you desire.
3. Release the lever and make sure the seat is locked in place.
Adjust the seat before driving, and
make sure the seat is locked secure-
ly by trying to move forward and rear-
ward without using the lever. If the
seat moves, it is not locked properly.
Seatback angle
To recline the seatback:
1. Lean forward slightly and lift up the seatback recline lever.
2. Carefully lean back on the seat and adjust the seatback of the
seat to the position you desire.
3. Release the lever and make sure the seatback is locked in place.
(The lever MUST return to its orig-
inal position for the seatback to
lock.)
Seat cushion height (if equipped)
To change the height of the seat
cushion, push the lever upwards or
downwards.
To lower the seat cushion, push thelever down several times.
To raise the seat cushion, pull the lever up several times.ONCESA2002
ONCESA2003ONCESA2004
Page 29 of 570
Safety features of your vehicle
83
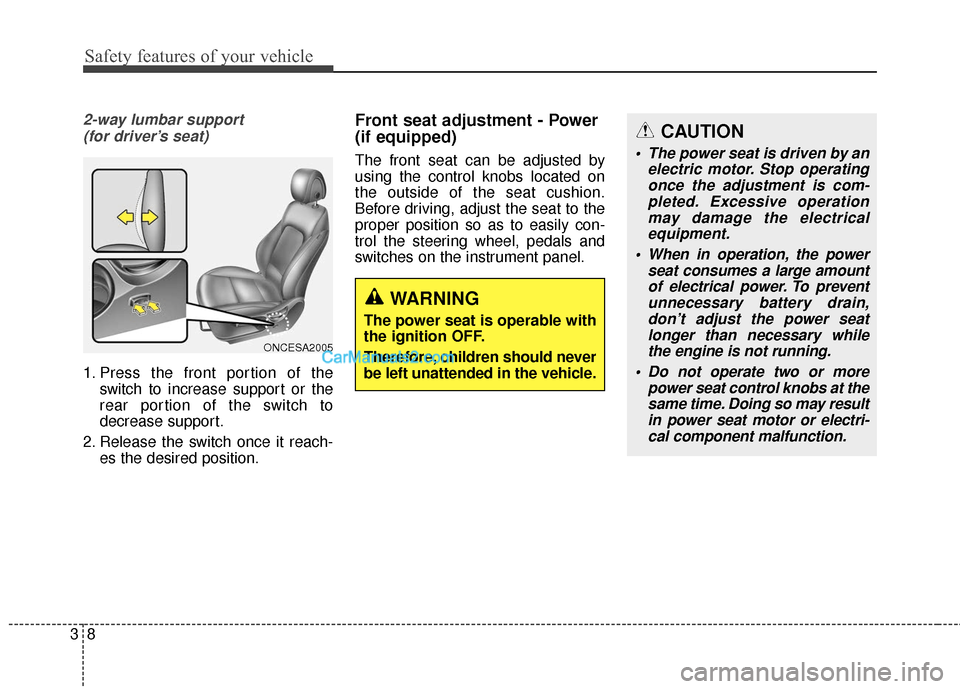
2-way lumbar support (for driver’s seat)
1. Press the front portion of the switch to increase support or the
rear portion of the switch to
decrease support.
2. Release the switch once it reach- es the desired position.
Front seat adjustment - Power
(if equipped)
The front seat can be adjusted by
using the control knobs located on
the outside of the seat cushion.
Before driving, adjust the seat to the
proper position so as to easily con-
trol the steering wheel, pedals and
switches on the instrument panel.
ONCESA2005
WARNING
The power seat is operable with
the ignition OFF.
Therefore, children should never
be left unattended in the vehicle.
CAUTION
The power seat is driven by anelectric motor. Stop operatingonce the adjustment is com-pleted. Excessive operationmay damage the electricalequipment.
When in operation, the power seat consumes a large amountof electrical power. To preventunnecessary battery drain,don’t adjust the power seatlonger than necessary whilethe engine is not running.
Do not operate two or more power seat control knobs at thesame time. Doing so may resultin power seat motor or electri-cal component malfunction.
Page 31 of 570
Safety features of your vehicle
10
3
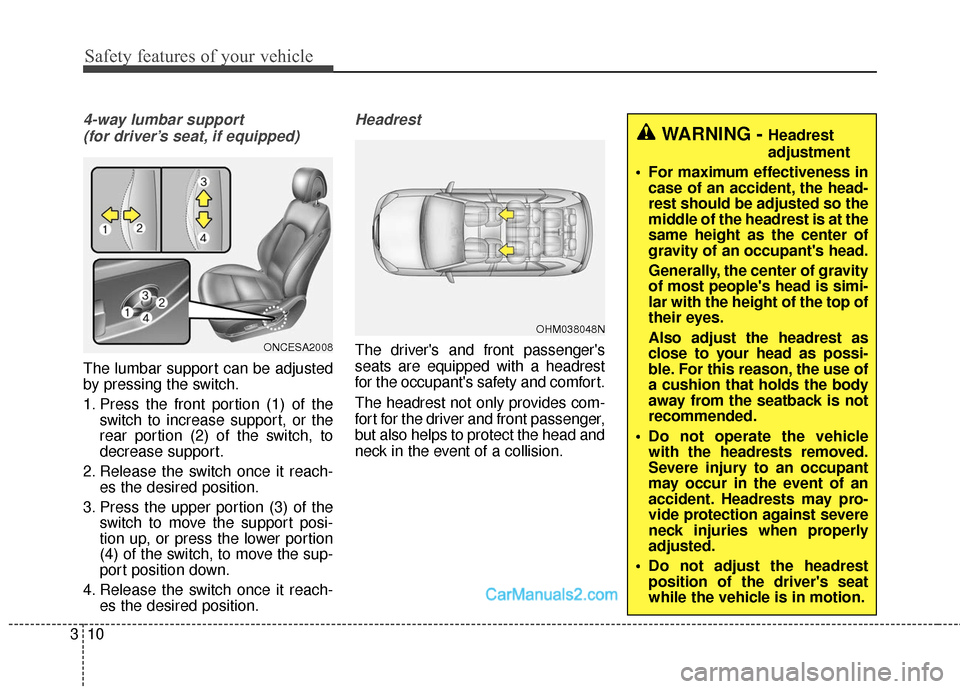
4-way lumbar support
(for driver’s seat, if equipped)
The lumbar support can be adjusted
by pressing the switch.
1. Press the front portion (1) of the switch to increase support, or the
rear portion (2) of the switch, to
decrease support.
2. Release the switch once it reach- es the desired position.
3. Press the upper portion (3) of the switch to move the support posi-
tion up, or press the lower portion
(4) of the switch, to move the sup-
port position down.
4. Release the switch once it reach- es the desired position.
Headrest
The driver's and front passenger's
seats are equipped with a headrest
for the occupant's safety and comfort.
The headrest not only provides com-
fort for the driver and front passenger,
but also helps to protect the head and
neck in the event of a collision.ONCESA2008
OHM038048N
WARNING - Headrest
adjustment
For maximum effectiveness in case of an accident, the head-
rest should be adjusted so the
middle of the headrest is at the
same height as the center of
gravity of an occupant's head.
Generally, the center of gravity
of most people's head is simi-
lar with the height of the top of
their eyes.
Also adjust the headrest as
close to your head as possi-
ble. For this reason, the use of
a cushion that holds the body
away from the seatback is not
recommended.
Do not operate the vehicle with the headrests removed.
Severe injury to an occupant
may occur in the event of an
accident. Headrests may pro-
vide protection against severe
neck injuries when properly
adjusted.
Do not adjust the headrest position of the driver's seat
while the vehicle is in motion.
Page 32 of 570
311
Safety features of your vehicle
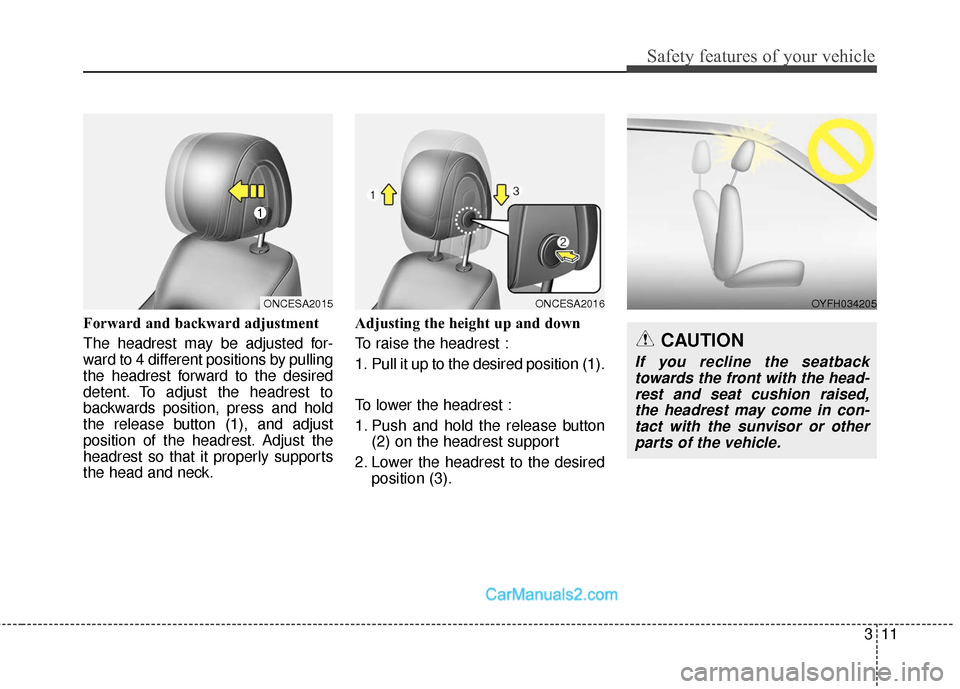
Forward and backward adjustment
The headrest may be adjusted for-
ward to 4 different positions by pulling
the headrest forward to the desired
detent. To adjust the headrest to
backwards position, press and hold
the release button (1), and adjust
position of the headrest. Adjust the
headrest so that it properly supports
the head and neck.Adjusting the height up and down
To raise the headrest :
1. Pull it up to the desired position (1).
To lower the headrest :
1. Push and hold the release button
(2) on the headrest support
2. Lower the headrest to the desired position (3).
ONCESA2016ONCESA2015OYFH034205
CAUTION
If you recline the seatbacktowards the front with the head-rest and seat cushion raised,the headrest may come in con-tact with the sunvisor or otherparts of the vehicle.
Page 38 of 570
317
Safety features of your vehicle
Storing positions into memoryusing the buttons on the door
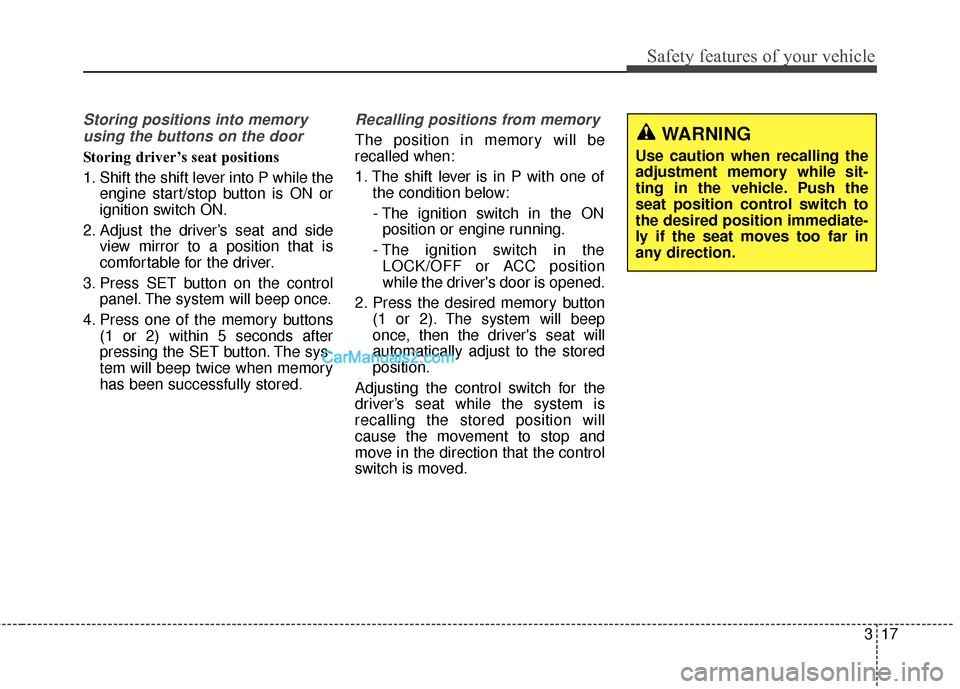
Storing driver’s seat positions
1. Shift the shift lever into P while the engine start/stop button is ON or
ignition switch ON.
2. Adjust the driver’s seat and side view mirror to a position that is
comfortable for the driver.
3. Press SET button on the control panel. The system will beep once.
4. Press one of the memory buttons (1 or 2) within 5 seconds after
pressing the SET button. The sys-
tem will beep twice when memory
has been successfully stored.
Recalling positions from memory
The position in memory will be
recalled when:
1. The shift lever is in P with one of the condition below:
- The ignition switch in the ON position or engine running.
- The ignition switch in the LOCK/OFF or ACC position
while the driver's door is opened.
2. Press the desired memory button (1 or 2). The system will beep
once, then the driver's seat will
automatically adjust to the stored
position.
Adjusting the control switch for the
driver’s seat while the system is
recalling the stored position will
cause the movement to stop and
move in the direction that the control
switch is moved.WARNING
Use caution when recalling the
adjustment memory while sit-
ting in the vehicle. Push the
seat position control switch to
the desired position immediate-
ly if the seat moves too far in
any direction.
Page 39 of 570
Safety features of your vehicle
18
3
Easy access function
(if equipped)
The system will move the driver's
seat automatically as follows:
Without smart key system
- It will move the driver’s seat rear-ward when the ignition key is
removed.
- It will move the driver’s seat for- ward when the ignition key is
inserted.
With smart key system - It will move the driver’s seat rear-ward when the engine start/stop
button is changed to the OFF
position.
- It will move the driver’s seat for- ward when the engine start/stop
button is changed to the ACC or
START position.
You can activate or deactivate this
feature. Refer to "User settings" in
section 4.
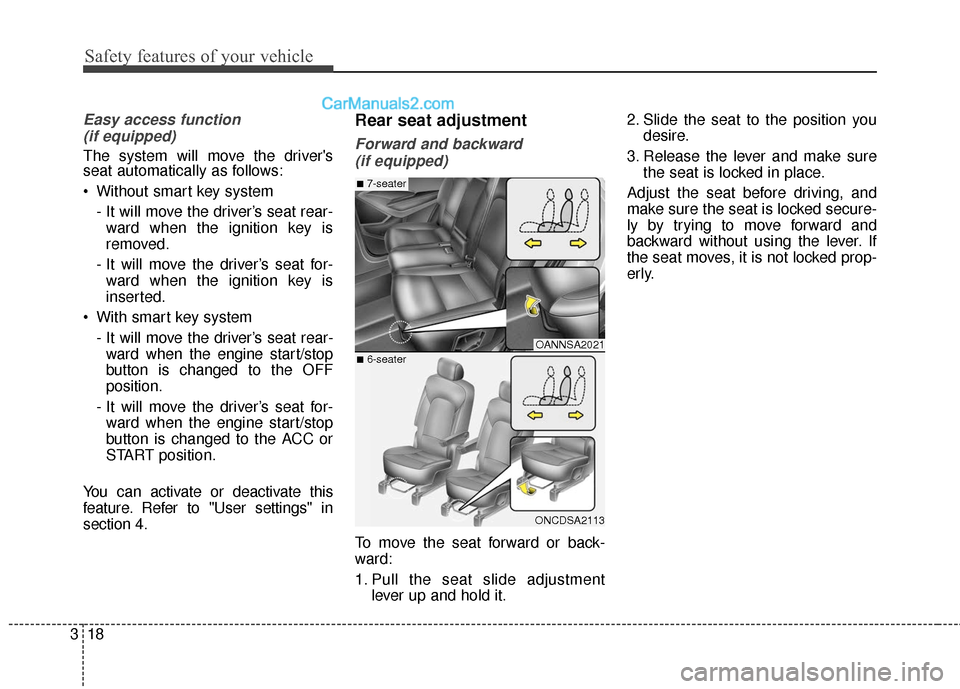
Rear seat adjustment
Forward and backward (if equipped)
To move the seat forward or back-
ward:
1. Pull the seat slide adjustment lever up and hold it. 2. Slide the seat to the position you
desire.
3. Release the lever and make sure the seat is locked in place.
Adjust the seat before driving, and
make sure the seat is locked secure-
ly by trying to move forward and
backward without using the lever. If
the seat moves, it is not locked prop-
erly.
OANNSA2021
ONCDSA2113
■7-seater
■6-seater
Page 41 of 570
Safety features of your vehicle
20
3
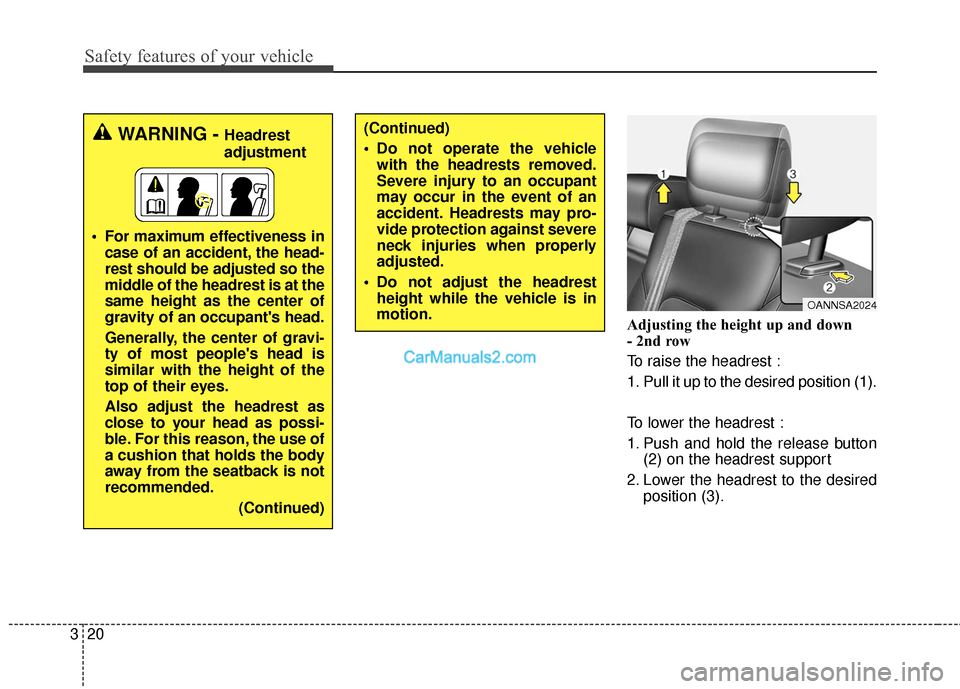
Adjusting the height up and down
- 2nd row
To raise the headrest :
1. Pull it up to the desired position (1).
To lower the headrest :
1. Push and hold the release button
(2) on the headrest support
2. Lower the headrest to the desired position (3).
OANNSA2024
(Continued)
Do not operate the vehiclewith the headrests removed.
Severe injury to an occupant
may occur in the event of an
accident. Headrests may pro-
vide protection against severe
neck injuries when properly
adjusted.
Do not adjust the headrest height while the vehicle is in
motion.WARNING - Headrest
adjustment
For maximum effectiveness in case of an accident, the head-
rest should be adjusted so the
middle of the headrest is at the
same height as the center of
gravity of an occupant's head.
Generally, the center of gravi-
ty of most people's head is
similar with the height of the
top of their eyes.
Also adjust the headrest as
close to your head as possi-
ble. For this reason, the use of
a cushion that holds the body
away from the seatback is not
recommended.
(Continued)
Page 54 of 570
333
Safety features of your vehicle
The seat belt automatically adjusts to
the proper length only after the lap
belt portion is adjusted manually so
that it fits snugly around your hips. If
you lean forward in a slow, easy
motion, the belt will extend and let
you move around. If there is a sud-
den stop or impact, however, the belt
will lock into position. It will also lock
if you try to lean forward too quickly.
If you are not able to pull out the seat
belt from the retractor, firmly pull the
belt out and release it. Then you will
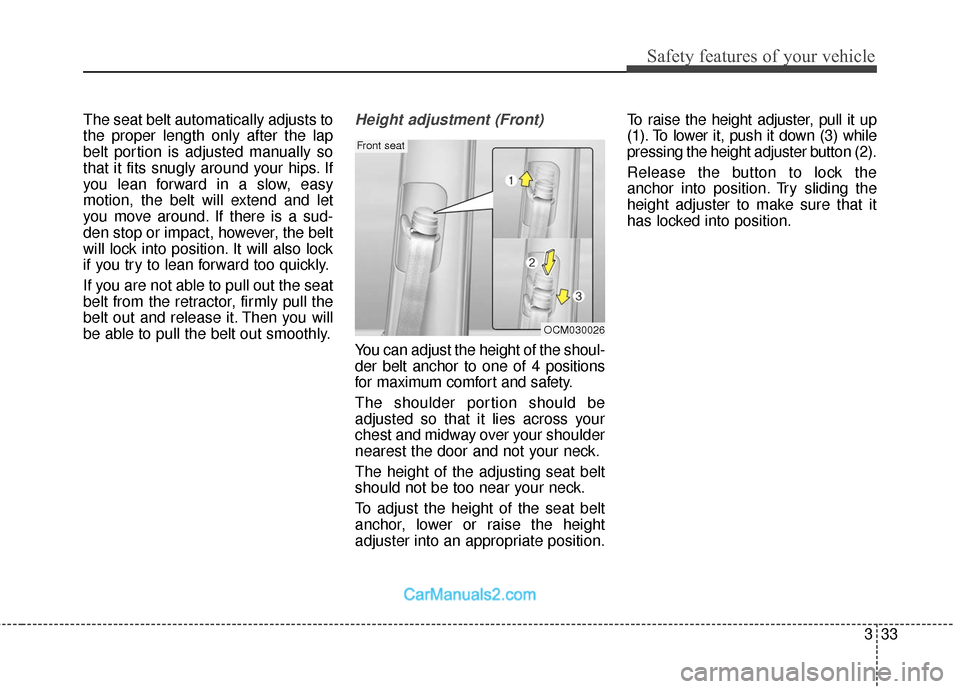
be able to pull the belt out smoothly.Height adjustment (Front)
You can adjust the height of the shoul-
der belt anchor to one of 4 positions
for maximum comfort and safety.
The shoulder portion should be
adjusted so that it lies across your
chest and midway over your shoulder
nearest the door and not your neck.
The height of the adjusting seat belt
should not be too near your neck.
To adjust the height of the seat belt
anchor, lower or raise the height
adjuster into an appropriate position.To raise the height adjuster, pull it up
(1). To lower it, push it down (3) while
pressing the height adjuster button (2).
Release the button to lock the
anchor into position. Try sliding the
height adjuster to make sure that it
has locked into position.
OCM030026
Front seat
Page 163 of 570
Features of your vehicle
60
4
MIRRORS
Inside rearview mirror
Adjust the rearview mirror so that the
center view through the rear window
is seen. Make this adjustment before
you start driving.
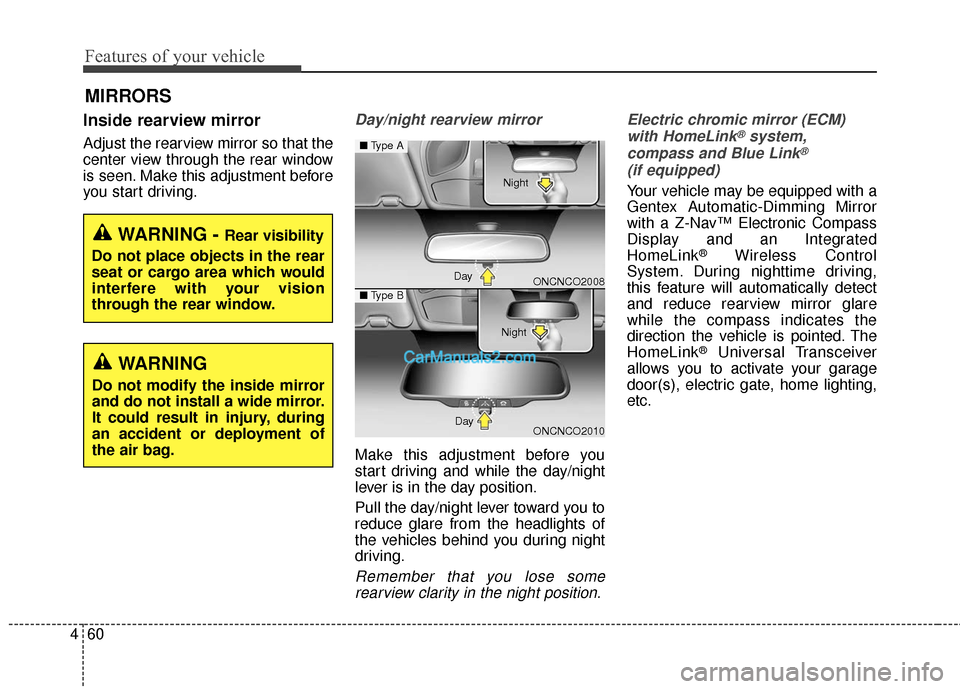
Day/night rearview mirror
Make this adjustment before you
start driving and while the day/night
lever is in the day position.
Pull the day/night lever toward you to
reduce glare from the headlights of
the vehicles behind you during night
driving.
Remember that you lose some
rearview clarity in the night position. Electric chromic mirror (ECM)
with HomeLink
®system,
compass and Blue Link®
(if equipped)
Your vehicle may be equipped with a
Gentex Automatic-Dimming Mirror
with a Z-Nav™ Electronic Compass
Display and an Integrated
HomeLink
®Wireless Control
System. During nighttime driving,
this feature will automatically detect
and reduce rearview mirror glare
while the compass indicates the
direction the vehicle is pointed. The
HomeLink
®Universal Transceiver
allows you to activate your garage
door(s), electric gate, home lighting,
etc.
WARNING - Rear visibility
Do not place objects in the rear
seat or cargo area which would
interfere with your vision
through the rear window.
WARNING
Do not modify the inside mirror
and do not install a wide mirror.
It could result in injury, during
an accident or deployment of
the air bag.
ONCNCO2008
ONCNCO2010
■ Type A
■Type B
Day Night
Day Night
Page 567 of 570
Index
8I
Radial-ply tires .............................................................7-62
Rear parking assist system..........................................4-113
Rear View Camera ......................................................4-117
Rear window defroster ...............................................4-137
Rear window wiper and washer switch......................4-132
Recommended cold tire inflation pressures .................7-48
Recommended lubricants and capacities........................8-7
Reducing the risk of a rollover ...................................5-103
Refrigerant label ...........................................................8-10
Removable towing hook ...............................................6-26
Reporting safety defects ...............................................8-12
Road warning..................................................................6-2
Rocking the vehicle ....................................................5-104
Roof rack ....................................................................4-17\
6Scheduled maintenance service ......................................7-8
Seat belts .......................................................................3\
-30
Care of seat belts .......................................................3-42
Pre-tensioner seat belt ...............................................3-36
Seat belt precautions .................................................3-39
Seat belt restraint system ..........................................3-30
Seats ........................................................................\
........3-4 Driver position memory system ................................3-16
Front seat adjustment - Manual ..................................3-7
Front seat adjustment - power .....................................3-8
Rear seat adjustment .................................................3-18
Side air bag ...................................................................3-71
Side curtain .................................................................4-175
Side view mirrors .........................................................4-68
Smart High Beam .......................................................4-126
Smart key ......................................................................4-\
10
Smart Liftgate (Smart Tailgate) ....................................4-34
Smooth cornering .......................................................5-105
Snow tires .....................................................................7-6\
1
Special driving conditions ..........................................5-103
Steering wheel ..............................................................4-56 Electric power steering (EPS) ...................................4-56
Heated steering wheel ...............................................4-58
Horn........................................................................\
...4-59
Tilt & telescopic steering ..........................................4-57
RS