Jack Hyundai Santa Fe 2019 Owner's Manual - RHD (UK, Australia)
[x] Cancel search | Manufacturer: HYUNDAI, Model Year: 2019, Model line: Santa Fe, Model: Hyundai Santa Fe 2019Pages: 682, PDF Size: 16.24 MB
Page 143 of 682
3-52
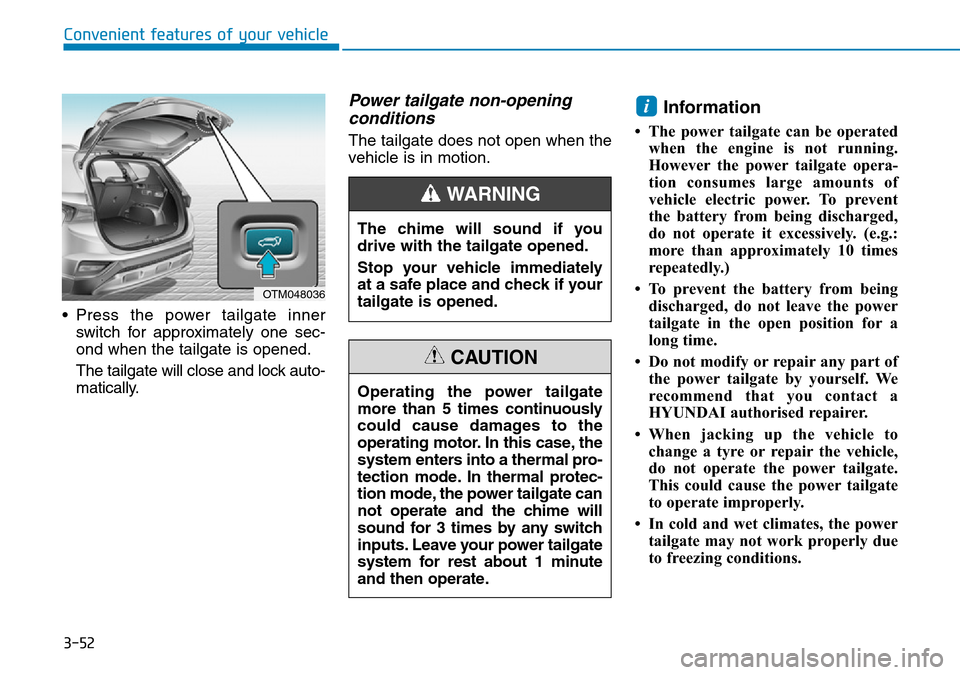
• Press the power tailgate inner
switch for approximately one sec-
ond when the tailgate is opened.
The tailgate will close and lock auto-
matically.
Power tailgate non-opening
conditions
The tailgate does not open when the
vehicle is in motion.
Information
• The power tailgate can be operated
when the engine is not running.
However the power tailgate opera-
tion consumes large amounts of
vehicle electric power. To prevent
the battery from being discharged,
do not operate it excessively. (e.g.:
more than approximately 10 times
repeatedly.)
• To prevent the battery from being
discharged, do not leave the power
tailgate in the open position for a
long time.
• Do not modify or repair any part of
the power tailgate by yourself. We
recommend that you contact a
HYUNDAI authorised repairer.
• When jacking up the vehicle to
change a tyre or repair the vehicle,
do not operate the power tailgate.
This could cause the power tailgate
to operate improperly.
• In cold and wet climates, the power
tailgate may not work properly due
to freezing conditions.
i
Convenient features of your vehicle
OTM048036
The chime will sound if you
drive with the tailgate opened.
Stop your vehicle immediately
at a safe place and check if your
tailgate is opened.
WARNING
Operating the power tailgate
more than 5 times continuously
could cause damages to the
operating motor. In this case, the
system enters into a thermal pro-
tection mode. In thermal protec-
tion mode, the power tailgate can
not operate and the chime will
sound for 3 times by any switch
inputs. Leave your power tailgate
system for rest about 1 minute
and then operate.
CAUTION
Page 308 of 682
4-17
Multimedia System
4
Using the media player
You can play music stored in various
media storage devices, such as USB
storage devices, smartphones, and
iPods.
1. Connect a device to the USB port
or the AUX port in your vehicle.
• Playback may start immediately
depending on the device that
you connect to the system.
2. On the control panel, press the
[MEDIA] button.
• If you have multiple media stor-
age devices, Press the [MEDIA]
button again and press the cor-
responding number button to
select the desired mode.
• When you connect an Apple
device, playback does not start
automatically. To start the media
player in the iPod mode, press
the [MEDIA] button on the con-
trol panel.
• You can also change the mode
by press the [MODE] button
repeatedly on the steering wheel.• Make sure to connect or discon-
nect external USB devices with
the system power turned off.
• Depending on vehicle models
and specifications, available
buttons or the appearance and
layout of the USB/AUX ports in
your vehicle may vary.
• Do not connect a smartphone or
an MP3 device to the system via
multiple methods such as USB,
Bluetooth, and AUX, simultane-
ously. Doing so may cause a dis-
torted noise or a system mal-
function.
• When the equaliser function of
the connected device and
Equaliser (Tone) settings of the
system are both activated, the
effects may interfere with each
other and may lead to sound
degradation or distortion.
Deactivate the device’s equalis-
er function if possible.
• Noise may occur when an Apple
device or AUX device is con-
nected. When such devices are
not being used, disconnect the
device for storage.• When the Apple device or AUX
device power is connected to the
power jack, playing the external
device may result in noise. In
such cases, disconnect the
power connection before use.
Using the USB mode
You can play media files stored in
portable devices, such as USB stor-
age devices and MP3 players. Check
compatible USB storage devices and
file specifications before using the
USB mode.
Connect your USB device to the
USB port in the vehicle.
• Playback starts immediately.
NOTICE
MEDIA PLAYER
Page 314 of 682
4-23
Multimedia System
4
• Do not duplicate a song in multiple
folders. One song saved in multiple
folders may cause an error with
search and playback functions.
• If you perform a media control
function, such as stop or repeat,
just before a song ends, the song
information displayed on the
screen may not match the song
currently playing. This is not a sys-
tem error. Restart the iPod mode
on the system or pause and
resume playback on your device.
• Skipping or improper operations
may occur depending on the char-
acteristics of your Apple device.
• If the Apple device malfunctions
due to an Apple device defect,
reset the Apple device and try
again. (To learn more, refer to your
Apple device manual.)Using the AUX mode
You can listen to audio from your
vehicle’s speakers by connecting
external devices, such as smart-
phones and MP3 players.
Connect an external device to the
AUX port in your vehicle using an
AUX cable.
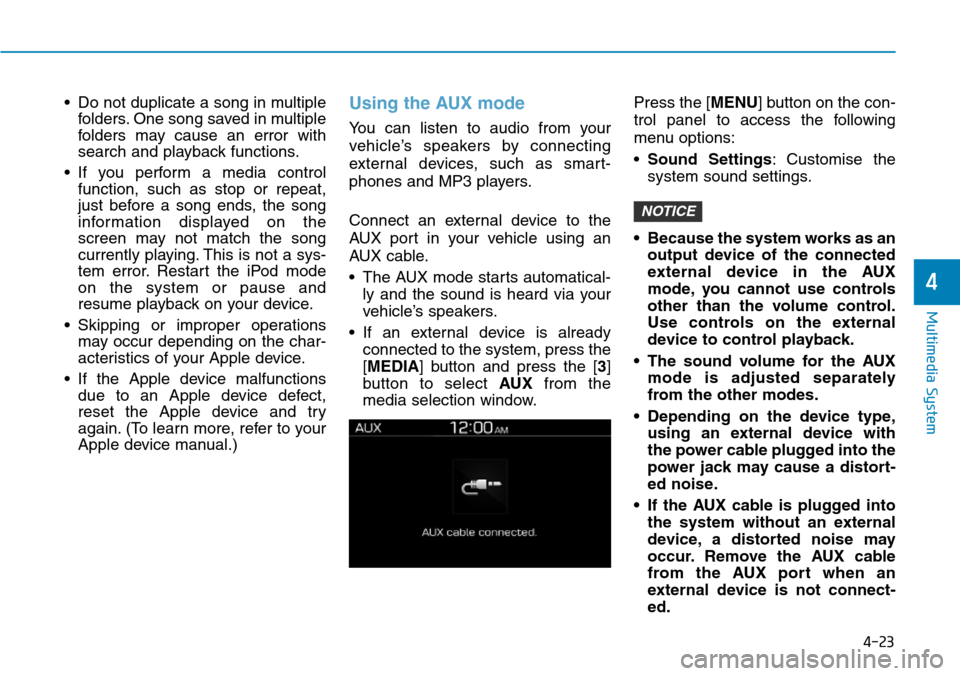
• The AUX mode starts automatical-
ly and the sound is heard via your
vehicle’s speakers.
• If an external device is already
connected to the system, press the
[MEDIA] button and press the [3]
button to select AUXfrom the
media selection window.Press the [MENU] button on the con-
trol panel to access the following
menu options:
•Sound Settings: Customise the
system sound settings.
• Because the system works as an
output device of the connected
external device in the AUX
mode, you cannot use controls
other than the volume control.
Use controls on the external
device to control playback.
• The sound volume for the AUX
mode is adjusted separately
from the other modes.
• Depending on the device type,
using an external device with
the power cable plugged into the
power jack may cause a distort-
ed noise.
• If the AUX cable is plugged into
the system without an external
device, a distorted noise may
occur. Remove the AUX cable
from the AUX port when an
external device is not connect-
ed.
NOTICE
Page 389 of 682
Driving your vehicle
Additional driving conditions
• Become familiar with the off-road
conditions before driving.
• Always pay attention when driving
off-road and avoid dangerous
areas.
• Drive slowly when driving in heavy
wind.
• Reduce vehicle speed when cor-
nering. The centre of gravity of
4WD vehicles is higher than con-
ventional 2WD vehicles, making
them more likely to roll over when
you rapidly turn corners.
• Always hold the steering wheel firm-
ly when you are driving off-road.
Emergency precautions
Tyres
Do not use tyre and wheel with dif-
ferent size and type from the one
originally installed on your vehicle. It
can affect the safety and perform-
ance of your vehicle, which could
lead to steering failure or rollover
causing serious injury.
When replacing the tyres, be sure to
equip all four tyres with the tyre and
wheel of the same size, type, tread,
brand and load-carrying capacity. If
you equip your vehicle with any
tyre/wheel combination not recom-
mended by HYUNDAI for off-road
driving, you should not use these
tyres for highway driving.
Towing
4WD vehicles must be towed with a
wheel lift and dollies or flatbed equip-
ment with all the wheels off the
ground. For more information, refer
to "Towing" in chapter 6.
Dynamometer testing
A full-time 4WD vehicle must be test-
ed on a special four wheel chassis
dynamometer.
Do not grab the inside of the
steering wheel when you are
driving off-road. You may hurt
your arm by a sudden steering
manoeuvre or from steering
wheel rebound due to an impact
with objects on the ground. You
could lose control of the steer-
ing wheel which may lead to
serious injury or death.
WARNING
Never start or run the engine
whilst a full-time 4WD vehicle is
raised on a jack. The vehicle can
slip or roll off of a jack causing
serious injury or death to you or
those nearby.
WARNING
5-60
Page 391 of 682
5-62
Driving your vehicle
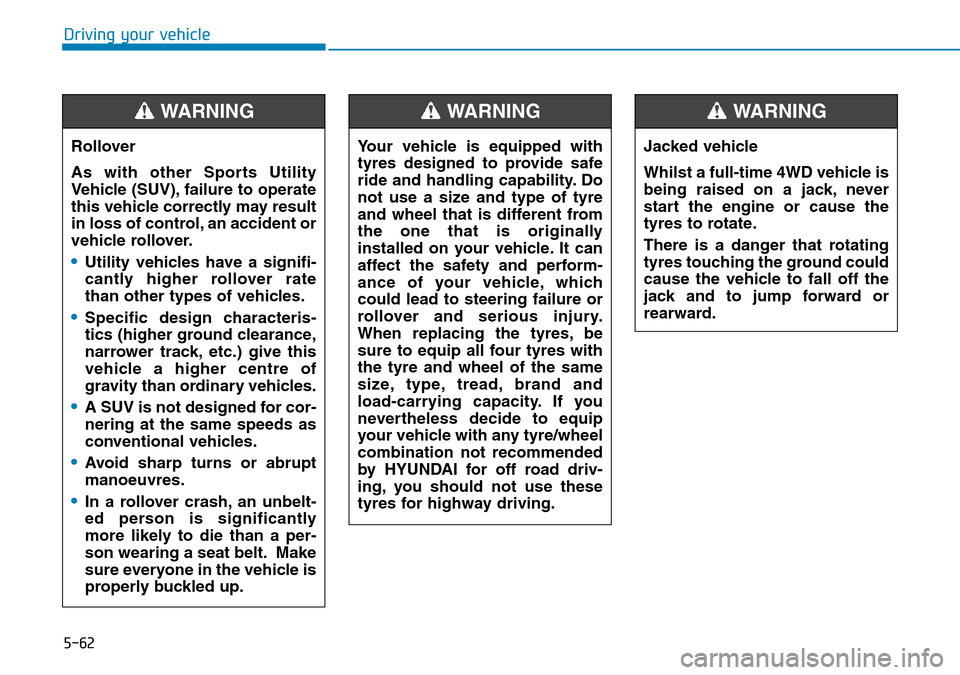
Rollover
As with other Sports Utility
Vehicle (SUV), failure to operate
this vehicle correctly may result
in loss of control, an accident or
vehicle rollover.
•Utility vehicles have a signifi-
cantly higher rollover rate
than other types of vehicles.
•Specific design characteris-
tics (higher ground clearance,
narrower track, etc.) give this
vehicle a higher centre of
gravity than ordinary vehicles.
•A SUV is not designed for cor-
nering at the same speeds as
conventional vehicles.
•Avoid sharp turns or abrupt
manoeuvres.
•In a rollover crash, an unbelt-
ed person is significantly
more likely to die than a per-
son wearing a seat belt. Make
sure everyone in the vehicle is
properly buckled up.
WARNING
Your vehicle is equipped with
tyres designed to provide safe
ride and handling capability. Do
not use a size and type of tyre
and wheel that is different from
the one that is originally
installed on your vehicle. It can
affect the safety and perform-
ance of your vehicle, which
could lead to steering failure or
rollover and serious injury.
When replacing the tyres, be
sure to equip all four tyres with
the tyre and wheel of the same
size, type, tread, brand and
load-carrying capacity. If you
nevertheless decide to equip
your vehicle with any tyre/wheel
combination not recommended
by HYUNDAI for off road driv-
ing, you should not use these
tyres for highway driving.
WARNING
Jacked vehicle
Whilst a full-time 4WD vehicle is
being raised on a jack, never
start the engine or cause the
tyres to rotate.
There is a danger that rotating
tyres touching the ground could
cause the vehicle to fall off the
jack and to jump forward or
rearward.
WARNING
Page 539 of 682
What to do in an emergency
Hazard warning flasher ........................................6-2
In case of an emergency whilst driving .............6-2
If the engine stalls whilst driving ..................................6-2
If the engine stalls at a crossroad or crossing .........6-2
If you have a flat tyre whilst driving ..........................6-3
If the engine will not start ...................................6-3
If the engine doesn't turn over
or turns over slowly .........................................................6-3
If the engine turns over normally
but doesn't start ................................................................6-4
Jump starting ..........................................................6-4
If the engine overheats ........................................6-7
Tyre pressure monitoring system (TPMS) .........6-9
Check tyre pressure .........................................................6-9
Tyre pressure monitoring system ...............................6-10
Low tyre pressure telltale.............................................6-11
Low tyre pressure position telltale
and tyre pressure telltale..............................................6-11
TPMS (Tyre Pressure Monitoring System)
malfunction indicator .....................................................6-12
Changing a tyre with TPMS .........................................6-13
If you have a flat tyre (with spare tyre) .........6-15
Jack and tools ..................................................................6-15
Removing and storing the spare tyre ........................6-16
Changing tyres .................................................................6-17
Jack label ...........................................................................6-24
EC Declaration of conformity for Jack......................6-25
If you have a flat tyre
(with tyre mobility kit) ........................................6-26
Introduction ......................................................................6-26
Notes on the safe use of the Tyre Mobility Kit......6-27
Components of the Tyre Mobility Kit ........................6-28
Using the Tyre Mobility Kit...........................................6-29
Checking the tyre inflation pressure .........................6-31
Towing ...................................................................6-33
Towing service .................................................................6-33
Removable towing hook ................................................6-34
Emergency towing ..........................................................6-35
Emergency commodity ........................................6-37
Fire extinguisher .............................................................6-37
First aid kit ........................................................................6-37
Triangle reflector ............................................................6-37
Tyre pressure gauge ......................................................6-37
6
Page 553 of 682
6-15
What to do in an emergency
6
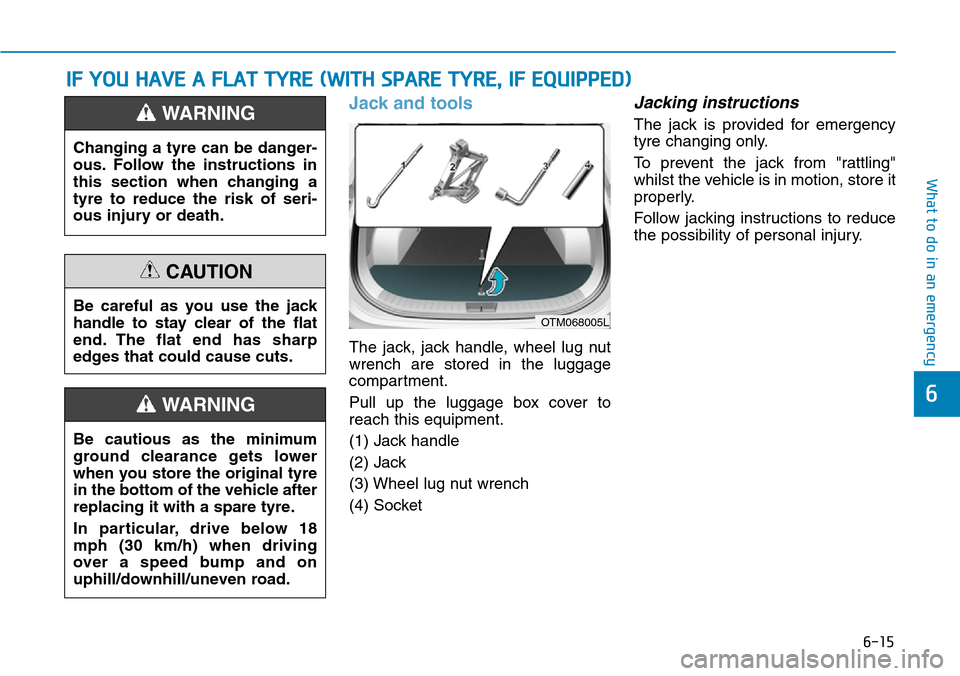
Jack and tools
The jack, jack handle, wheel lug nut
wrench are stored in the luggage
compartment.
Pull up the luggage box cover to
reach this equipment.
(1) Jack handle
(2) Jack
(3) Wheel lug nut wrench
(4) Socket
Jacking instructions
The jack is provided for emergency
tyre changing only.
To prevent the jack from "rattling"
whilst the vehicle is in motion, store it
properly.
Follow jacking instructions to reduce
the possibility of personal injury.
IF YOU HAVE A FLAT TYRE (WITH SPARE TYRE, IF EQUIPPED)
Changing a tyre can be danger-
ous. Follow the instructions in
this section when changing a
tyre to reduce the risk of seri-
ous injury or death.
WARNING
Be careful as you use the jack
handle to stay clear of the flat
end. The flat end has sharp
edges that could cause cuts.
CAUTION
OTM068005L
Be cautious as the minimum
ground clearance gets lower
when you store the original tyre
in the bottom of the vehicle after
replacing it with a spare tyre.
In particular, drive below 18
mph (30 km/h) when driving
over a speed bump and on
uphill/downhill/uneven road.
WARNING
Page 555 of 682
6-17
What to do in an emergency
6
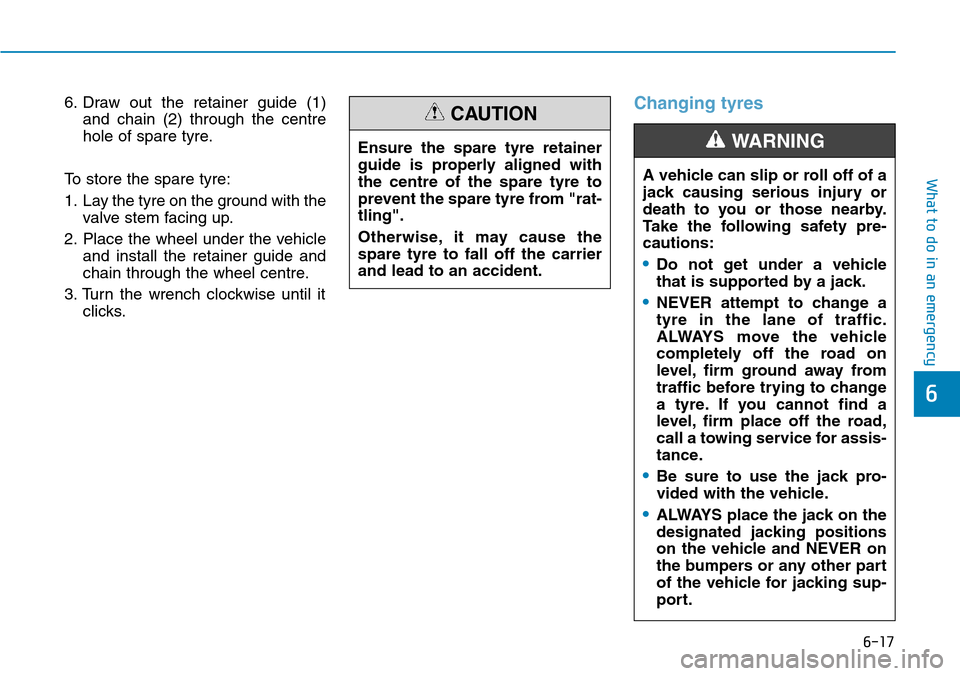
6. Draw out the retainer guide (1)
and chain (2) through the centre
hole of spare tyre.
To store the spare tyre:
1. Lay the tyre on the ground with the
valve stem facing up.
2. Place the wheel under the vehicle
and install the retainer guide and
chain through the wheel centre.
3. Turn the wrench clockwise until it
clicks.Changing tyres
Ensure the spare tyre retainer
guide is properly aligned with
the centre of the spare tyre to
prevent the spare tyre from "rat-
tling".
Otherwise, it may cause the
spare tyre to fall off the carrier
and lead to an accident.
CAUTION
A vehicle can slip or roll off of a
jack causing serious injury or
death to you or those nearby.
Take the following safety pre-
cautions:
•Do not get under a vehicle
that is supported by a jack.
•NEVER attempt to change a
tyre in the lane of traffic.
ALWAYS move the vehicle
completely off the road on
level, firm ground away from
traffic before trying to change
a tyre. If you cannot find a
level, firm place off the road,
call a towing service for assis-
tance.
•Be sure to use the jack pro-
vided with the vehicle.
•ALWAYS place the jack on the
designated jacking positions
on the vehicle and NEVER on
the bumpers or any other part
of the vehicle for jacking sup-
port.
WARNING
Page 556 of 682
6-18
What to do in an emergency
1. Park on a level surface and apply
the parking brake firmly.
2. Shift the shift lever into R
(Reverse) with manual transmis-
sion or P (Park) with automatic
transmission.
3. Activate the hazard warning flash-
er.4. Remove the wheel lug nut wrench,
jack, jack handle, and spare tyre
from the vehicle.
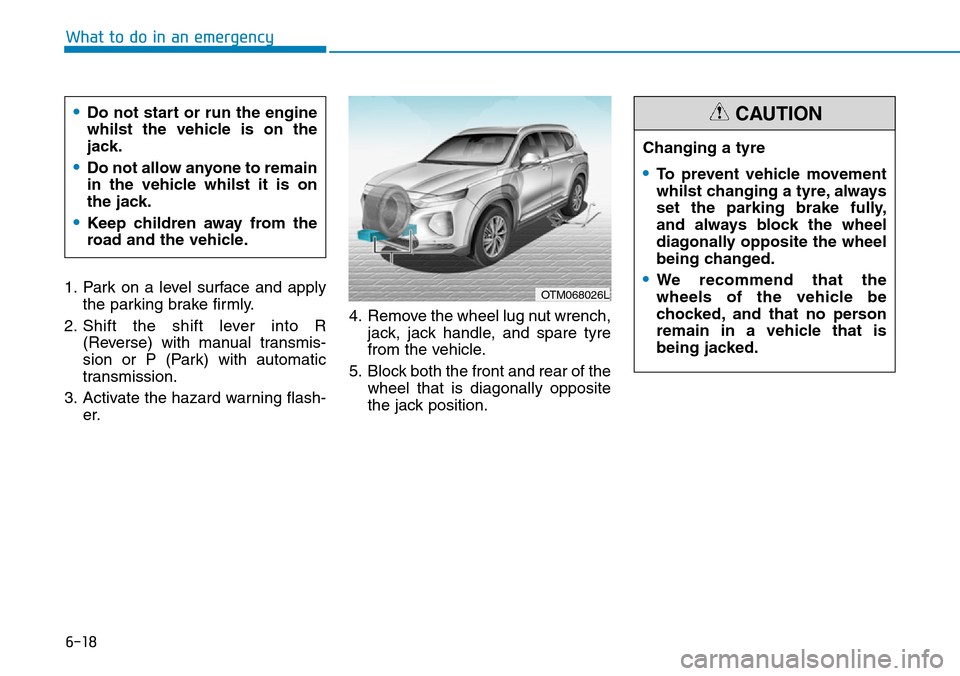
5. Block both the front and rear of the
wheel that is diagonally opposite
the jack position.
•Do not start or run the engine
whilst the vehicle is on the
jack.
•Do not allow anyone to remain
in the vehicle whilst it is on
the jack.
•Keep children away from the
road and the vehicle.
OTM068026L
Changing a tyre
•To prevent vehicle movement
whilst changing a tyre, always
set the parking brake fully,
and always block the wheel
diagonally opposite the wheel
being changed.
•We recommend that the
wheels of the vehicle be
chocked, and that no person
remain in a vehicle that is
being jacked.
CAUTION
Page 557 of 682
6-19
What to do in an emergency
6
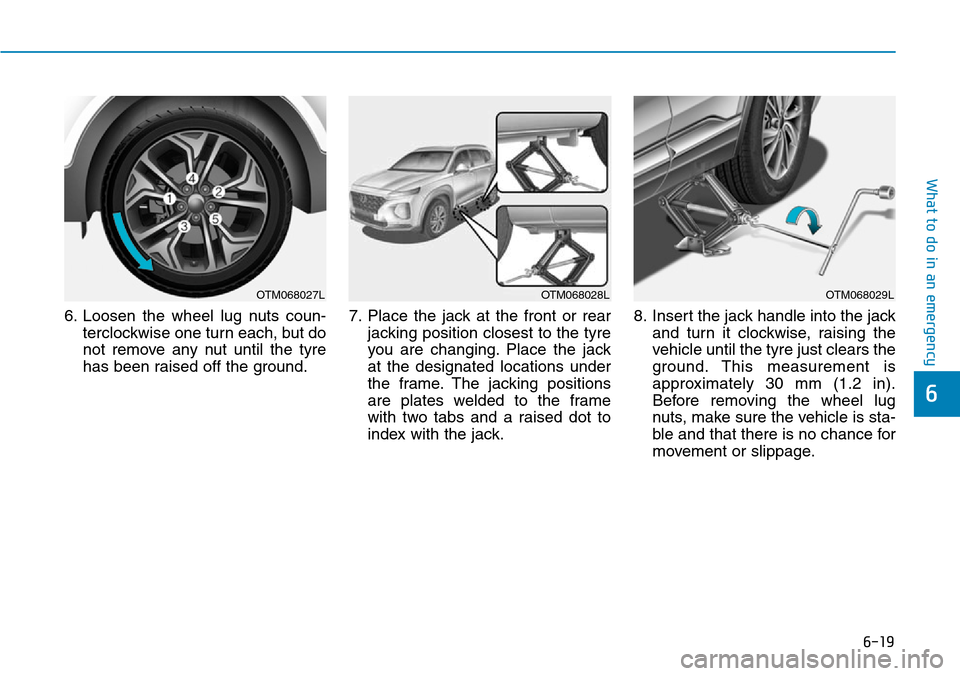
6. Loosen the wheel lug nuts coun-
terclockwise one turn each, but do
not remove any nut until the tyre
has been raised off the ground.7. Place the jack at the front or rear
jacking position closest to the tyre
you are changing. Place the jack
at the designated locations under
the frame. The jacking positions
are plates welded to the frame
with two tabs and a raised dot to
index with the jack.8. Insert the jack handle into the jack
and turn it clockwise, raising the
vehicle until the tyre just clears the
ground. This measurement is
approximately 30 mm (1.2 in).
Before removing the wheel lug
nuts, make sure the vehicle is sta-
ble and that there is no chance for
movement or slippage.
OTM068027LOTM068028LOTM068029L