service Hyundai Santa Fe Sport 2015 Owner's Manual
[x] Cancel search | Manufacturer: HYUNDAI, Model Year: 2015, Model line: Santa Fe Sport, Model: Hyundai Santa Fe Sport 2015Pages: 785, PDF Size: 13.38 MB
Page 4 of 785
F4
FOREWORD
Thank you for choosing Hyundai. We are pleased to welcome you to the growing number of discriminating people
who drive Hyundais. The advanced engineering and high-quality construction of each Hyundai we build is something
of which we're very proud.
Your Owner's Manual will introduce you to the features and operation of your new Hyundai. It is suggested that you
read it carefully because the information it contains can contribute greatly to the satisfaction you receive from your
new car.
Hyundai Auto Canada Corp. also recommends that all service and maintenance on your car be performed by an
authorized Hyundai dealer. Hyundai dealers are prepared to provide high-quality service, maintenance and any other
assistance that may be required.
HYUNDAI AUTO CANADA
Note: Because future owners will also need the information included in this manual, if you sell this Hyundai, please
leave the manual in the vehicle for their use. Thank you.
This Owner's manual copyright 2015, Hyundai Auto Canada Corp. All rights reserved. No part of this publication may
be reproduced, stored in any retrieval system or transmitted in any form or by any means without prior written per-
mission of Hyundai Auto Canada Corp.
All trademarks and tradenames owned in Canada by Hyundai Auto Canada Corp.
CAUTION
Severe engine and transmission damage may result from the use of poor quality fuels and lubricants that
do not meet Hyundai specifications. You must always use high quality fuels and lubricants that meet the
specifications listed on Page 8-6 in the Vehicle Specifications and consumer information section of the
Owner's Manual.
Page 51 of 785
Safety features of your vehicle
30 3
✽NOTICE
• Both the driver's and front pas-
senger's seat belt pre-tensioner
system may be activated not only
in certain frontal collision but also
in certain side collision or rollover,
if the vehicle is equipped with a
side or curtain air bag.
• When the pre-tensioner seat belts
are activated, a loud noise may be
heard and fine dust, which may
appear to be smoke, may be visible
in the passenger compartment.
These are normal operating condi-
tions and are not hazardous.
• Although it is harmless, the fine
dust may cause skin irritation and
should not be breathed for pro-
longed periods. Wash all exposed
skin areas thoroughly after an
accident in which the pre-tension-
er seat belts were activated.
• Because the sensor that activates
the SRS air bag is connected with
the pre-tensioner seat belt, the
SRS air bag warning light on
the instrument panel will illumi-
nate for approximately 6 seconds
after the ignition switch has been
turned to the ON position, and
then it should turn off.WARNING
• Pre-tensioners are designed
to operate only one time. After
activation, pre-tensioner seat
belts must be replaced. All
seat belts, of any type, should
always be replaced after they
have been worn during a colli-
sion.
• The pre-tensioner seat belt
assembly mechanisms
become hot during activation.
Do not touch the pre-tension-
er seat belt assemblies for
several minutes after they
have been activated.
• Do not attempt to inspect or
replace the pre-tensioner seat
belts yourself. This must be
done by an authorized
HYUNDAI dealer.
• Do not strike the pre-tension-
er seat belt assemblies.
• Do not attempt to service or
repair the pre-tensioner seat
belt system in any manner.
(Continued)
CAUTION
If the pre-tensioner seat belt
system are not working proper-
ly, this warning light will illumi-
nate even if there is no malfunc-
tion of the SRS air bag. If the
SRS air bag warning light does
not illuminate when the ignition
switch is turned ON, or if it
remains illuminated after illumi-
nating for approximately 6 sec-
onds, or if it illuminates while
the vehicle is being driven, have
an authorized HYUNDAI dealer
inspect the pre-tensioner seat
belt and SRS air bag system as
soon as possible.
Page 52 of 785
331
Safety features of your vehicle
Seat belt precautionsInfant or small child
You should be aware of the specific
requirements in your country. Child
and/or infant seats must be properly
placed and installed in the rear seat.
For more information about the use of
these restraints, refer to “Child
restraint system” in this section.(Continued)
• Improper handling of the pre-
tensioner seat belt assem-
blies, and failure to heed the
warnings not to strike, modify,
inspect, replace, service or
repair the pre-tensioner seat
belt assemblies may lead to
improper operation or inad-
vertent activation and serious
injury.
• Always wear the seat belts
when driving or riding in a
motor vehicle.
• If the vehicle or pre-tensioner
seat belt must be discarded,
contact an authorized
HYUNDAI dealer.
WARNING
All occupants of the vehicle
must wear their seat belts at all
times. Seat belts and child
restraints reduce the risk of
serious or fatal injuries for all
occupants in the event of a col-
lision or sudden stop. Without a
seat belt, occupants could be
shifted too close to a deploying
air bag, strike the interior struc-
ture or be thrown from the vehi-
cle. Properly worn seat belts
greatly reduce these hazards.
Even with advanced air bags,
unbelted occupants can be
severely injured by a deploying
air bag.
Always follow the precautions
about seat belts, air bags and
occupant seating contained in
this manual.
WARNING
Every person in your vehicle
needs to be properly restrained
at all times, including infants
and children. Never hold a child
in your arms or lap when riding
in a vehicle. The violent forces
created during a crash will tear
the child from your arms and
throw the child against the inte-
rior. Always use a child restraint
appropriate for your child's
height and weight.
Page 91 of 785
Safety features of your vehicle
70 3
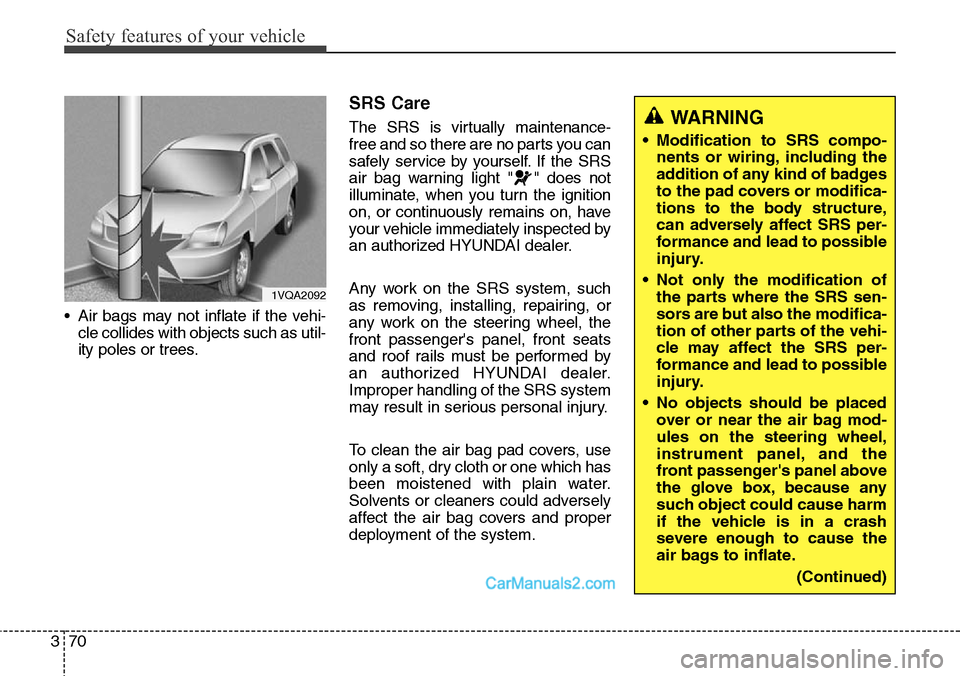
• Air bags may not inflate if the vehi-
cle collides with objects such as util-
ity poles or trees.
SRS Care
The SRS is virtually maintenance-
free and so there are no parts you can
safely service by yourself. If the SRS
air bag warning light " " does not
illuminate, when you turn the ignition
on, or continuously remains on, have
your vehicle immediately inspected by
an authorized HYUNDAI dealer.
Any work on the SRS system, such
as removing, installing, repairing, or
any work on the steering wheel, the
front passenger's panel, front seats
and roof rails must be performed by
an authorized HYUNDAI dealer.
Improper handling of the SRS system
may result in serious personal injury.
To clean the air bag pad covers, use
only a soft, dry cloth or one which has
been moistened with plain water.
Solvents or cleaners could adversely
affect the air bag covers and proper
deployment of the system.WARNING
• Modification to SRS compo-
nents or wiring, including the
addition of any kind of badges
to the pad covers or modifica-
tions to the body structure,
can adversely affect SRS per-
formance and lead to possible
injury.
• Not only the modification of
the parts where the SRS sen-
sors are but also the modifica-
tion of other parts of the vehi-
cle may affect the SRS per-
formance and lead to possible
injury.
• No objects should be placed
over or near the air bag mod-
ules on the steering wheel,
instrument panel, and the
front passenger's panel above
the glove box, because any
such object could cause harm
if the vehicle is in a crash
severe enough to cause the
air bags to inflate.
(Continued)
1VQA2092
Page 95 of 785
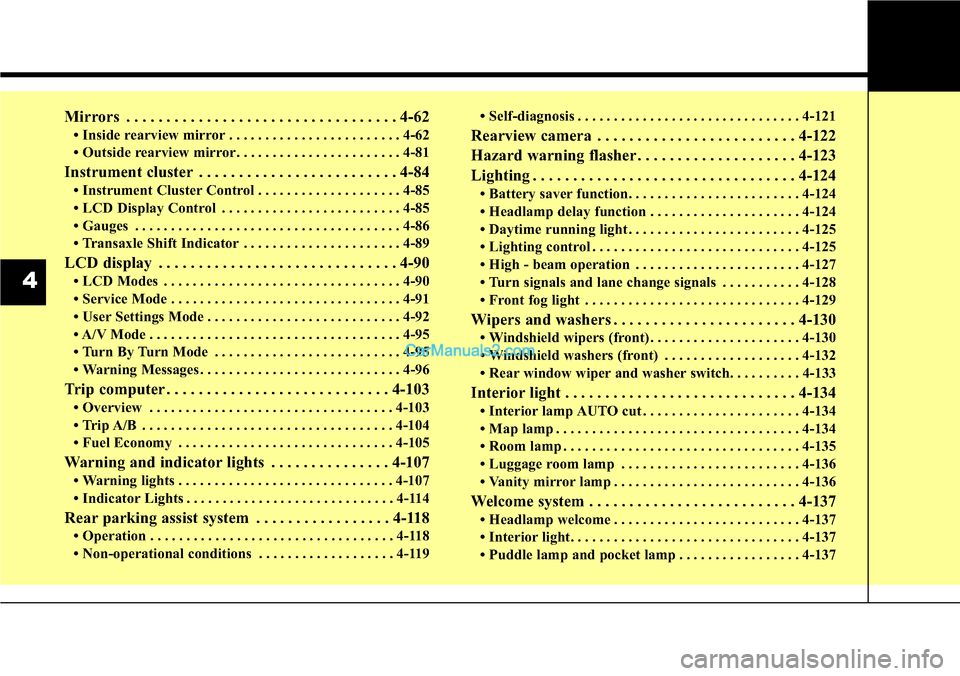
Mirrors . . . . . . . . . . . . . . . . . . . . . . . . . . . . . . . . . . 4-62
• Inside rearview mirror . . . . . . . . . . . . . . . . . . . . . . . . 4-62
• Outside rearview mirror. . . . . . . . . . . . . . . . . . . . . . . 4-81
Instrument cluster . . . . . . . . . . . . . . . . . . . . . . . . . 4-84
• Instrument Cluster Control . . . . . . . . . . . . . . . . . . . . 4-85
• LCD Display Control . . . . . . . . . . . . . . . . . . . . . . . . . 4-85
• Gauges . . . . . . . . . . . . . . . . . . . . . . . . . . . . . . . . . . . . . 4-86
• Transaxle Shift Indicator . . . . . . . . . . . . . . . . . . . . . . 4-89
LCD display . . . . . . . . . . . . . . . . . . . . . . . . . . . . . . 4-90
• LCD Modes . . . . . . . . . . . . . . . . . . . . . . . . . . . . . . . . . 4-90
• Service Mode . . . . . . . . . . . . . . . . . . . . . . . . . . . . . . . . 4-91
• User Settings Mode . . . . . . . . . . . . . . . . . . . . . . . . . . . 4-92
• A/V Mode . . . . . . . . . . . . . . . . . . . . . . . . . . . . . . . . . . . 4-95
• Turn By Turn Mode . . . . . . . . . . . . . . . . . . . . . . . . . . 4-95
• Warning Messages . . . . . . . . . . . . . . . . . . . . . . . . . . . . 4-96
Trip computer . . . . . . . . . . . . . . . . . . . . . . . . . . . . 4-103
• Overview . . . . . . . . . . . . . . . . . . . . . . . . . . . . . . . . . . 4-103
• Trip A/B . . . . . . . . . . . . . . . . . . . . . . . . . . . . . . . . . . . 4-104
• Fuel Economy . . . . . . . . . . . . . . . . . . . . . . . . . . . . . . 4-105
Warning and indicator lights . . . . . . . . . . . . . . . 4-107
• Warning lights . . . . . . . . . . . . . . . . . . . . . . . . . . . . . . 4-107
• Indicator Lights . . . . . . . . . . . . . . . . . . . . . . . . . . . . . 4-114
Rear parking assist system . . . . . . . . . . . . . . . . . 4-118
• Operation . . . . . . . . . . . . . . . . . . . . . . . . . . . . . . . . . . 4-118
• Non-operational conditions . . . . . . . . . . . . . . . . . . . 4-119• Self-diagnosis . . . . . . . . . . . . . . . . . . . . . . . . . . . . . . . 4-121
Rearview camera . . . . . . . . . . . . . . . . . . . . . . . . . 4-122
Hazard warning flasher . . . . . . . . . . . . . . . . . . . . 4-123
Lighting . . . . . . . . . . . . . . . . . . . . . . . . . . . . . . . . . 4-124
• Battery saver function. . . . . . . . . . . . . . . . . . . . . . . . 4-124
• Headlamp delay function . . . . . . . . . . . . . . . . . . . . . 4-124
• Daytime running light . . . . . . . . . . . . . . . . . . . . . . . . 4-125
• Lighting control . . . . . . . . . . . . . . . . . . . . . . . . . . . . . 4-125
• High - beam operation . . . . . . . . . . . . . . . . . . . . . . . 4-127
• Turn signals and lane change signals . . . . . . . . . . . 4-128
• Front fog light . . . . . . . . . . . . . . . . . . . . . . . . . . . . . . 4-129
Wipers and washers . . . . . . . . . . . . . . . . . . . . . . . 4-130
• Windshield wipers (front) . . . . . . . . . . . . . . . . . . . . . 4-130
• Windshield washers (front) . . . . . . . . . . . . . . . . . . . 4-132
• Rear window wiper and washer switch. . . . . . . . . . 4-133
Interior light . . . . . . . . . . . . . . . . . . . . . . . . . . . . . 4-134
• Interior lamp AUTO cut . . . . . . . . . . . . . . . . . . . . . . 4-134
• Map lamp . . . . . . . . . . . . . . . . . . . . . . . . . . . . . . . . . . 4-134
• Room lamp . . . . . . . . . . . . . . . . . . . . . . . . . . . . . . . . . 4-135
• Luggage room lamp . . . . . . . . . . . . . . . . . . . . . . . . . 4-136
• Vanity mirror lamp . . . . . . . . . . . . . . . . . . . . . . . . . . 4-136
Welcome system . . . . . . . . . . . . . . . . . . . . . . . . . . 4-137
• Headlamp welcome . . . . . . . . . . . . . . . . . . . . . . . . . . 4-137
• Interior light. . . . . . . . . . . . . . . . . . . . . . . . . . . . . . . . 4-137
• Puddle lamp and pocket lamp . . . . . . . . . . . . . . . . . 4-137
4
Page 102 of 785
49
Features of your vehicle
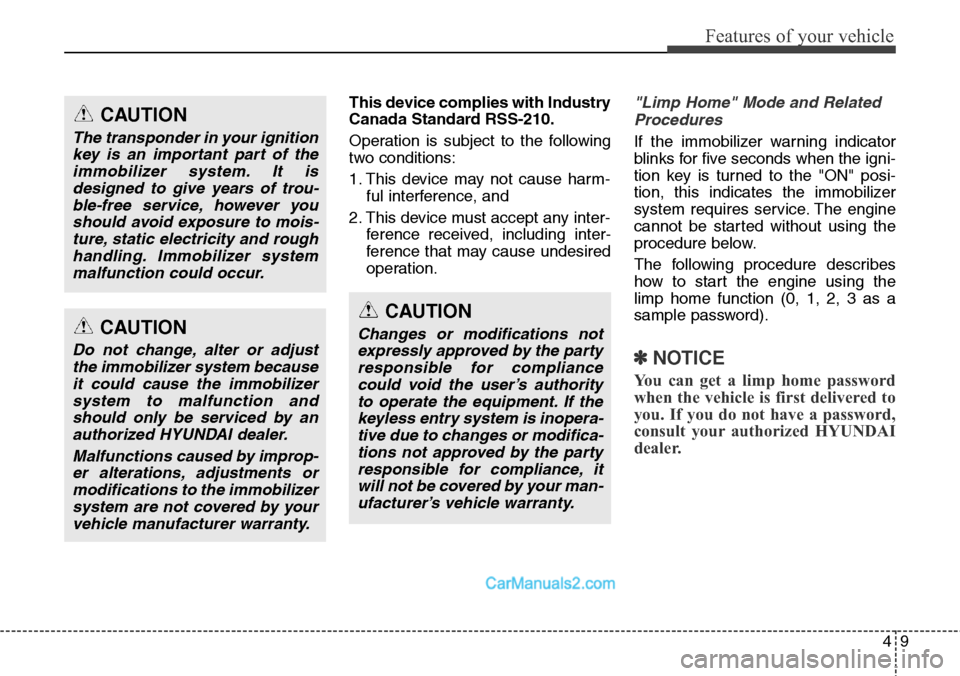
This device complies with Industry
Canada Standard RSS-210.
Operation is subject to the following
two conditions:
1. This device may not cause harm-
ful interference, and
2. This device must accept any inter-
ference received, including inter-
ference that may cause undesired
operation."Limp Home" Mode and Related
Procedures
If the immobilizer warning indicator
blinks for five seconds when the igni-
tion key is turned to the "ON" posi-
tion, this indicates the immobilizer
system requires service. The engine
cannot be started without using the
procedure below.
The following procedure describes
how to start the engine using the
limp home function (0, 1, 2, 3 as a
sample password).
✽NOTICE
You can get a limp home password
when the vehicle is first delivered to
you. If you do not have a password,
consult your authorized HYUNDAI
dealer.
CAUTION
Changes or modifications not
expressly approved by the party
responsible for compliance
could void the user’s authority
to operate the equipment. If the
keyless entry system is inopera-
tive due to changes or modifica-
tions not approved by the party
responsible for compliance, it
will not be covered by your man-
ufacturer’s vehicle warranty.
CAUTION
The transponder in your ignition
key is an important part of the
immobilizer system. It is
designed to give years of trou-
ble-free service, however you
should avoid exposure to mois-
ture, static electricity and rough
handling. Immobilizer system
malfunction could occur.
CAUTION
Do not change, alter or adjust
the immobilizer system because
it could cause the immobilizer
system to malfunction and
should only be serviced by an
authorized HYUNDAI dealer.
Malfunctions caused by improp-
er alterations, adjustments or
modifications to the immobilizer
system are not covered by your
vehicle manufacturer warranty.
Page 109 of 785
Features of your vehicle
16 4
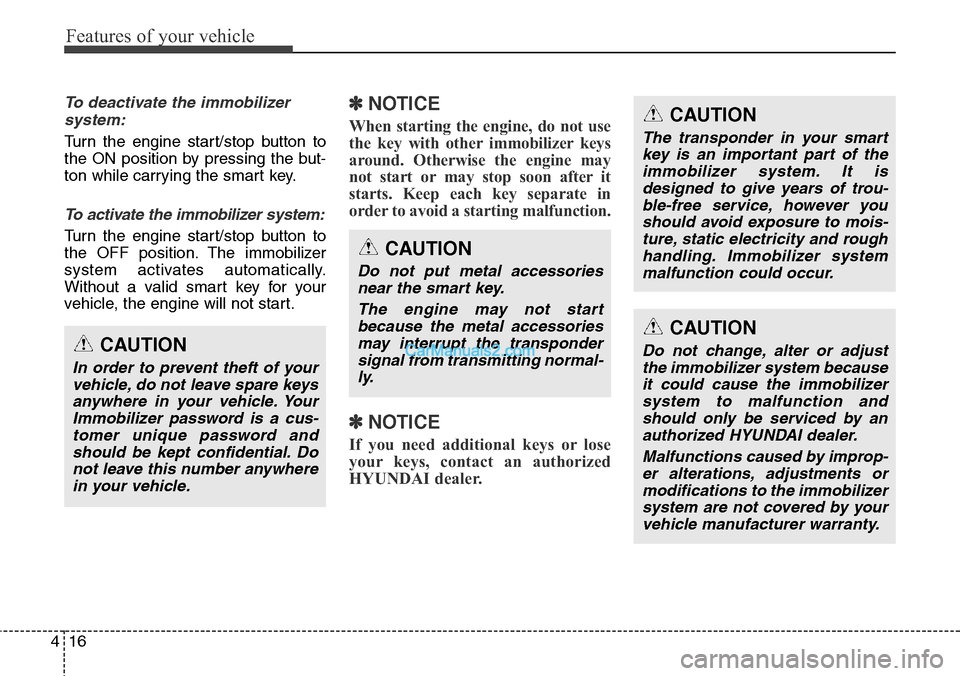
To deactivate the immobilizer
system:
Turn the engine start/stop button to
the ON position by pressing the but-
ton while carrying the smart key.
To activate the immobilizer system:
Turn the engine start/stop button to
the OFF position. The immobilizer
system activates automatically.
Without a valid smart key for your
vehicle, the engine will not start.
✽NOTICE
When starting the engine, do not use
the key with other immobilizer keys
around. Otherwise the engine may
not start or may stop soon after it
starts. Keep each key separate in
order to avoid a starting malfunction.
✽NOTICE
If you need additional keys or lose
your keys, contact an authorized
HYUNDAI dealer.
CAUTION
In order to prevent theft of your
vehicle, do not leave spare keys
anywhere in your vehicle. Your
Immobilizer password is a cus-
tomer unique password and
should be kept confidential. Do
not leave this number anywhere
in your vehicle.
CAUTION
The transponder in your smart
key is an important part of the
immobilizer system. It is
designed to give years of trou-
ble-free service, however you
should avoid exposure to mois-
ture, static electricity and rough
handling. Immobilizer system
malfunction could occur.
CAUTION
Do not change, alter or adjust
the immobilizer system because
it could cause the immobilizer
system to malfunction and
should only be serviced by an
authorized HYUNDAI dealer.
Malfunctions caused by improp-
er alterations, adjustments or
modifications to the immobilizer
system are not covered by your
vehicle manufacturer warranty.
CAUTION
Do not put metal accessories
near the smart key.
The engine may not start
because the metal accessories
may interrupt the transponder
signal from transmitting normal-
ly.
Page 115 of 785
Features of your vehicle
22 4
✽NOTICE
• Avoid trying to start the engine
while the alarm is activated. The
vehicle starting motor is disabled
during the theft-alarm stage.
• If you lose your keys, contact your
authorized HYUNDAI dealer.
CAUTION
Do not change, alter or adjust
the theft-alarm system because
it could cause the theft-alarm
system to malfunction and
should only be serviced by an
authorized Hyundai dealer.
Malfunctions caused by improp-
er alterations, adjustments or
modifications to the theft-alarm
system are not covered by your
vehicle manufacturer warranty.
Page 183 of 785
Features of your vehicle
90 4
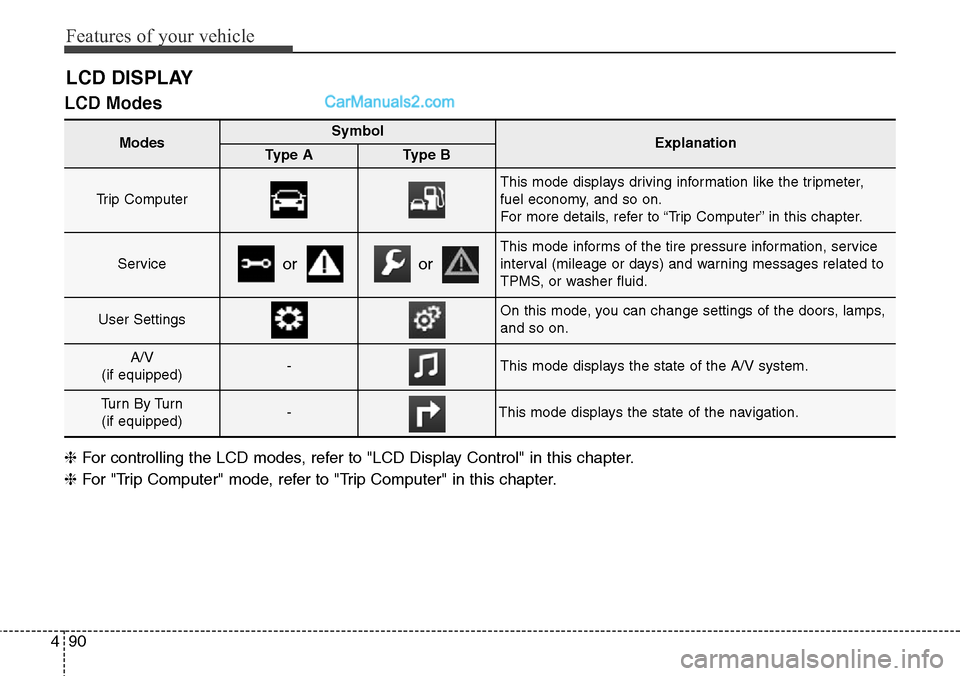
LCD Modes
LCD DISPLAY
Modes SymbolExplanationType AType B
Trip Computer
This mode displays driving information like the tripmeter,
fuel economy, and so on.
For more details, refer to “Trip Computer” in this chapter.
Service
This mode informs of the tire pressure information, service
interval (mileage or days) and warning messages related to
TPMS, or washer fluid.
User SettingsOn this mode, you can change settings of the doors, lamps,
and so on.
A/V
(if equipped)-This mode displays the state of the A/V system.
Tu r n B y Tu r n
(if equipped)-This mode displays the state of the navigation.
oror
❈For controlling the LCD modes, refer to "LCD Display Control" in this chapter.
❈For "Trip Computer" mode, refer to "Trip Computer" in this chapter.
Page 184 of 785
491
Features of your vehicle
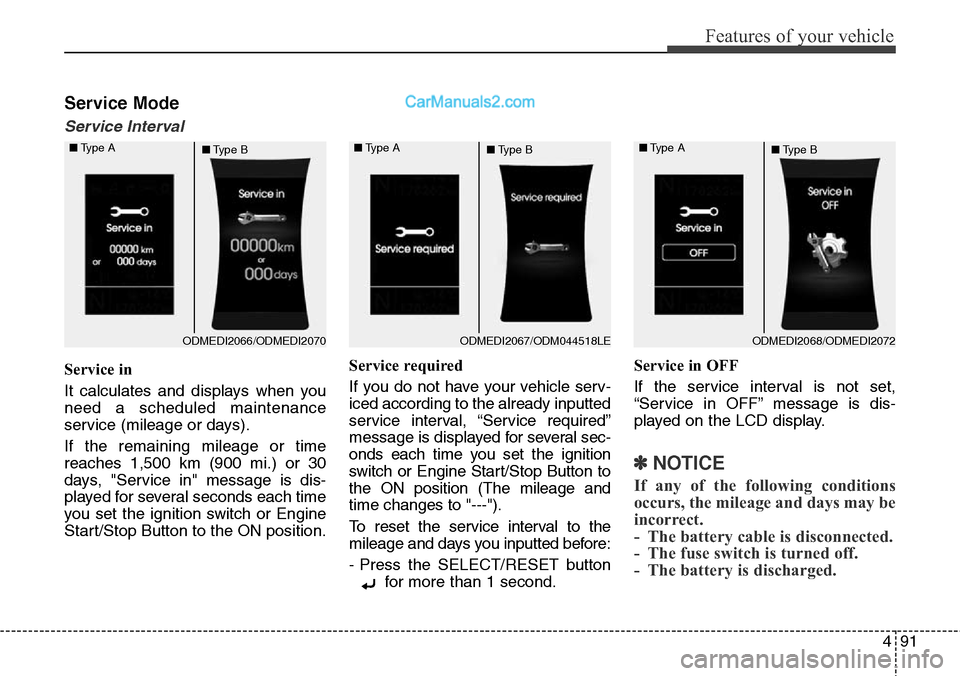
Service Mode
Service Interval
Service in
It calculates and displays when you
need a scheduled maintenance
service (mileage or days).
If the remaining mileage or time
reaches 1,500 km (900 mi.) or 30
days, "Service in" message is dis-
played for several seconds each time
you set the ignition switch or Engine
Start/Stop Button to the ON position.Service required
If you do not have your vehicle serv-
iced according to the already inputted
service interval, “Service required”
message is displayed for several sec-
onds each time you set the ignition
switch or Engine Start/Stop Button to
the ON position (The mileage and
time changes to "---").
To reset the service interval to the
mileage and days you inputted before:
- Press the SELECT/RESET button
for more than 1 second.Service in OFF
If the service interval is not set,
“Service in OFF” message is dis-
played on the LCD display.
✽NOTICE
If any of the following conditions
occurs, the mileage and days may be
incorrect.
- The battery cable is disconnected.
- The fuse switch is turned off.
- The battery is discharged.
ODMEDI2066/ODMEDI2070 ■Type A
■Type BODMEDI2067/ODM044518LE ■Type A
■Type BODMEDI2068/ODMEDI2072 ■Type A
■Type B